

This post may contain affiliate links
Add Bake with Zoha as a preferred source on Google and find more of my tried-and-tested recipes.
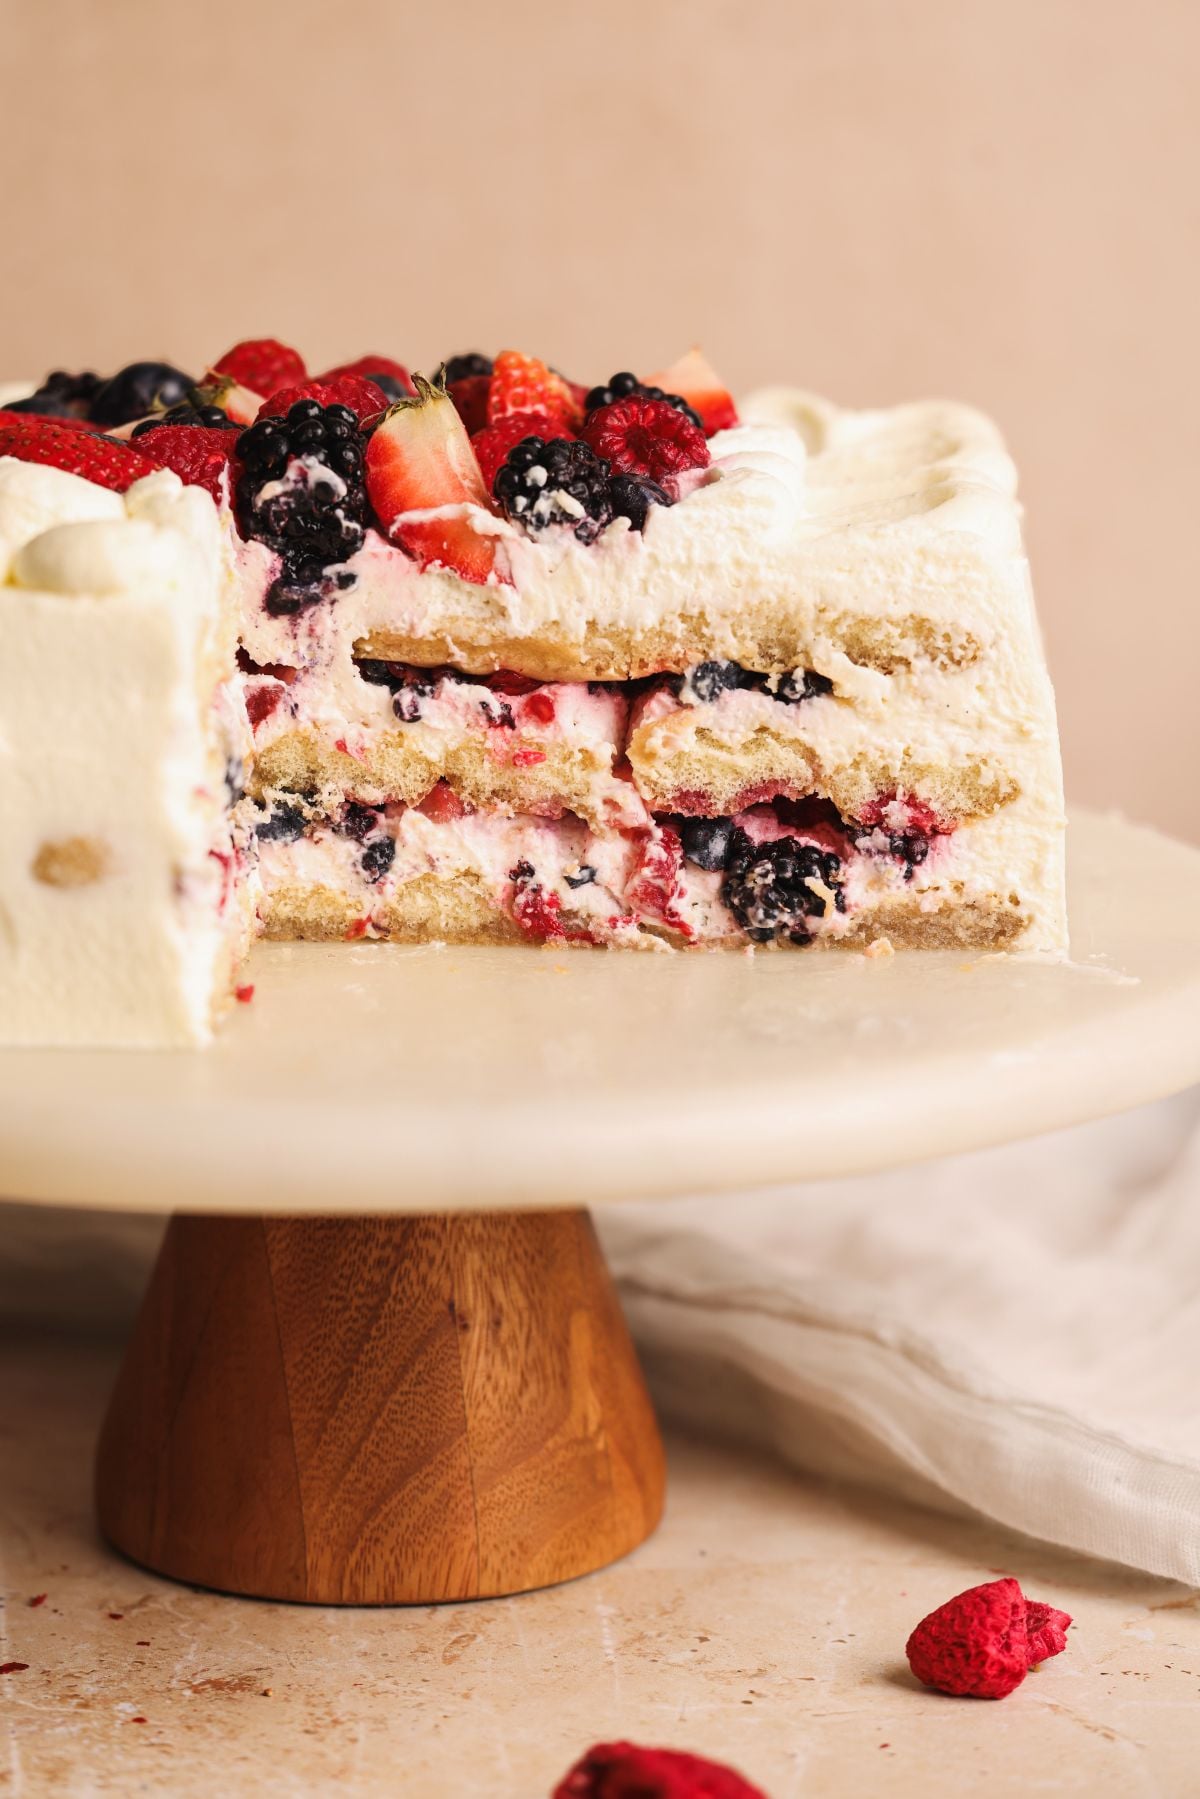
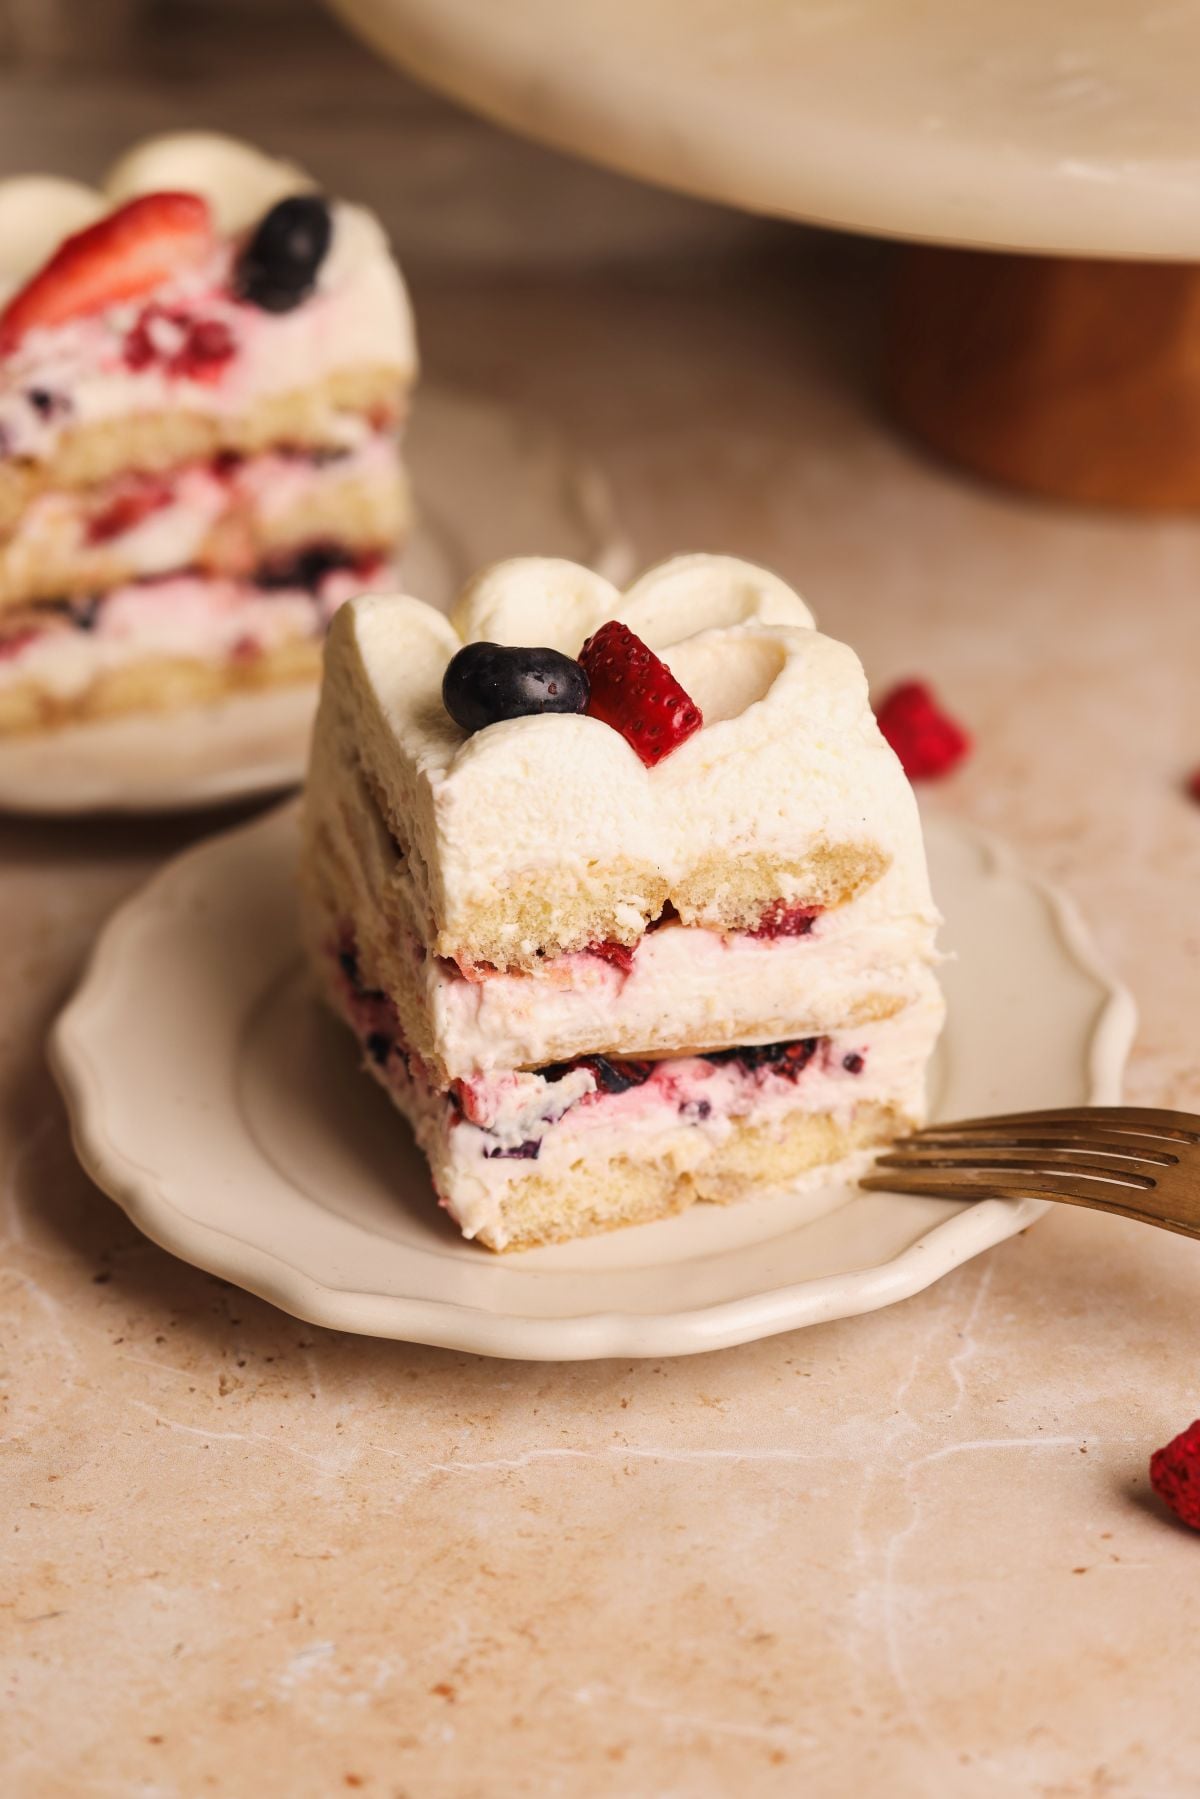
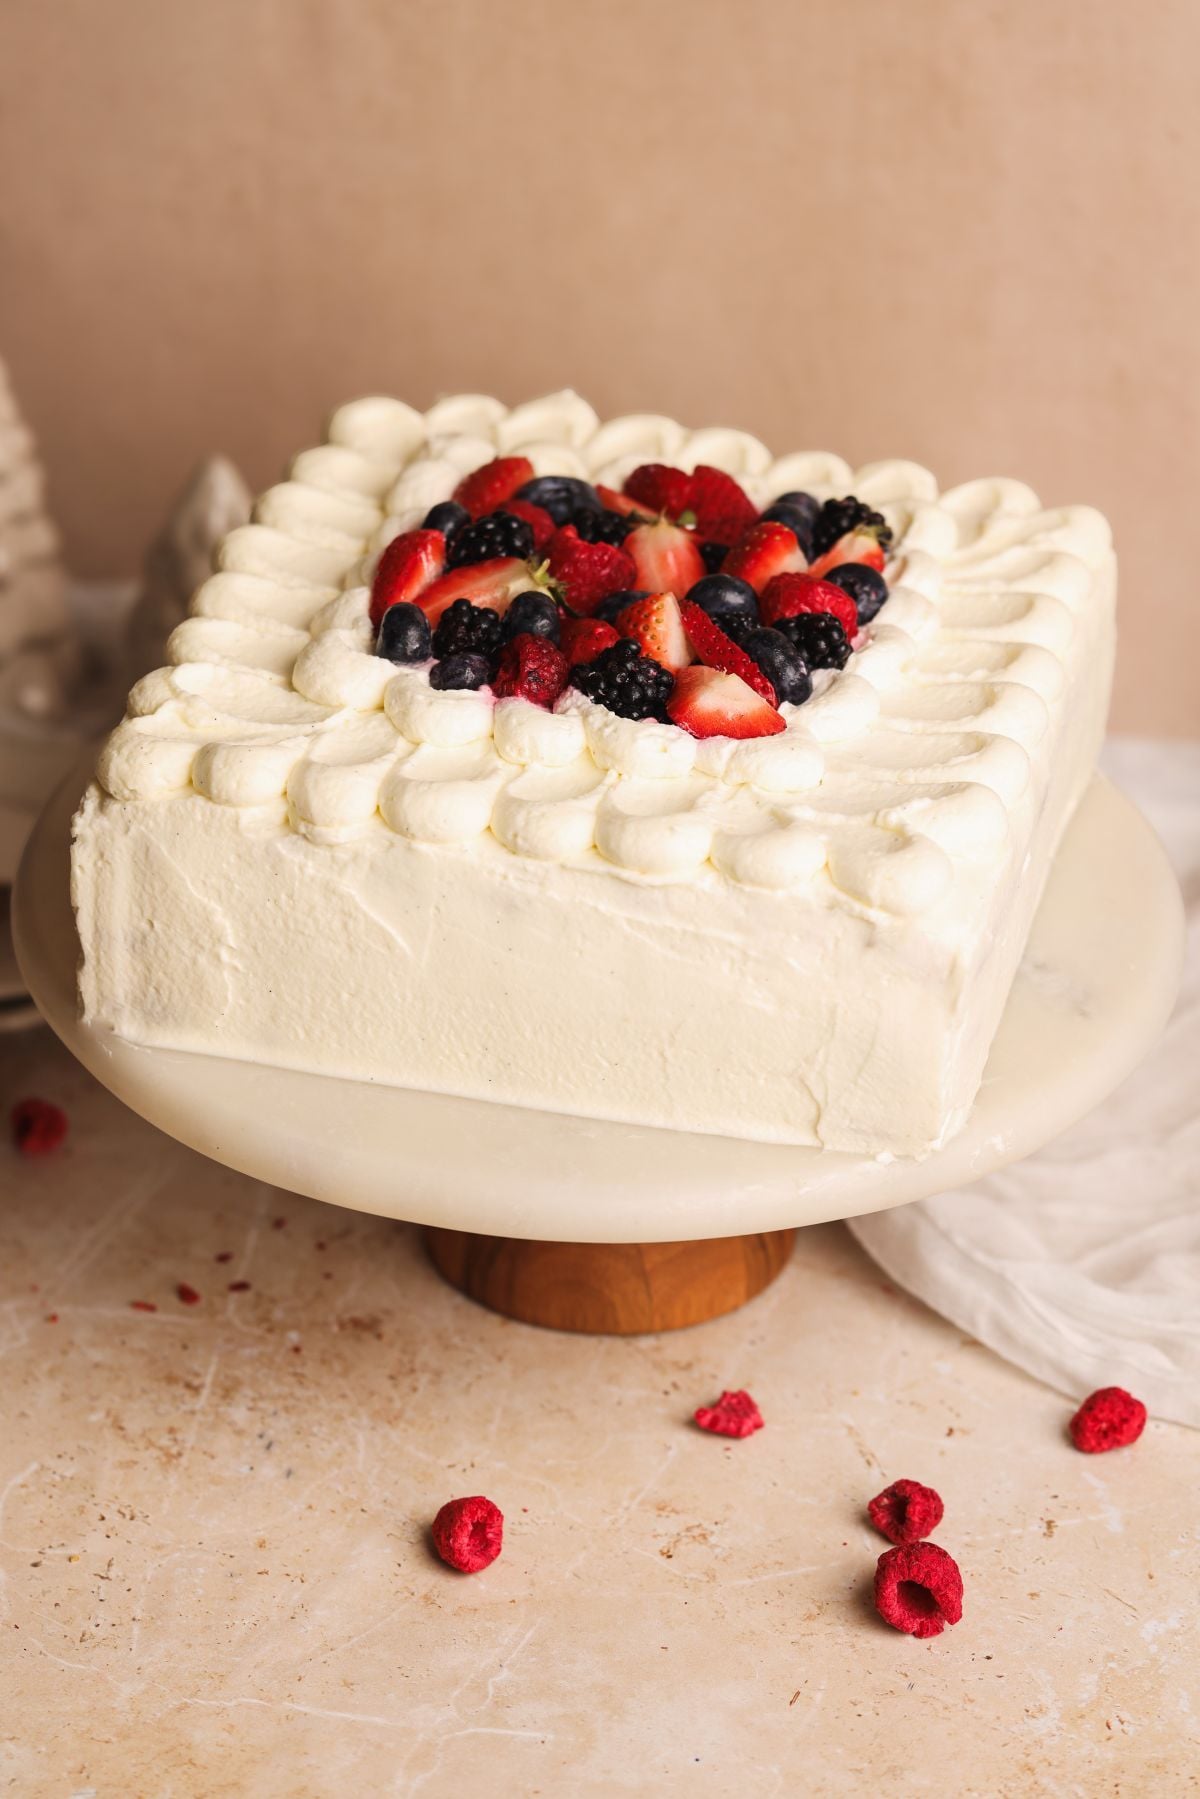
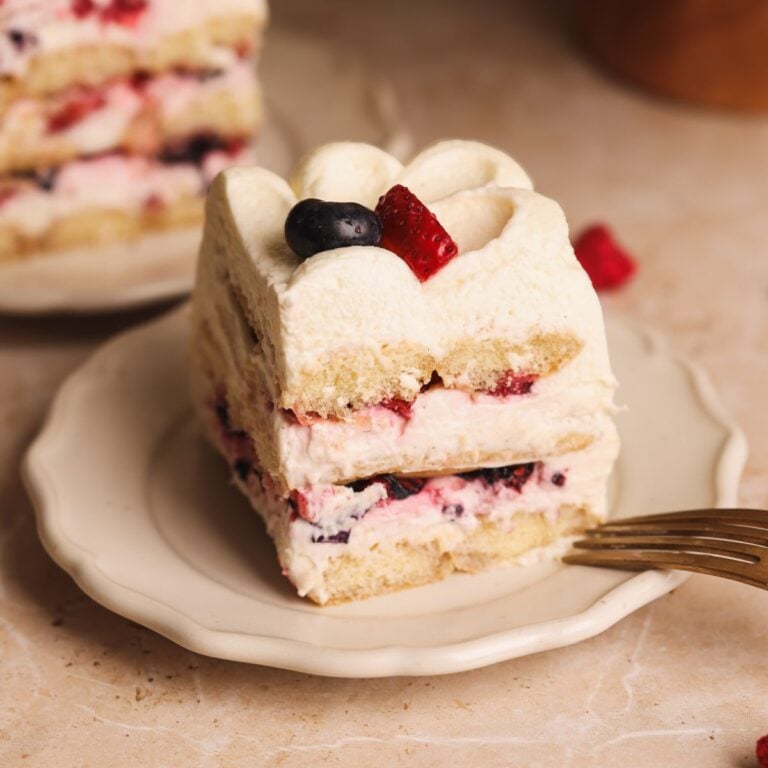
If you’ve ever wanted a stunning, bakery-worthy cake without even turning on your oven, this Easy No Bake Berry Chantilly Cake is perfect for you! Instead of baked cake layers, it is made with ladyfingers soaked in a berry simple syrup so they become soft and moist like a genoise. They are layered with a light and creamy Chantilly whipped cream stabilized with cream cheese and mascarpone, and loaded with fresh berries. The result is a beautiful dessert that looks and slices like a proper celebration cake, and tastes light, fresh, and just sweet enough to let the berries shine. In fact, after making this and my baked Berry Chantilly Cake many times? I’d say this no bake version is softer, more flavorful, and more impressive, despite taking a fraction of the effort!
I’m a BIG fan of using ladyfingers for easy no bake desserts – they’re basically cake, just dried out! Some of my favorites include my popular No Bake Tres Leches Cake, my No Bake Tiramisu Tres Leches Cake, and my new Triple Chocolate Tiramisu.
4 simple components
This cake is made with 4 simple components:
- Ladyfingers: This is the real star of the show, and what makes this no-bake cake just like a baked one! They are also called Savoiardi biscuits, and available at many grocery stores. I typically get them on Amazon here
- Berry simple syrup: To soften the ladyfingers and add flavor, we dip them in a syrup made with water, sugar, berry jam and lemon juice
- Chantilly whipped cream: A incredibly luscious and silky frosting made with heavy cream, cream cheese and mascarpone cheese brings the cake together, and coats it to give it the look of a baked cake
- Berries: Of course, the cake isn’t complete without fresh berries! You can use any that you like, but I love adding all four (blackberries, blueberries, strawberries and raspberries)
Tips for assembly
Because we’re working with individual ladyfingers instead of cake layers, you can’t transfer this cake from one stand to another without it falling apart! Therefore, you have to assemble it directly on your serving stand.
Good news is, the assembly is VERY flexible because you can adjust the shape, size, number of layers and height of the cake based on your liking. Here are a few examples:
- Make a square cake like mine – this is the easiest thing to do because the ladyfingers naturally make a square shape, and you don’t need to trim or waste them. You can still change the size and height, though
- Make a round cake – use a cake ring or acetate collar to guide the shape, and trim the ladyfingers to fit in the circle as you layer. I don’t love this as it does waste ladyfingers
- Assemble in a dish – you can also assemble this cake in a dish and serve from it, just like tiramisu
- Make individual dessert cups
Step by step photos
Let’s quickly go over the steps with photos to help you visualize this easy, no-fuss recipe:
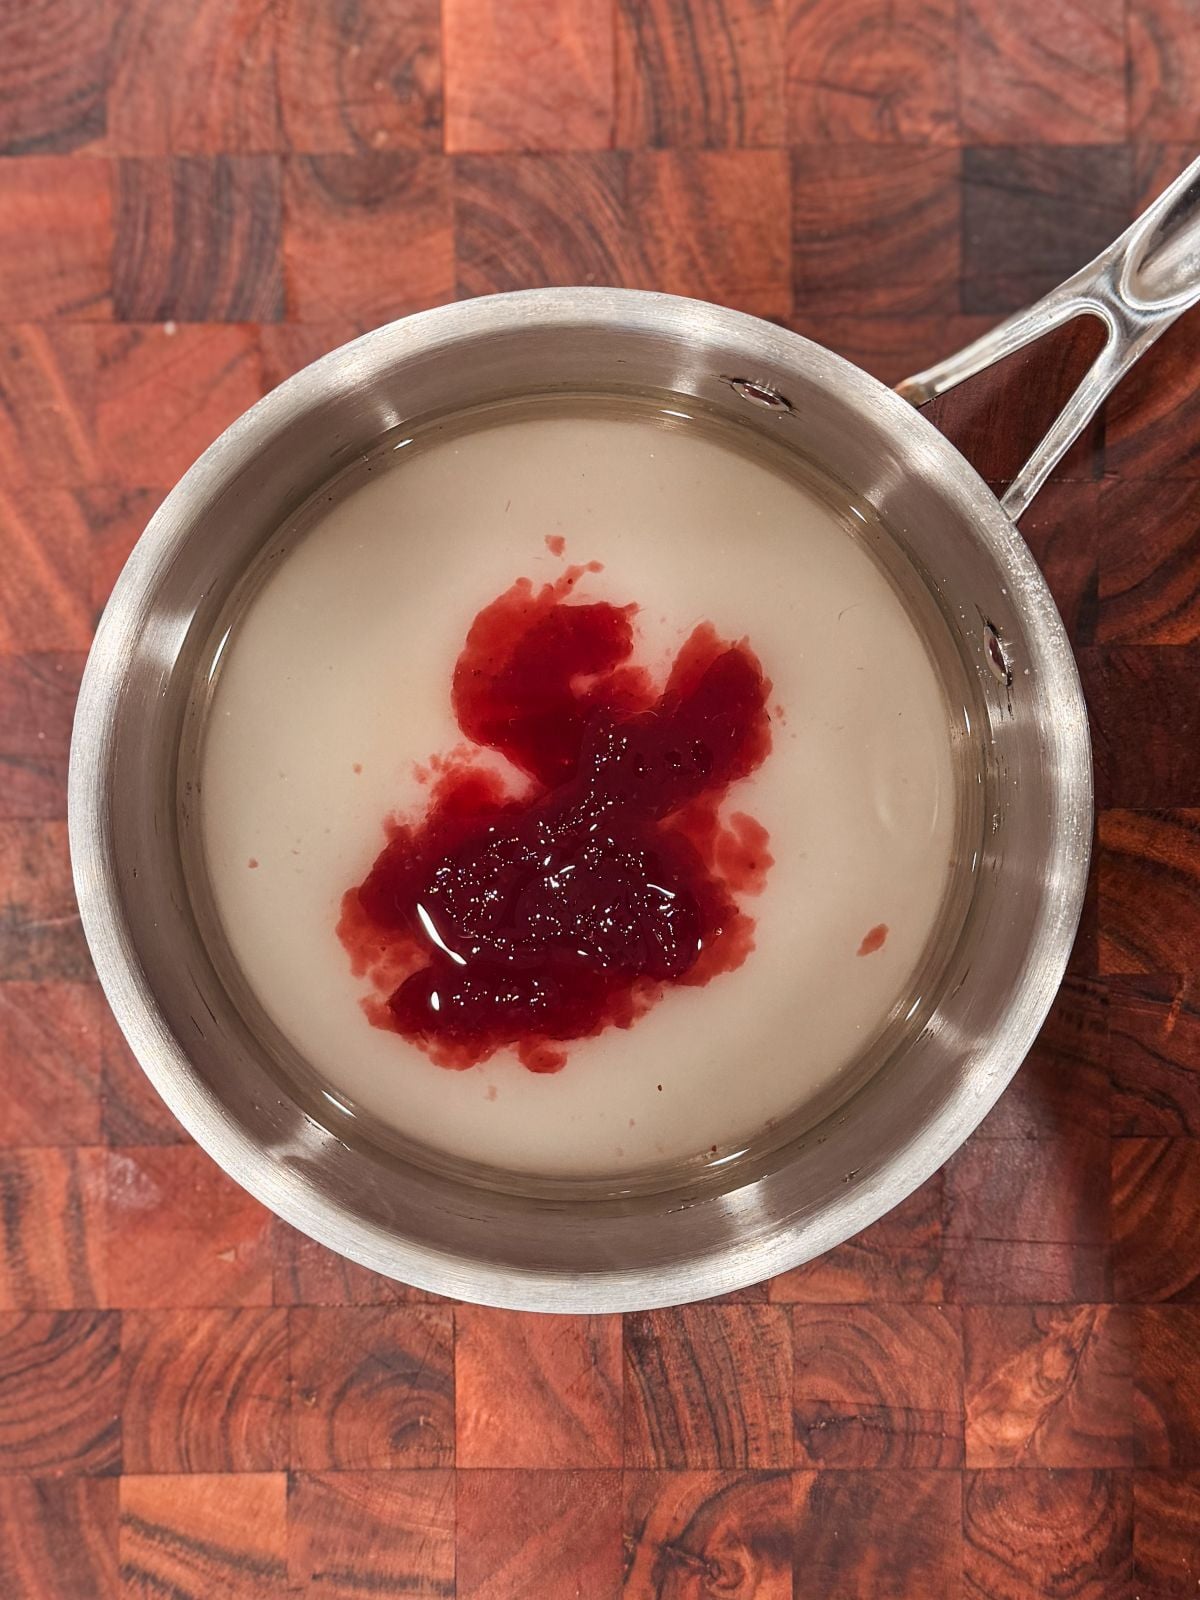
Start by making the berry syrup. Add the water, sugar, jam, and lemon juice to a saucepan.
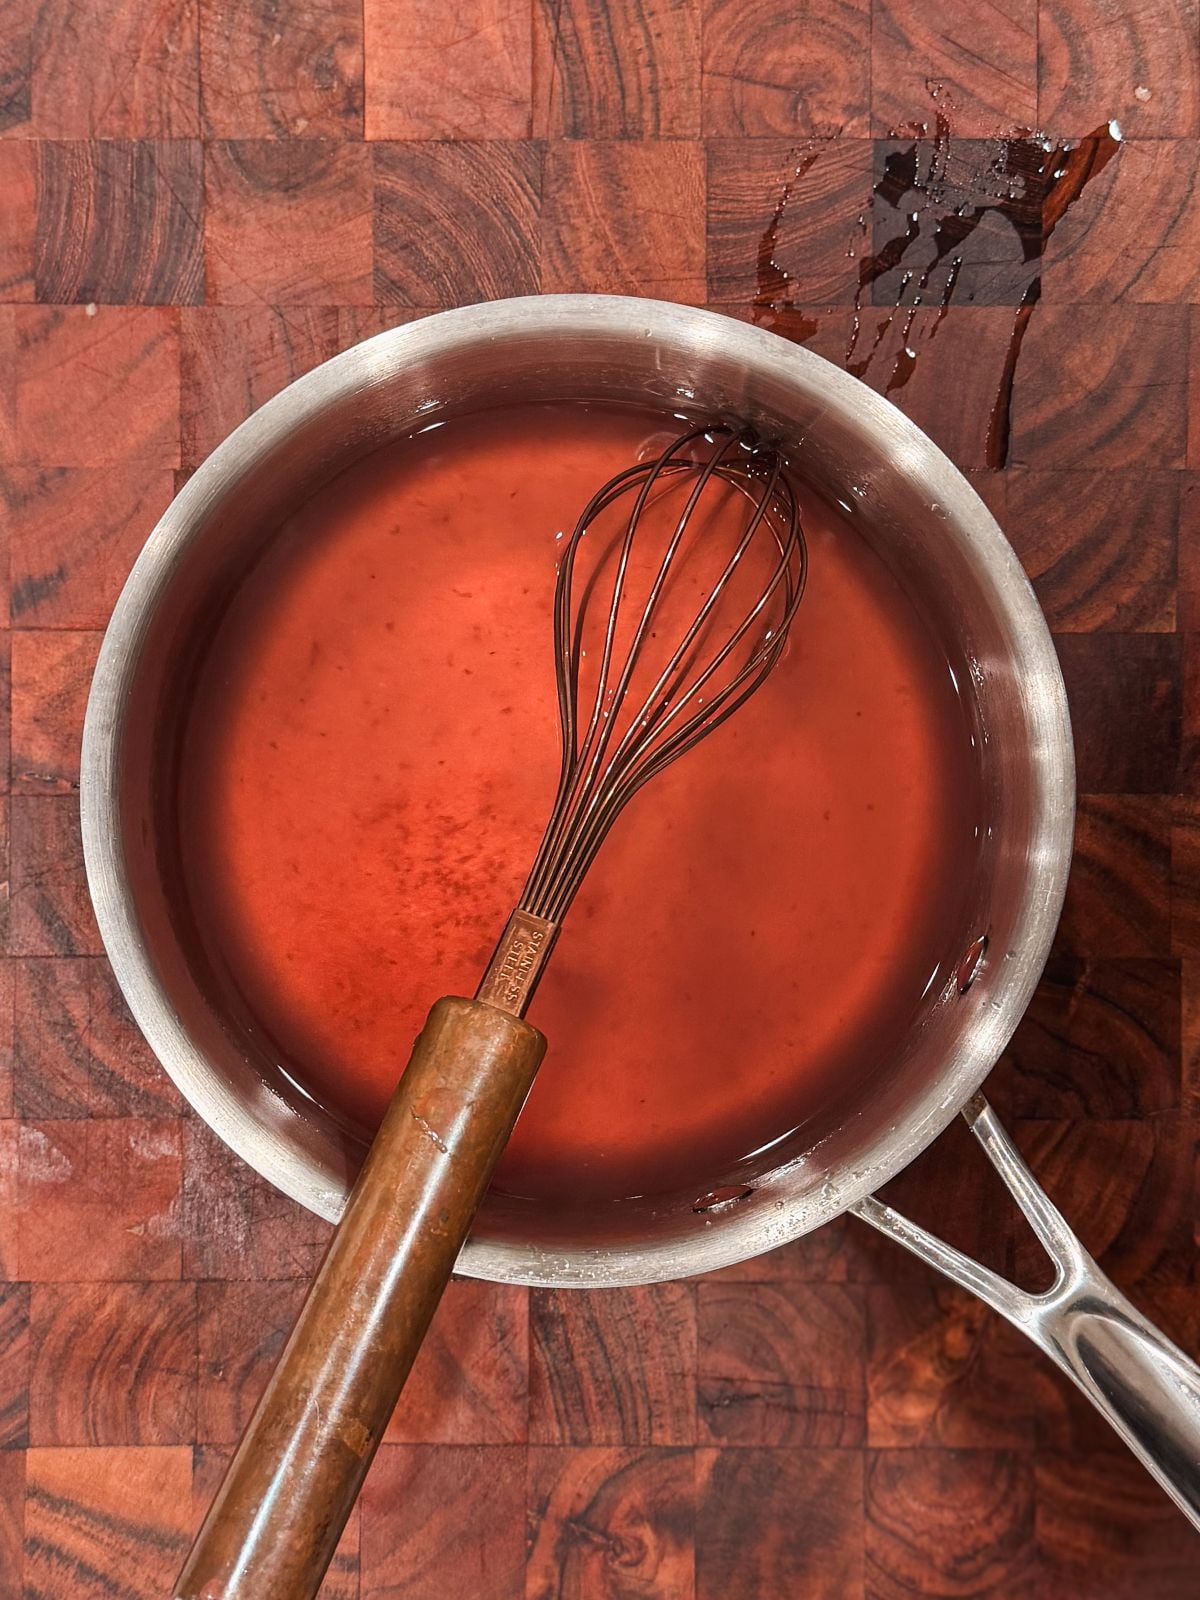
Cook and stir on low heat for 3-5 minutes, until the sugar and jam have dissolved. Let it cool down.
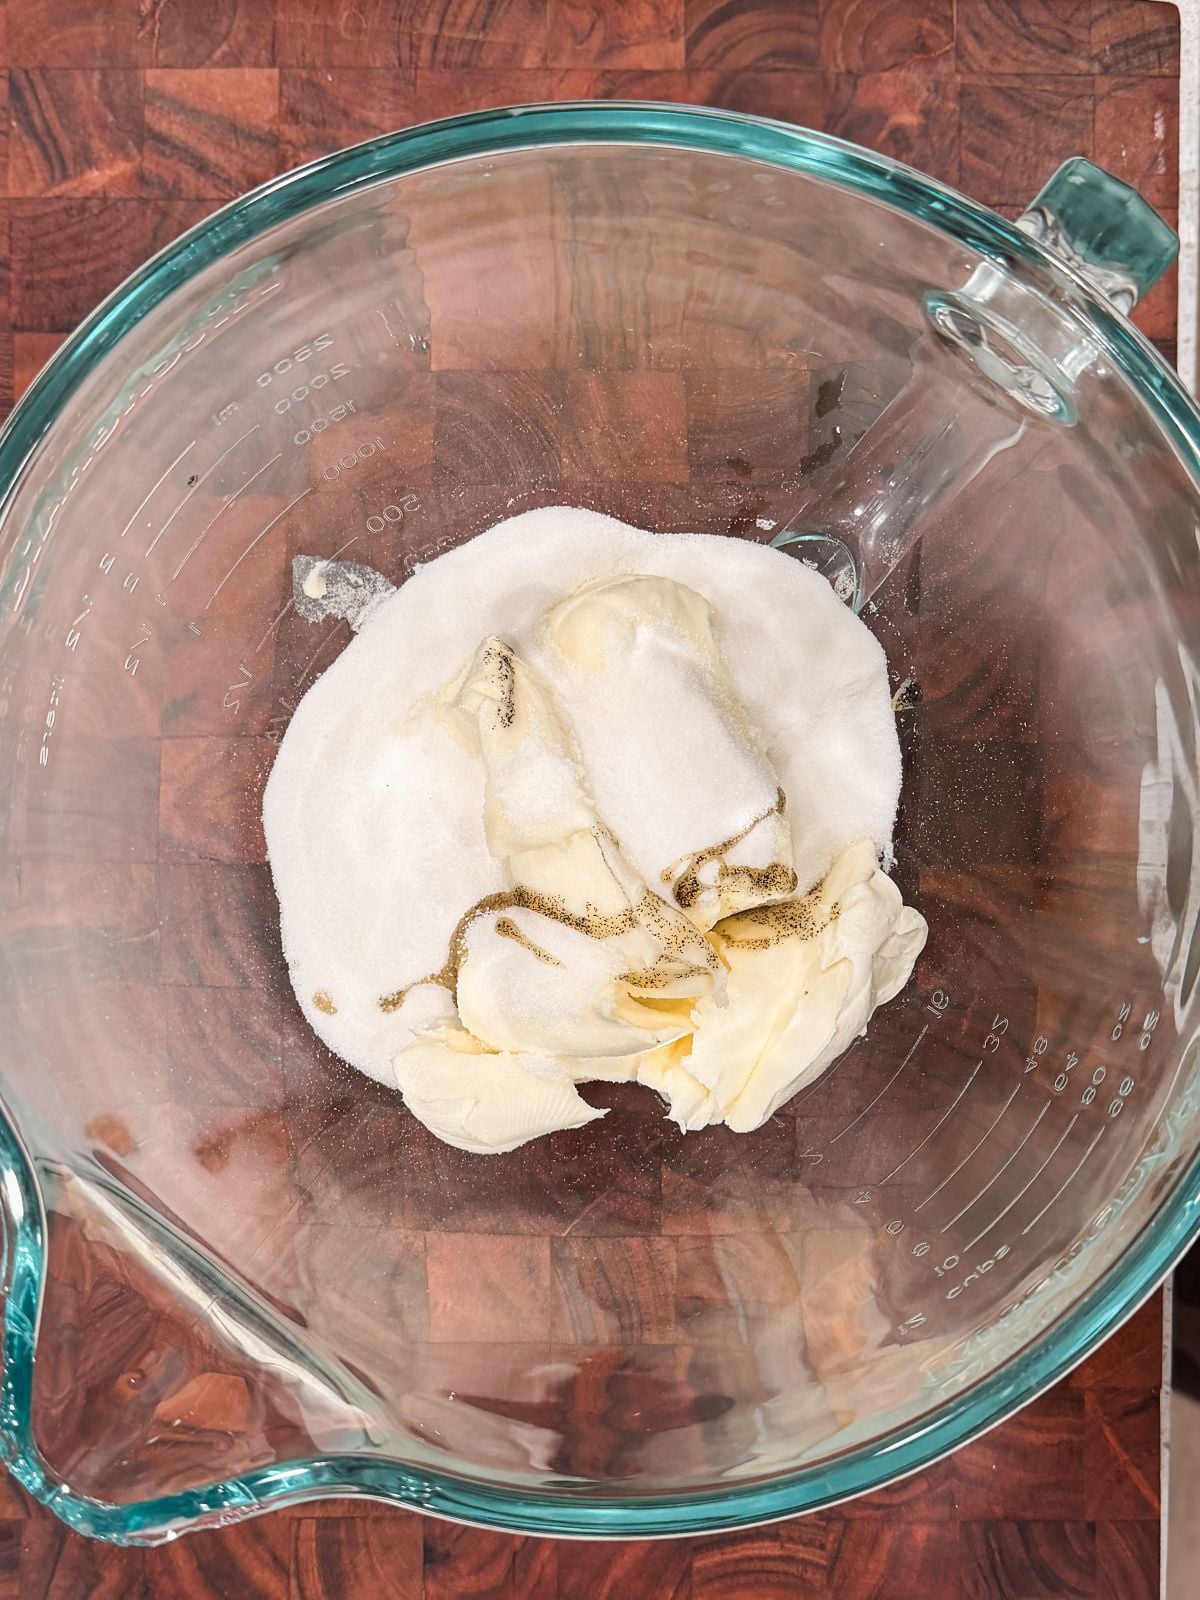
For the Chantilly whipped cream, add the cream cheese, mascarpone cheese, sugar, vanilla and salt to the bowl of your stand mixer.
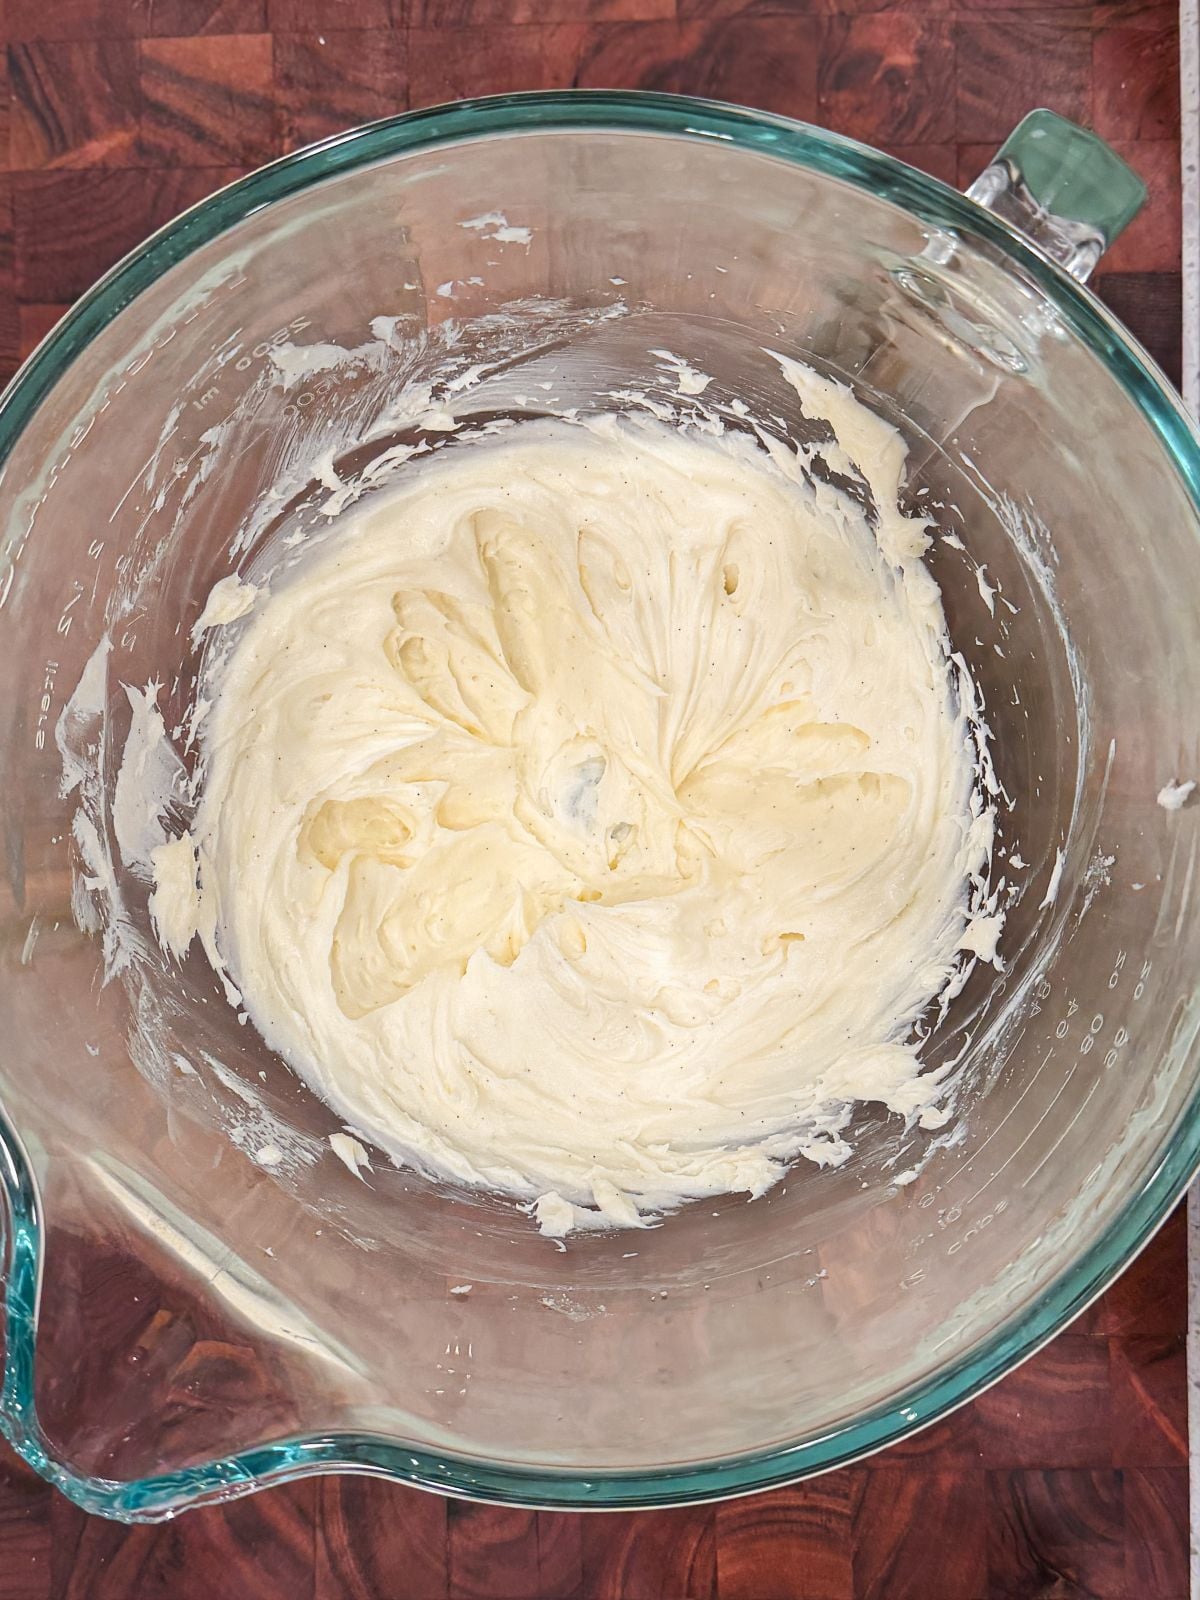
Whisk for 2-3 minutes until creamy and combined.
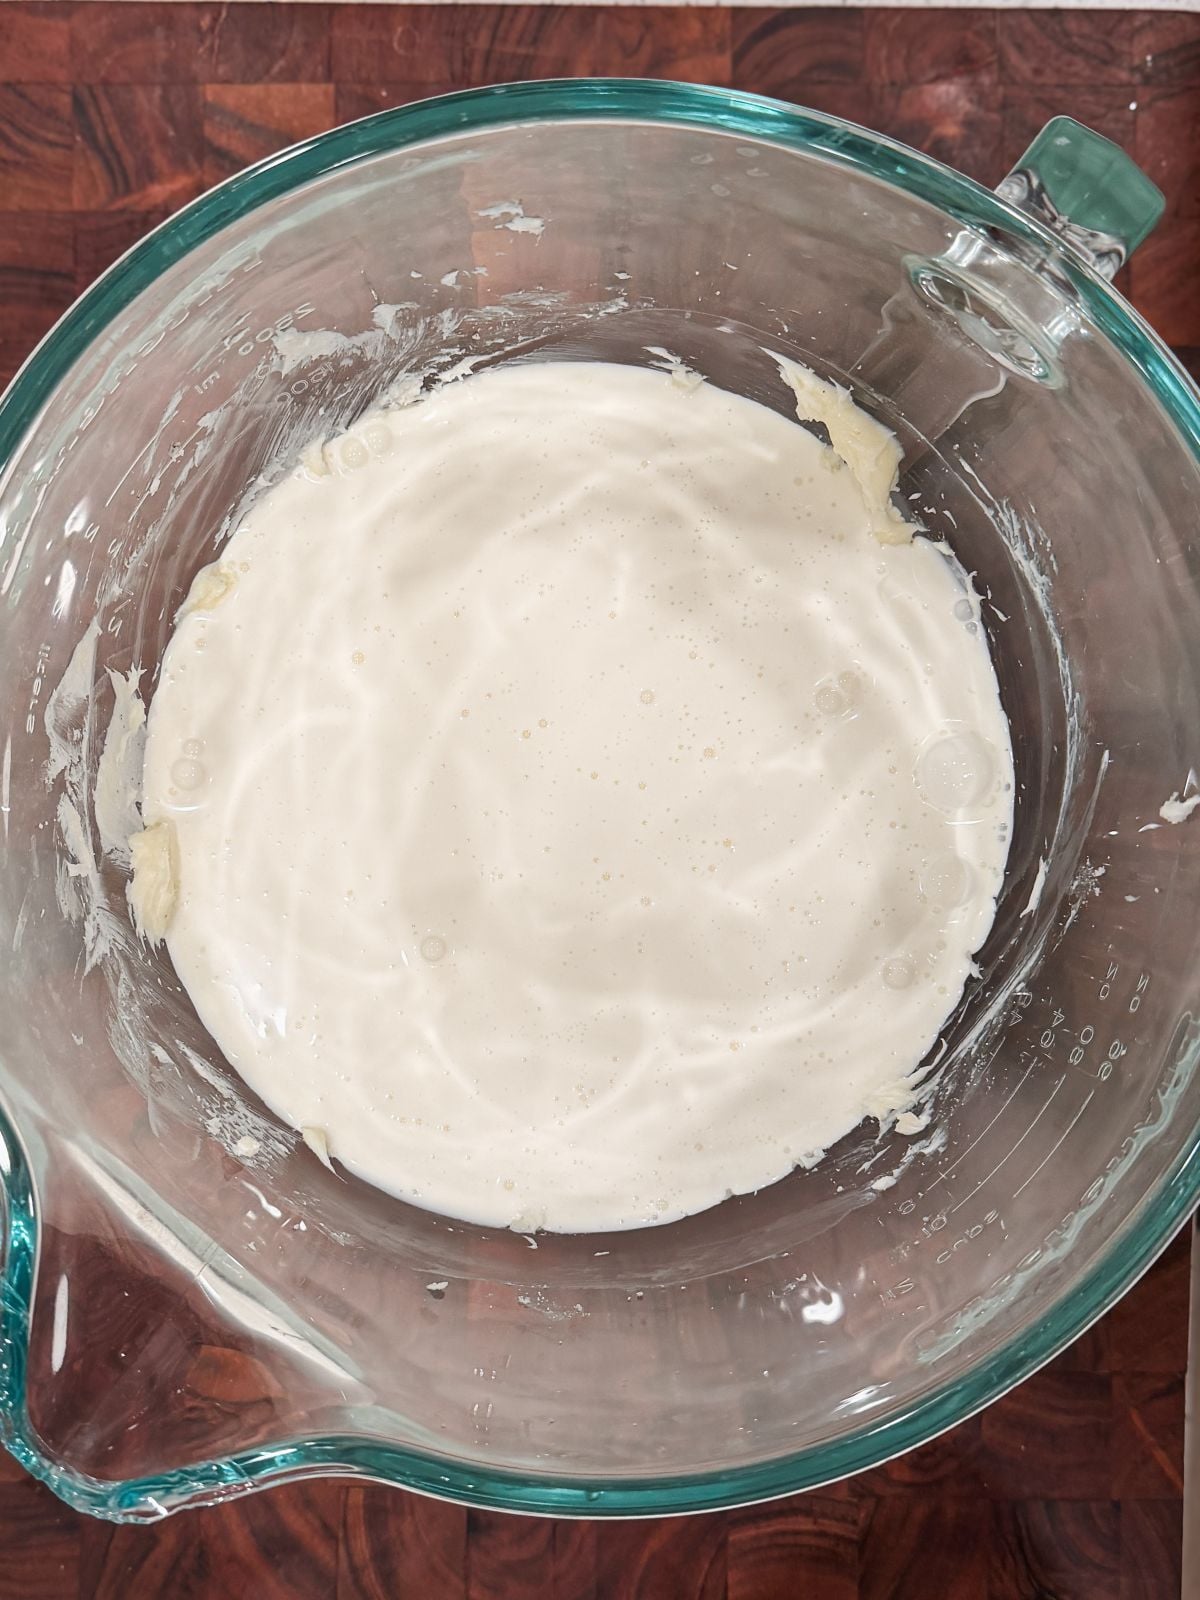
Add the cold heavy cream and scrape the bowl.
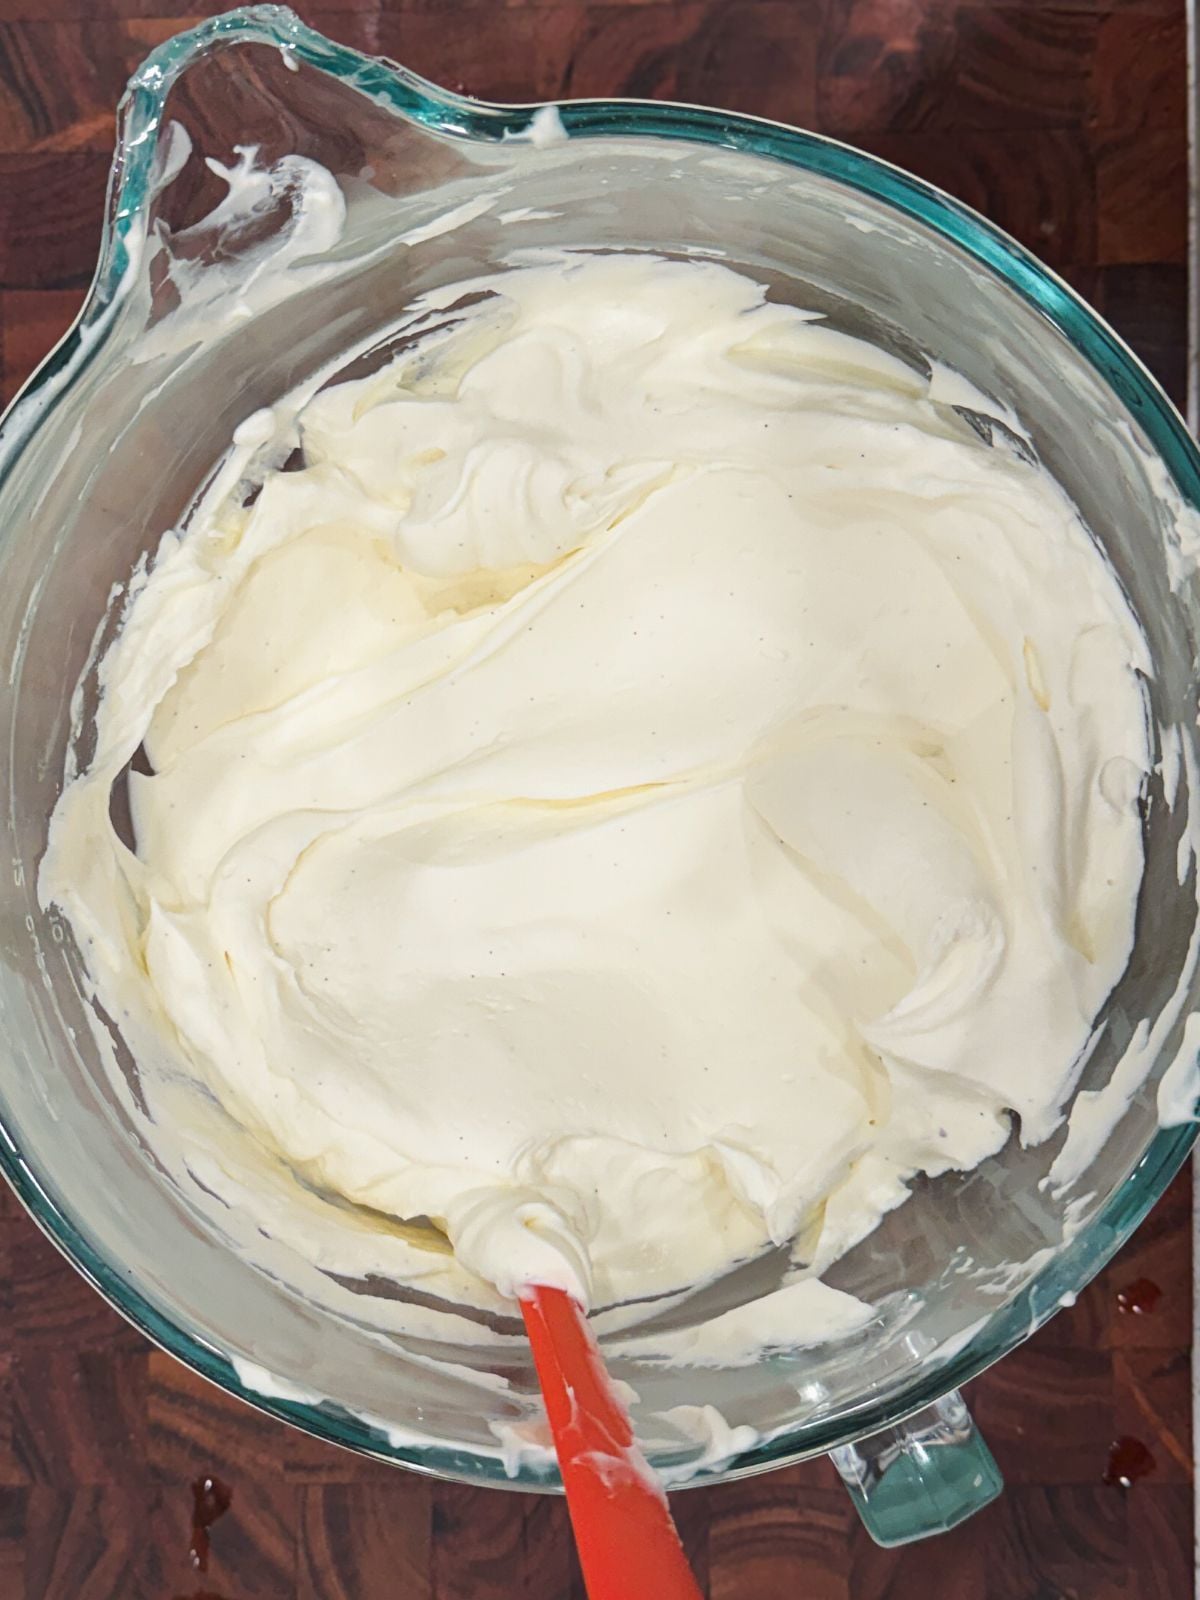
Whisk for another few minutes until a smooth, thick and spreadable frosting forms. This happens quick! Don’t overmix – that will cause the cream to split and become grainy
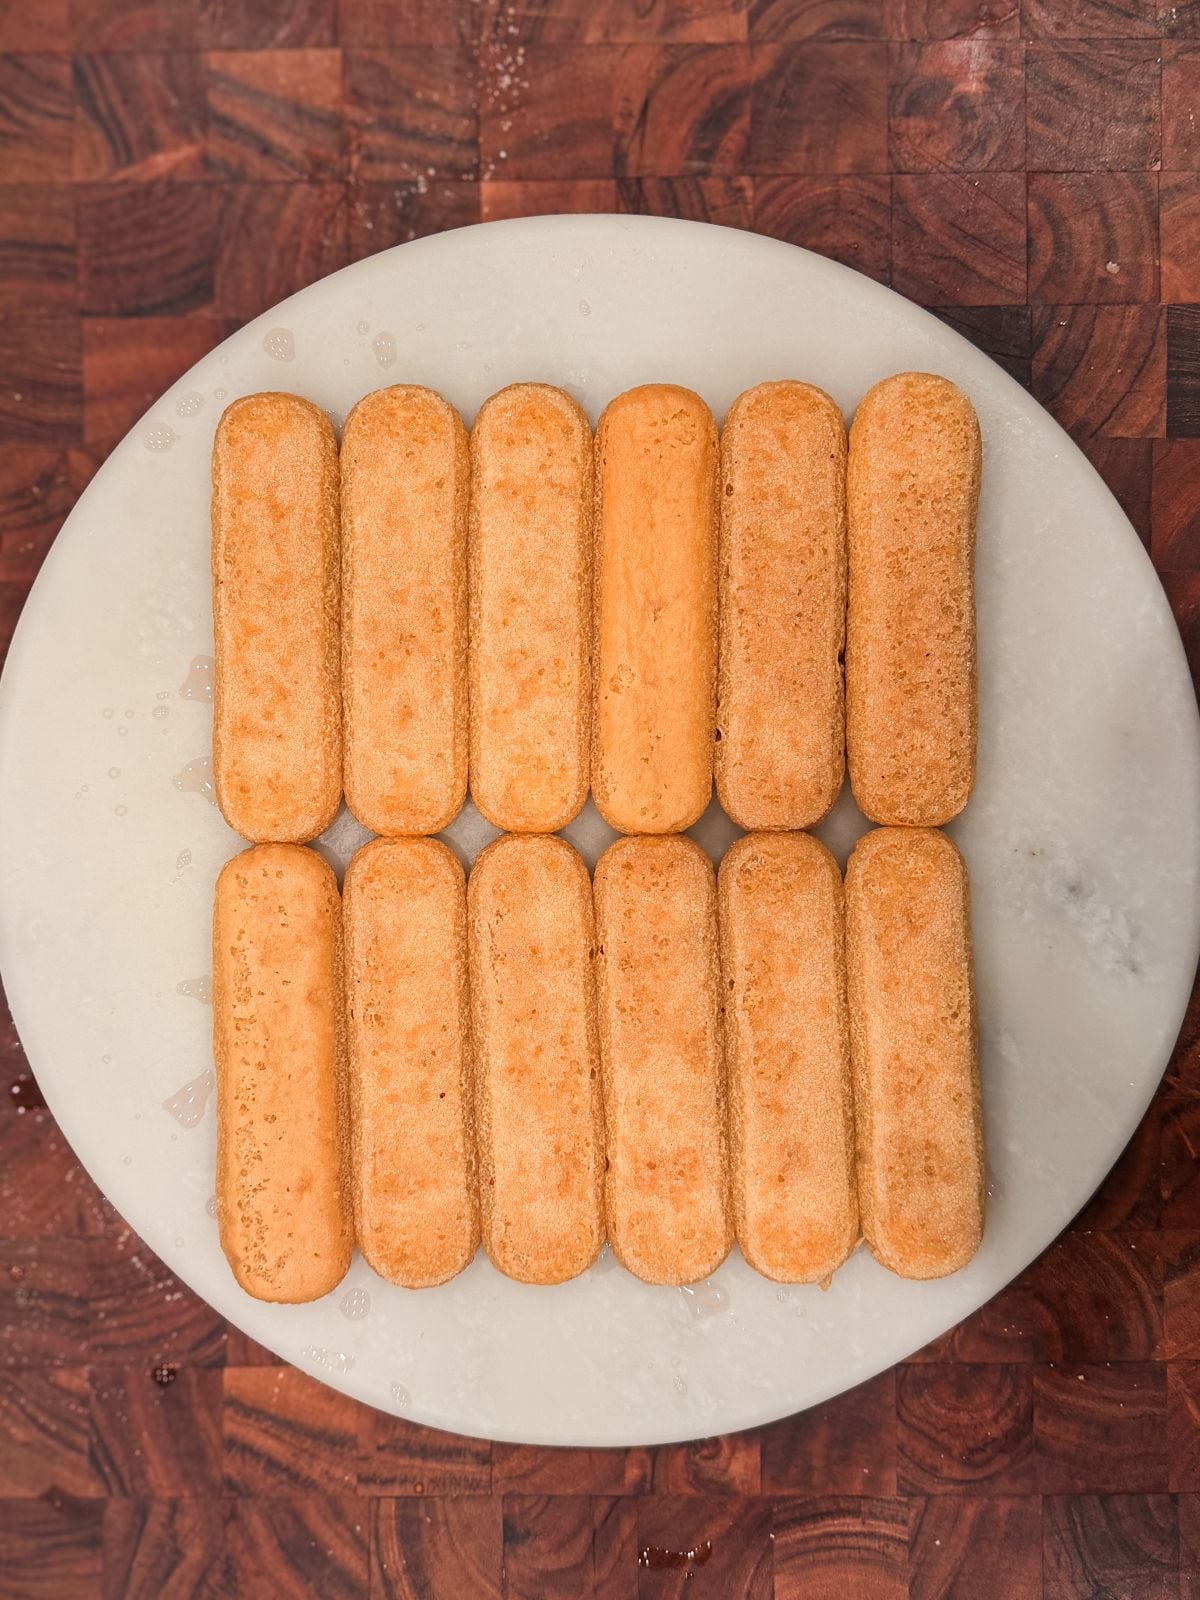
To assemble, dip the ladyfingers into the berry syrup and arrange them in a neat layer on your serving stand as pictured.
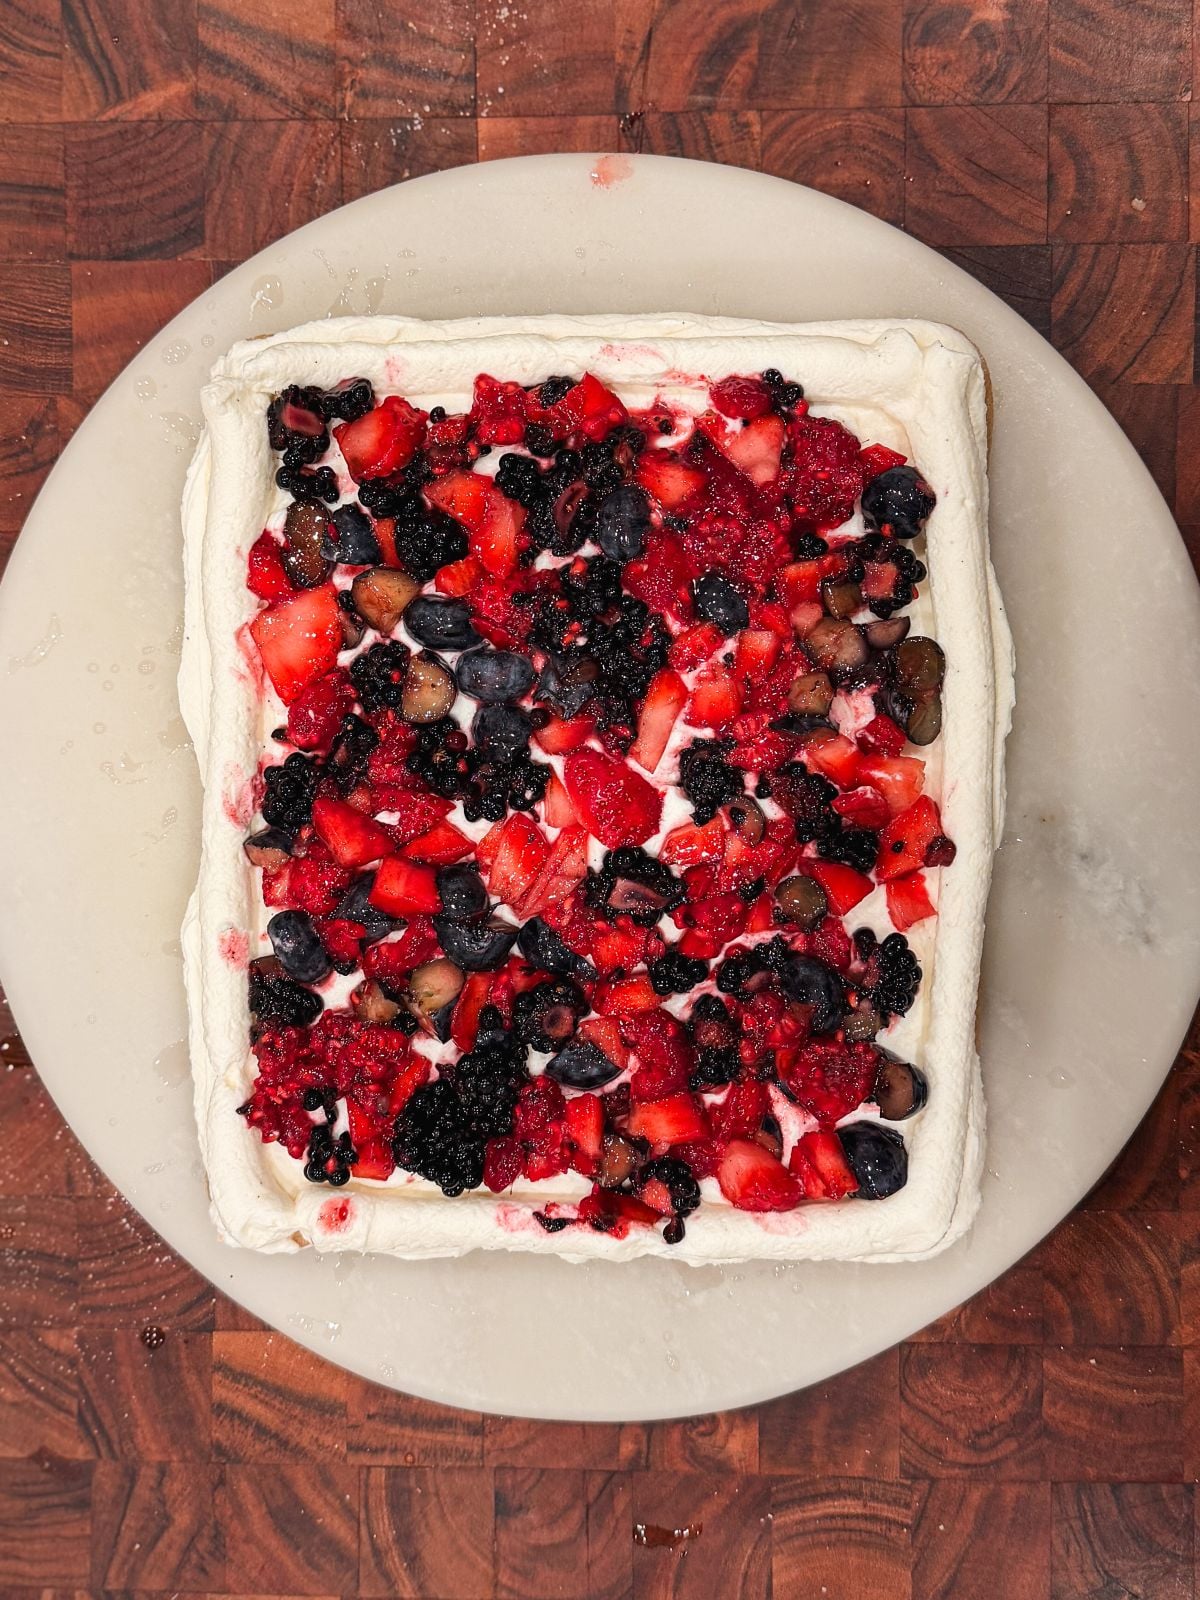
Spread the frosting on top, and pipe a border of the frosting around the edge. Cover with chopped berries, and gently press them in.
Repeat the process for the second layer of the cake. Then cover the entire thing in frosting (you can even pipe some to decorate!), and refrigerate for at least 6 hours, ideally overnight. When ready to serve, decorate with fresh berries, slice and enjoy!
Chilling is important!
I know it’s tempting to dive right in, but you have to chill this cake for at least 6 hours! This allows the ladyfingers to absorb moisture and flavor, and develop a cake like texture.
Email This Recipe
Enter your email and I’ll send this directly to you. Plus you’ll get new recipes from me every week!
Ingredients
Berry simple syrup:
- 1/2 cup water (120g)
- 1/2 cup sugar (100g)
- 1/4 cup berry jam of choice – I used Smucker’s strawberry jam
- Squeeze of lemon juice
Chantilly whipped cream:
- 6 oz cream cheese (170g), room temp
- 6 oz mascarpone cheese (170g), cold from the fridge – I highly recommend Galbani
- ¾ cup granulated sugar (150g)
- 2 tsp vanilla bean paste
- ½ tsp salt
- 3 cups heavy whipped cream, chilled (720g)
Assembly:
- 40–45 ladyfingers – the exact quantity will depend on the size you choose to make your cake , but this range will provide the best ratio of ladyfingers to frosting
- 6oz each of strawberries, raspberries, blackberries and blueberries – exact quantity depends on your preference.
Instructions
- Start by making the berry simple syrup. Add the water, sugar, jam and lemon juice to a saucepan. Place on the stove on medium-low heat, and cook and stir until the sugar and jam have fully dissolved. Set aside to cool down
- For the Chantilly whipped cream, add the room temperature cream cheese, cold mascarpone cheese, sugar, salt and vanilla to the bowl of your stand mixer. Use the paddle attachment to whisk on medium speed for 2-3 minutes, scraping the bowl along the way, until smooth and creamy. Add the cold heavy cream, and use the balloon whisk attachment to whisk on low speed for about 2-3 more minutes, until a thick, fluffy and spreadable frosting forms. Please take care not to overmix, as that can cause the frosting to split or become grainy. Give the frosting a good stir to ensure it is well combined and not runny. Transfer a quarter of the frosting to a piping bag
- Save some of the prettiest berries for decoration, and roughly chop the rest
- Once the syrup has cooled down, it is time to assemble! You must assemble the cake directly on your serving stand or cake board as it cannot be transferred. Dip the ladyfingers one by one in the berry syrup (just a quick dip on both sides, don’t hold) and arrange them in a neat 2×7 rectangle (see image in blog post above). Make sure they are tightly packed with no gaps between, as we are trying to form a cake layer.
- Add a generous layer of the frosting on top, and carefully and gently spread it out evenly. I recommend using light pressure so you don’t move the ladyfingers. Then pipe a border of the frosting around the edge of the cake, and spread a generous amount of the chopped berries in the middle. Lightly press them down
- Now repeat steps 4 and 5 to add a second layer on the cake. Cover with a third layer of the ladyfingers dipped in the syrup. This is the structure of your cake
- Cover the entire cake with the rest of your frosting, using an offset spatula and being as careful and gentle as you can to give the cake a neat look. If you wish, you can pipe some frosting on top for decoration
- Once the cake is fully frosted, transfer to the fridge and chill for ~6 hours. This step allows the ladyfingers to soak moisture and flavor, and makes the cake layers gel together better
- When you are ready to serve, decorate the cake with the berries reserved in step 3
- Slice, serve and enjoy!
Video Tutorial
Notes
- Shape and size of the cake: This is a free standing cake and you can adjust the shape and size to your liking! The instructions will help you make the exact shape and size of my cake pictured above, but you can play around with what works best for you. For example, you could make a larger sheet cake with just 2 layers of ladyfingers instead of 3
- Make ahead and storage: Because this cake uses fresh berries, I don’t recommend making it more than 1 day in advance. Keep it covered in the fridge for up to 3 days

Comments
Alenshy Amirthanayagam
I’m a hobby baker, and I made this last week for my husband’s birthday. He’s a big berry lover, so I knew this would be perfect and it did not disappoint! It was absolutely delicious, super easy to make, and everyone loved it. 🍓
I’ve also tried your chocolate cake recipe, and that was a huge hit too! What I love most about your recipes is how simple they are easy to follow, require just a few ingredients, and still turn out so delicious. Thank you for sharing such wonderful recipes! ❤️
Zoha Malik
This is so sweet of you! Thank you so much for trusting and trying my recipes x
Larisa Pamujac
I’ve made this 3 times already.. and it’s only been 1 month. Really delicious, easy to whip up, leaves people happy 🙂
Zoha Malik
AWW thank you, Larisa!
Beth
I’m planning to make a big cake for 30-35 people, should I double the recipe? Also how should I cover the cake that is on the cake stand/serving board when I put in the fridge?
Thank you so much in advance. 🫶🏼 I tried small cake tiramisu style in a baking pan with a lid and it was a huge hit! So I want to now make it for a bigger crowd 🥰
Zoha Malik
So happy to hear that, Beth! Yes, I think doubling is a good idea for 30-35 people, but you might have to make 2 cakes or use a larger serving board to make it happen. I first refrigerate the cake for 30 minutes so the frosting can firm up, then cover the cake with cling wrap without applying pressure.
Fatima Lila
My nephews/nieces made this dessert and I had 2 bowls of it for breakfast without any shame. Not only does it taste AMAZING, but the kids and their mom all said that it was SUPER DUPER easy. I can’t wait to make it myself, but I’m scared I’ll eat all of it on my own. 10/10 !!
Zoha Malik
AWWW thank you SO much! I can’t believe the little ones made this – that is so impressive 🙂
PR
We made this cake and it tastes absolutely heavenly—no one could tell it was homemade! 😊
We made one small tweak: instead of regular cream cheese, we used a mixed berry whipped cream cheese we had at home. That little change really enhanced both the color and the flavor of the cake.
Thank you so much!
Zoha Malik
oooh that sounds so delicious! Thank you PR
Georgette
this looks delicious. is there a specific brand of lady finger cookies, or any brand?
Georgette
thank u. can you substitute with vanilla extract?
Zoha Malik
Yes!
Zoha Malik
Hi Georgette! I use these ones: https://amzn.to/4yq7Szj
Malia
My new favorite dessert. This was perfect for July 4th! I rounded everything up, 8oz cream cheese & mascarpone, full qt of cream and full cup of sugar. I did one in a loaf pan like an icebox cake and another in a 8×8 pan like tiramisu (2 layers of lady fingers and filling) and had plenty for both. So easy, not too sweet and impressed everyone. Can’t wait to make it again
Zoha Malik
Aw, thank you Malia!! This will be so helpful for anyone else attempting the recipe, too!
M Shenoy
Took about 40 mins from start to finish. I halved the quantity for a smaller cake. Tastes so delicious! Big hit for July 4 celebrations
Zoha Malik
That’s my honor! Thank you, M Shenoy!
Michelle Mark
Delicious and not too sweet no bake recipe. Super easy to follow and everyone loved it! Definitely a must try dessert for parties and potlucks that will wow the crowd.
Zoha Malik
AWW thank you SO much!! Made my day!
Jo DiGiovanni
This cake is absolutely amazing. It’s actually better than the Whole Foods version. I used to buy the Whole Foods cake all the time, but then they changed the recipe and it just was not as good as it used to be. This recipe is better than even the original Whole Foods Berry Chantilly cake. It freezes extremely well too.
Zoha Malik
hi Jo, such a kind review! Thank you SO much!
Mary
Hi Zoha, I made your No Bake Berry Chantilly cake this past weekend, and it turned out so fabulous! Timely recipe, as it highlights the wonderful in season berries. My family LOVED it! Your recipe was so easy to follow, and I love your step by step directions and video, it was very helpful. Truly a fun recipe to make. Even better when the results turn out great. I am now excited to try out other recipes on your website! I’m so glad I came across your page on Instagram! I look forward to seeing new postings from you!
Zoha Malik
That’s so kind of you, Mary! Glad you’re enjoying the recipes here 🙂
Cynthia Garcia
I did it ! I made it ! When I was making the frosting I tasted it and I said .. mmmm yeah idk if I will like this (because I am not a cheesecake person) and then when I was done assembling I went ahead and tasted an extra lady finger left over I with syrup and I said mmmm this is going to be sweet for me — but I finished assembling it before bed and I took it out of the fridge and had it on Mother’s Day this morning- DIVINE! And yummy and easy saved me $20 at Whole Foods .
Zoha Malik
YAYYY haha I am glad you trusted the process!! happy mother’s day!
Jannah
Hai I’m from Malaysia.
I’ve tried this recipe it turned out really good. it’s not easy to find this kind of dessert in our country as the price of berries are very expensive so this recipe is a keeper. so easy to make and yes you have to wait overnight but worth it. thank you
Zoha Malik
Thank you so much for trusting and trying my recipe, means a lot to me!
Laraeb Tahir
Incredible recipe
Mariam Qureshi
Tried it for a party turned out great everyone loved it!
Asanda Dube
Best chantilly cake recipe ever!
Asma @ Bake with Zoha
That’s the absolutely perfect feedback Asanda. Not only yummy, its so easy to make. 🙂
Fadwa
Absolutely excellent! I made that cake for Eid and everybody was amazed. I was even more amazed because this is so easy to make so if you want to impress, that’s the recipe you have to try! 😋❤️
Asma @ Bake with Zoha
Thanks Fadwa. Couldn’t have written a better endorsement for this no bake berry chantilly cake. ❤️
Patel Priya
This was so easy and tasted amazing. Was a hit at a dinner party. I made it twice in a week as it was that good. I only just reduced the sugar 🙂
Yousma
tried this recipe and it turned out to be absolutely delicious. My daughter loved it so much she told me to make it again for her birthday
Rajeshree Pillay
Thanks Zoha. Can I layer this in shape of a car ? And cover it with fondant ? For a Lightening McQueen birthday cake ?
Zoha Malik
Hi Rajashree! Firstly that sounds so fun! But for shaped cakes with fondant, it’s best to use a sturdy recipe that has a butter cake and a buttercream icing. This cake is soft and doesn’t have as much sturdiness, so it would be too risky in my opinion