
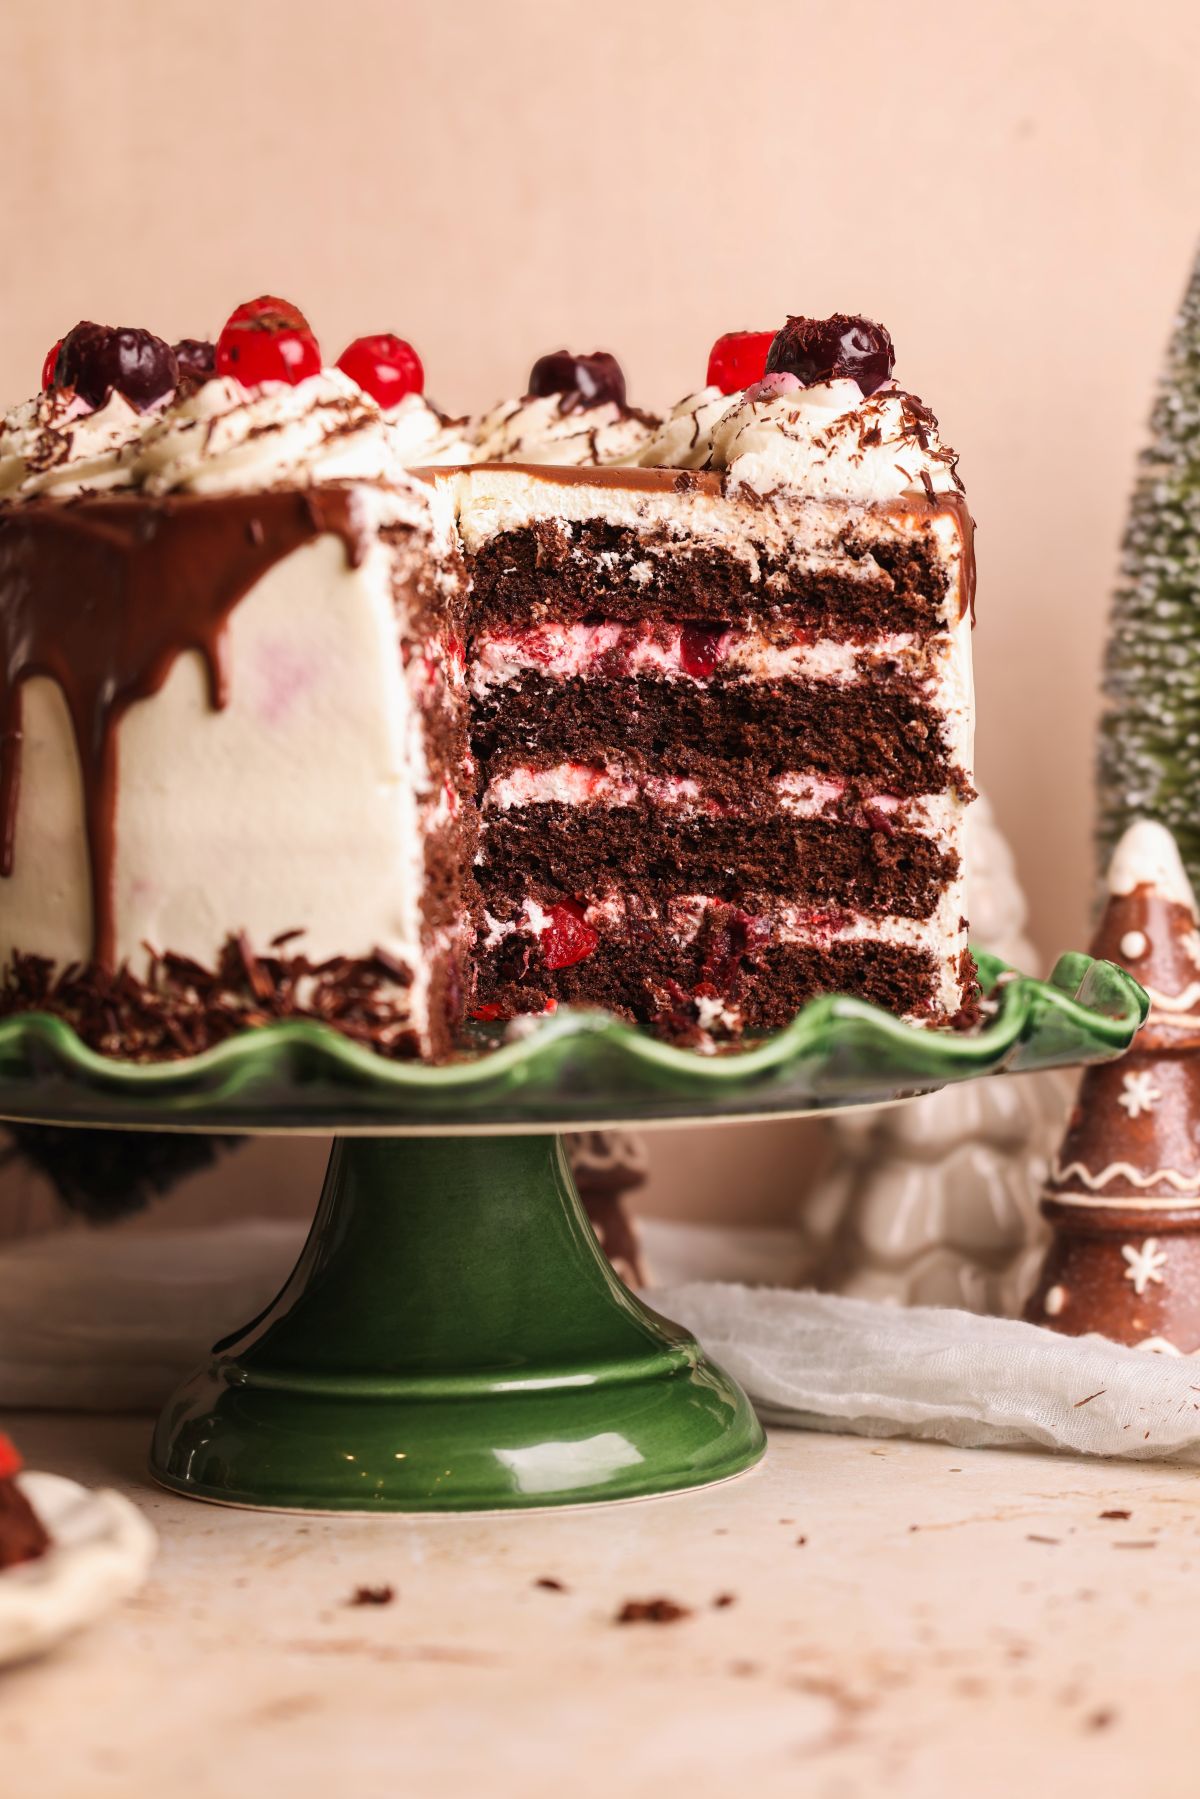
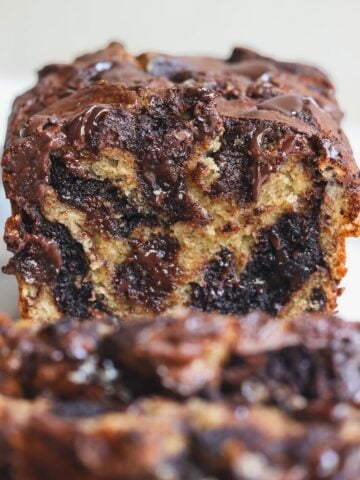
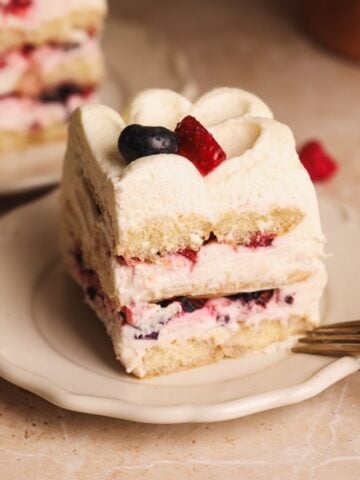
This is the classic Black Forest Cake made even better. It is a no-fuss cake made with layers of the softest, lightest chocolate sponge cake soaked in a simple cherry syrup, a not-too-sweet Chantilly whipped cream, and lots of cherries. But what makes it special is the addition of chocolate ganache between each layer and on top, which not only makes the cake look like an absolute showstopper, but also adds a richer chocolate flavor to balance the sweetness of the cake perfectly. This is as good as Black Forest gets!
Fun fact: I made a Black Forest Cake Swiss Roll in the first challenge of Next Level Baker with Gordon Ramsay, and it won me the top dish! The judges found it very soft, beautifully balanced and delicious - so you best believe I know what I'm talking about 😉
5 quick and easy components
This cake is made with 5 components, and while that may sound like a lot, trust me, they're very, very simple!
- Chocolate genoise cake. This is a very light and soft sponge cake made by whipping eggs and sugar until they more than triple in volume. The cake doesn't have any butter or oil, which gives it a sponge like texture, perfect to soak the cherry syrup. It also gives the cake a very delicate mouth feel
- Cherries. There are many opinions on the right kind of cherries to put in black forest, ranging from dark sweet to sour. My take? It's totally up to you. I usually opt for maraschino, dark sweet, or a mixture. I do recommend using canned / jarred cherries, though, because they they are pre-pitted, taste good, and already have syrup in them
- Cherry syrup. To keep things simple, this is the same juice from the jarred cherries that we cook for a few minutes. Generously brush each cake layer with the cherry syrup to add moisture and flavor
- Chantilly whipped cream. You frost the cake with a delicate and light whipped cream that's not too sweet and balances the cherries beautifully
- Ganache. This is where I like to do things differently! I add ganache in between the layers and on top of the cake as a drip to add more chocolate. HIGHLY recommend not skipping this, although you can if you want to
Lastly, you can decorate the cake with whipped cream dollops, cherries and shaved chocolate for a classic look.
3 tips to perfect the genoise sponge cake
There are 2 common mistakes people make when it comes to genoise sponge cake that can result in a dense, rubbery cake. Here's what you need to know about perfecting it:
Whip a LOT of air into the eggs and sugar
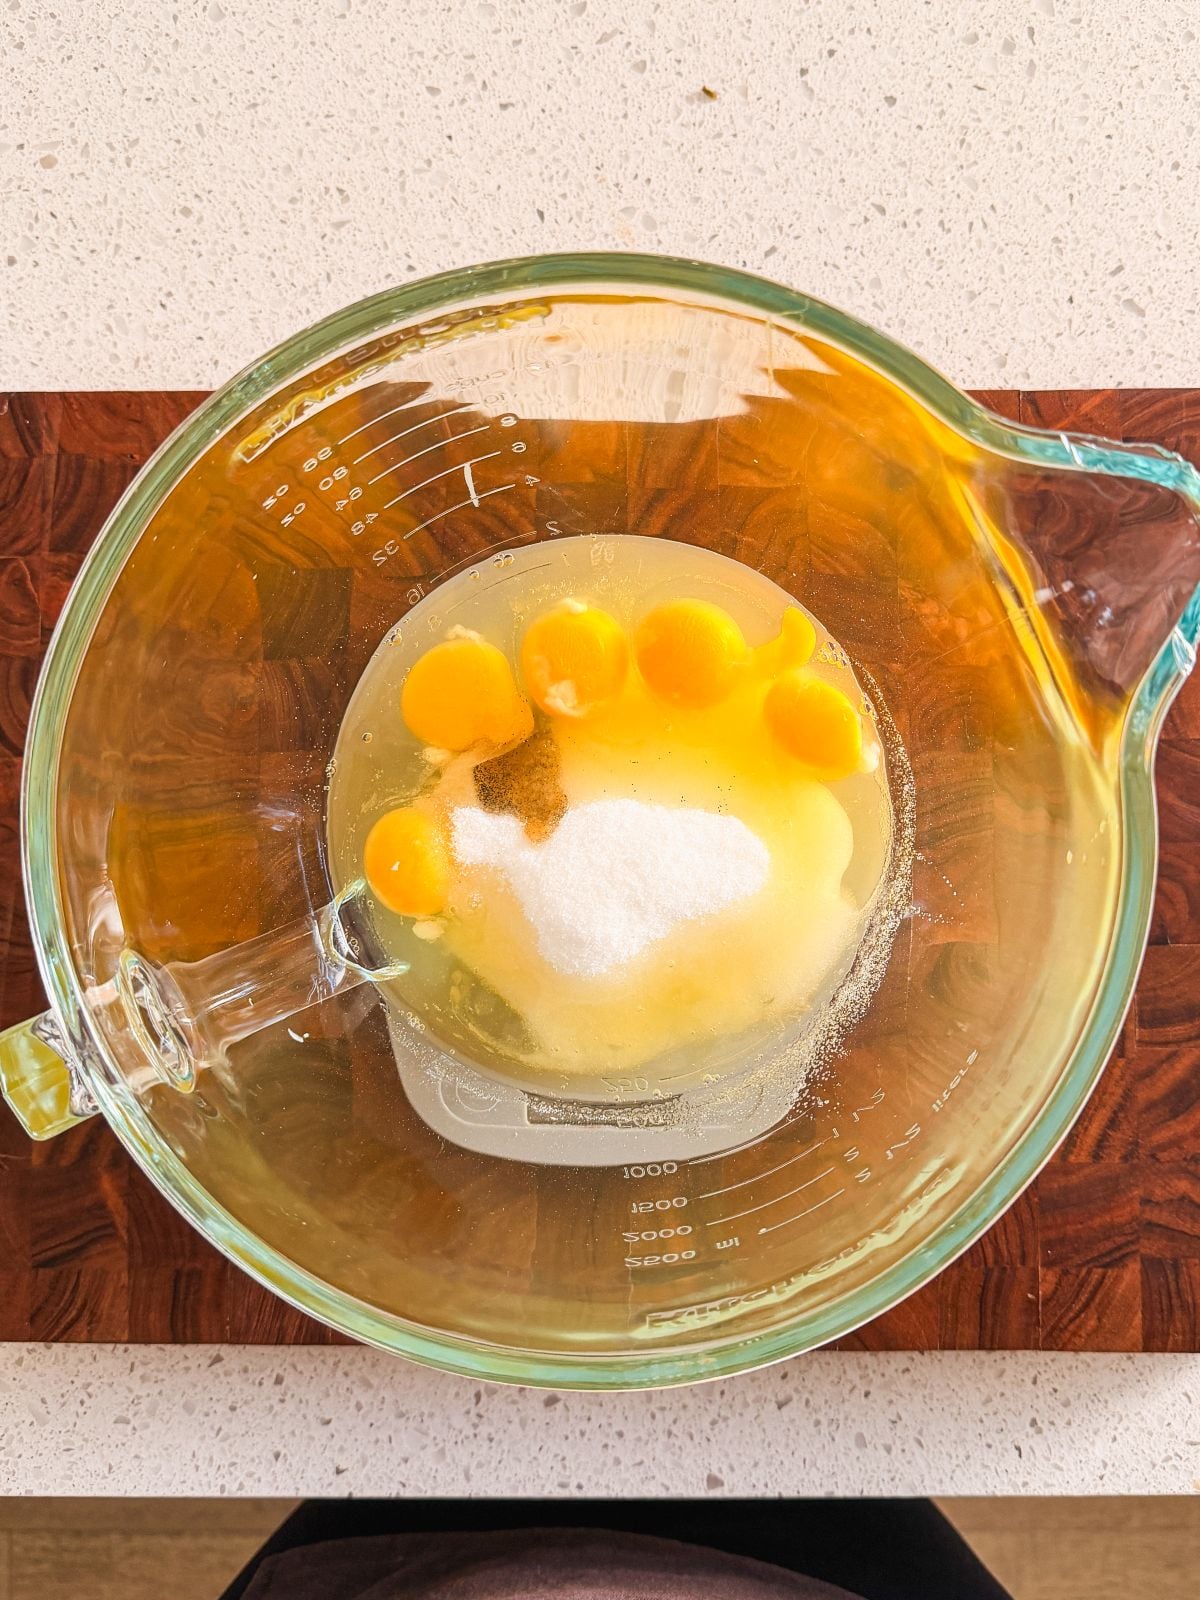
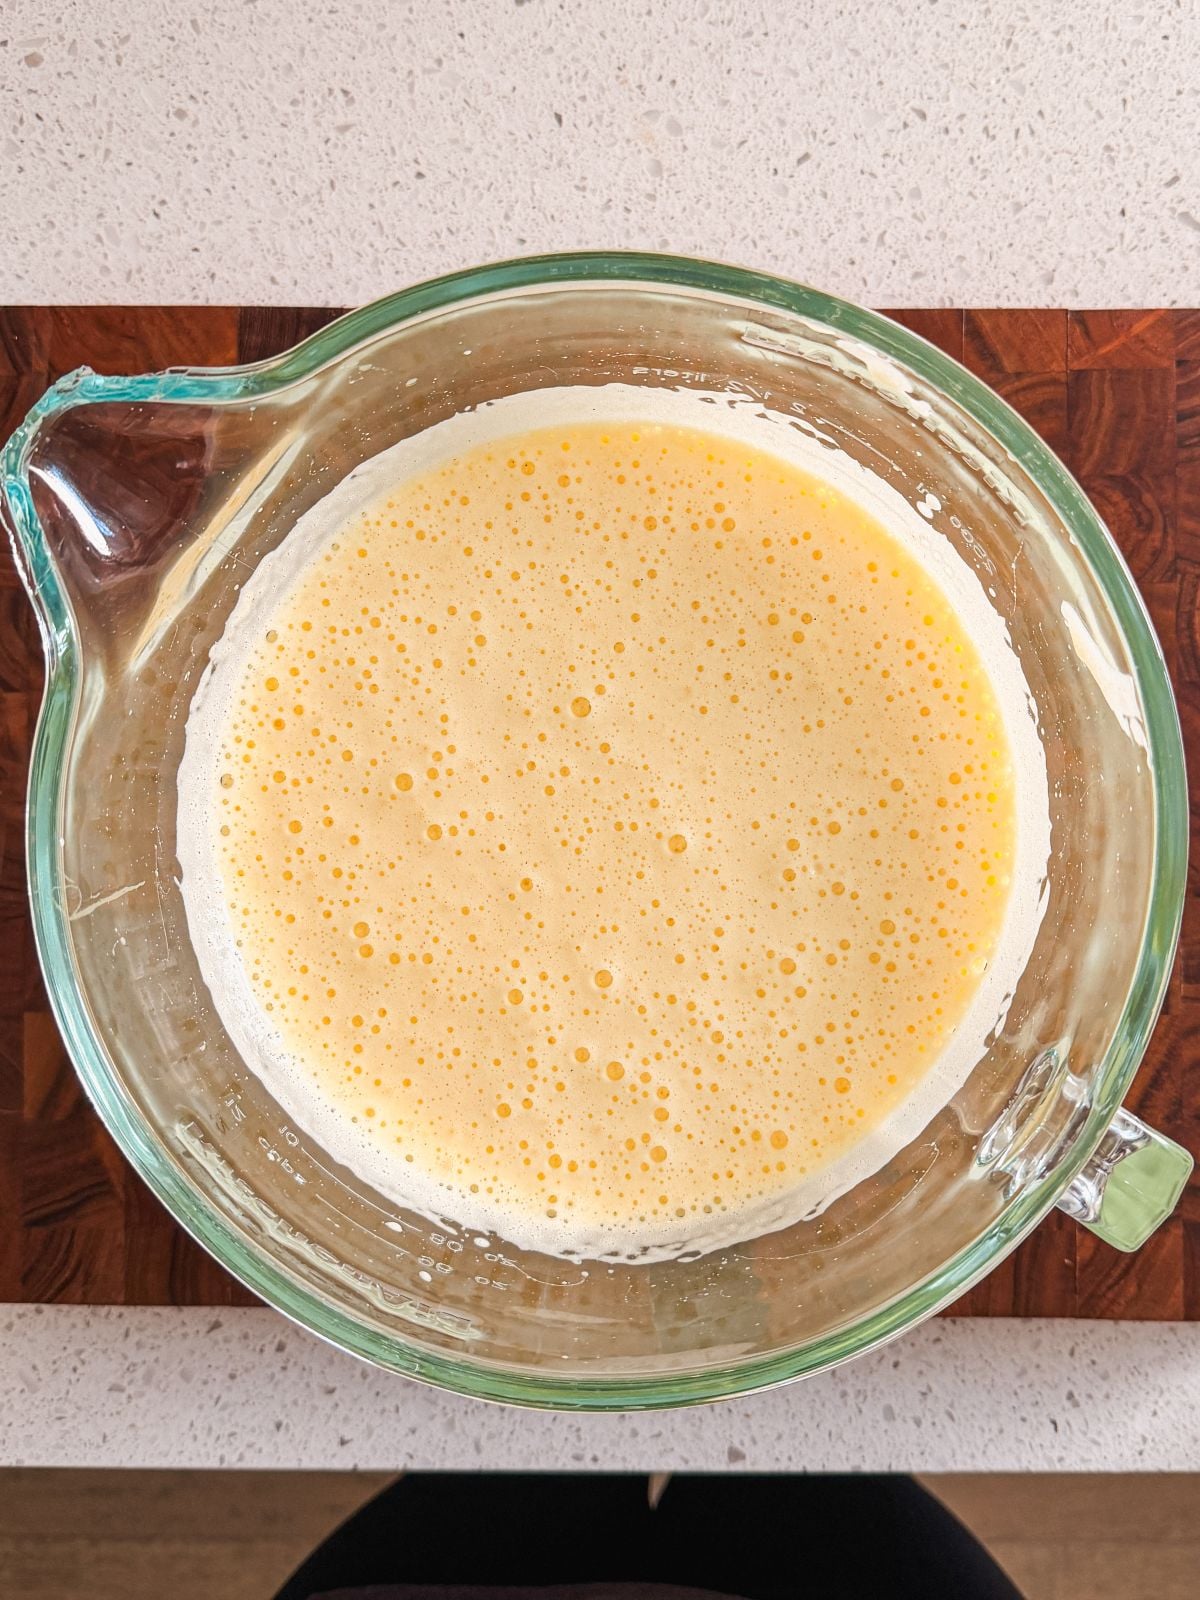
You start by whipping together the eggs, sugar and vanilla. This step is incredibly important, as we want to add as much air into the batter as possible. Whisk for at least 5 minutes until the mixture more than triples in volume. It should be very pale in color, thick and fluffy in texture, and falls off the mixer attachments in ribbons. Under-whipping at this stage will result in a dense cake!
Be VERY gentle when folding in the dry ingredients
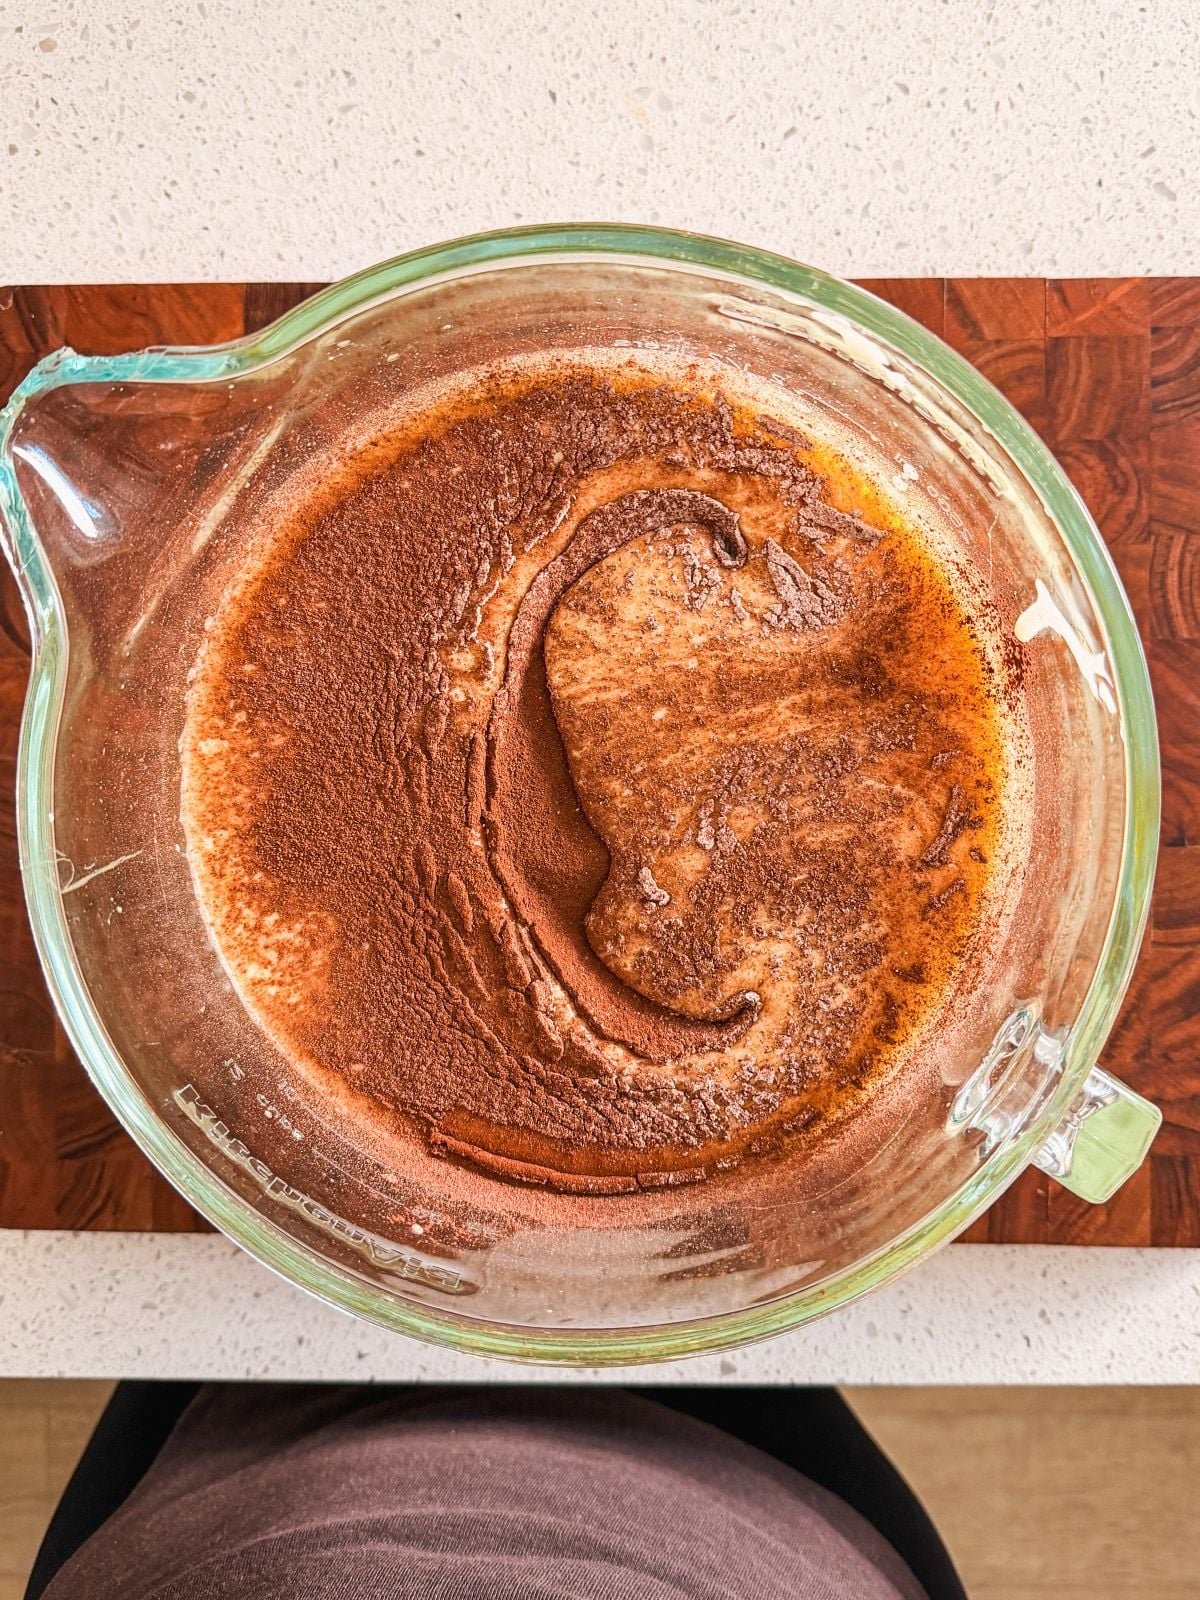
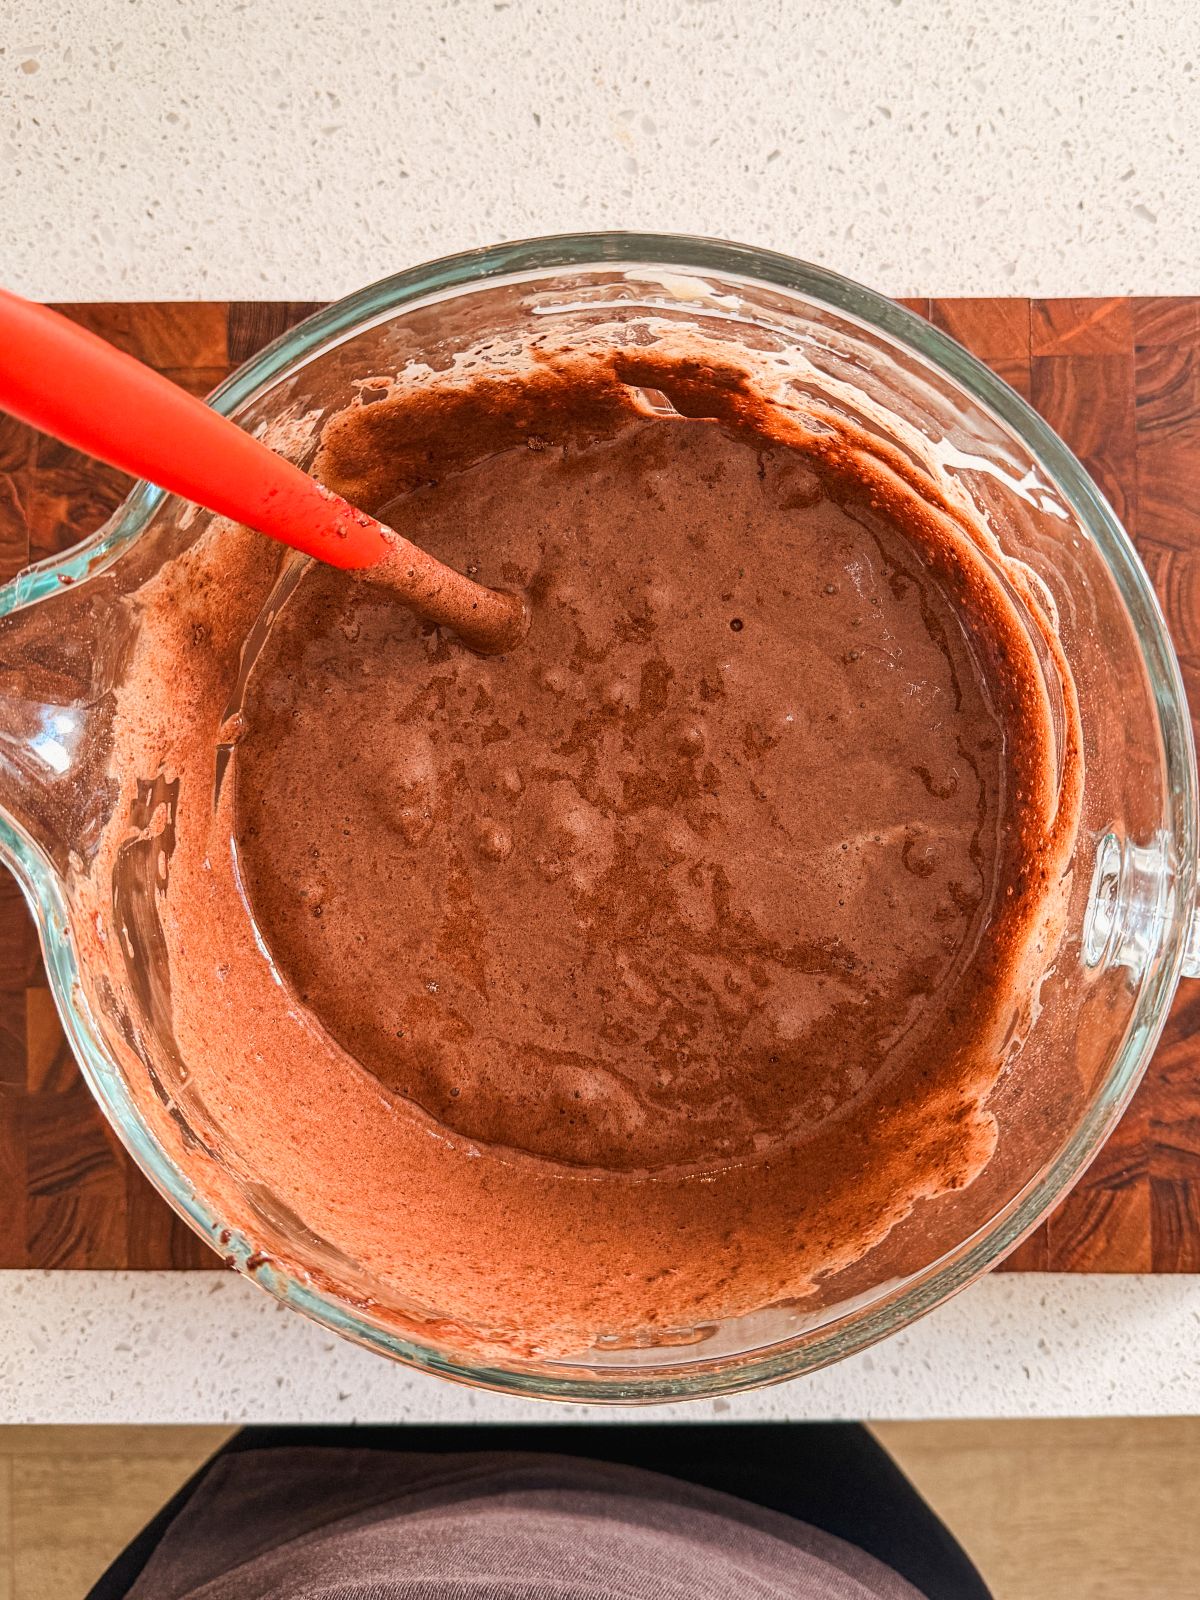
Immediately sift the dry ingredients into the egg mixture. Sifting is crucial as it aerates them and makes them easier to mix. Then, use a rubber spatula to very gently and slowly fold them in. This means using a "J" shaped mixing motion, going around and cutting through, going down and coming up. You have to incorporate the dry ingredients without getting rid of the air whipped into the batter. Overmixing or being aggressive in this step will cause the batter to deflate, ruining the cake's texture.
Bake quickly in thin layers
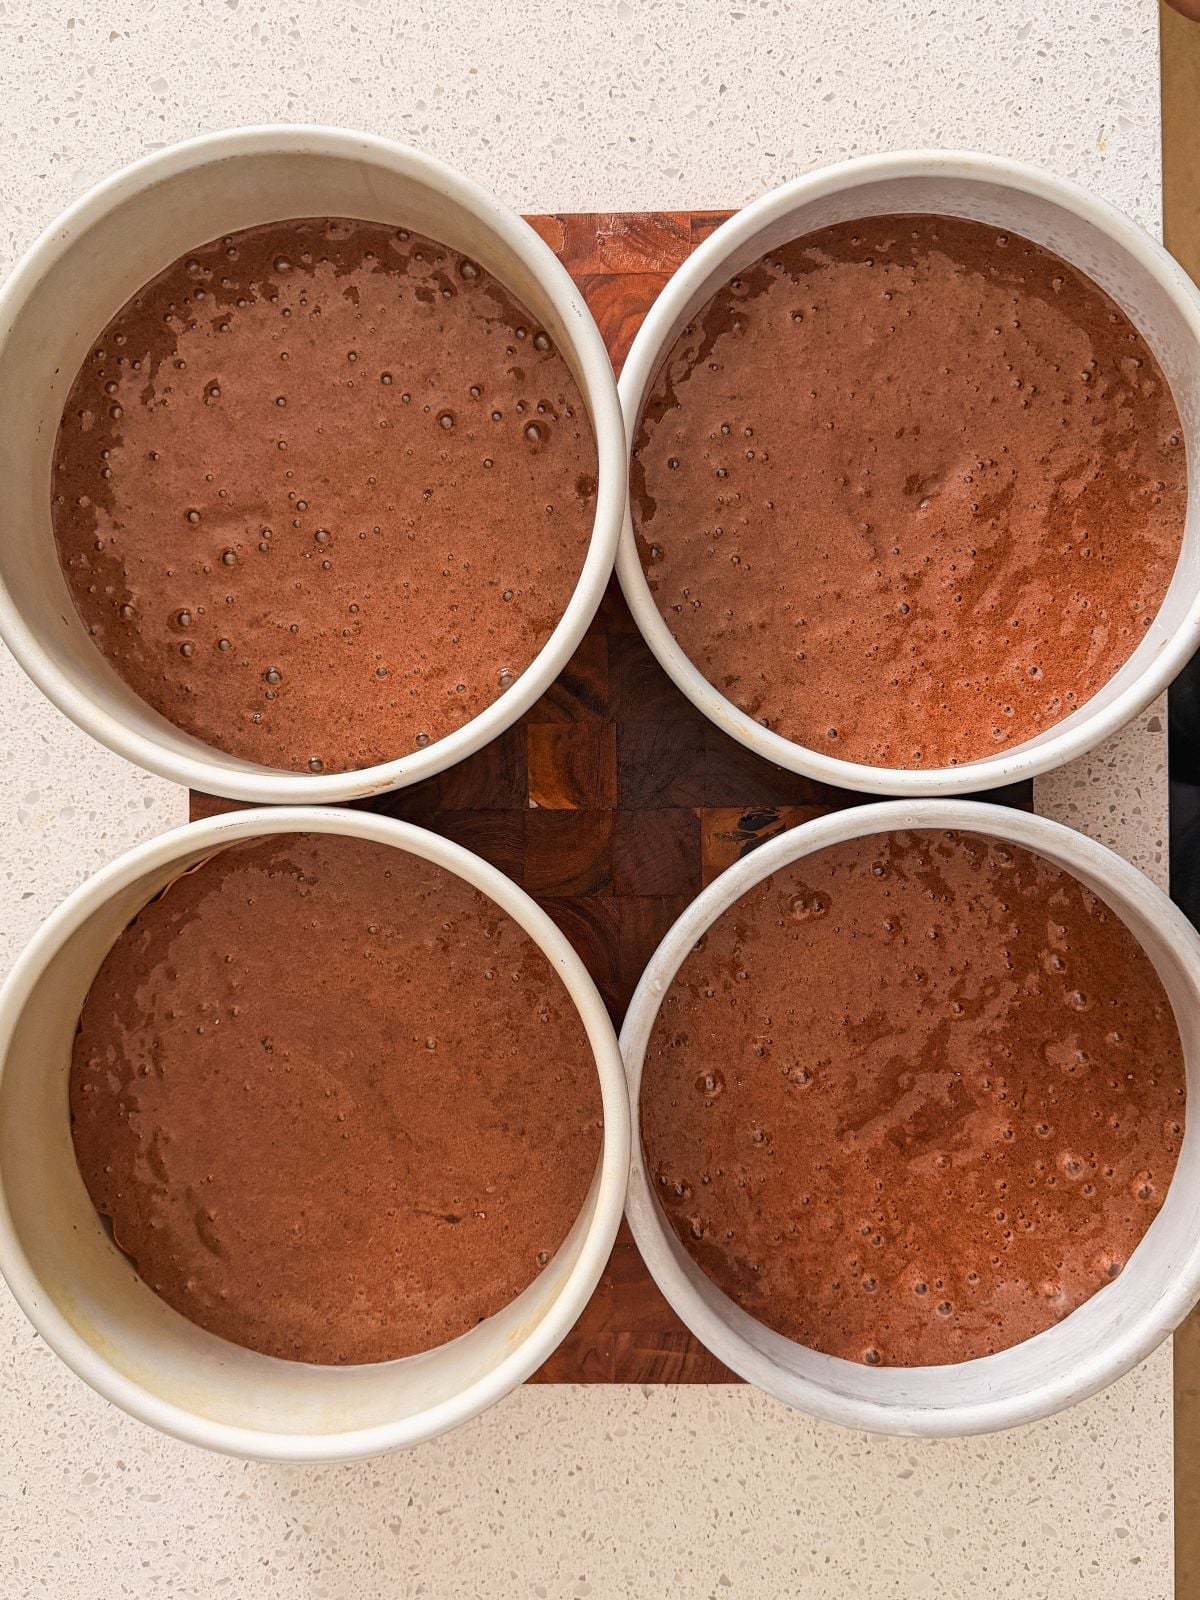
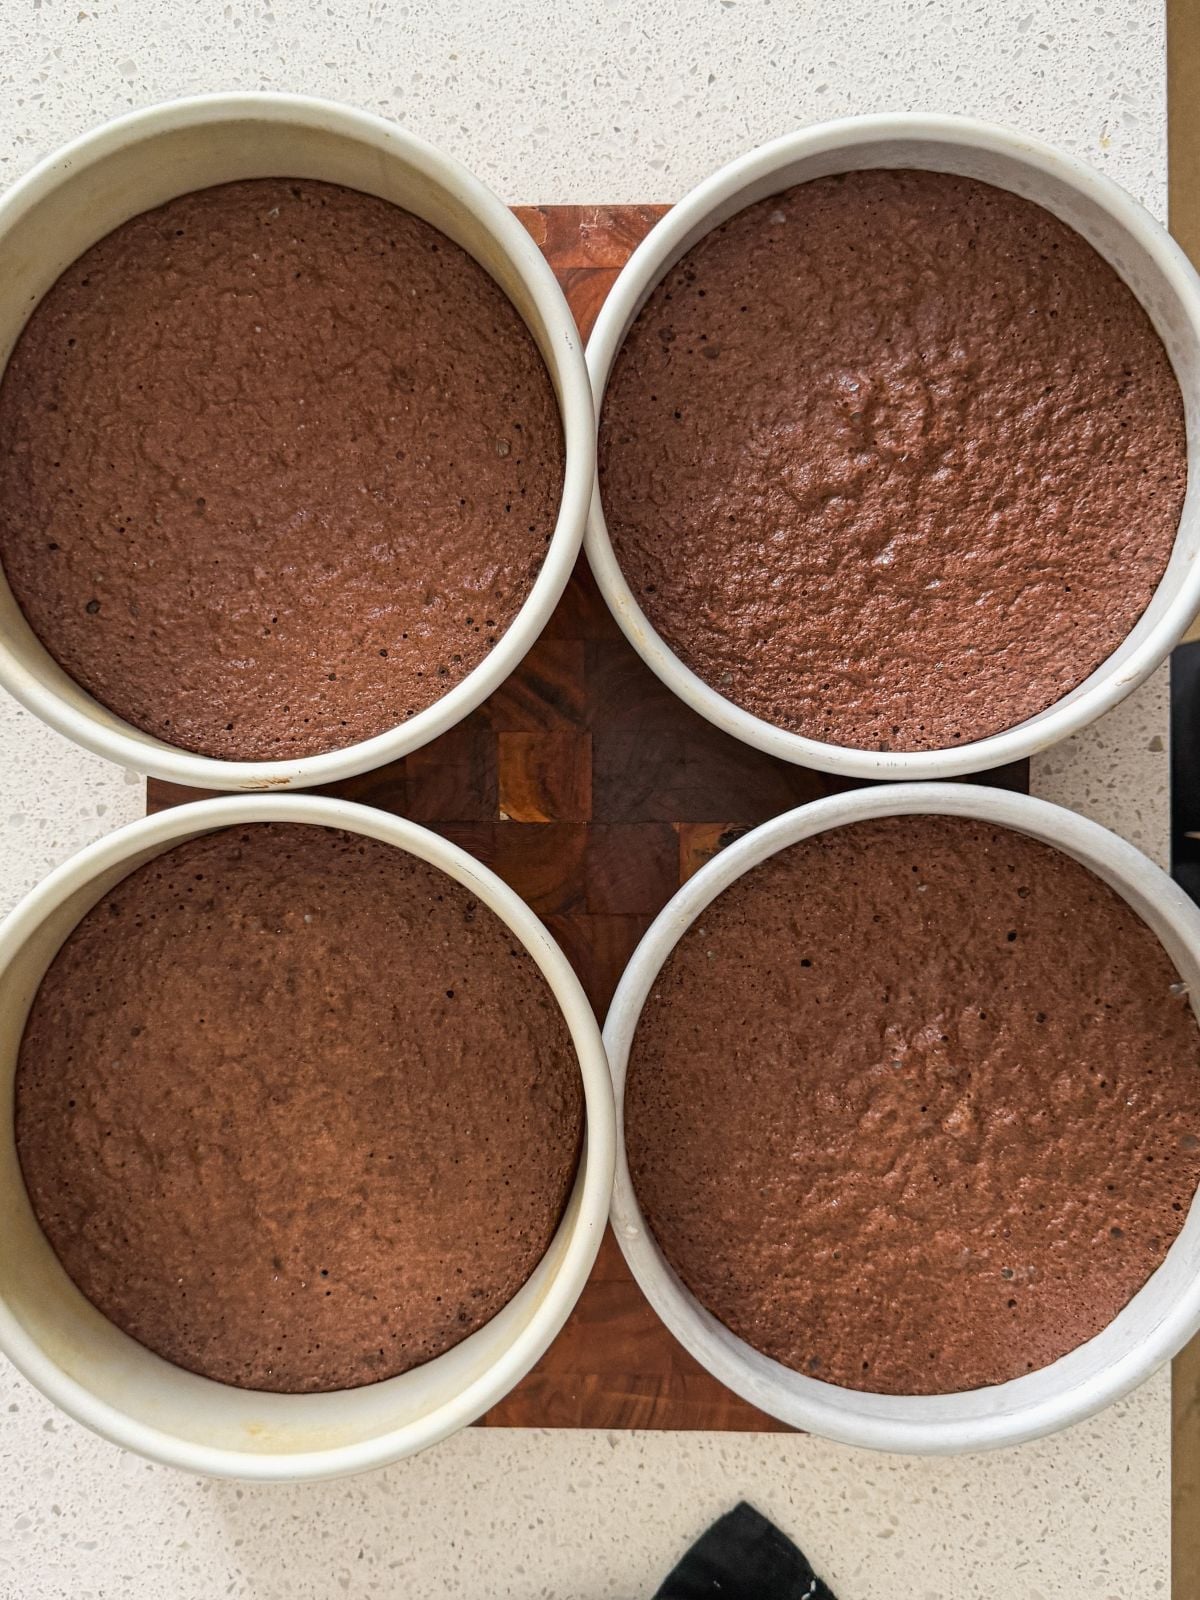
Instead of baking the cake in thick layers and dividing them after baking, I recommend baking in thin layers between 3-4 pans. This keeps the bake quick, locking in the aeration in the batter. Also, NEVER let the cake batter sit around - bake it straight away!
Assembling this Black Forest cake
Once all components are ready and cooled down, it's time to assemble!

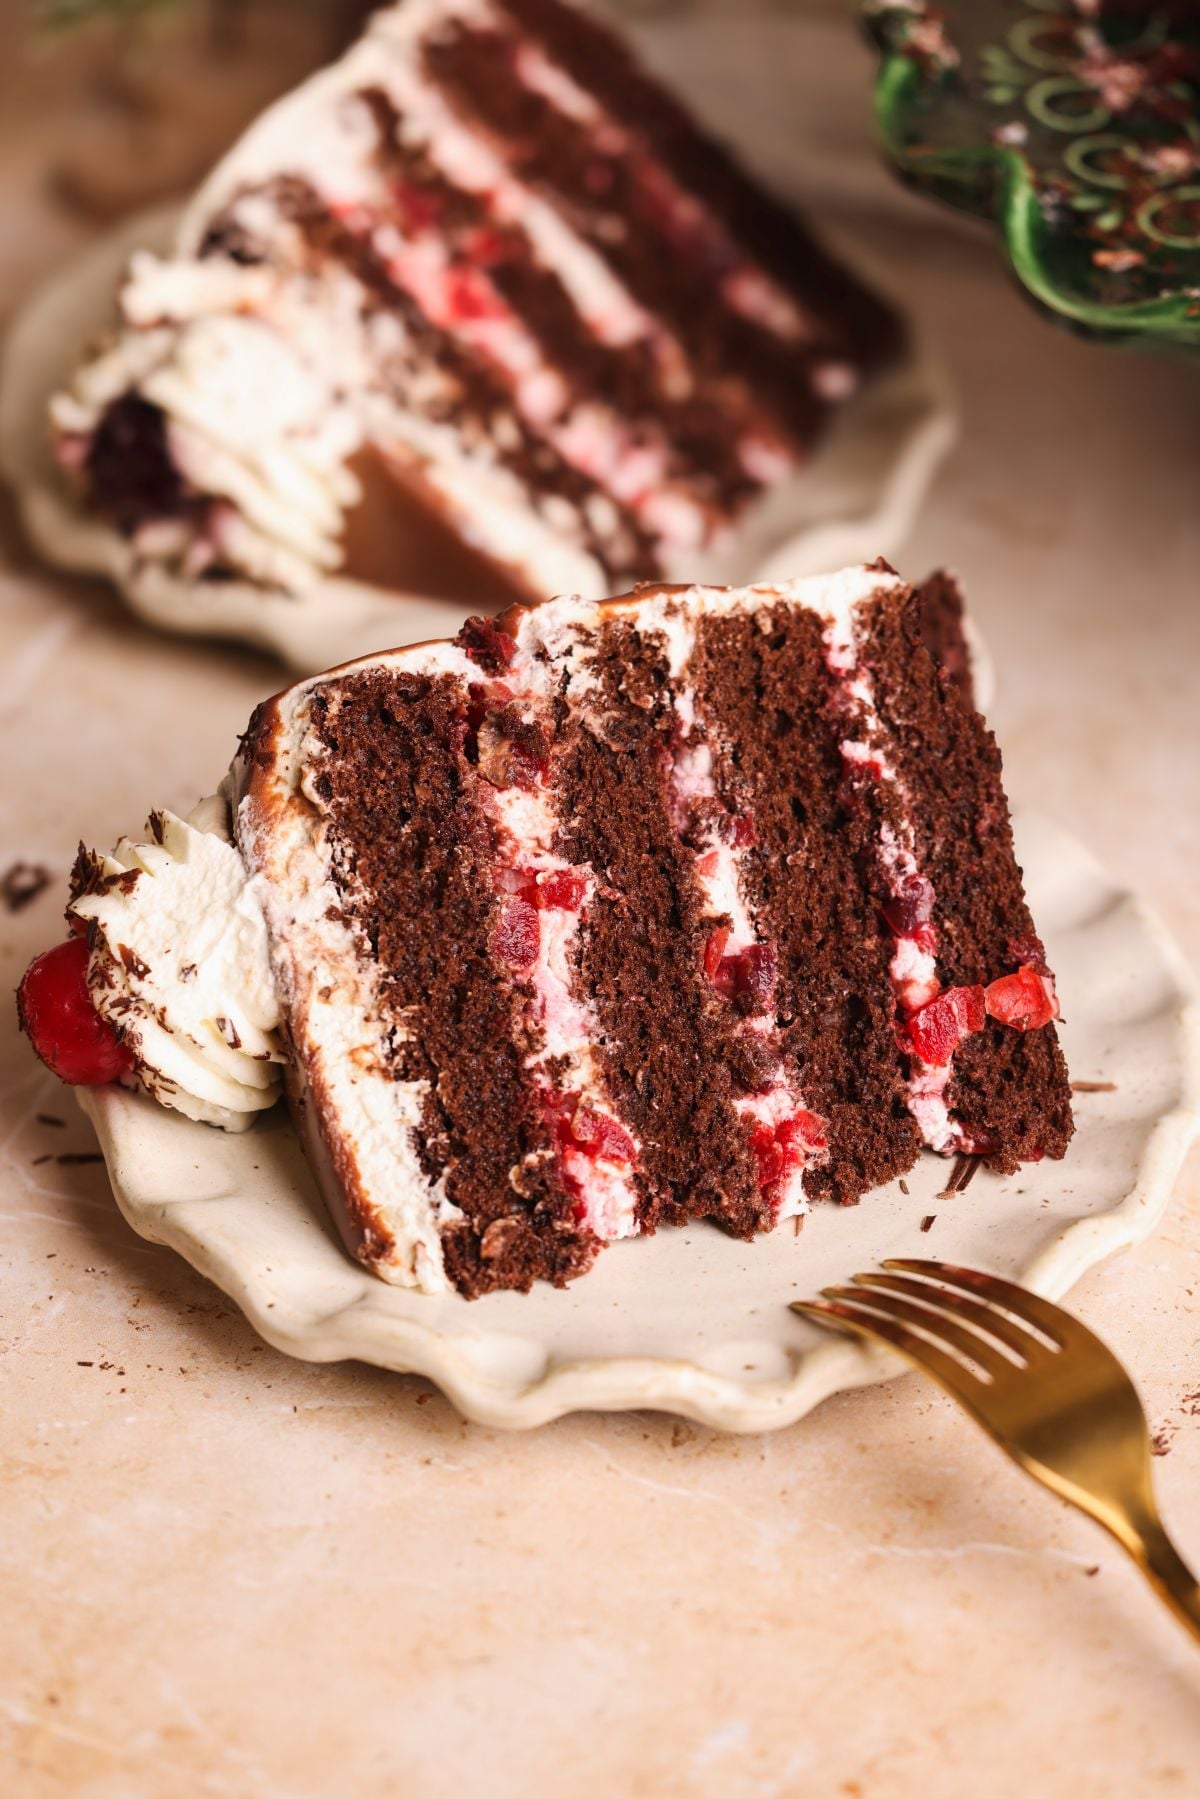
Place one cake layer on a turntable / serving stand upside down, and brush it generously with the cherry syrup. This is our opportunity to make the cake moist!
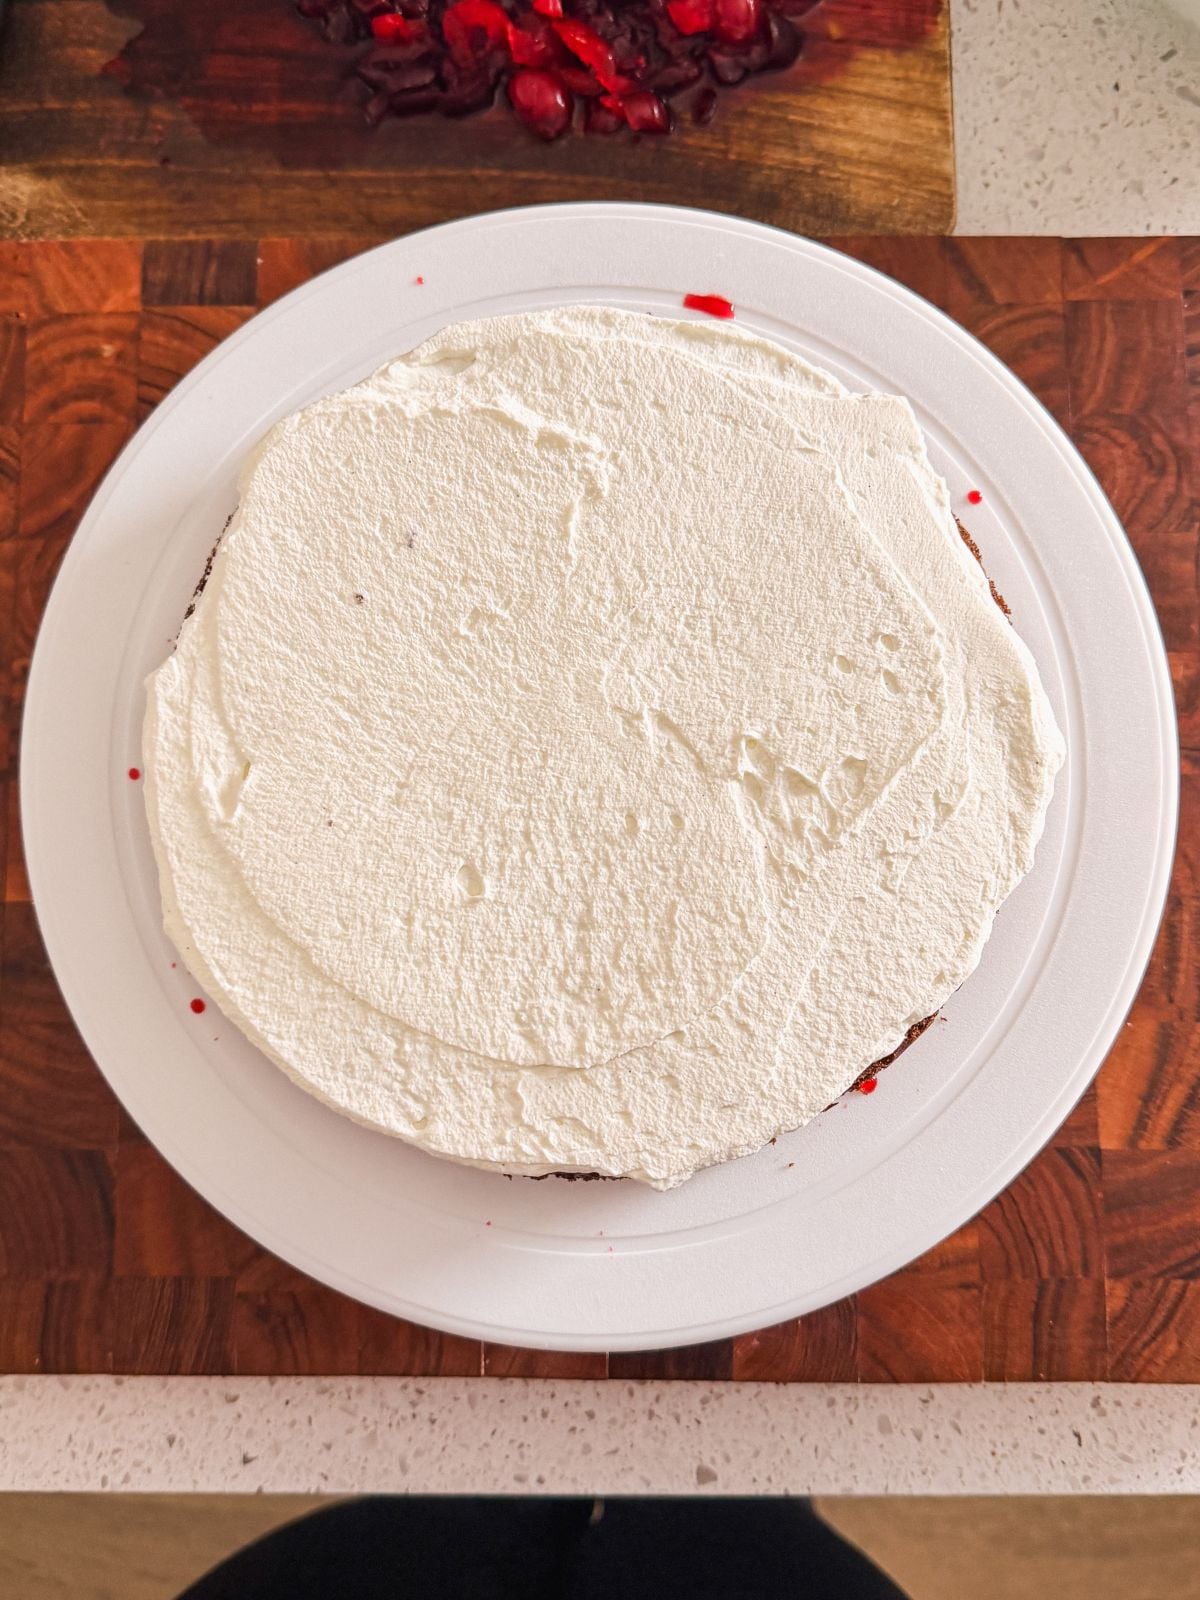
Spread a generous layer of the whipped cream.
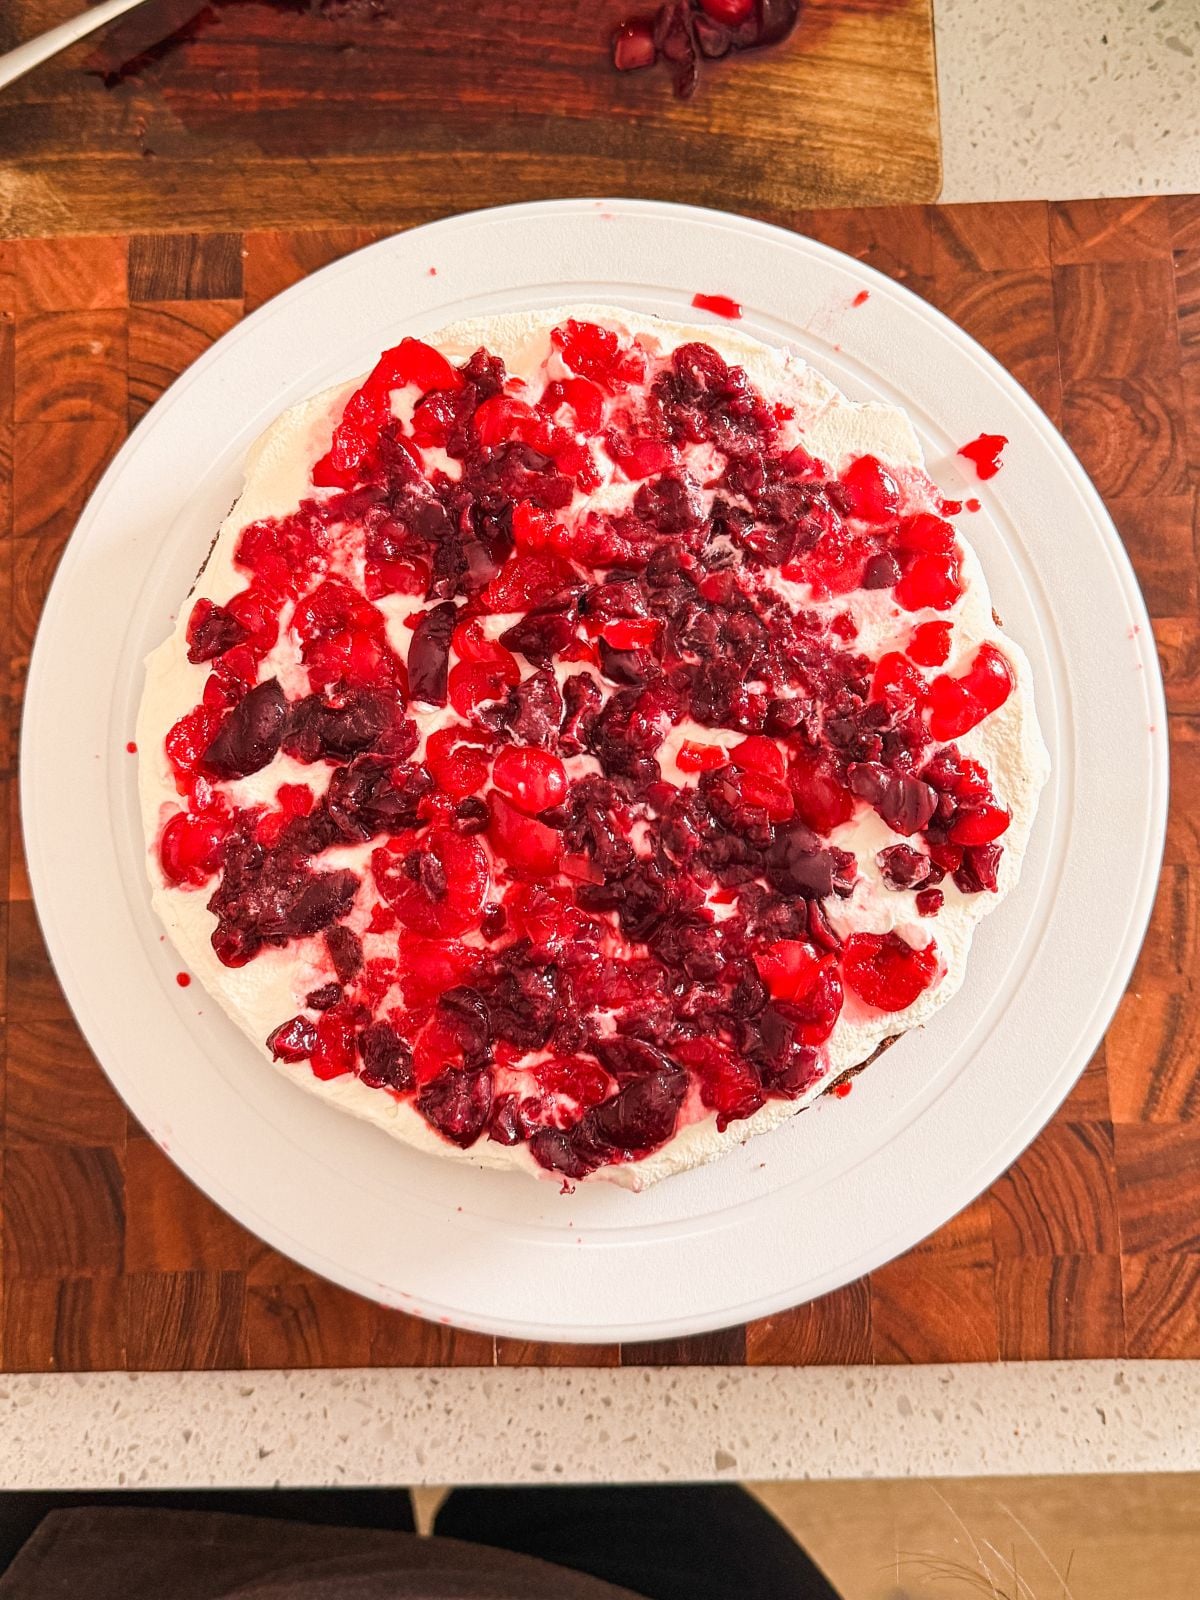
Cover the cream with the chopped cherries, gently pressing them in.
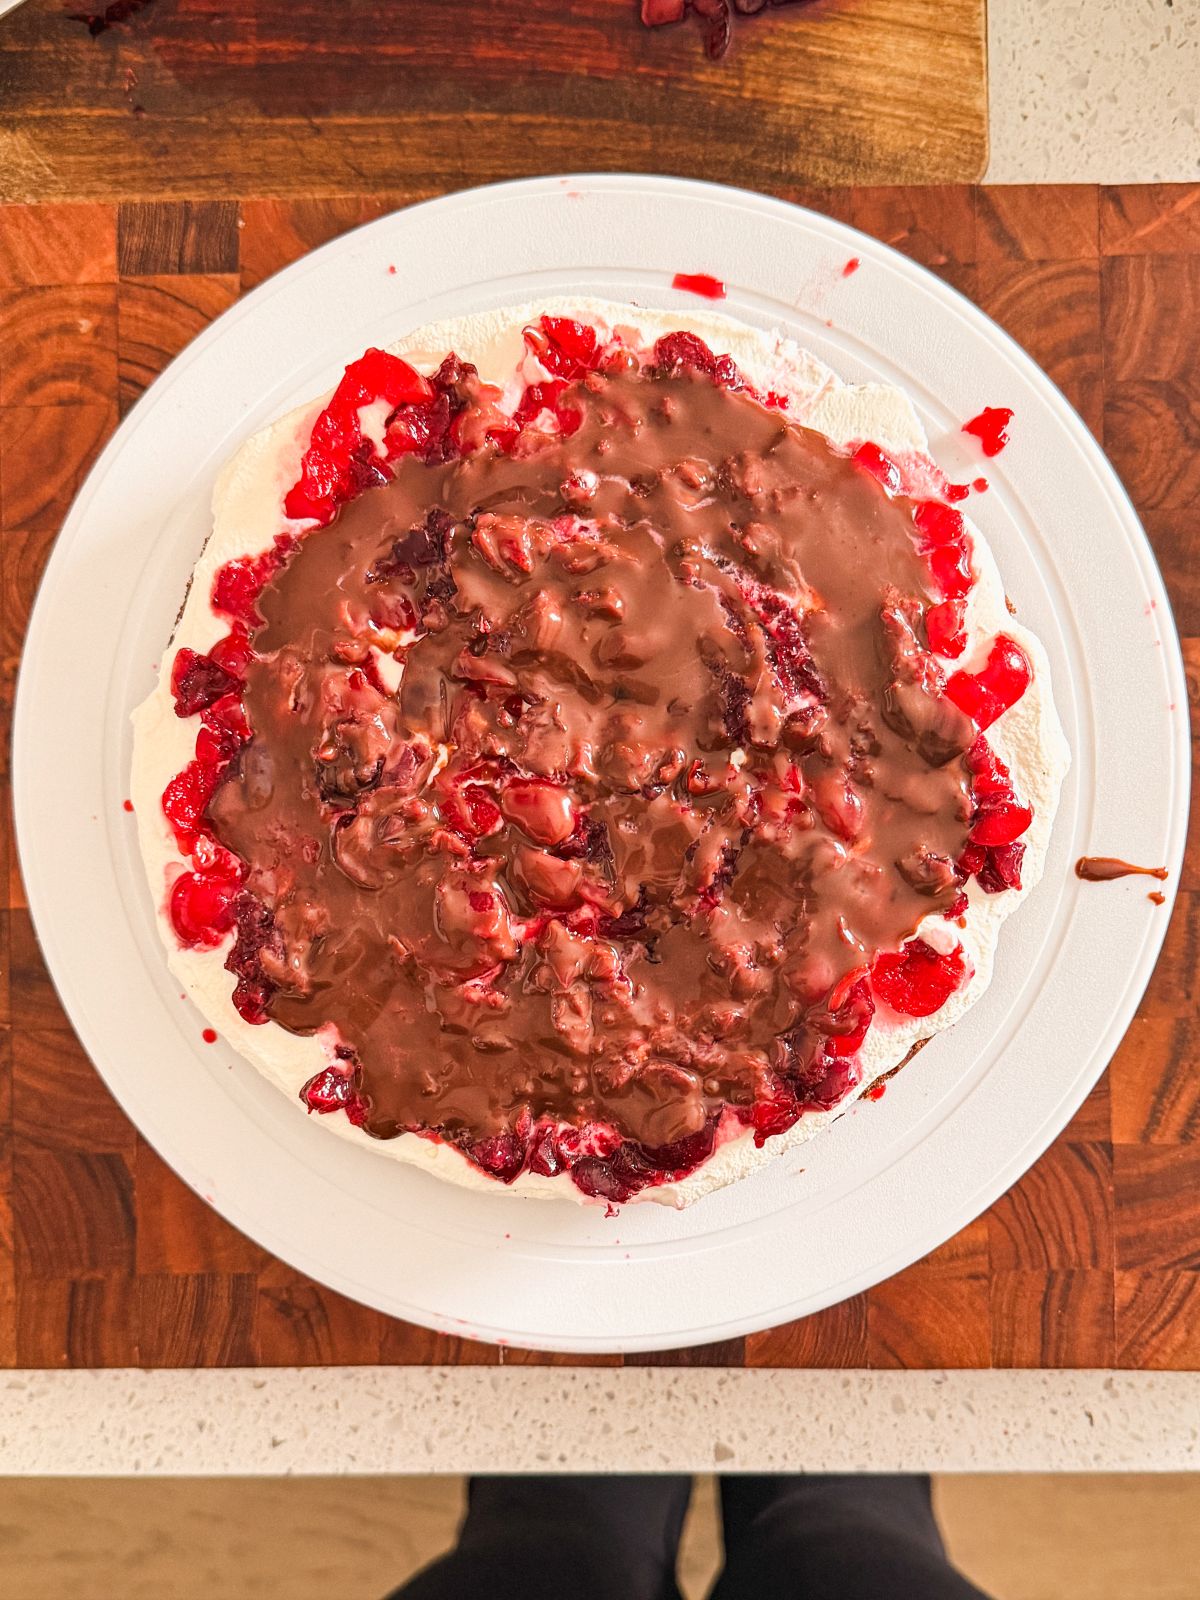
Drizzle over 2-3 tablespoon of ganache - don't put too much, as that will cause the cake layers to slide around!
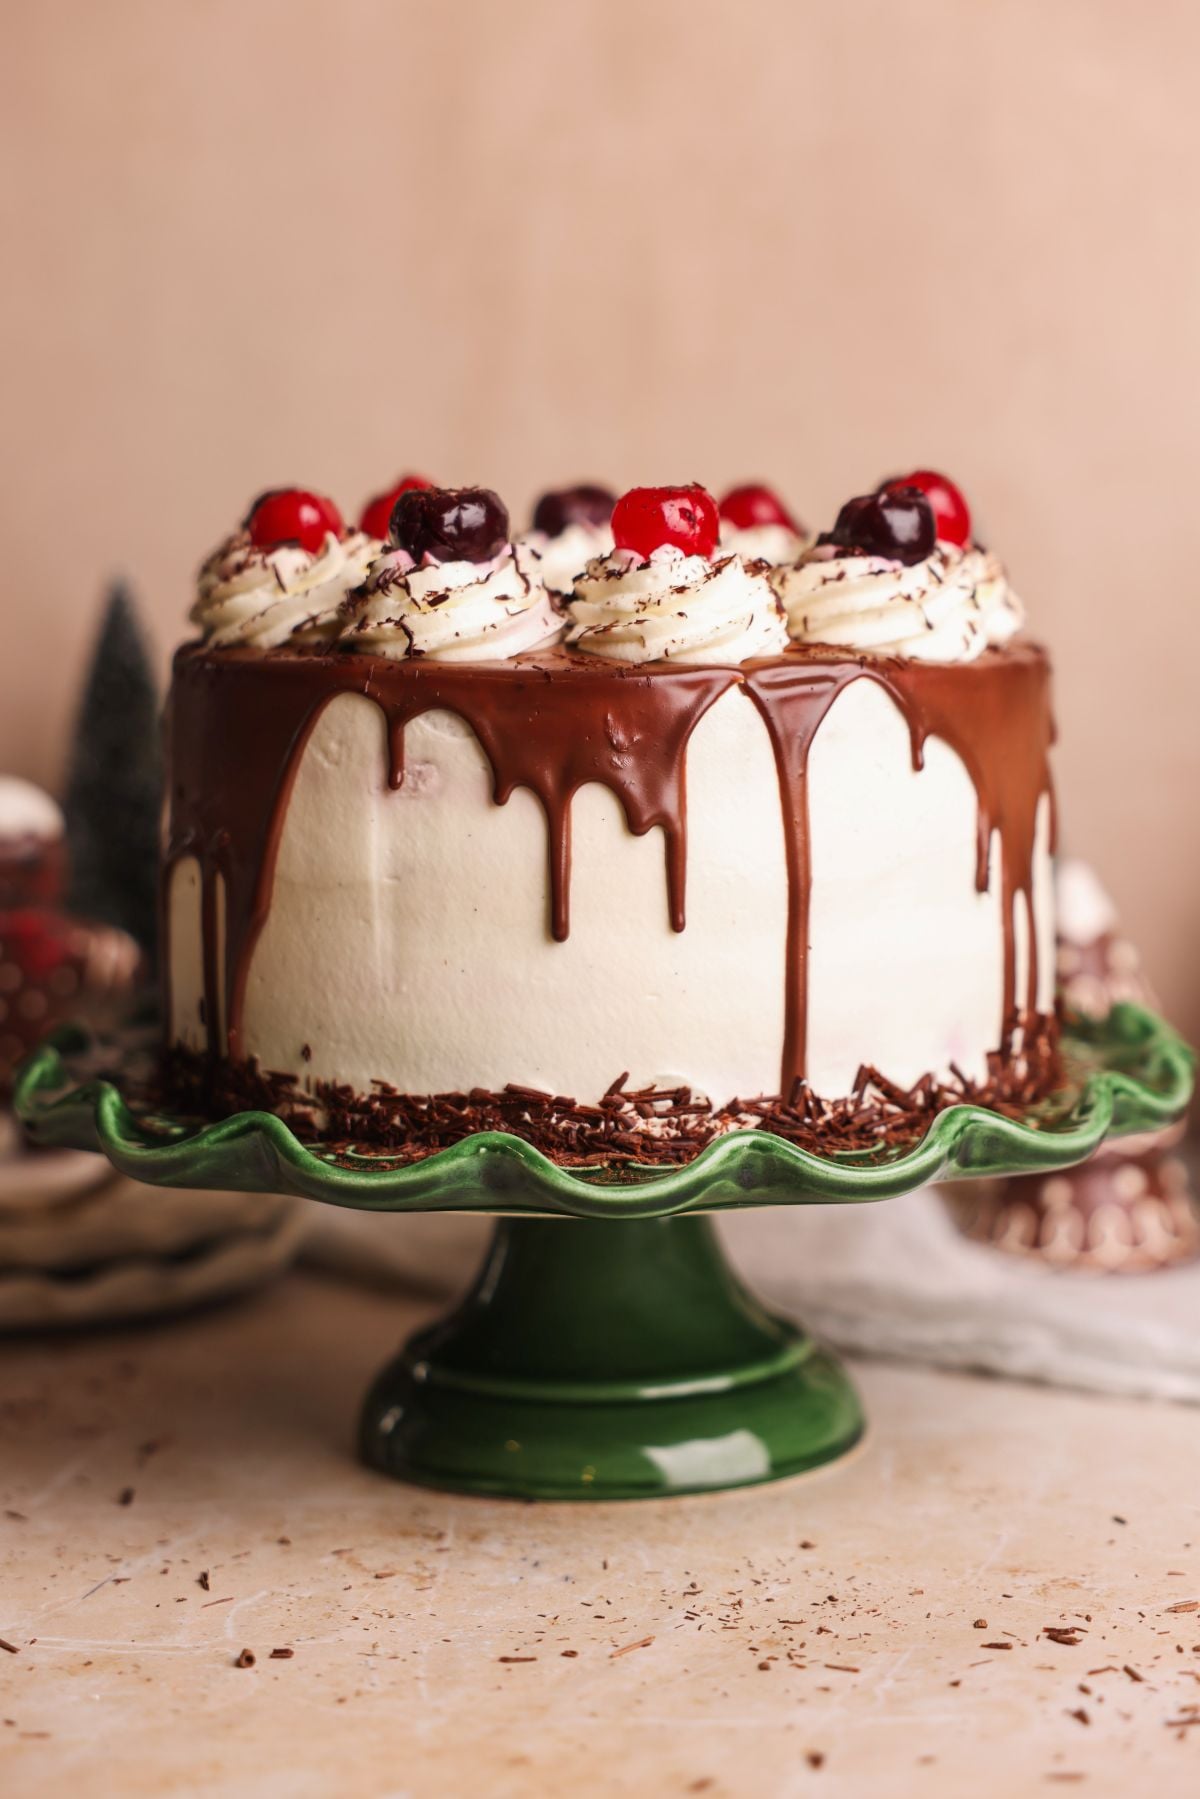
Continue until all layers are done, then coat the entire cake in the whipped cream. To do a drip, chill the cake so the whipped cream is cold, and warm up the ganache so it's runny but not hot. Pour it on top of the cake, and use a spatula to quickly spread it and let it drip down the sides!


The Perfect Chocolatey Black Forest Cake Recipe
- Total Time: 1 hour + cooling
- Yield: 10-12 servings
Description
A not-too-sweet and extra chocolatey black forest cake with light and soft chocolate sponge cake, cherries, Chantilly whipped cream and chocolate ganache
Ingredients
Chocolate Genoise Cake
- 8 large eggs, room temperature
- 1 cup granulated sugar (200)
- 1 cup all purpose flour (130g)
- ½ cup cocoa powder (50g)
- ½ tsp salt
- 2 tsp baking powder
Cherries and syrup
- 2 14 oz cans or jars of pitted cherries in syrup - I use a mix of dark sweet cherries in 100% cherry syrup and maraschino cherries, but you can use any that you like. See notes for fresh cherries
Chantilly whipped cream
- 3 cups of heavy whipping cream, chilled (720g)
- ¼ cup sugar (50g)
- 1 tsp vanilla
- ⅛ tsp salt
Ganache
- 240g semi sweet chocolate (or use a mix of dark + milk chocolate)
- 1 cup heavy cream (240g)
Instructions
Chocolate Genoise Cake
- Pre-heat oven to 350F (conventional / no fan) and prepare 4 8" round cake pans by placing parchment paper on the bottom. Do not add oil or butter. If you don't have 4 pans, you can use 3 pans instead, but I don't recommend fewer
- Add the eggs and sugar to the bowl of your stand mixer and use the whisk attachment to whisk on medium high speed for 5-7 minutes until the mixture becomes very pale in color, thick and fluffy in texture, and almost triples in volume. Do not rush this step!
- Now sift in the flour, cocoa powder, baking powder and salt
- Use a rubber spatula to very carefully, gently and slowly fold the dry ingredients into the wet. Take your time and do not use an aggressive mixing motion because you don't want the air to be knocked out of the batter. Stop folding as soon as no more streaks of flour can be seen. You should have a very fluffy batter
- Carefully divide the batter evenly between the prepared pans and spread it out
- Bake in the pre-heated oven for 10-12 minutes, or until a toothpick inserted in the middle comes out clean. Do not over bake!
- Let the cakes cool down in the pans for 20 minutes, then carefully take them out and fully cool down while you work on the other components
Cherries and syrup
- Drain the canned / jarred cherries and reserve all the juice in a saucepan
- Save a handful of perfect looking cherries for decoration, and roughly chop the rest of them
- Cool the cherry juice for ~3-5 minutes to slightly reduce it, then let it cool down fully
Chantilly whipped cream
- Add the cold heavy cream, sugar, salt and vanilla to a bowl. Whisk on medium high speed for a few minutes until the cream reaches a medium peak consistency. This means the cream should be able to hold shape but not be too firm or grainy
Ganache
- Add the chocolate and cream to a microwave safe bowl, and microwave in 20 second increments, stirring in between, until the chocolate has melted and a smooth ganache forms. Let it cool down for 10-15 minutes at room temperature
Assembly and decoration
- Once all components are prepared and cooled down, it's time to assemble. Place a cake layer on the turntable / serving stand upside down, and brush it generously with the cherry syrup. Spread on a thick layer of the whipped cream. Then spread on a third of the chopped cherries and gently press them into the cream. Lastly, drizzle over 2-3tbsp of the ganache
- Repeat with the next 2 cake layers, then cover with the last layer of cake. Brush it with syrup, then use the remaining whipped cream to fully frost the cake. Chill the cake in the fridge for 15 minutes
- For the drip, warm up the ganache until it's runny but not hot. Pour it on top of the cake, then use an offset spatula to quickly spread it and let it drip down the sides
- For extra decoration (optional), transfer the remaining whipped cream to a piping bag with a star tip nozzle. Pipe dollops around the edge of the cake, and top each dollop with a cherry reserved from earlier. Lastly, sprinkle over chocolate shavings / grated chocolate
- Serve & enjoy!
Video Tutorial:
Notes
- Using fresh cherries instead of canned/jarred: If using fresh cherries, take 2 cups of cherries and remove their seeds. Add the cherries, 4 tablespoon water and 4 tablespoon sugar to a saucepan. Cook on medium-low heat for 10 minutes until a syrup forms. Reserve the syrup to soak the cake, and remove the cherries. Chop up the cherries for the filling inside the cake
- Make ahead and storage: Genoise sponge cakes can dry out easily so I recommend decorating and serving this cake fresh, or at maximum 1 day in advance. Store the cake in an airtight container in the fridge for up to 4 days
- Prep Time: 45 min
- Cook Time: 10 min
- Category: Dessert
- Cuisine: American
Katherine says
Is heavy whipping cream and heavy cream the same?
Zoha says
Yes 🙂
Pavi says
hi,how can we convert this recipe to 4 6inch cake pans
Pavi says
hi,how can we convert this recipe to 4 6inch cake pans
Zoha says
hi Pavi! You can halve all the quantities to make a smaller 6" cake; but be sure to reduce baking time as needed, too!
Fizzah says
Hi Zoha,
I love your recipes - they've always turned out great after baking and I really enjoy them.
Quick question: I have a very small oven that can only fit one pan at a time.
Since you mentioned not to leave the batter out and to bake it immediately, do you have any suggestions?
Zoha Malik says
Thank you, Fizzah! Hmm I'd suggest doing the cake as 2 layers instead of 4 so you can save time. But the cake layers will be thicker so baking time will need to be increased by ~5-8 minutes (I am not exactly sure). I'd also recommend keeping the cake batter for the second cake in the freezer while you bake the first one.
Romitha says
Hey Zoha, my cake is in the oven baking as I type this. I just realized I forgot to use a parchment paper 🙈 will that ruin my cake? I'm using stainless steel baking pans.
Zoha Malik says
OH noooo, yes that will be tough to remove :/ How did it go?
Romitha says
so luckily for me, my stainless steel baking pans were a really good quality and it came out easily without cracking! I was so glad! the cake turned out amazing. so I used apple juice to soak the cake and strawberries instead of cherries. I wish I could attach a photo of the cake. it turned out amazing! thank you for your amazing recipes 🤗❤️
Zoha Malik says
I am so glad to hear htat, phew!! And the apple juice sounds yum!
Saima says
Hi Zoha,
I love your recipes!
Thank you so much for keeping it amazing, honest and super duper delicious. I have a quick question and hope you reply soon. Can you please tell me how can I turn this chocolate genoise into vanilla genoise?
Thank you and have a great day!
Zoha Malik says
Hi Saima! you can just replace the cocoa powder with more flour - not the perfect approach but works in a crunch 🙂
Saima says
Thank you so much Zoha!
Can you please post a vanilla genoise recipe one day?
Zoha Malik says
Noted - for sure!!
Saima says
Yaaaay! Thank you so much Zoha!