
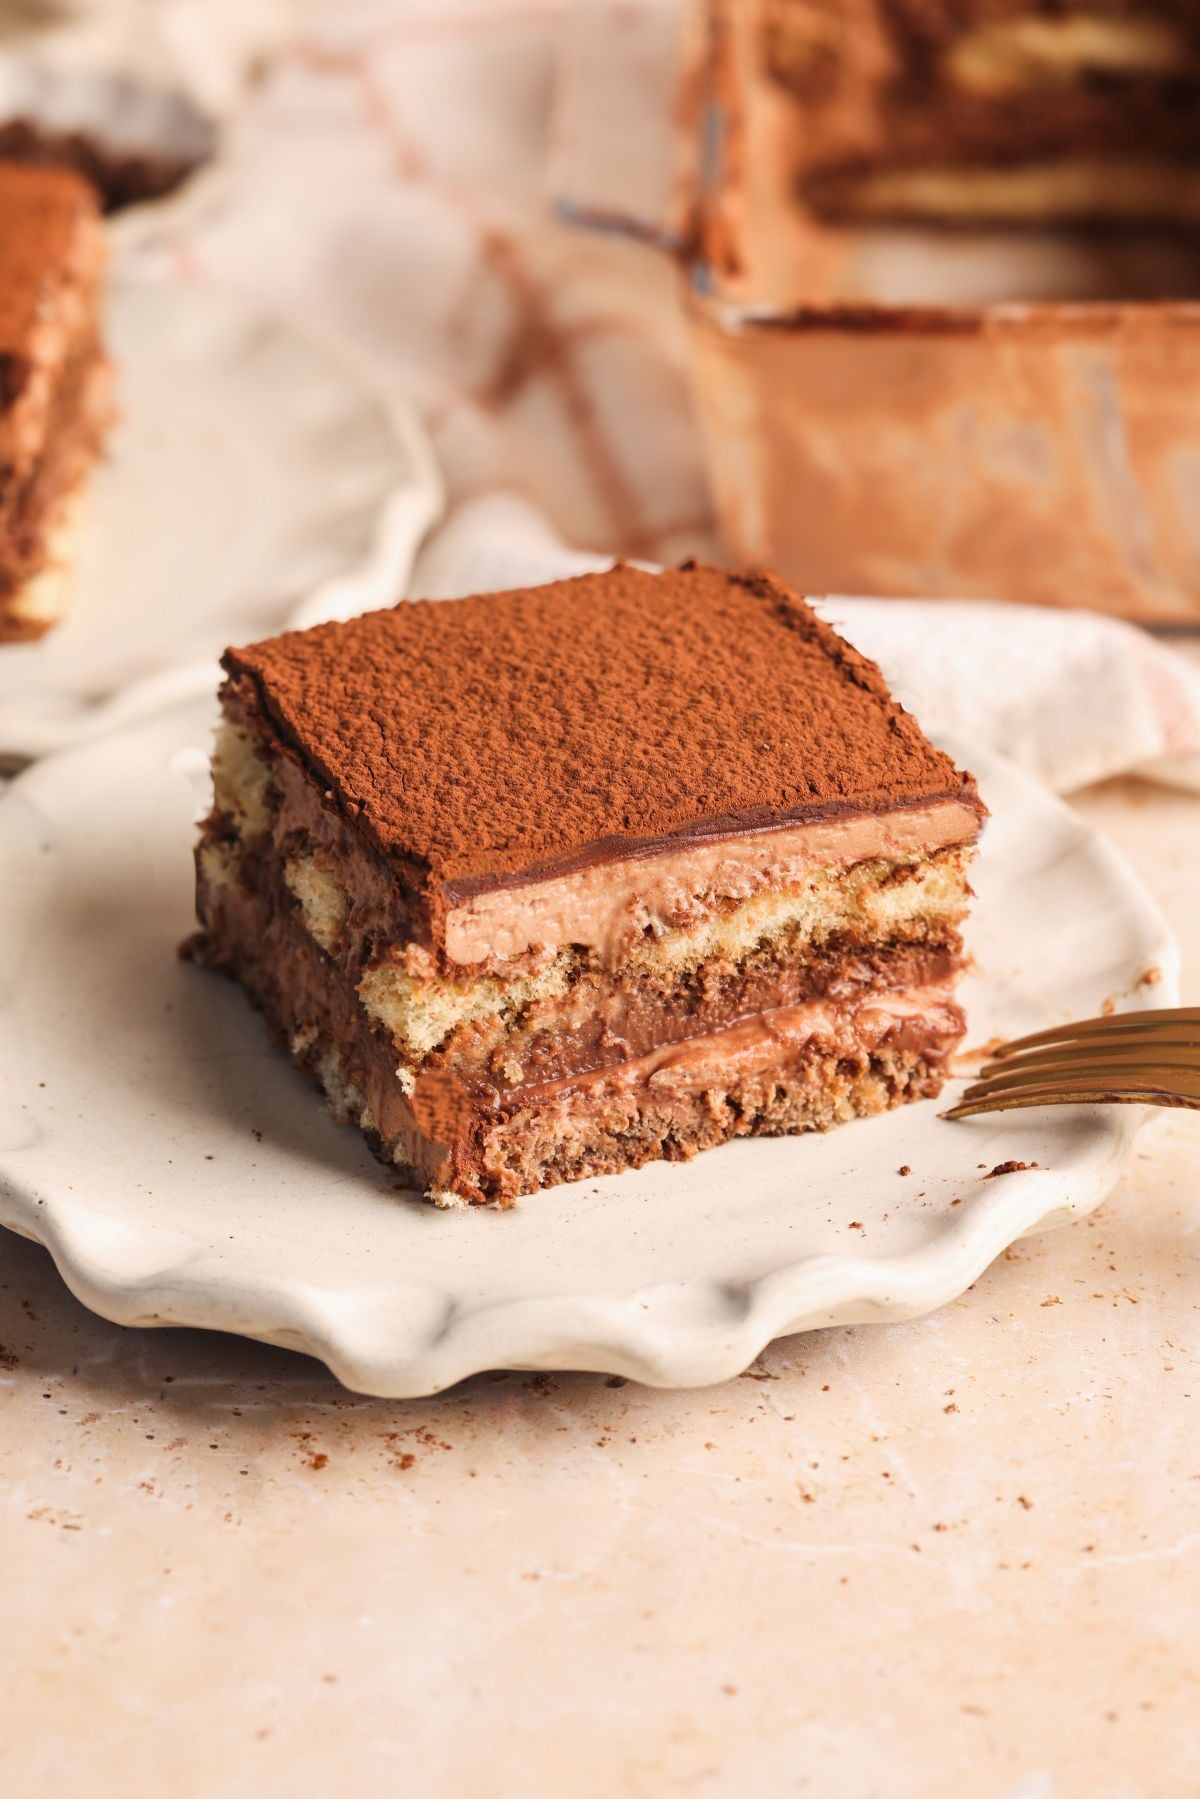
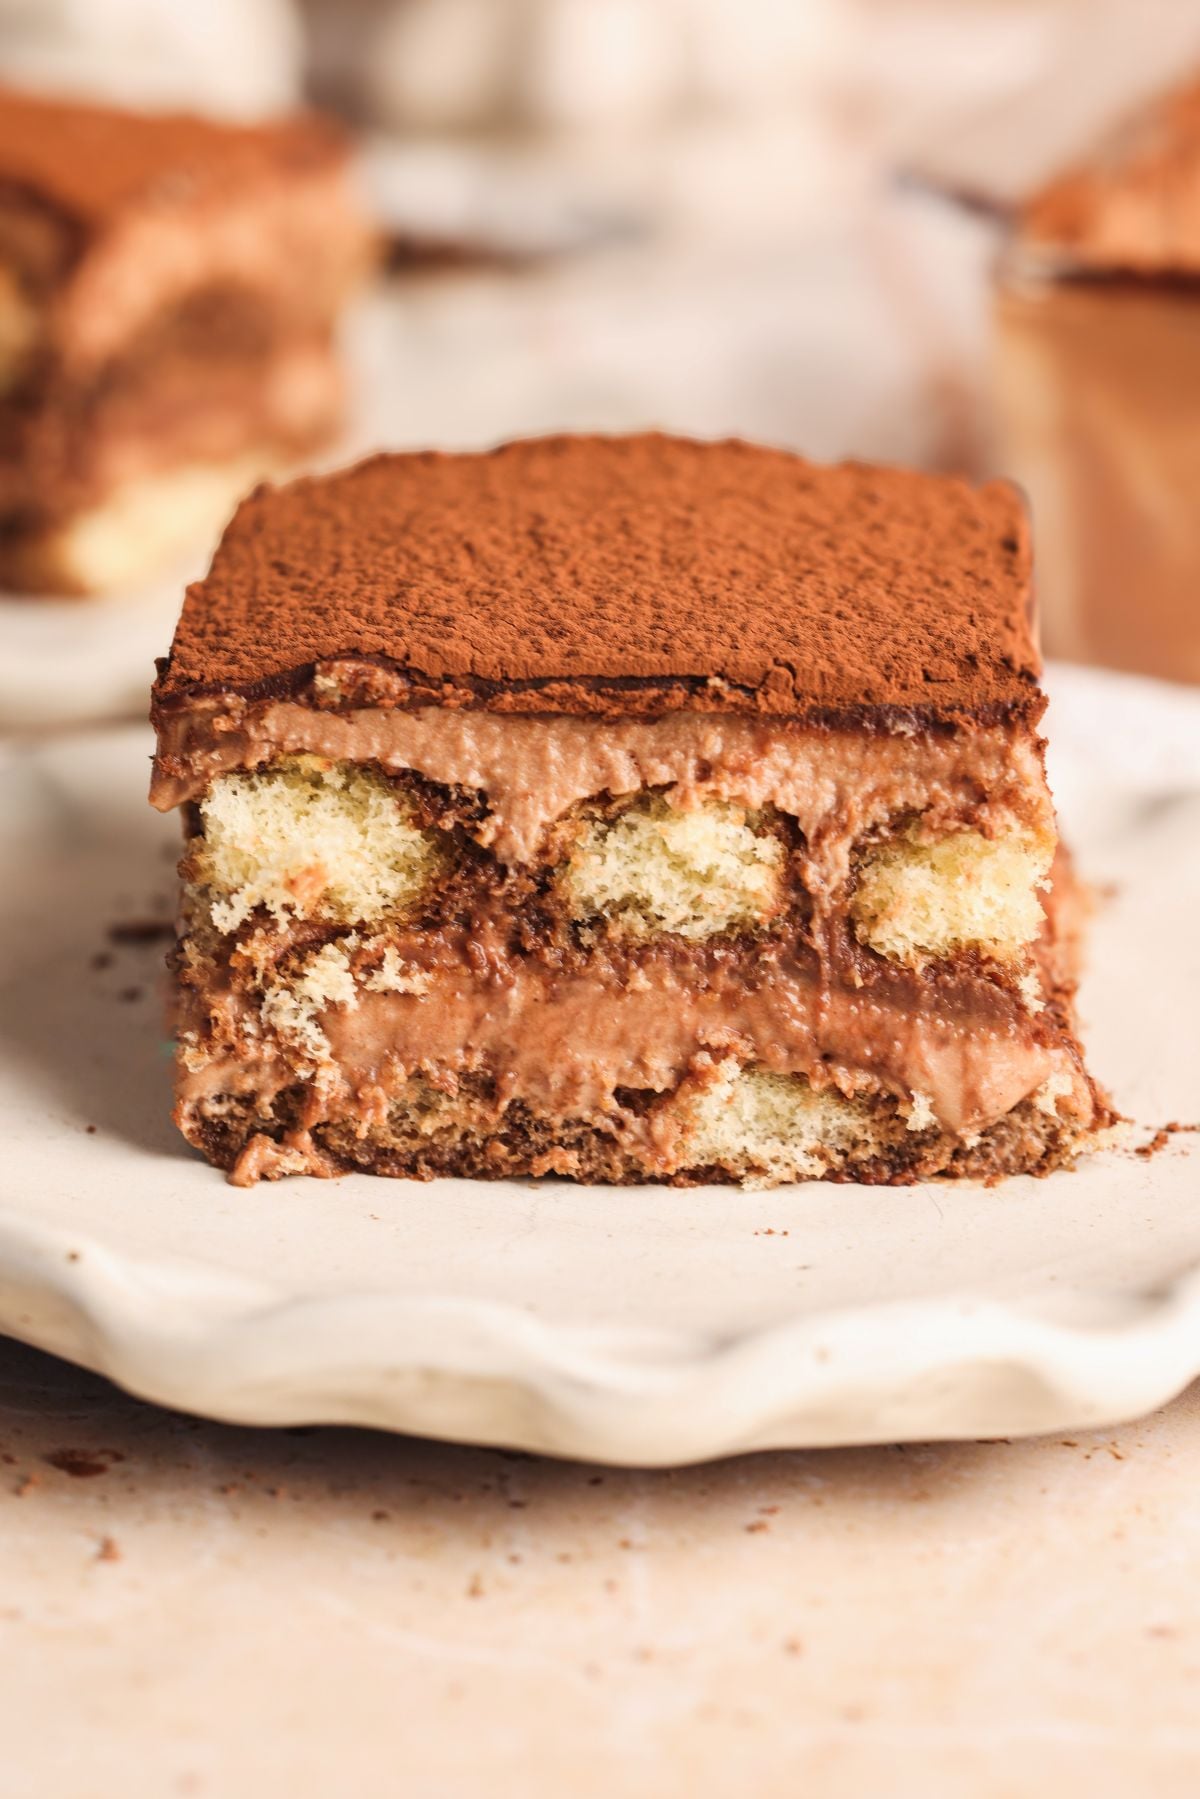
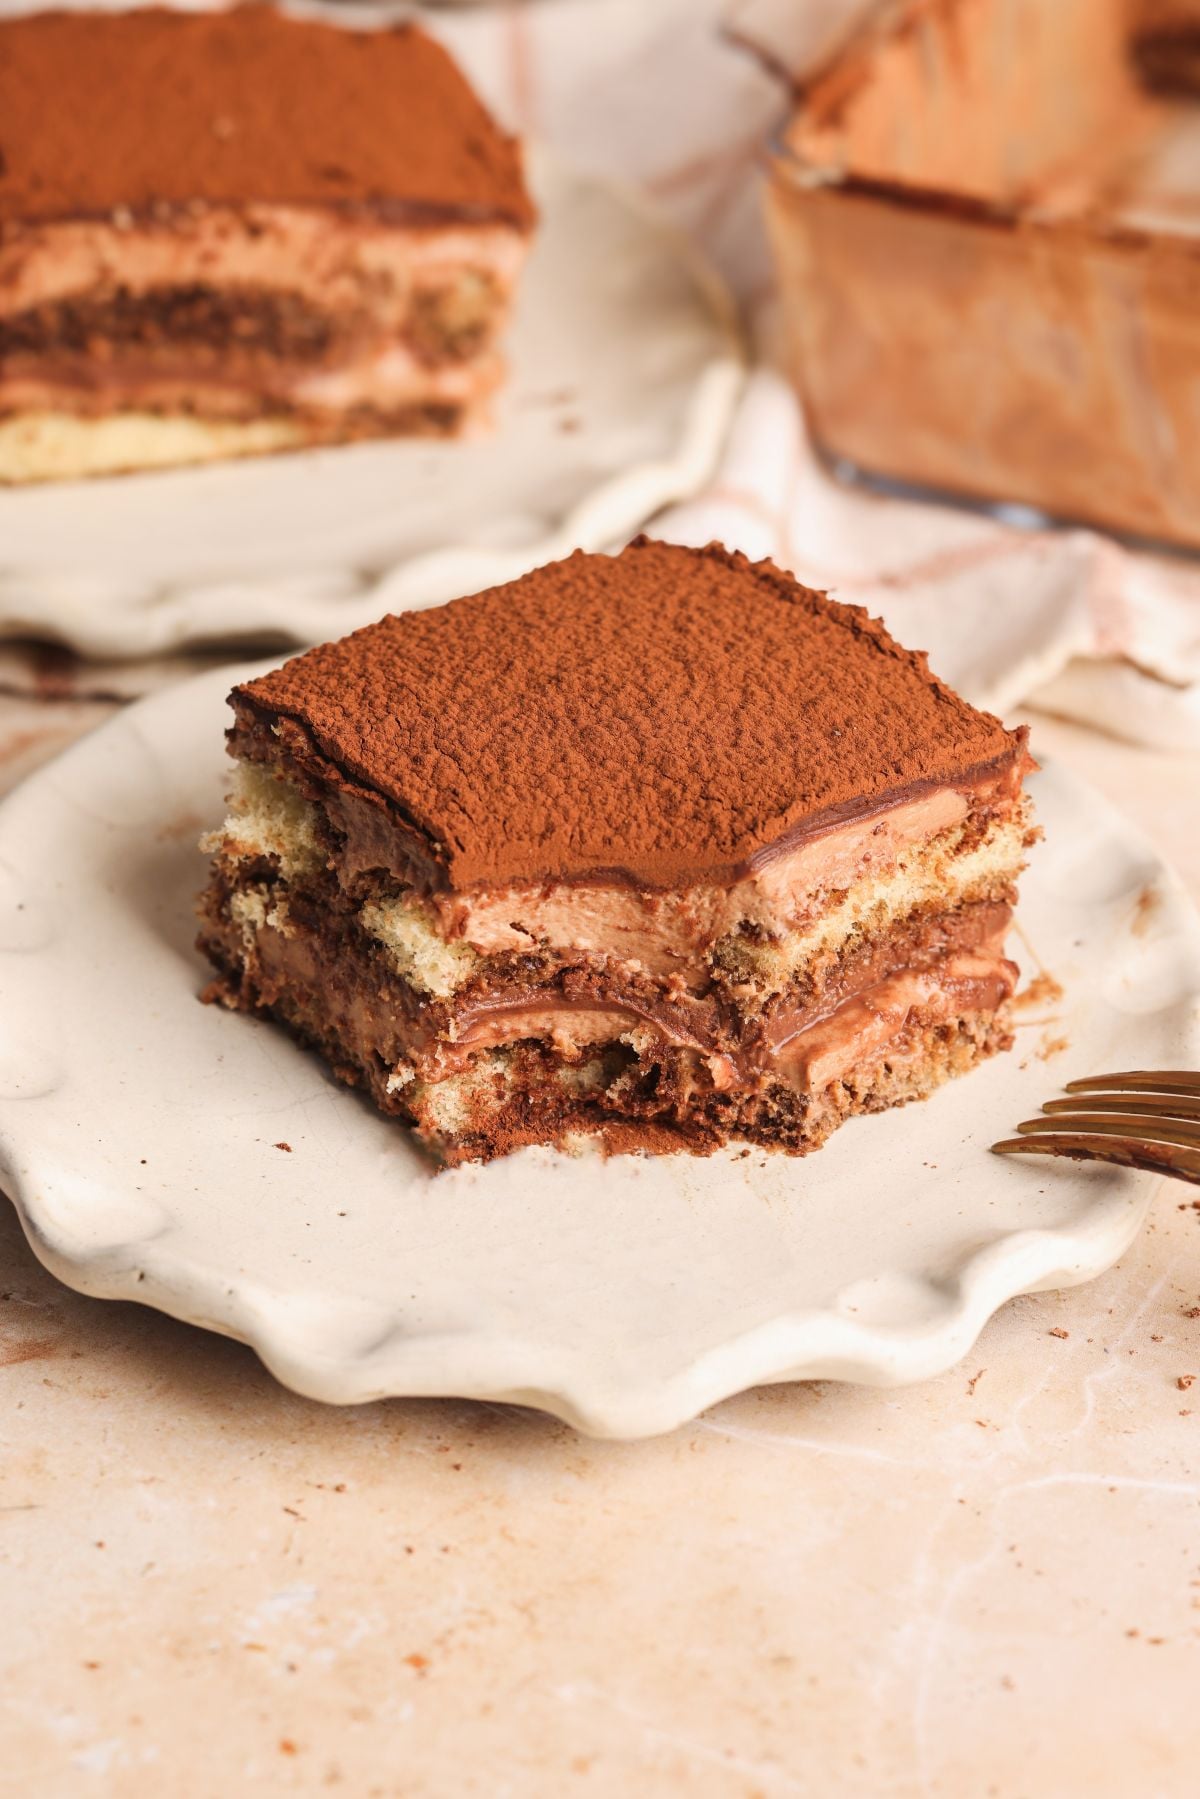
This Triple Chocolate Tiramisu is THE dessert for chocolate and coffee lovers! It is rich and creamy just like a Classic Italian Tiramisu, but has chocolate in three layers: a chocolate coffee soak for the ladyfingers, a chocolate mascarpone cream, and chocolate ganache. The result is unbelievably decadent, but still balanced and not overpowering, with both the chocolate and coffee shining together. This recipe is also very simple to make, requires no baking, and can be made ahead of time - making it great for hosting!
If you like the sounds of chocolate tiramisu but want a simpler, less chocolatey and eggless version, you will love my Easy Chocolate Tiramisu! And if you want even more decadent and chocolatey, check out my Hot Chocolate Tiramisu which is served with hot chocolate poured on top.
Chocolate in 3 layers!
This tiramisu has chocolate in 3 layers, hence the "triple". Technically, the cocoa powder dusting on top is a fourth layer, but "quadruple" doesn't have quite the same ring to it...
- Chocolate mascarpone cream: The mascarpone cream layer is very similar to that of a classic tiramisu, but has a cup of chocolate ganache mixed into it. The result is a yummy cream with a light chocolate flavor
- Chocolate ganache: The chocolate ganache is also spread as its own layer in this tiramisu, so you're hit with a rich, silky and decadent chocolate flavor in every bite!
- Cocoa coffee soak: There's also cocoa powder in the coffee soak. Not too much, just a sprinkle. It's kind of like a mocha!
Ingredient recommendations
There are 3 important ingredients in this recipe that I want you to make the right pick for:
- Chocolate: I recommend using semi-sweet chocolate for this tiramisu for the perfect amount of sweetness - dark will lean too bitter, and milk will lean too sweet. You can always do a 50/50 mix of dark and milk chocolate (which is what I do!). And, as always, I recommend using good quality chocolate that comes in bars of callets, not chocolate chips (they just don't melt right). My personal favorite brand of chocolate right now is Callebaut, a Belgian brand available on Amazon (it's pricey, but much cheaper than other high end, imported brands)!
- Mascarpone cheese. I am a broken record at this point, but PLEASE use a good brand (I HIGHLY recommend Galbani) and make sure the mascarpone cheese is smooth and creamy, not grainy, to begin with. This makes the biggest impact on the texture of Tiramisu (I go into this in much more detail in my Classic Tiramisu recipe, with a comparison picture!)
- Ladyfingers. They can sometimes be tough to find at grocery stores, so lately I have been getting mine off on Amazon. This is the exact pack I order, and it's great value! They last a long time in the freezer.
Step by step photos
Let's quickly go over the steps with photos to help you visualize this recipe:
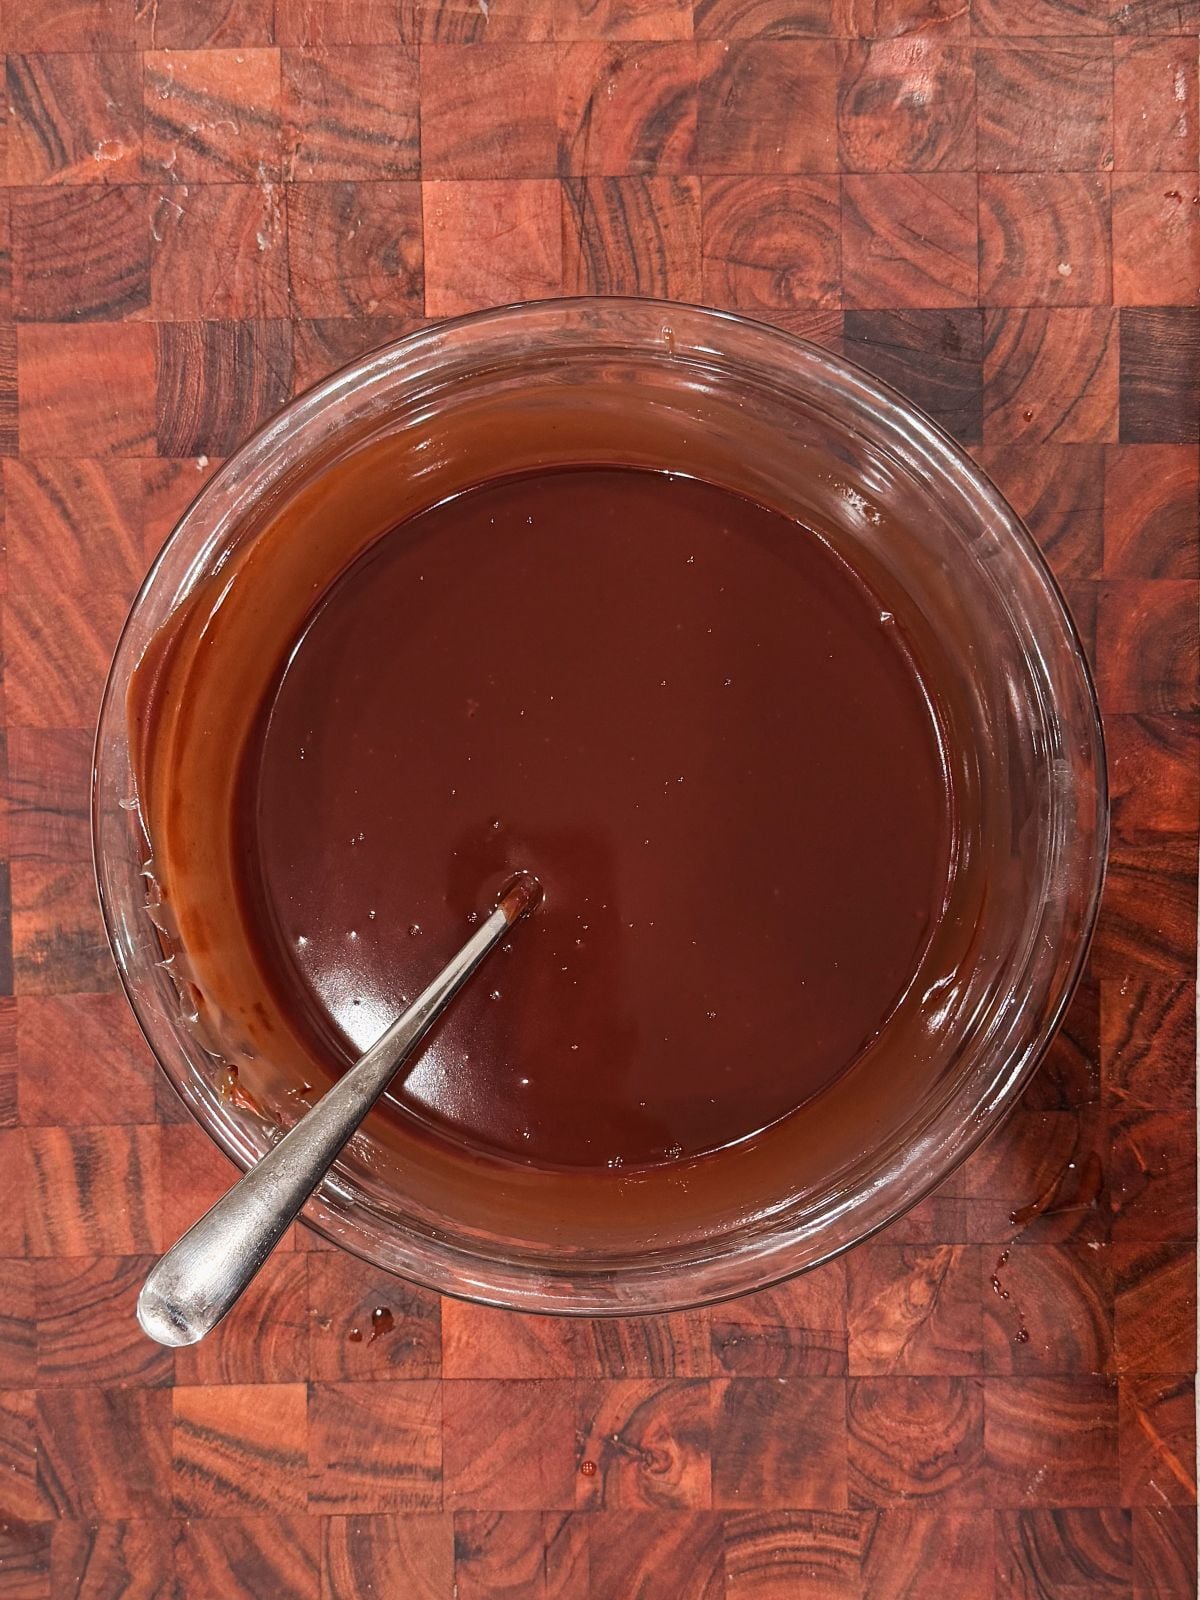
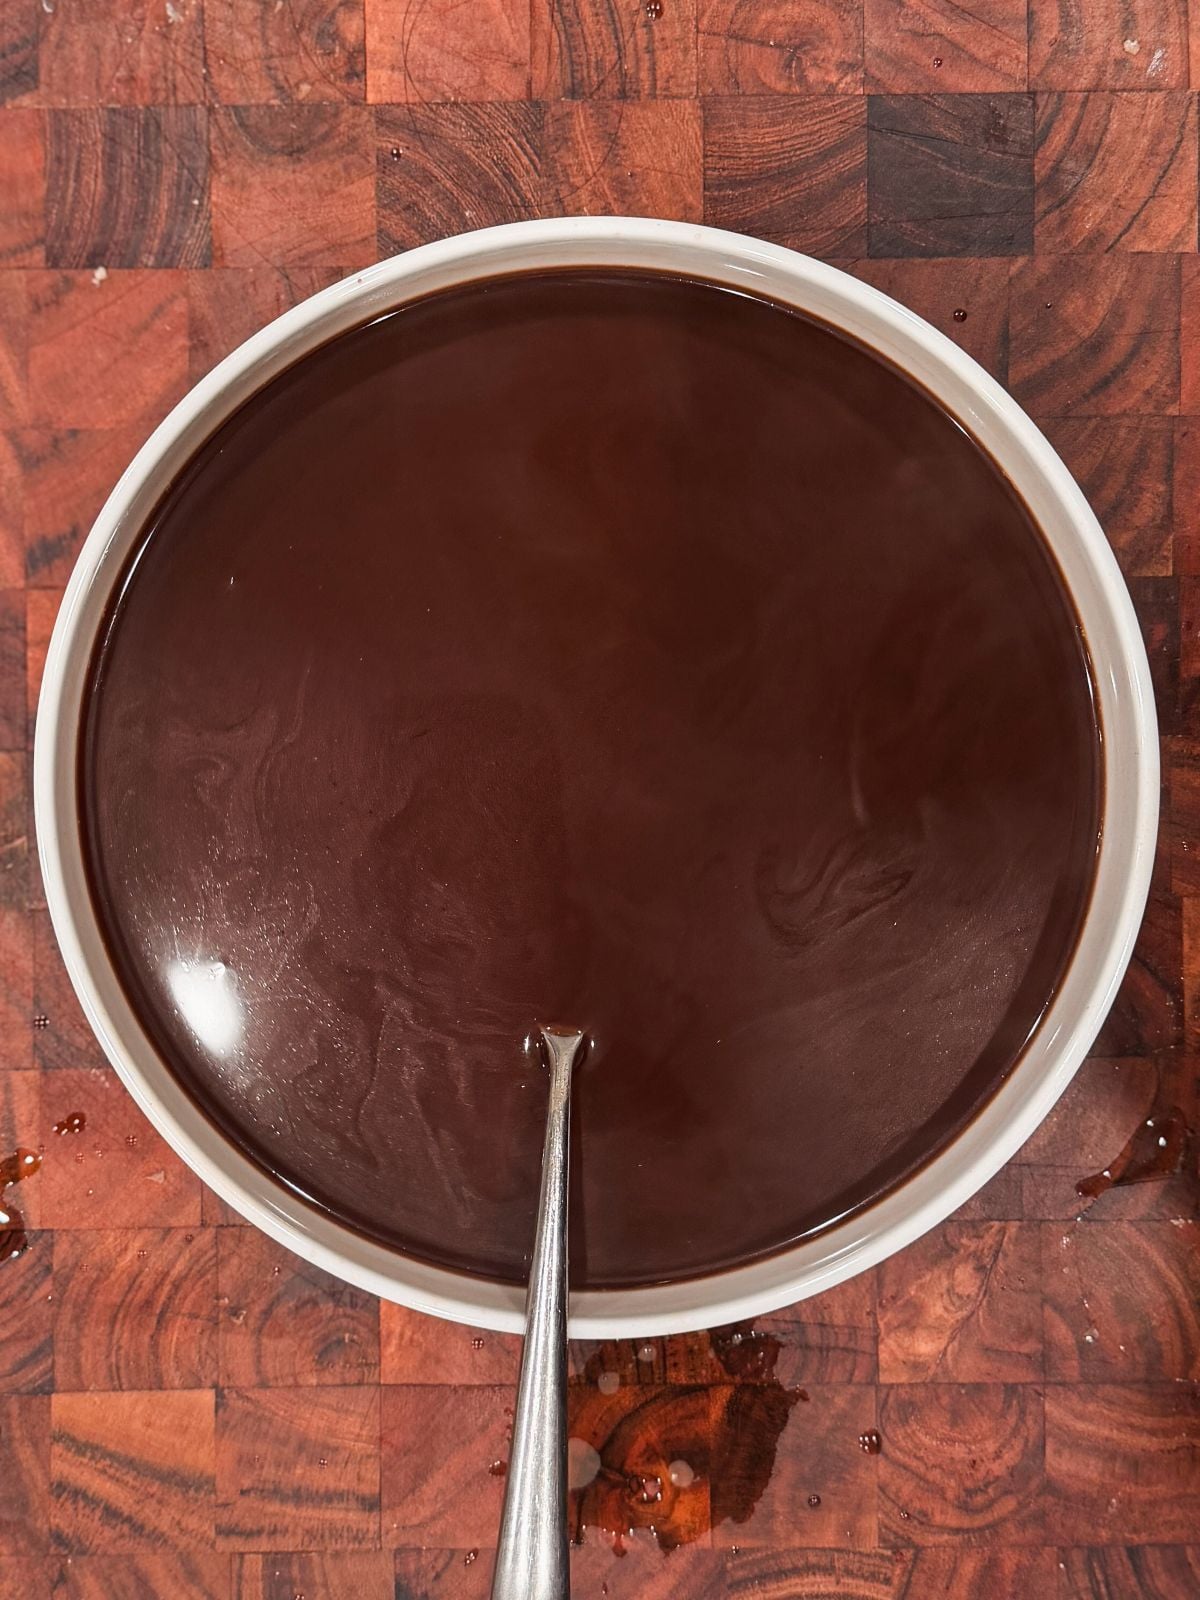
Start by making the ganache. Mix the chocolate and cream, microwave in 20 second increments, stirring in between, until the chocolate has fully melted.

For the mascarpone cream, start by whisking the mascarpone cheese until it's creamy.
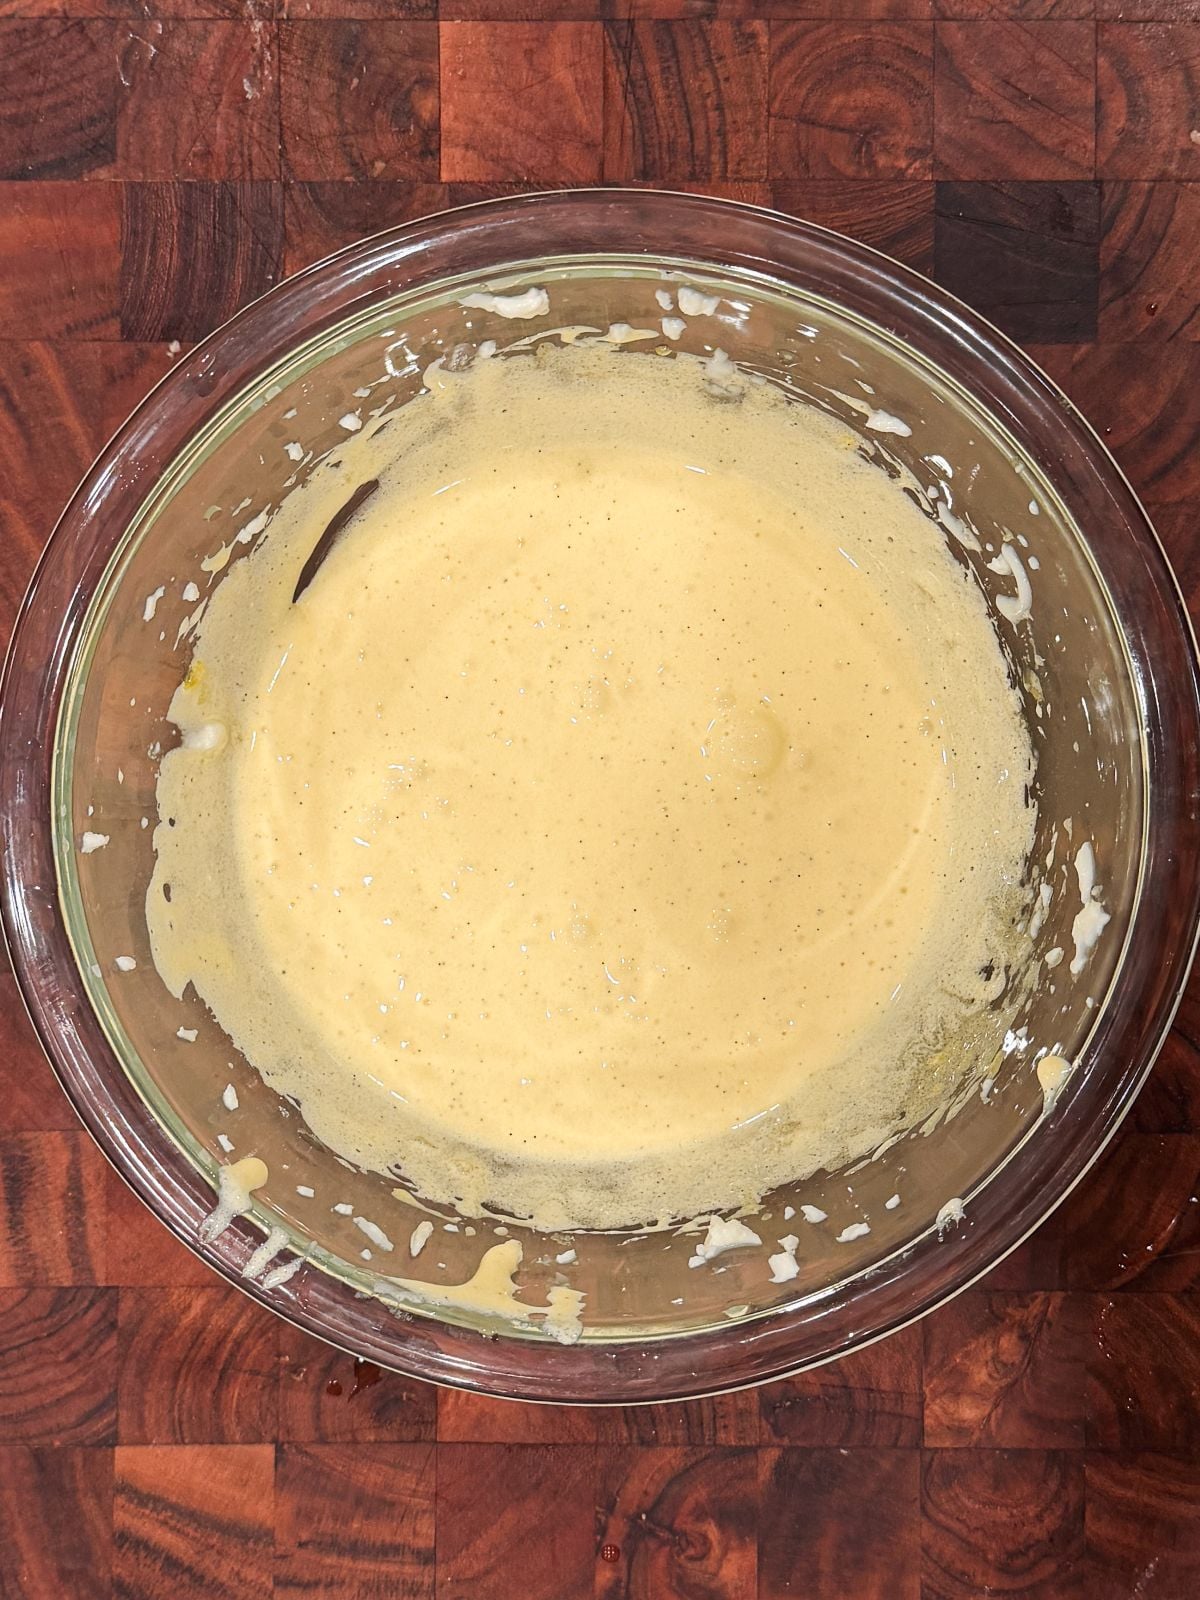
In a separate bowl, add the eggs, sugar, vanilla and salt. Place on a double boiler and whisk for 2 minutes until very pale in color. Don't overmix, and don't worry if the mixture looks slightly grainy!
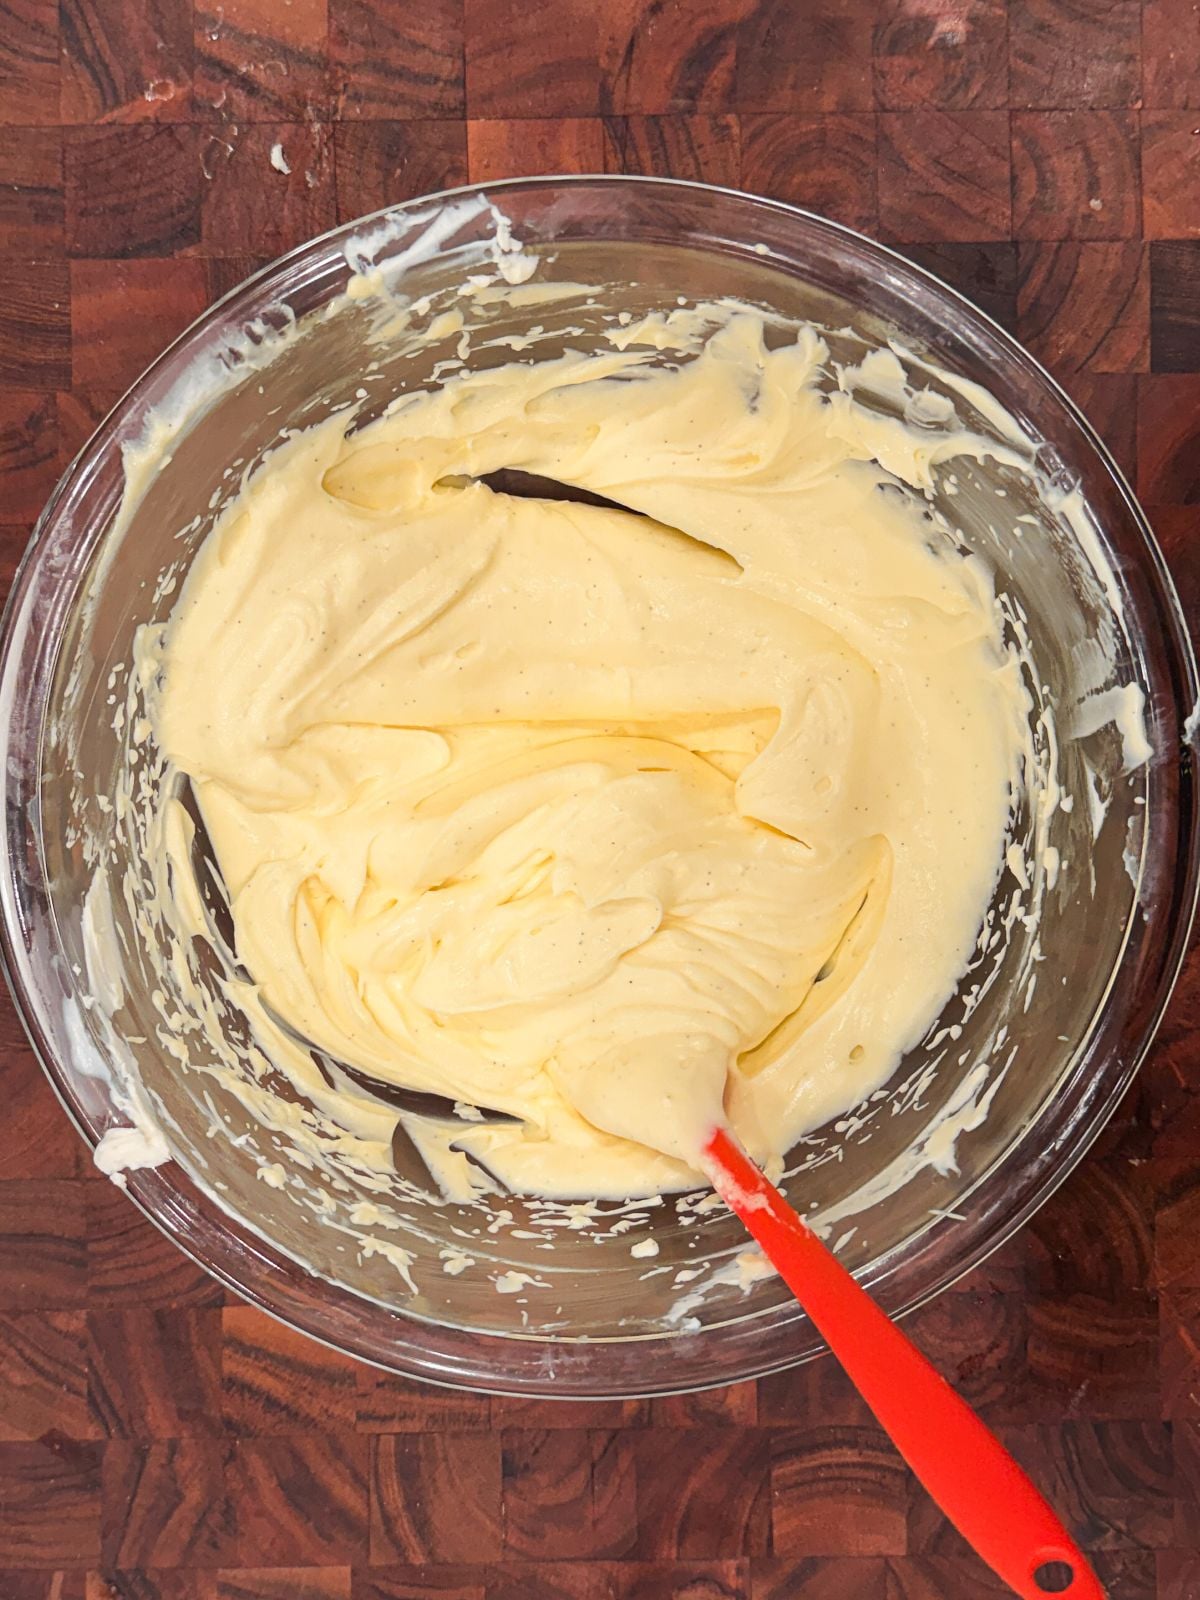
Add the egg mixture to the mascarpone cheese, and whisk until combined and smooth. Avoid overmixing, as that can cause mascarpone to split.
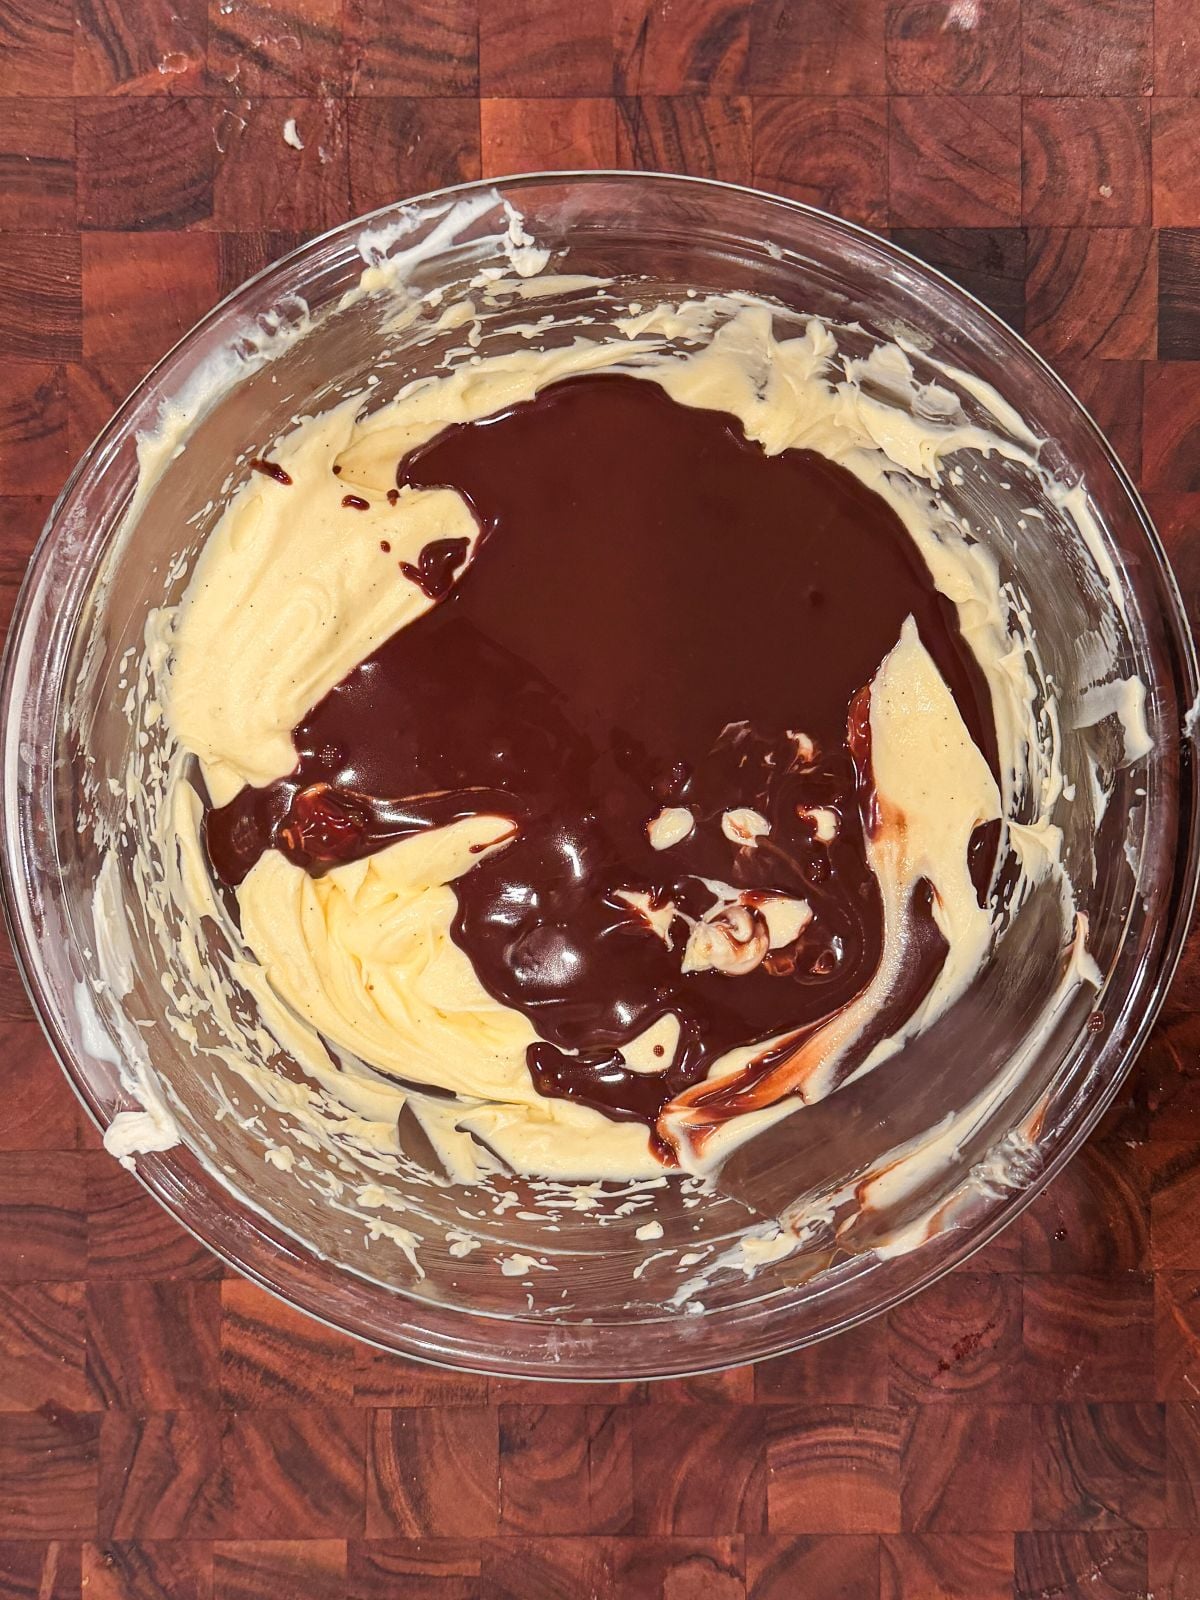
Now mix in 1 cup of the chocolate ganache, and whisk until just combined.
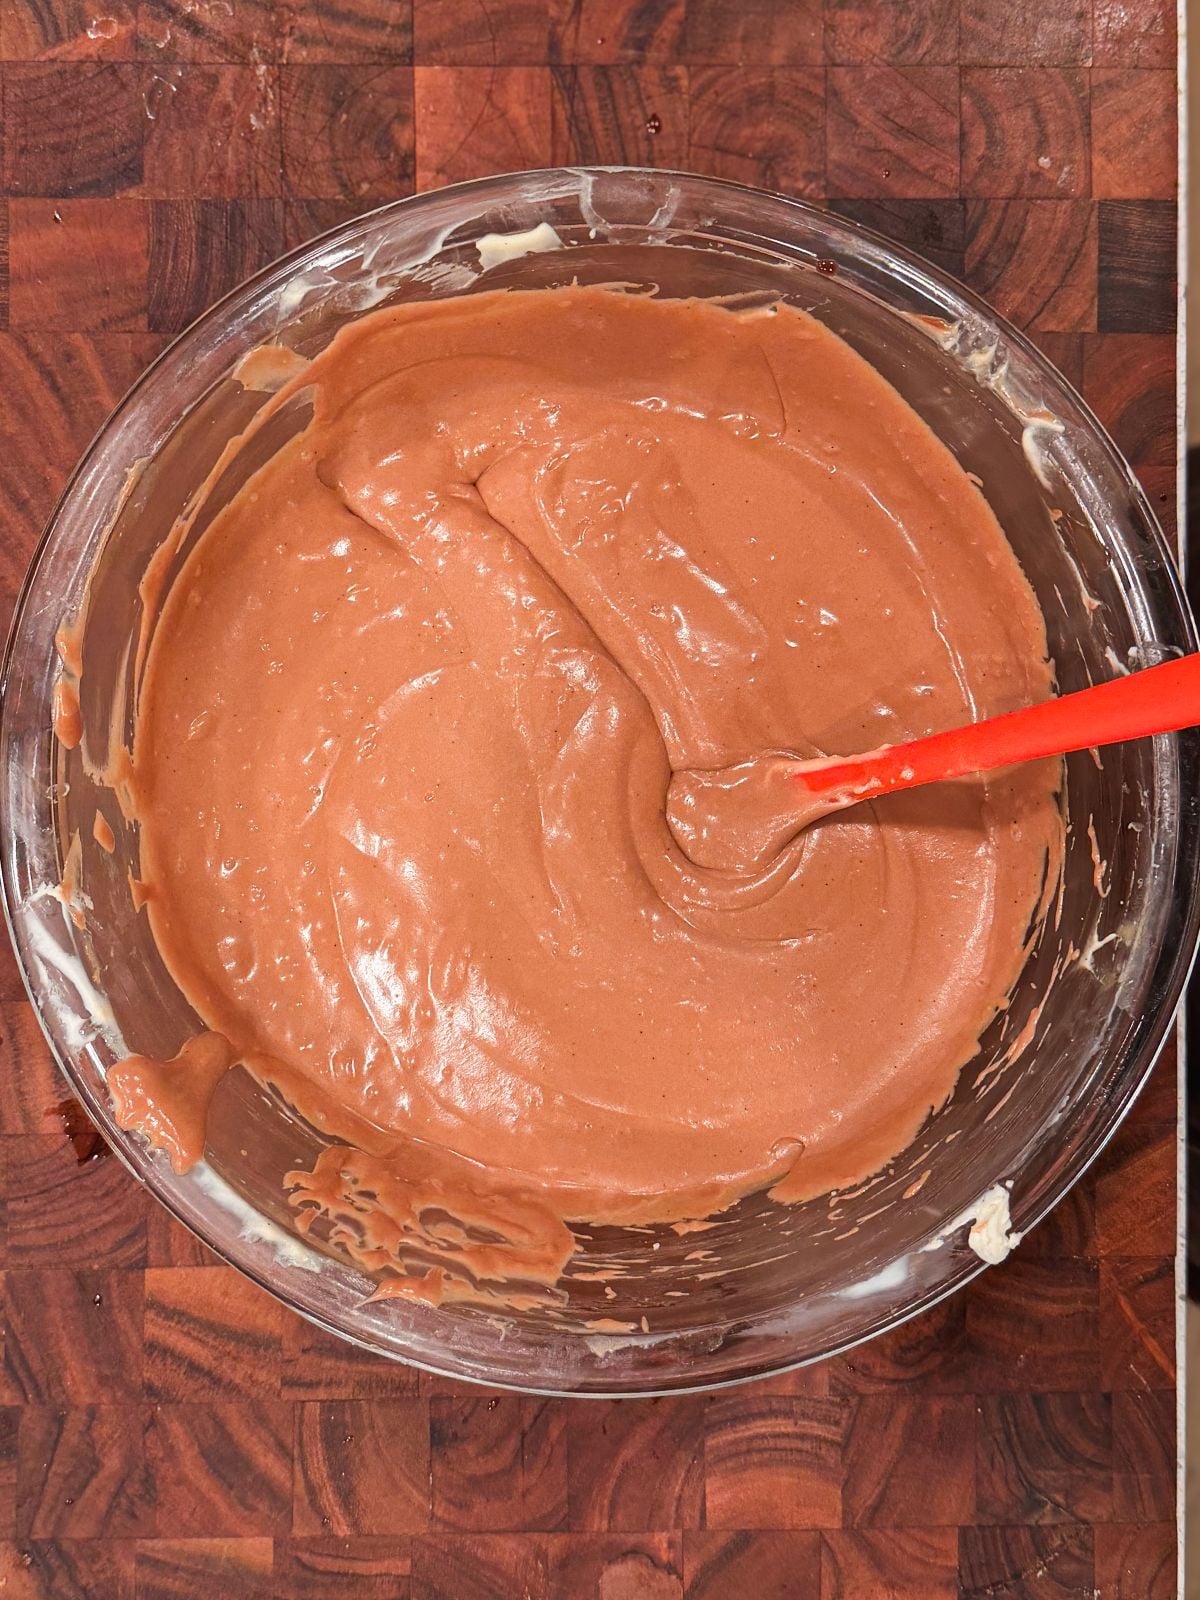
Separately, whip up heavy cream to medium peaks (not pictured - I forgot!), and fold it into the rest of the cream until just combined.
Make the soak by mixing hot strong coffee and cocoa powder, and let it cool down.
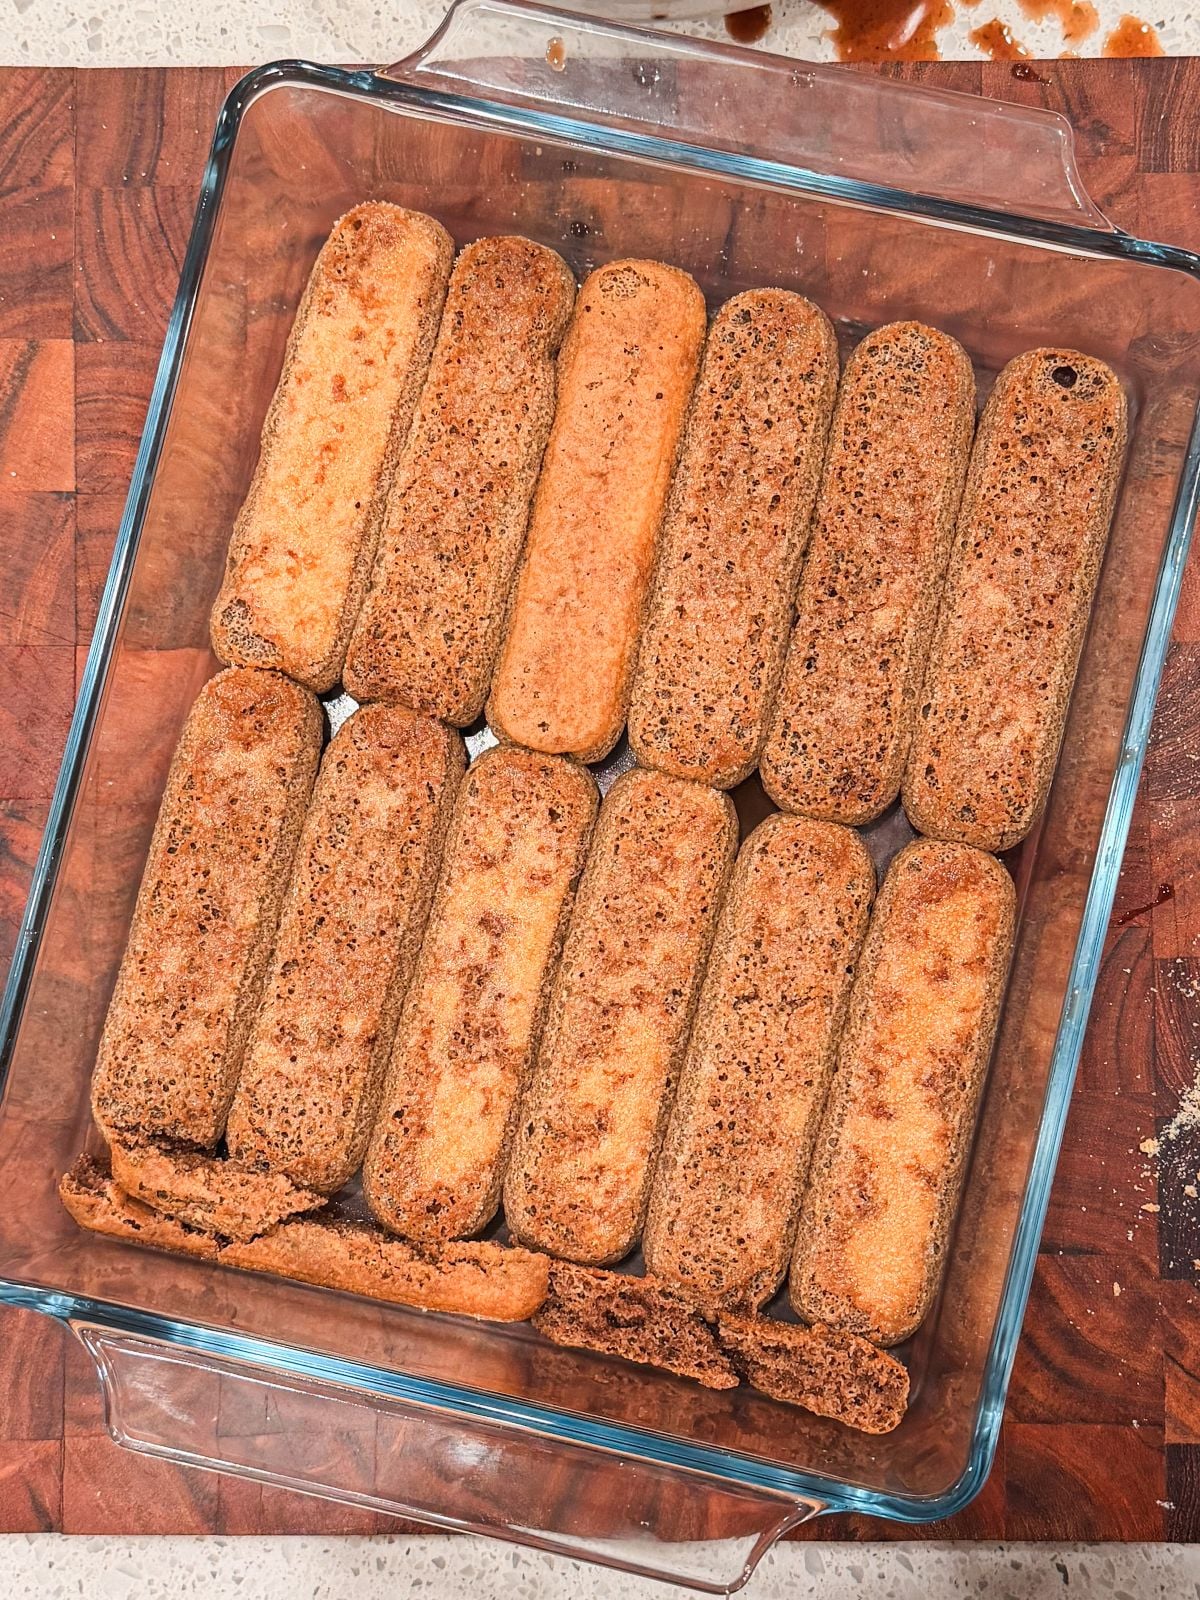
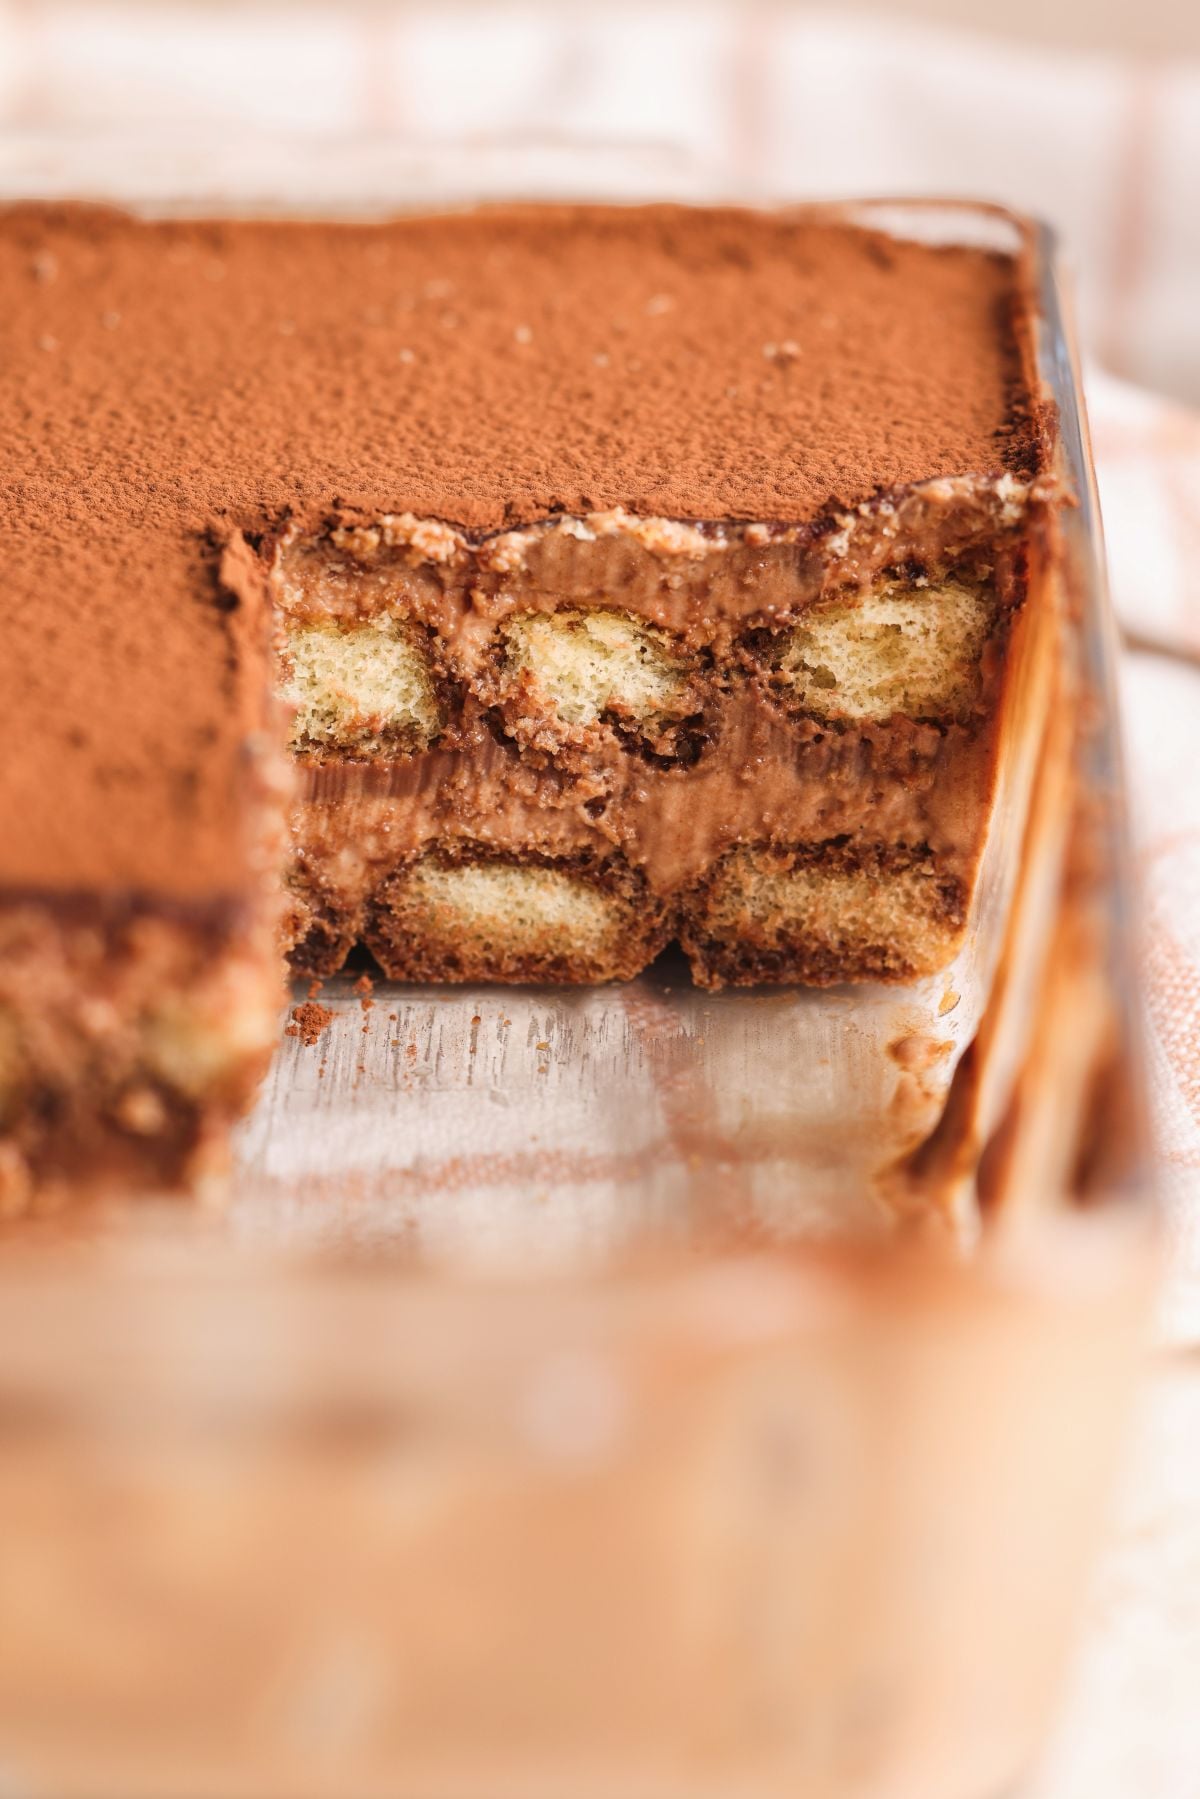
To assemble, soak each ladyfinger in the cocoa coffee (1-2 seconds) and layer neatly on the bottom of your serving dish.
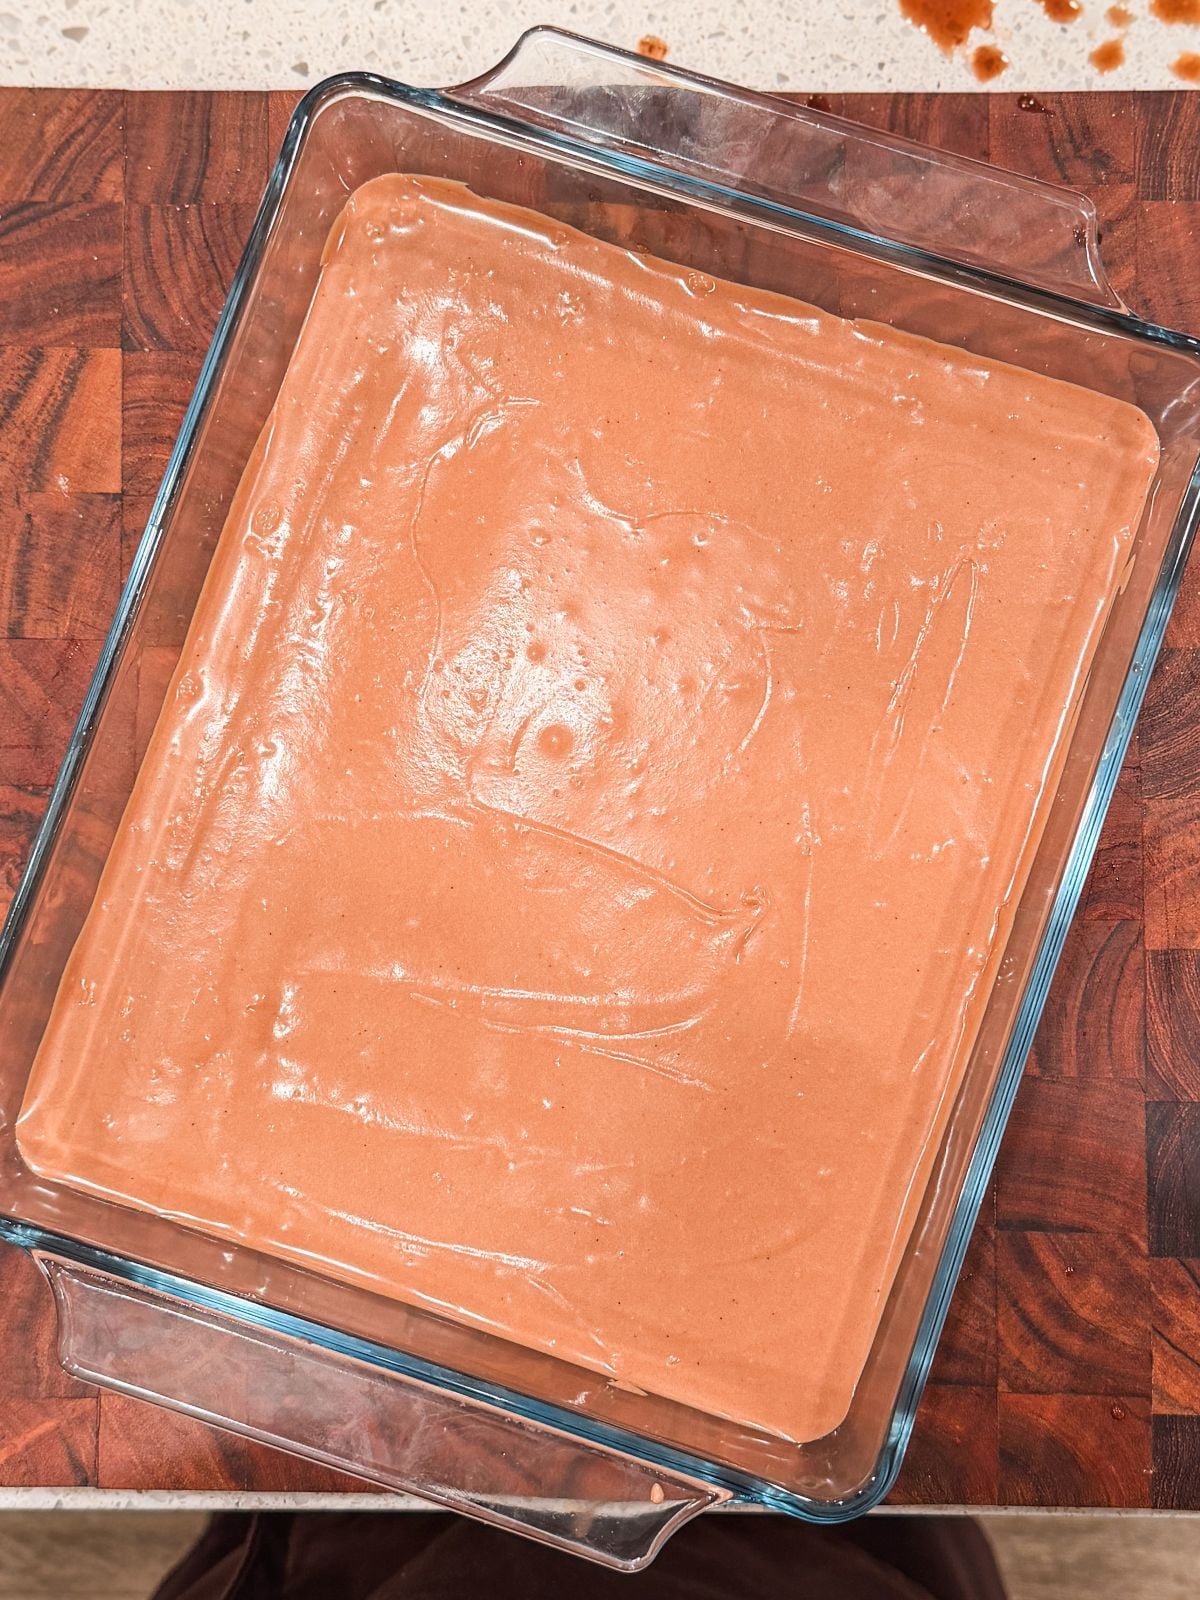
Add half of the chocolate mascarpone cream and spread it evenly.
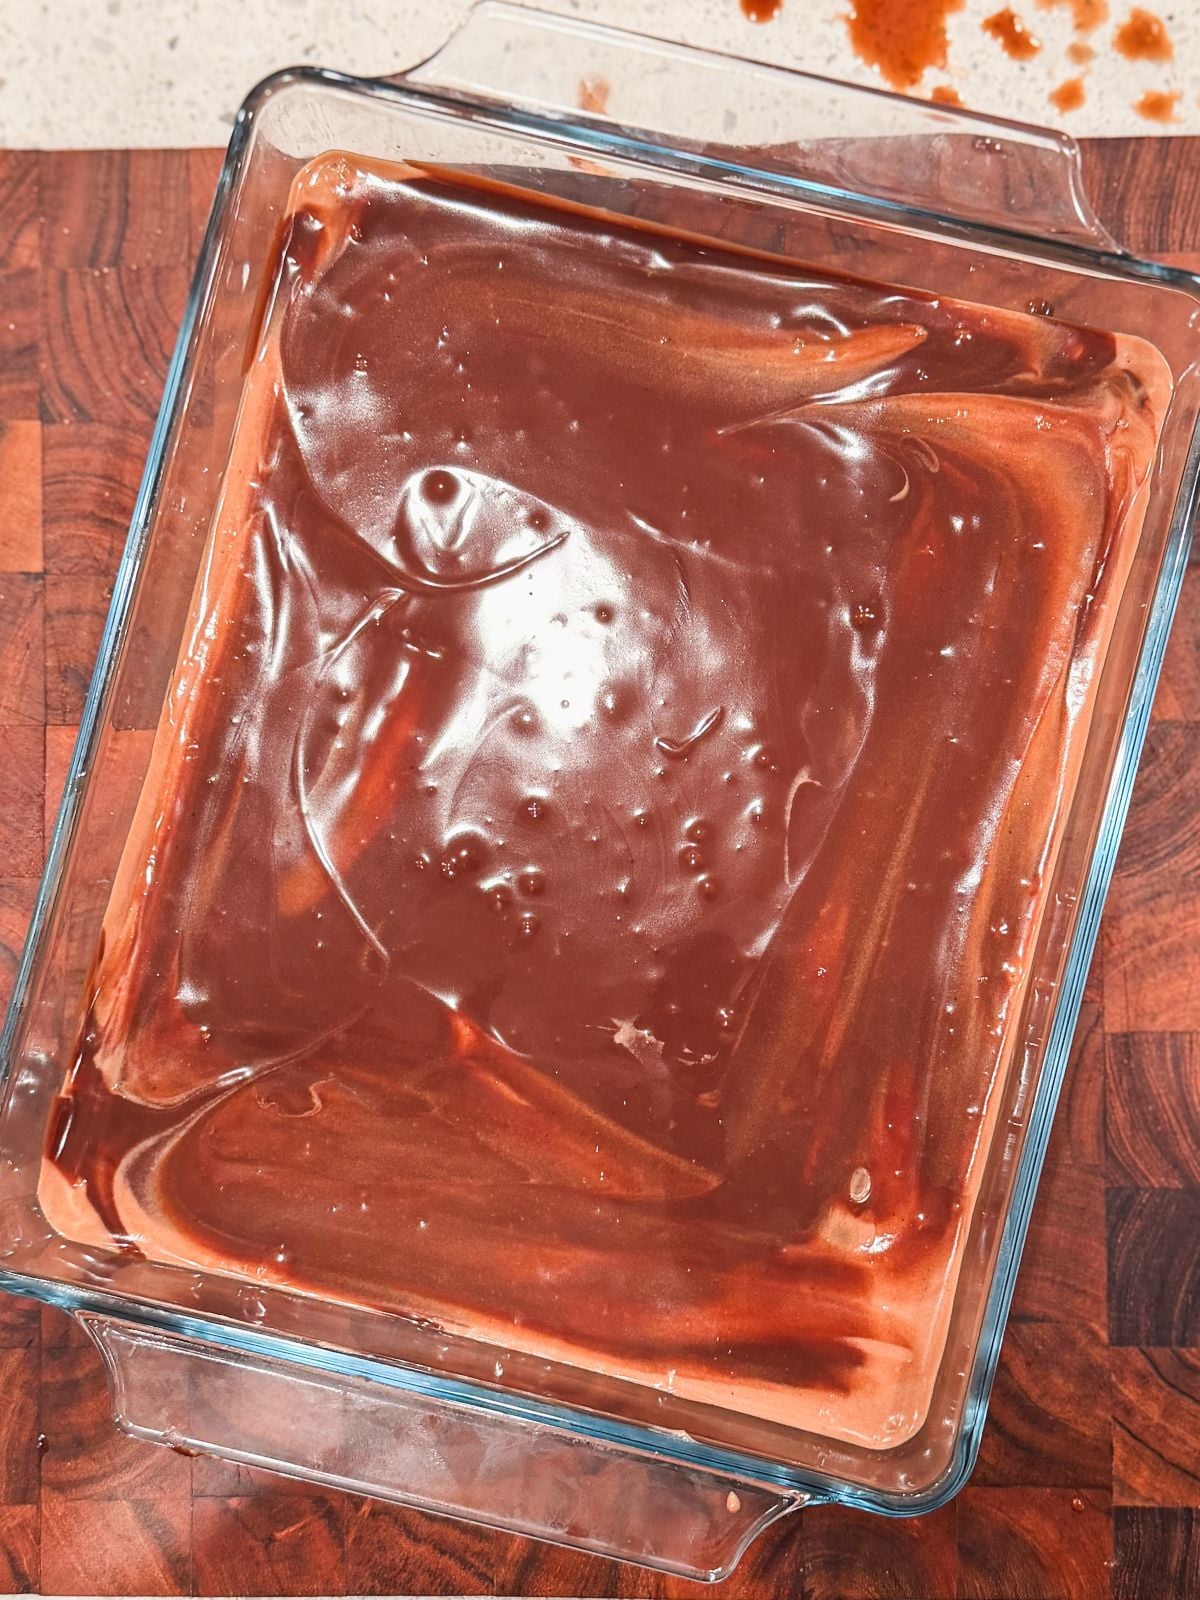
Pour over half of the ganache and spread it evenly.
Repeat the process for the second layer of the tiramisu. Then cover and refrigerate for at least 6 hours, ideally overnight. Dust with cocoa powder right before serving, and enjoy!
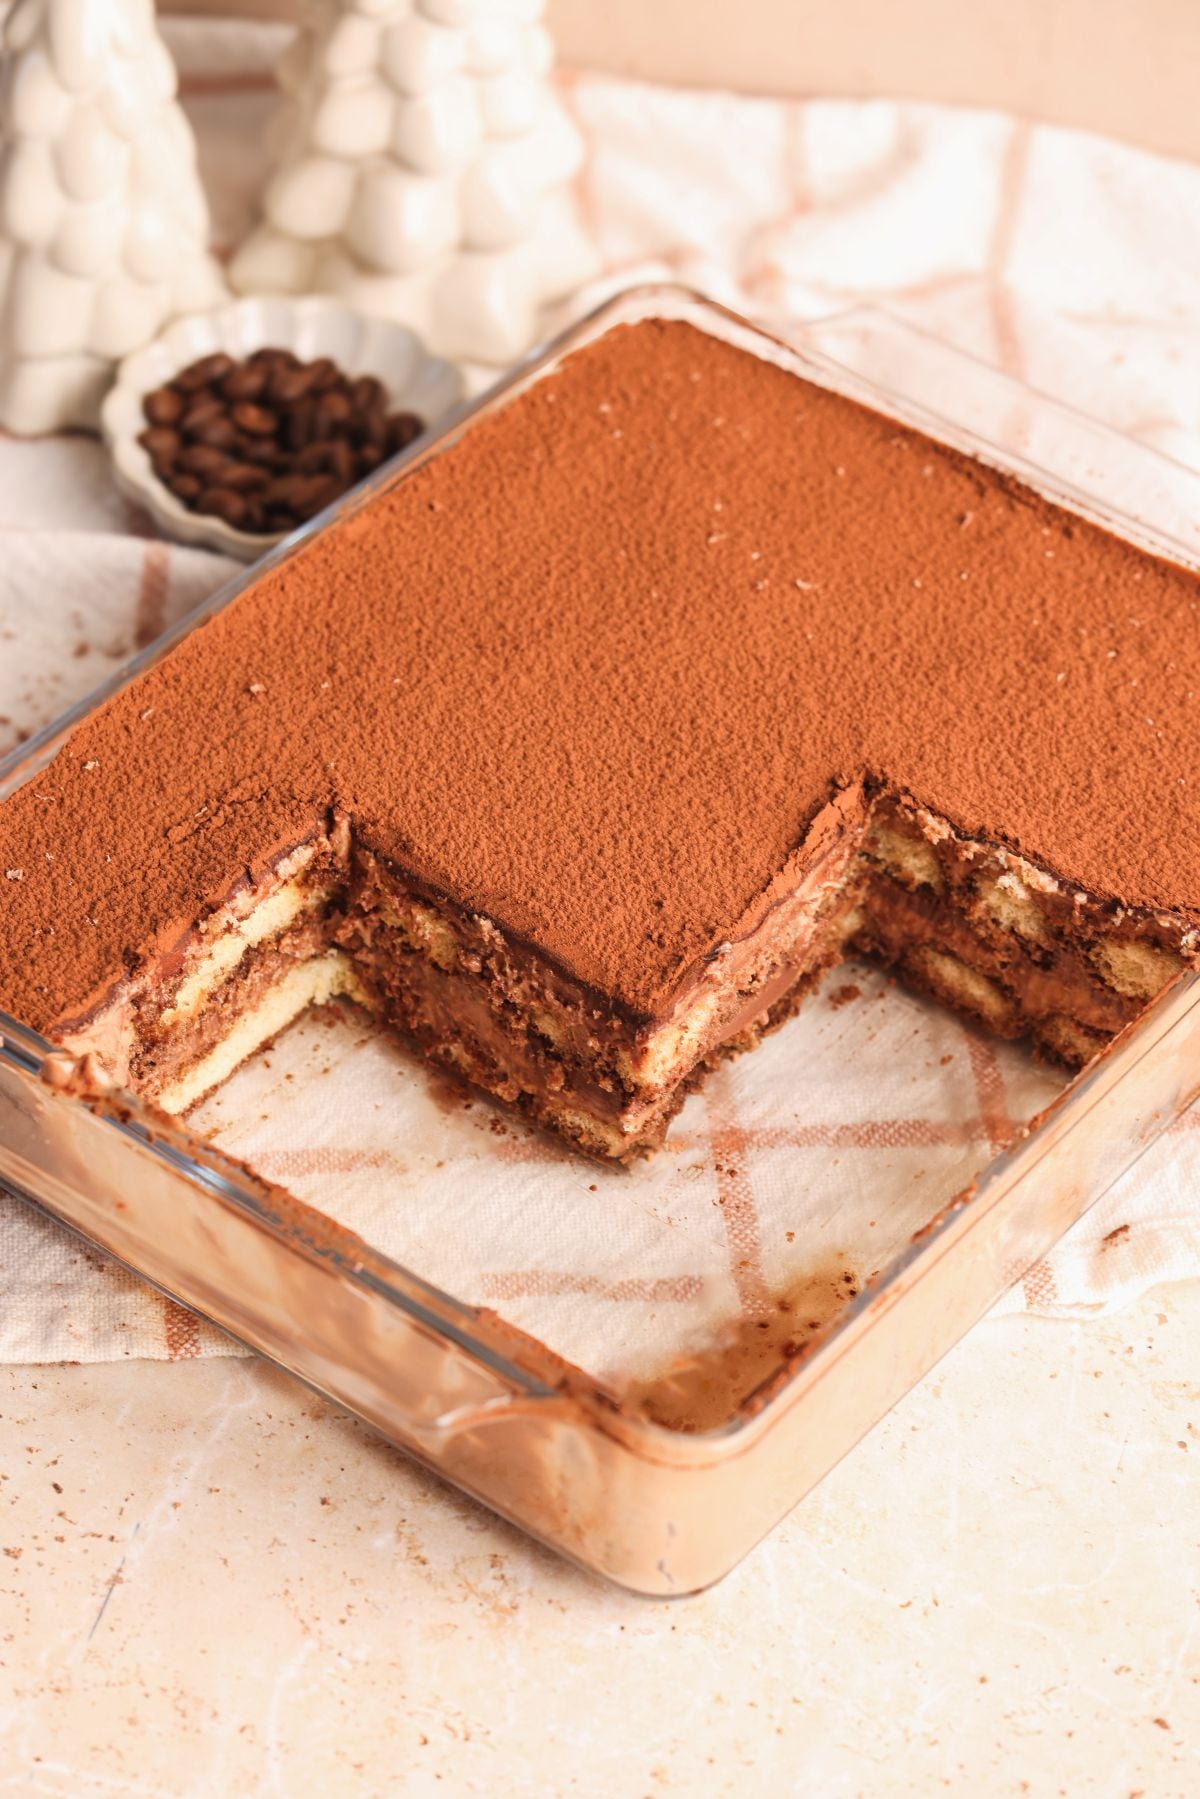
My favorite Tiramisu dish
I've shared this several times before, but this rectangular glass casserole dish is PERFECT for Tiramisu. It is made of glass so you can see the layers, has straight edges for the perfect slices, and even comes with a lid!
A few tips to achieve perfection
I want you to get this recipe *absolutely perfect* on the first attempt, so here are three tips:
Soaking ladyfingers
It's hard to give an exact time for how long to soak ladyfingers, but I generally aim for 1-2 seconds. The truth it, it will vary depending on how hot the coffee soak is, and how thick the ladyfingers are. So I recommend doing a test: soak a ladyfinger in the coffee for 2 seconds (1s per side), then put it aside and wait for 5 minutes. After 5 minutes, cut it in half. If the ladyfinger is too soft to lift or disintegrating, it has absorbed too much liquid and you need to reduce the soaking time. If the center is still dry (not penetrated), soak for longer. Ideally it should become soft but still be able to hold shape, with just the very center looking unsoaked.
Layering the ganache
If the ganache is too warm when you add it to the tiramisu during assembly, it will start mixing in with the mascarpone cream. Not the end of the world, but I know we want neat layers! So to make this easier, you can actually chill the tiramisu dish for 10 minutes after spreading the mascarpone layer so it becomes firmer. Make sure the ganache is runny but not hot, then gently pour it on top, and spread it by tilting the pan in every direction.
Cocoa powder dusting
The top layer of the tiramisu is ganache, which becomes firm in the fridge. If you dust cocoa powder on that, it will just sit on top, instead of slowly soaking in, and make slicing messy. I recommend using a blow dryer on a low setting to slightly warm up the ganache layer on top of the tiramisu until it looks shiny, then dusting with cocoa powder. This will help the cocoa powder stick to the tiramisu better!

Triple Chocolate Tiramisu Recipe
- Total Time: 6+ hours with chilling
- Yield: 8-10 servings
Description
A rich and creamy tiramisu with chocolate in three layers, with a perfectly balanced flavor that lets the chocolate and coffee shine
Ingredients
Ganache:
- 300g semi-sweet chocolate (or mix dark chocolate and milk chocolate in equal parts)
- 1 ¼ cup heavy cream (300g)
Chocolate mascarpone cream:
- 12 oz mascarpone cheese (340g), cold from the fridge; I recommend Galbani
- 3 egg yolks
- ½ cup granulated sugar (100g)
- 1 tsp vanilla
- ¼ tsp salt
- 1 cup heavy cream, chilled (240g)
Cocoa coffee soak:
- 1 ½ cup strong black coffee, room temperature (360g)*
- 2 tbsp cocoa powder
Assembly:
- 30-36 ladyfingers*
- 2 tbsp cocoa powder to dust
Instructions
Ganache:
- Add the chopped chocolate and heavy cream to a microwave safe bowl. Microwave in 20 second increments, stirring gently in between, until the chocolate melts and a smooth ganache forms. Set aside to cool down
Chocolate Mascarpone Cream:
- Whisk the mascarpone cheese on medium speed for 30-60 seconds until creamy. Scrape the bowl and set aside
- In a separate heat-proof bowl, add the egg yolks, sugar, salt and vanilla. Boil 1-2" of water in a saucepan and reduce heat to the lowest setting. Place the bowl with egg yolks and sugar on top of the saucepan such that the water does not touch the bottom of the bowl. This is a double boiler. Whisk on medium-high speed for exactly 2 minutes, then remove from heat. The mixture will be light and fluffy. Do not overmix or overheat as it can become grainy
- Pour the egg yolk and sugar mixture onto the mascarpone cheese. Whisk on medium speed just until combined, scraping the bowl halfway (do not overmix as the mixture can become grainy)
- Add 1 cup of the ganache from step 1 above (240g). Whisk on low speed until just combined; do not overmix
- In a separate bowl, whip the cold heavy cream until it reaches medium stiff peaks (just starts to hold shape)
- Add the whipped cream to the chocolate mascarpone mixture in 2-3 additions, folding gently with a rubber spatula and taking care not to knock out the air. You will have a creamy, slightly fluffy mixture
Cocoa coffee soak:
- Make the coffee however you normally do (see notes on strength), and whisk in the cocoa powder. Pour into a wide bottomed bowl / plate and let it cool down to lukewarm temperature
Assembly and serving:
- Dip each ladyfinger quickly into the coffee (I do a quick dip on each side, see tips in blog post above) and add a layer of soaked ladyfingers in the bottom of a 8x9.5" rectangular dish*
- Spread on half of the chocolate mascarpone cream evenly. If the cream feels soft / runny, refrigerate for 10 minutes
- The ganache should be runny but not hot. If it's too thick, microwave for 10 seconds until it reaches the desired consistency. Pour half of the ganache on top of the mascarpone layer, and tilt the pan in every direction gently to help spread it out evenly. You can also use a spatula with gentle pressure to avoid mixing the ganache with the mascarpone layer
- Repeat with another layer of soaked ladyfingers. Top with the remaining chocolate mascarpone cream and spread on the rest of the ganache on top
- Cover and refrigerate for at least 6 hours, or ideally overnight
- When ready to serve, use a hair-dryer on low heat to slightly warm up the ganache layer on top until it becomes shiny. Then sift the cocoa powder evenly on top of the tiramisu. Cut into slices and serve!
Video Tutorial:
Notes
- Coffee: The strength of coffee depends on how much you like its flavor (some people use espresso), but my general guidance is to make the coffee twice as strong as you usually would. It can be brewed coffee, French press coffee, or instant coffee mixed in hot water. I make it in a French press with 1 ½ cup water and 4 tablespoon ground coffee
- Dipping ladyfingers: Ladyfingers absorb liquid quickly, so I recommend a quick dip on each side. However, if you want the coffee to fully penetrate the ladyfingers, you can do 1-2 seconds per side - just note that this can make the tiramisu more soggy. If in doubt, test with 1 ladyfinger first. Dip it, let it sit for 5 minutes, then check how soft it is
- Prep Time: 25 minutes
- Cook Time: 0 minutes
- Category: Dessert
- Cuisine: Italian

Mohammed Anwar Mughal says
I couldn't see any recipe. too many ads
Zoha Malik says
The recipe is in the brown recipe card. If you click "jump to recipe" at the top of the page, you will get to the recipe card
Amoooni says
My goodness!! I wish could share the pic here. It turns out to be the most flawless tiramisu i have ever made. Thank you for the treasury recipe
Zoha Malik says
OMG that is a huge compliment, thank you :')
JOCELYN SISON says
Thank you for giving me your recipe! I must try it later!
Zoha says
I hope you love it!
Sam says
Can i make this in advance? How long in advance?
Zoha says
Hi Sam! 1-2 days in advance should be fine 🙂
Easy baker says
Made it for a party and was a smashing hit. It does have a few steps but in the end, not a difficult recipe. Instructions are very detailed and perfect.
Zoha says
I am so glad you liked it!
Maria Ghani says
Thank you for sharing your recipe. Looks delicious. I have a question. The eggs remain uncooked?
Zoha Malik says
Hi Maria! They are cooked when we use the double boiler 🙂
Sana says
Hey Zoha!
I tried this recipe today with my own alterations and I already knew it was going to be my fav recipe of all time. What an outstanding idea of amplifying the tiramisu dessert with chocolate. Simply mind blowing recipe for a chocolate lover ❤️
Zoha says
Thank you so much Sana, I am so glad you tried it and made it your own! <3
Maria Ghani says
Are eggs uncooked in this recipe?
Zoha Malik says
No, they get cooked using the double boiler!
Ayesha A says
Girl I have tried this recipe and it tastes incredible! 😍 Your recipes have always worked perfectly for any last minute dessert prep! 🙂
Zoha Malik says
Made my day :')