

This post may contain affiliate links
Add Bake with Zoha as a preferred source on Google and find more of my tried-and-tested recipes.
I never thought any sweet bread could ever trump my favorite cinnamon rolls, but then I ate these Sticky Pecan Cinnamon Buns and stood corrected! They combine my pillowy soft cinnamon rolls with a sticky, crunchy caramelized maple pecan topping, and every bite is nothing short of extraordinary. They taste and smell like fall, with a beautiful cinnamon-y, nutty and caramel-y flavor. And the best part is, this is a very simple, fuss-free recipe, which you can make without a stand mixer (although you can use one if you want).
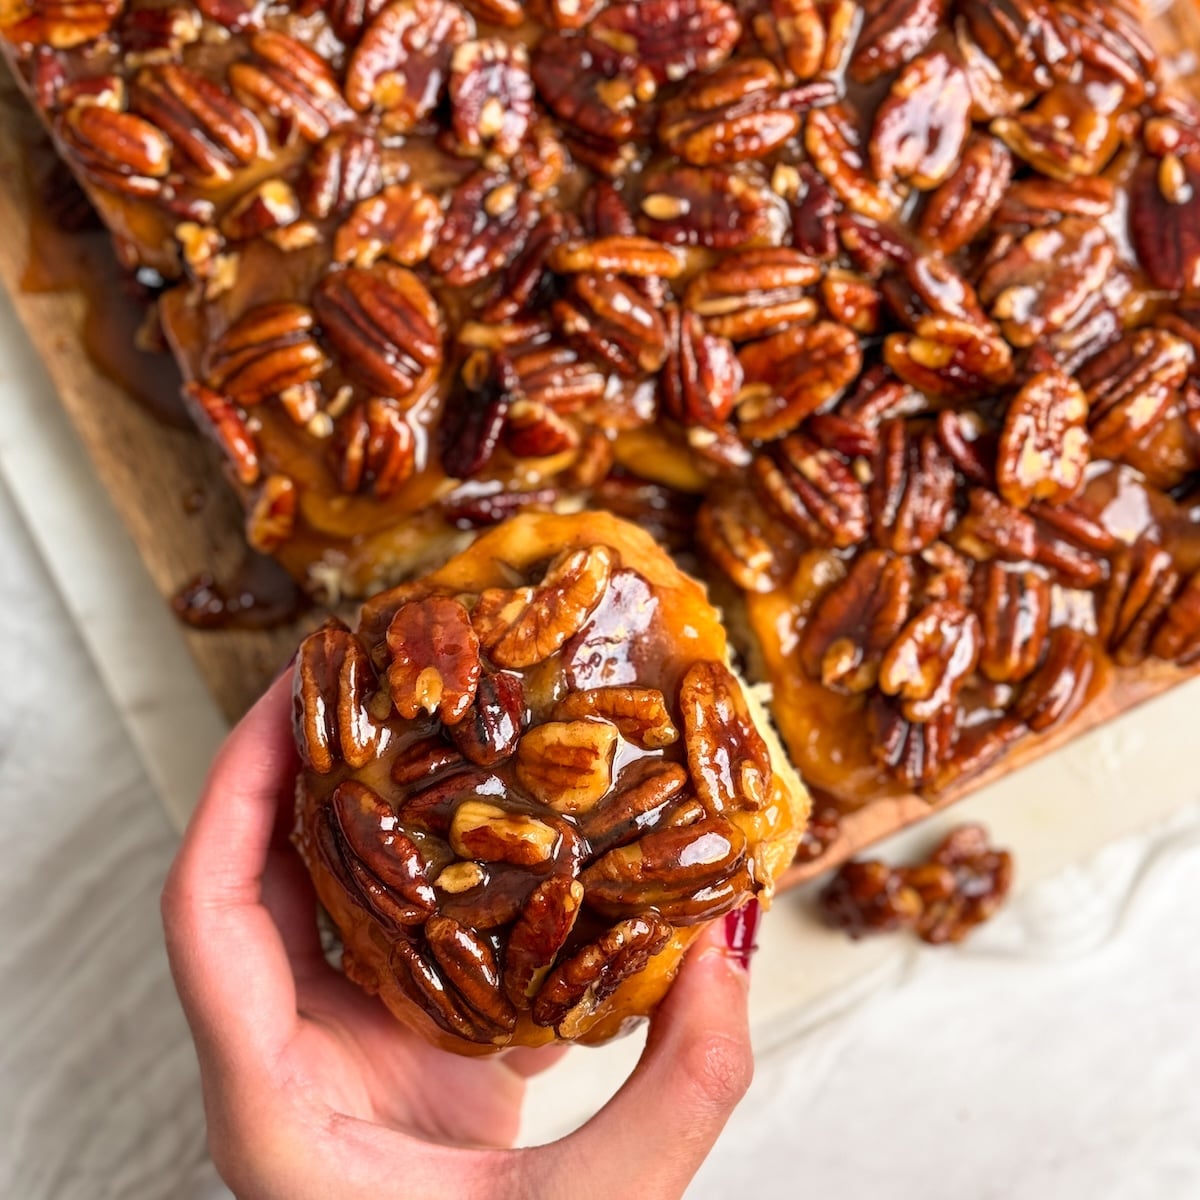
These sticky pecan cinnamon rolls have been a reader favorite on my blog for 3+ years, and are especially popular during Thanksgiving and Christmas. They are always a crowd-pleaser, so I highly recommend making them if you’re hosting. And if you’re still on the fence, just check out some of the reviews!
This is literally the BEST batch of ANY baked good I have had in my LIFE! They are fool-proof, because if anyone is dough challenged, it’s me.. and these turned out PERFECT! This is my new “impressive dish to bring to every party” choice!
– Jordan, ★★★★★
You really should try these!
If you still need convincing after the review and pictures, here are some reasons why you will love these:
- The rolls are pillowy soft, just like my soft and gooey cinnamon rolls. My sister in law is married to a Swedish man who has a family recipe for cinnamon rolls. So when she was about to try these buns, she warned me that she has very high standards. But after her first bite, her eyes bugged out of their sockets, and a delirious “oh my god” stuttered out of her mouth. She told me these are the softest buns she’s ever had!
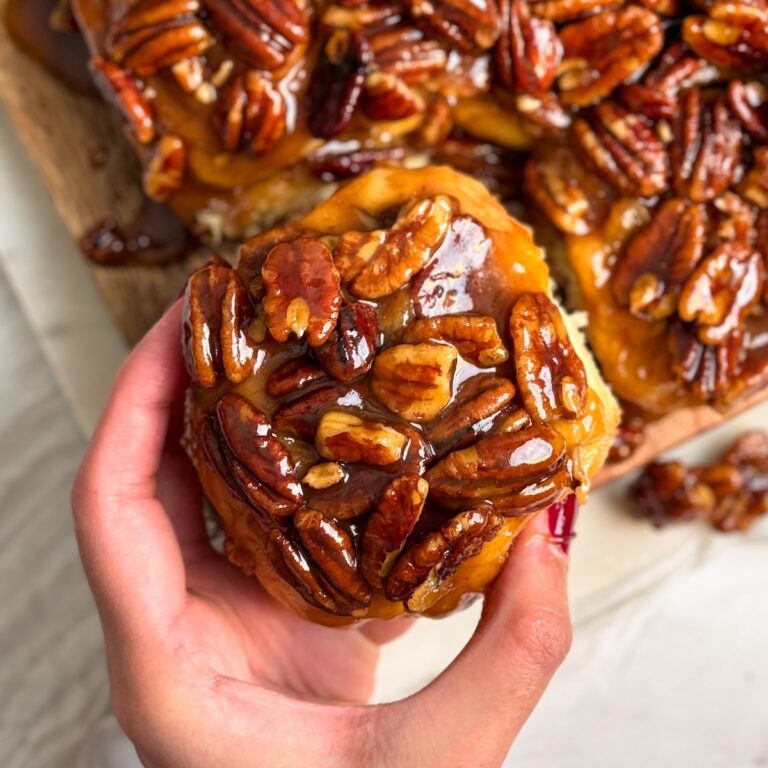
- The pecan topping is sticky, crunchy, nutty and caramel-y all in one. The pecans are toasted first, and therefore retain a crunch even after being baked in the sticky sauce. The result is a nutty caramel goodness that is hard to explain – and the smell is out of this world
- They are actually quite easy to make. I know many people are intimidated by yeast recipes, but I’m here to tell you it’s just an ingredient like any other! And this recipe is intentionally designed to be fuss free. There are no unnecessary steps, and almost all components come together quickly
- You don’t need a stand mixer. I have kneaded this dough both with and without a stand mixer, and both methods work perfectly fine. It comes down to your preference (and whether you have one)
3 simple components
These sticky pecan cinnamon buns are made of 3 key components:
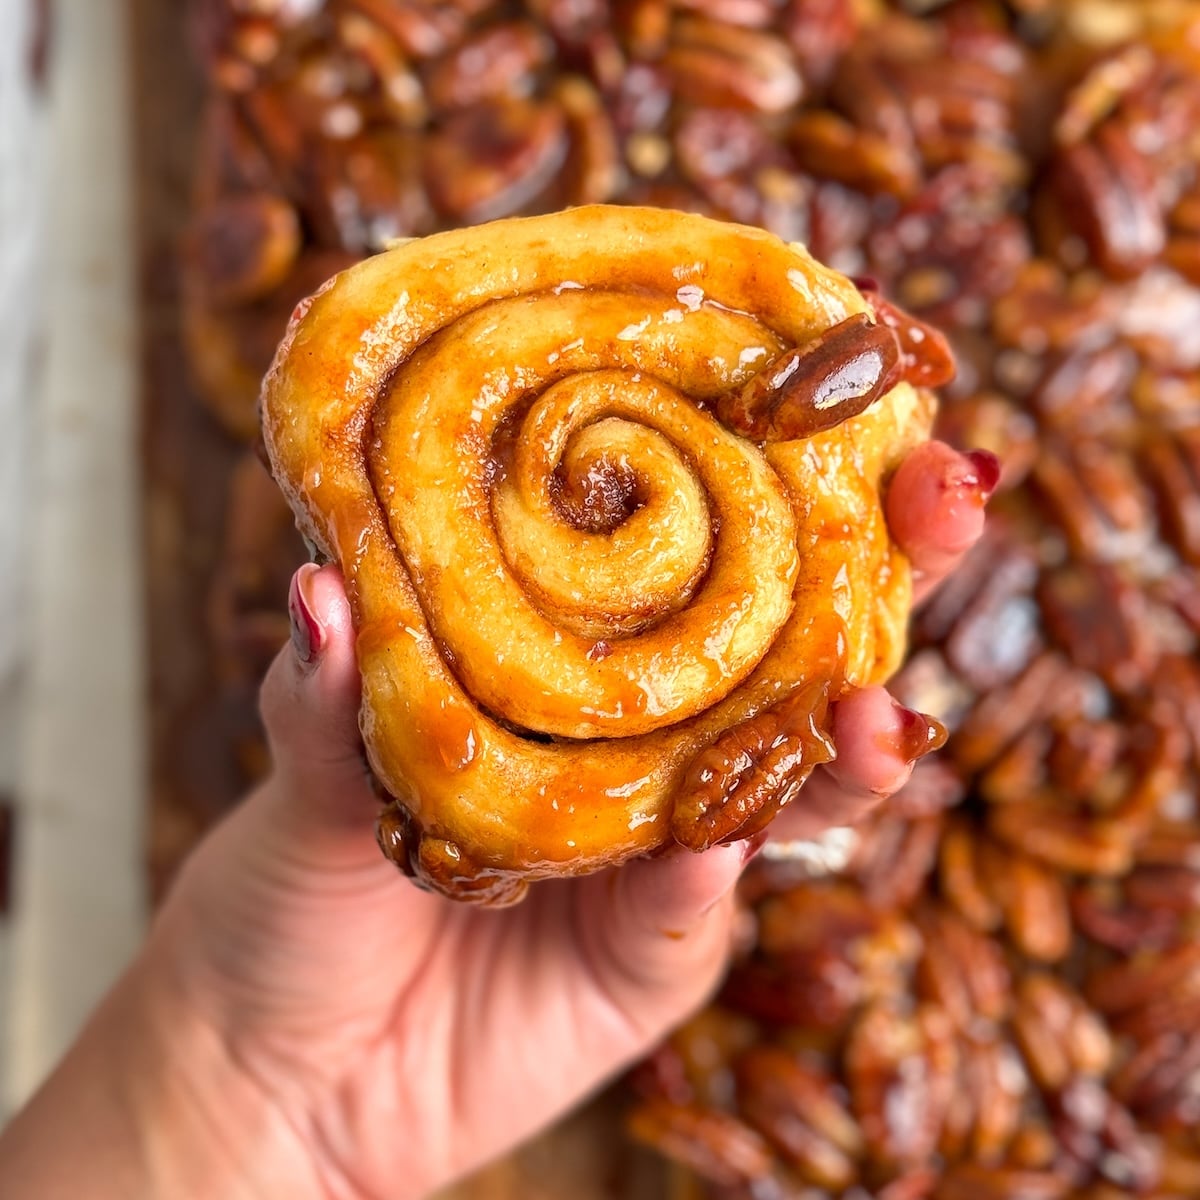
- The dough. This is the heart of these buns, and a recipe I am extremely proud of. The dough isn’t too wet or sticky to work with, but results in very soft, fluffy buns. The key to get it right lies in the kneading and proofing, both of which should be given the right amount of time
- The cinnamon sugar filling. Made by simply mixing together the ingredients, this filling gives a wonderful grit and balanced cinnamon flavor to the buns
- Sticky pecan topping. First, toast the pecans until they become fragrant. This step is a must as otherwise pecans can taste a bit earthy and become soft. Spread them out in the baking tray. Then make a sauce with maple syrup, brown sugar, butter and milk, and pour on top of the pecans. Place the rolls on top and bake. At the end, the baking tray is flipped upside down so the sticky pecans become the topping
How to make sticky pecan cinnamon buns
The detailed method is provided in the brown recipe card below, but here’s a quick overview of the steps:
- Knead the dough. Simply mix together all ingredients and knead until the dough reaches the window-pane stage
- Proof the dough. Cover and let it double in size
- Make the sticky pecan topping. While the dough is rising, make the sticky sauce and pour it over the toasted pecans in the baking tray. Stick this in the fridge for 10-15 minutes to cool down
- Make the cinnamon sugar filling
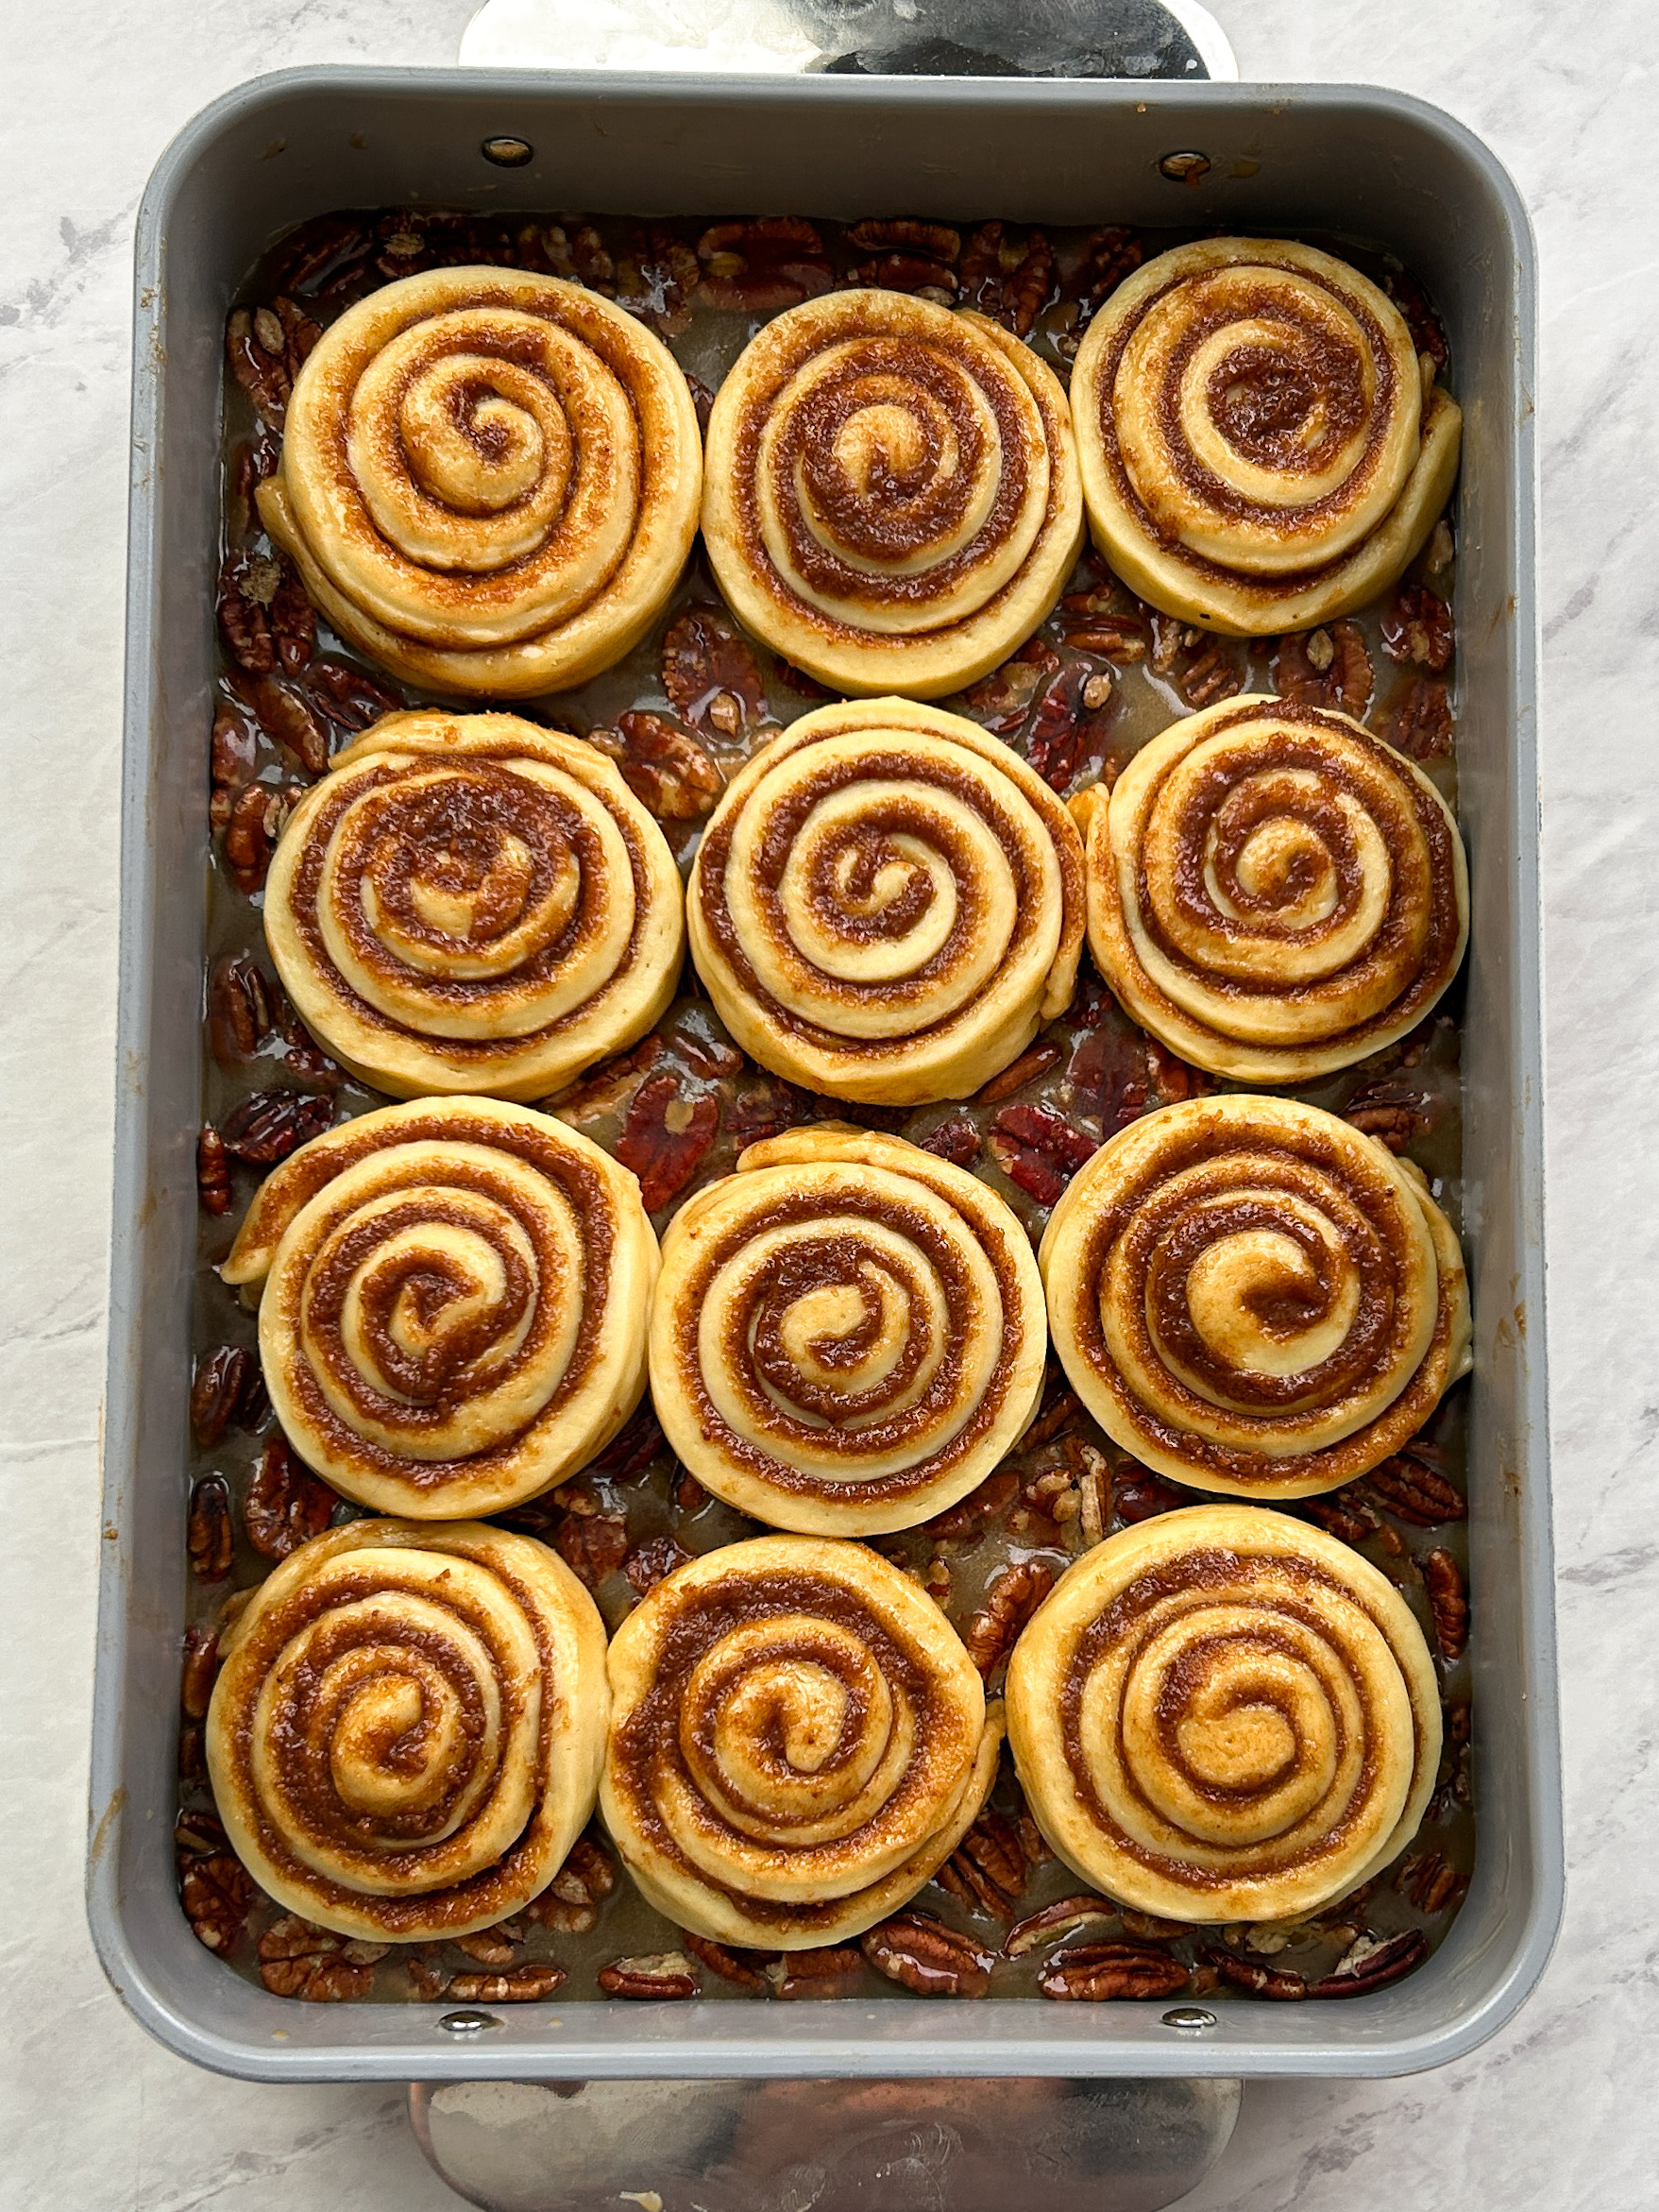
- Shape the buns. Roll out the dough, spread on the filling, cut into strips and roll them up into 12 cinnamon rolls. Place them on top of the pecan topping in the baking tray
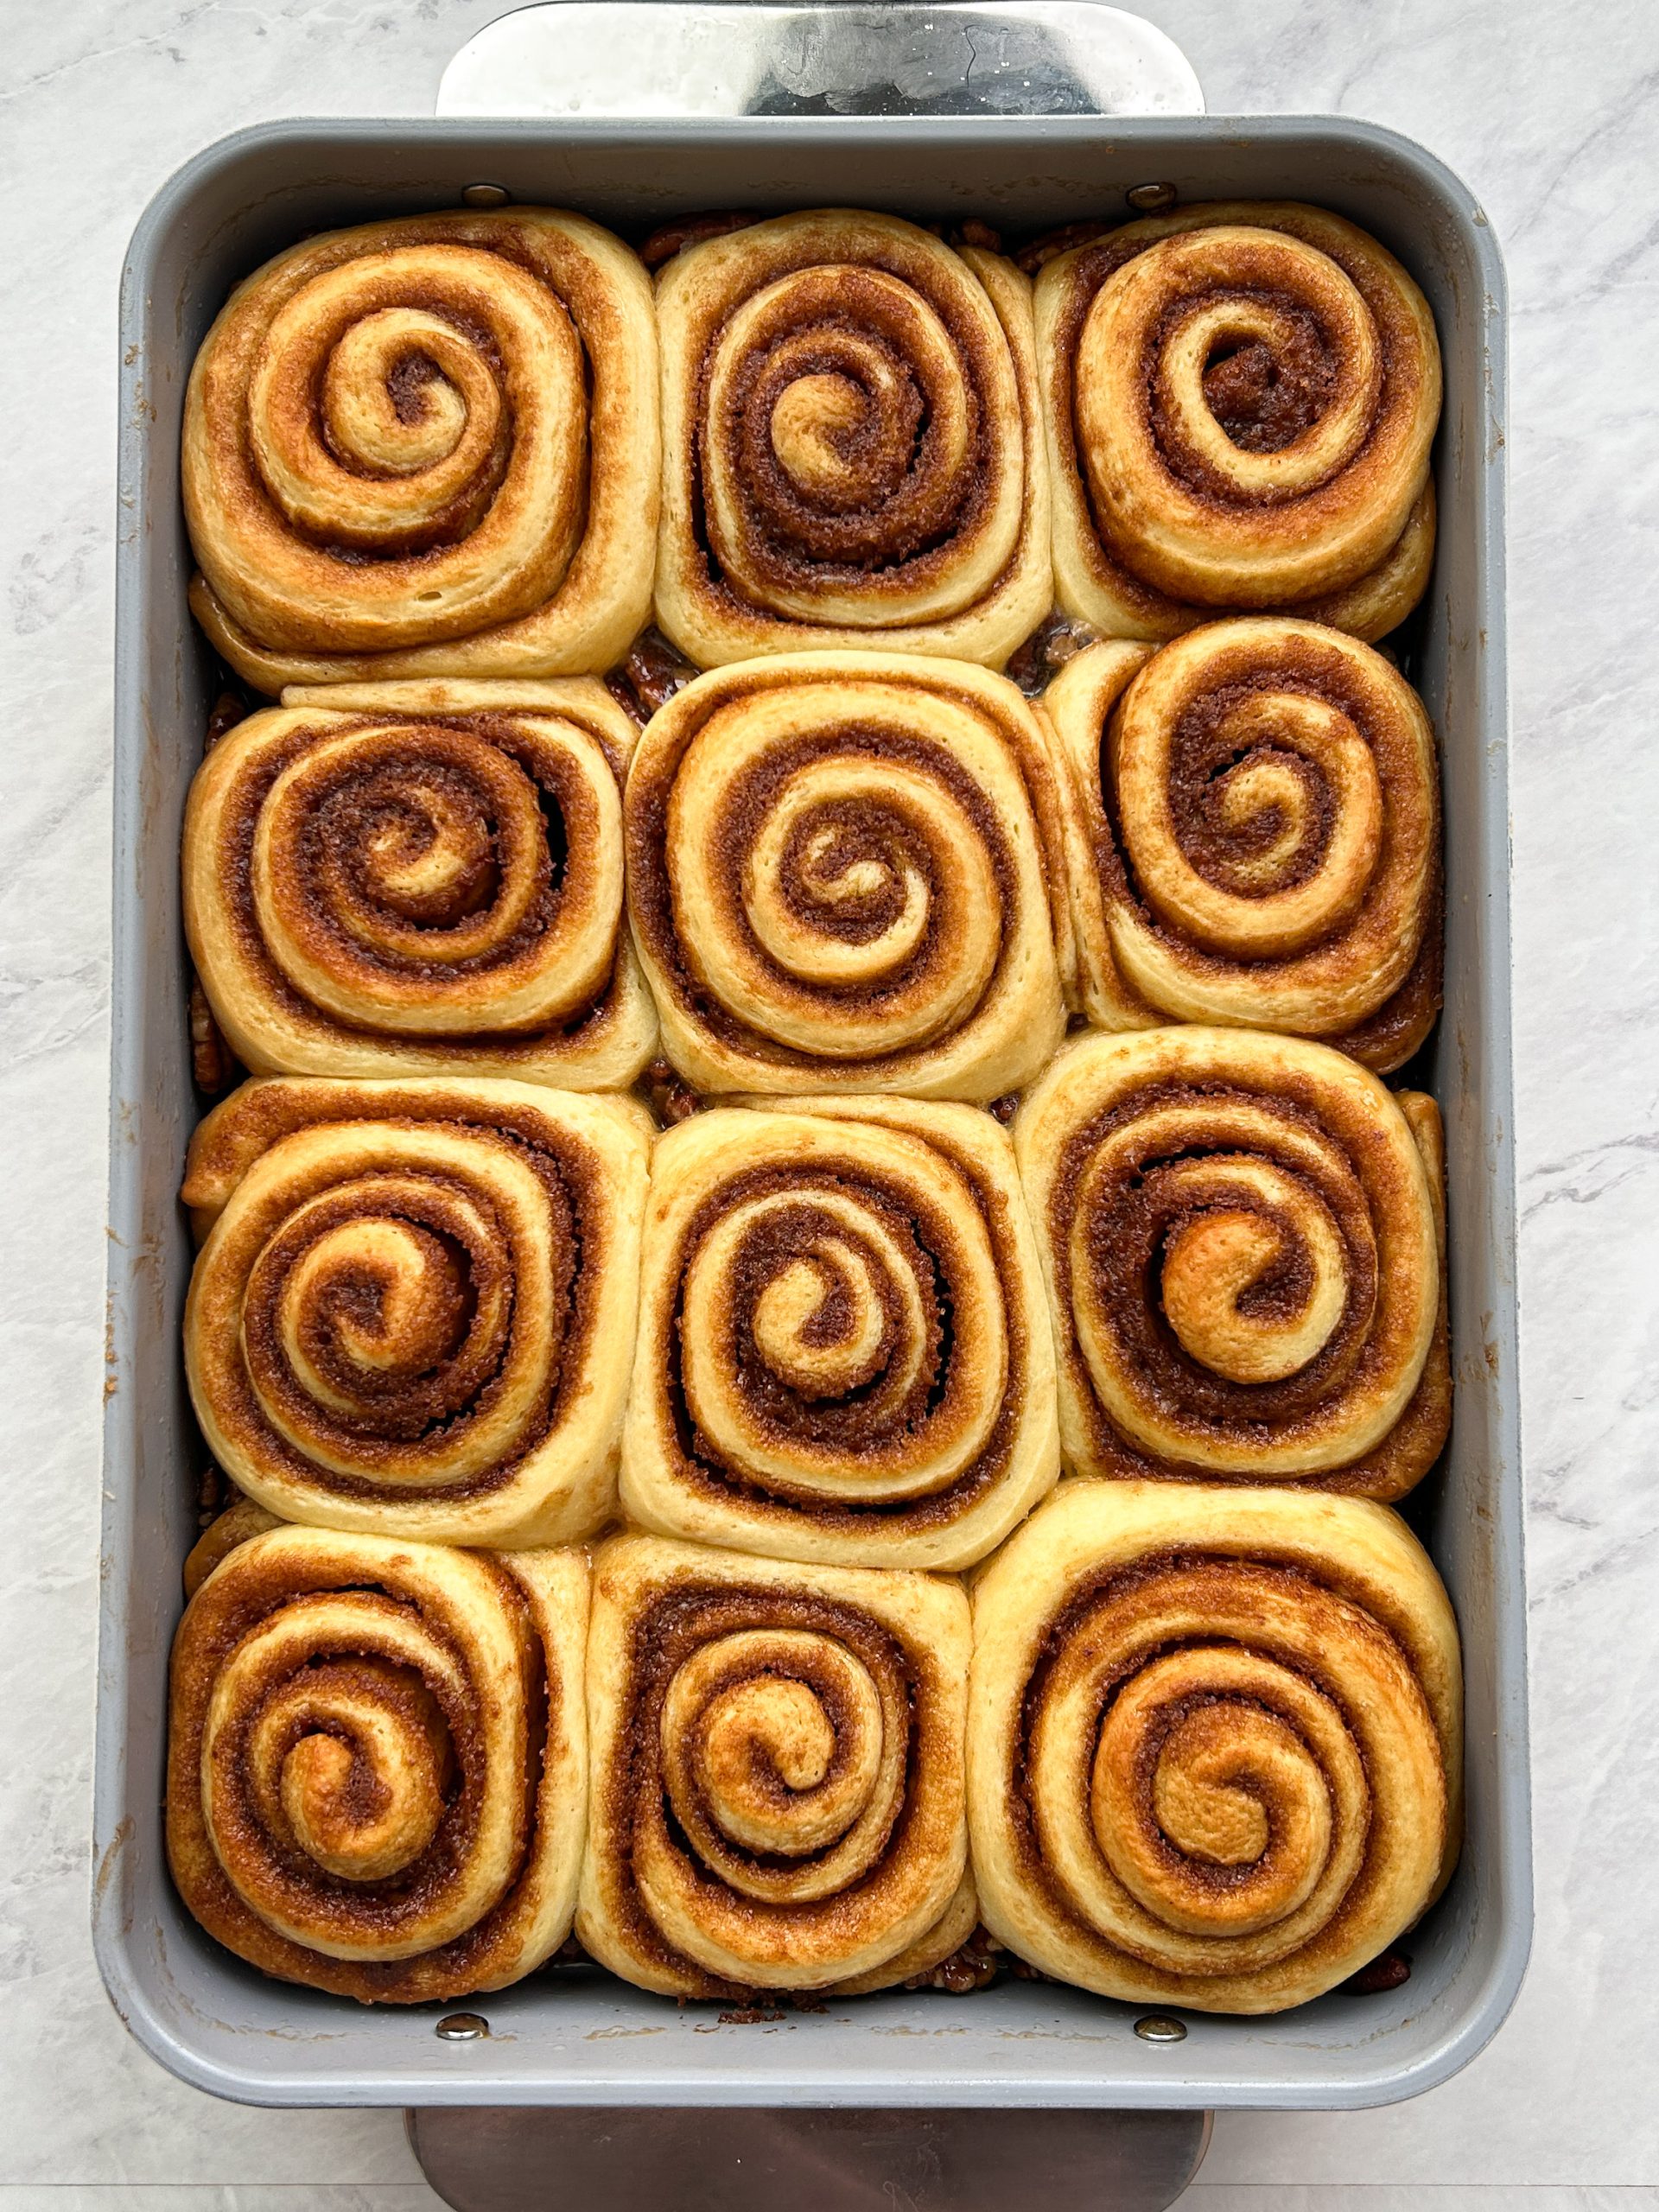
- Proof the buns. This is a shorter proof which allows the buns to become fluffy again before being baked
- Bake! Voila, time to go in the oven
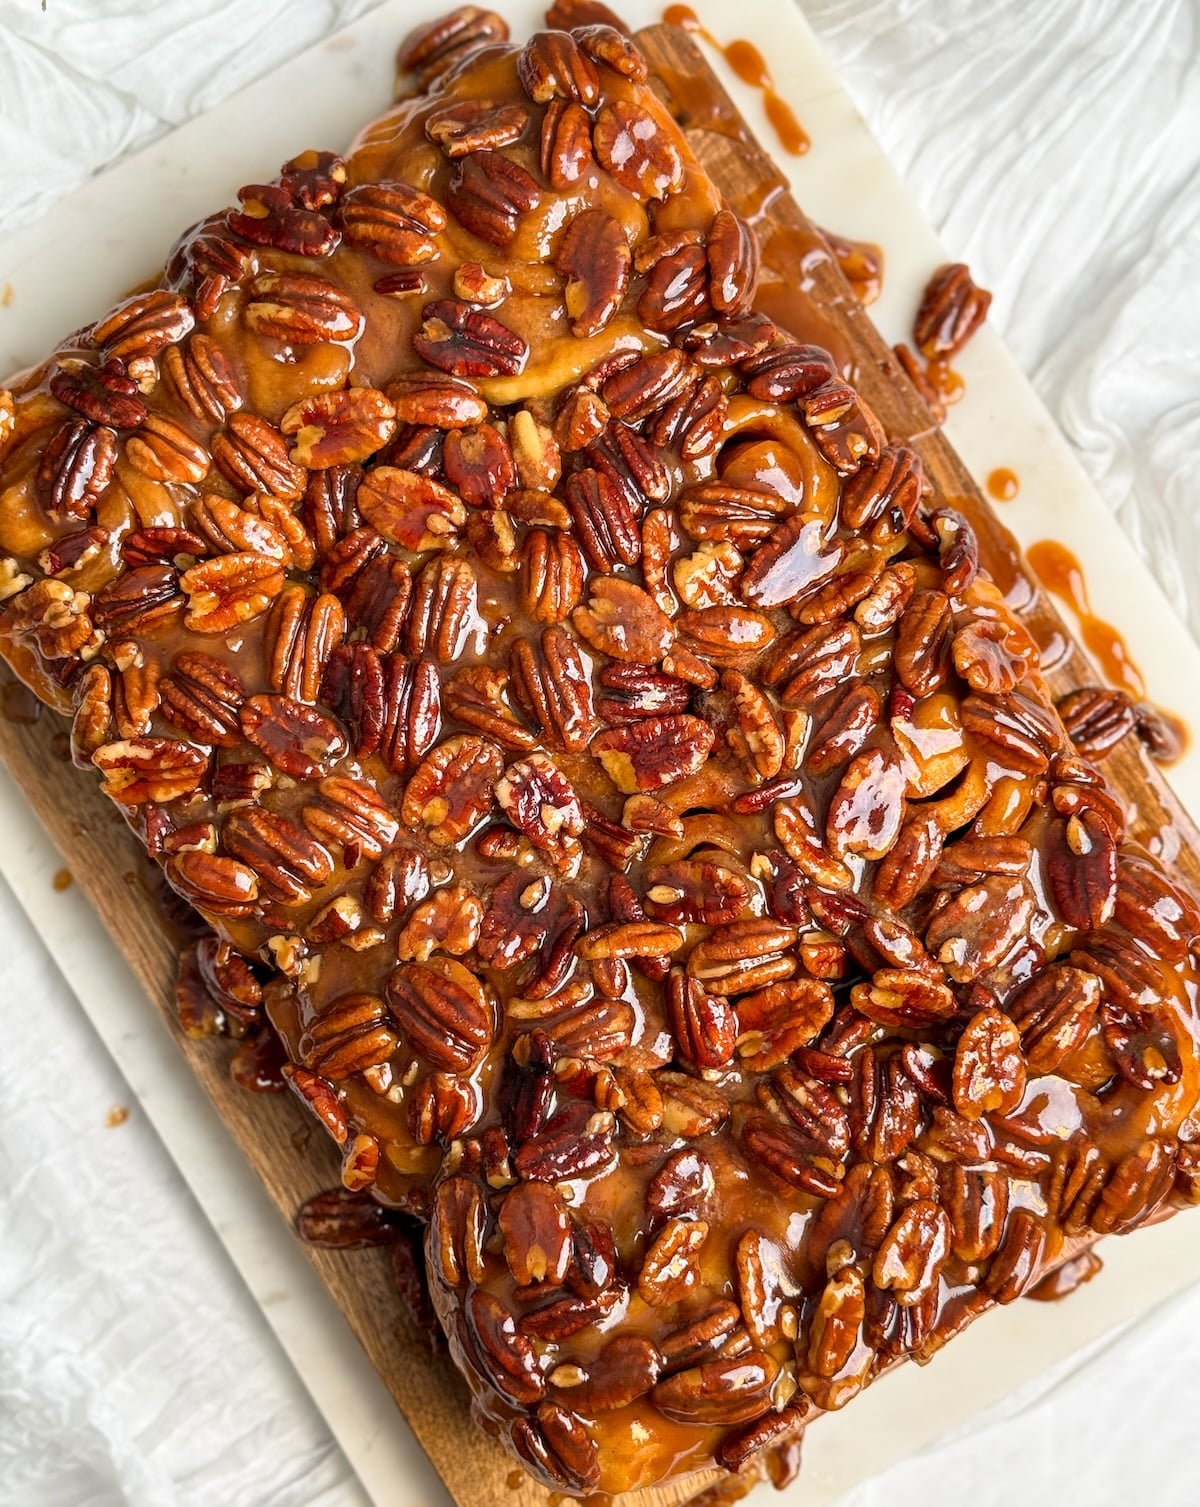
- Flip and serve. Wait for 5 minutes, then carefully flip the buns onto the serving platter, remove the parchment paper, and serve!

3 tips for the softest dough
There are three things you need to get right for your dough to turn out perfect:
- Measure accurately. I strongly recommend using a weighing scale instead of measuring cups as that will yield the most accurate results. Otherwise, you may end up with too much flour, making the rolls dry
- Knead to the window-pane stage. If a dough is not properly kneaded, it doesn’t have enough gluten formation and cannot rise as well, making it denser. Whether you are using a stand mixer or kneading by hand, make sure to knead until the dough becomes soft, smooth, and stretchy, and passes the window-pane test. If you hold a piece of dough in your fingers and slowly stretch it, it should get paper thin and translucent before it starts to rip
- Don’t under or over proof. Under-proofed dough will result in denser buns that don’t hold their shape properly, and over-proofed dough will result in deflated, sad buns. Proofing time can vary depending on the temperature and humidity in your kitchen, so look for the signs. After the first proof, the dough should more than double in size, and partly spring back when poked with a finger. After the second proof, which is done after shaping the buns, the buns should look puffy but not yet take up the whole tray
I’ve covered everything in more detail with pictures in my cinnamon roll recipe, and highly recommend taking a read.
Best Sticky Pecan Cinnamon Buns
Unbelievably soft and pillowy cinnamon buns topped with a sticky, crunchy, caramelized pecan topping – these buns are extraordinarily delicious and come together without a stand mixer!
Yield:12 buns
- Prep Time:
- 45 mins
- Cook Time:
- 25 mins
- Rest time:
- 90 mins
- Total Time:
- 2 hrs, 40 mins
Email This Recipe
Enter your email and I’ll send this directly to you. Plus you’ll get new recipes from me every week!
Ingredients
Dough:
- 1 cup whole milk (240g)
- 3 teaspoons active dry yeast (or instant yeast)
- 1/3 cup granulated sugar (66g)
- 3 3/4 cups all purpose flour (490g)
- 1 large egg
- 1 1/2 teaspoon salt
- 6 tbsp unsalted butter, softened (85g)
Sticky pecan topping:
- 2 1/3 cup pecan pieces and halves (260g)
- 1/3 cup maple syrup (100g)
- 1 cup firmly packed light brown sugar (200g)
- 3/4 cup unsalted butter (170g)
- 1/4 cup milk (60g)
- 1/2 tsp salt
Cinnamon sugar filling:
- 6 tbsp unsalted butter, softened or slightly melting (85g)
- 3/4 cup light brown sugar, packed (150g)
- 1 1/2 tbsp cinnamon
- 3/4 tsp salt
Assembly:
- 1/3 cup heavy cream (80g), optional – drizzled over the shaped buns for an even softer texture
Instructions
Dough:
- Microwave milk in 20-30 second increments until it is warm to touch (~100-110F). Add it to a bowl with the yeast and whisk. If using active dry yeast, rest for 10 minutes or until the mixture looks foamy. If using instant yeast, proceed without waiting
- If kneading by hand: Add the rest of the dough ingredients (sugar, flour, eggs, salt, and room temperature butter) to the same bowl. Use a large wooden spoon to mix everything and bring it into a shaggy dough. Tip out onto a clean work surface, then use clean hands to knead the dough with a push-pull motion. The dough will be sticky to begin with, but don’t add more flour at this point. After 5 minutes, clean your hands to remove sticky dough bits from them. If the dough still feels too sticky, add just 1-2 tbsp flour and keep kneading. After about 15 minutes of kneading, the dough will become soft, smooth and very stretchy, and pass the window-pane test
- If kneading with a stand mixer: Transfer the milk and yeast to the bowl of your stand mixer (or use that bowl to begin with), and add the rest of the dough ingredients. Knead using the dough hook attachment on medium high speed for 7-10 minutes, until the dough becomes smooth, pulls away from the edges of the bowl, and is stretchy enough to pass the window-pane test
- Transfer the dough to a clean bowl sprayed with oil, cover with cling wrap and rest in a warm place (75-80F) for 60-90 minutes, or until the dough has at least doubled in size and springs back partly when gently poked with a finger
Sticky pecan topping:
- Line a 9×13″ baking tray with parchment paper and brush with butter. Pre-heat your oven to 350F (conventional, no fan)
- Spread the pecans in the baking tray, and place in the pre-heated oven for 5-7 minutes until toasty and fragrant. Set aside
- Add the remaining ingredients of the topping (maple syrup, brown sugar, unsalted butter, milk and salt) to a saucepan, and cook and stir over medium low heat until everything is melted and combined (no need to cook more)
- Pour the sauce on top of the toasted pecans and ensure it is spread evenly. Place the tray in the fridge for ~15 minutes so the sauce cools down
Cinnamon sugar filling:
- In the meanwhile, prepare the filling by mixing softened butter with cinnamon, sugar and salt. If it feels hard to mix, microwave for a few seconds and mix again
Assembly & baking:
- Once the dough has risen, punch it down and transfer it to a clean surface dusted lightly with flour. Using your hands and a rolling pin, roll it into a 12×16″ rectangle. The dough will be really soft so won’t need much pressure
- Use a spatula to spread the filling evenly across the rectangle
- With the 12″ side towards you, divide the dough into 12 strips (each strip will be 1″ wide and 16″ long)
- Roll each strip tightly into a cinnamon roll, and transfer to the baking tray with the sticky pecan topping. You will arrange the rolls in a 4×3 formation
- Once all buns are shaped, let them rest in a warm spot for another ~30 minutes until they look a bit more puffed up and spring back partly when gently poked
- If you turned off your oven earlier, in the last 20 minutes of the proof, preheat it to 350F (conventional) again
- Optional: Right before putting the rolls in the oven, drizzle the heavy cream over them carefully. This results in even softer, moister buns, but can be skipped
- Transfer to the oven and bake for 25-30 minutes until the rolls develop a light golden color and feel firm to touch
- Remove from oven and let the rolls rest for 5 minutes. Carefully flip the tray onto the serving platter so the pecans are on the top. Remove the parchment paper. Serve and enjoy!
Video Tutorial
Notes
- Yeast: You can use both instant or active dry yeast for this recipe. If using instant, you can combine all dough ingredients and knead. If using active dry yeast, first combine the warm milk, yeast and sugar, and rest for 10 minutes or until frothy. Then add the rest of the ingredients
- Egg substitute: You can substitute the egg with 1/4 cup of full fat yogurt (60g)
- Pecan substitute: If you don’t like pecans or can’t find them, walnuts make a great substitute in this recipe
- Maple syrup substitute: If you can’t find maple syrup, you can swap it with 100g of honey
- Overnight rise: If you want to split the work between 2 days, you can do the first rise of the dough in the fridge overnight. Then shape the rolls the next day, and give the rolls their second rise at room temperature for about 1 hour before baking (longer because the dough will be cold to start with)
- Storage: You can store these buns in an airtight container at room temperature for up to 2 days. Any longer than that, store them in the fridge and microwave for 15-20 seconds before enjoying!

Comments
Jen Brown
These were amazing! Made exactly as written
Zoha Malik
Aw thank you so much, Jen!
Asia
Loved this recipe. I plan to make a big batch for Xmas. Has anyone doubled the recipe before? If so, any tips?
Zoha Malik
That should be totally doable! Use a 18×13 pan or two 9×13 pans!
Meg
Can they be frozen?
Zoha Malik
Hi Meg! I generally don’t recommend that as nuts will get stale over time.
Sharyn Fernandez
always a favorite; thanks; much easier than using Karo; my modifications: Dough – (no need for the cream): topping: (usually just use I cube of butter); topping: didn’t need parchment on the tray; no need to put in the fridge after placing in the tray, it’s cool enough by the time I hav prepared the rolls for placing; Assembly: I find it easier to roll lengthwise (16′ side). Then I take a ruler and a knife and mark every inch, and come back and separate each individual roll (so I measure a 20 inch roll, and place 5 x 4 on the tray; Lastly, I I find it easier after baking and cooling to take a larger tray (with parchment) and place on top of rolls and THEN flip at once. This is when it pays to use the Maple syrup instead of Karo which was so hard to get to come out from tray.But great instructions with when to heat the oven, too. oh, I place some of the ground nuts in the filling, also, just because! thanks
Zoha Malik
Thank you so much for the very helpful review! I am sure many will find this so handy 🙂
Ann Picard
The recipe was easy to follow and the results were amazing! So tender and sticky sweet Just like my mother’s! I made a double batch to bring to Easter dinner!
Zoha
‘Just like my mother’s’ — that made my heart so full!! 🥺 Double batch for Easter dinner is always the move. Thank you so much Ann 🙏
Aseel
It’s the best cinnamon rolls recipe I have ever tried
And trust me I tried a lot
Zoha
WOOP WOOP
happy cyclist
Wow! That is a lot of butter…I feel like I just gain 20 lbs watching your video.
Sharyn Fernandez
Thanks; I’m glad I found this recipe since I forgot I didn’t have Karo Syrup that i’d usually used to make pecan rolls. I actually had a sugar free syrup and it worked great and tasted fine with the butter and the brown sugar. (Right to not cook too much when blending together!) I lost my mom’s recipe I’d made for years and of course I can’t remember what to use. This was close enough. I appreciate the suggestion to use parchment paper! I went back to my old way of just rolling up the dough after putting the filling on it (and I used extra pecans here). Then I pulled it out (gently) to about 22 inches in length – turned it diagonally on the board – then, rather than making the 12 separate strips, I took a ruler and held it over the roll and with a knife, marked every inch lightly on top, coming back and slicing through each roll. I usually end up with 22- 24 1-inch pieces that I quickly move individually to the baking pan. I ended up improvising and used 6 rows, half with 3 across, and the other half with four across ! (I only had a 15″ x 10″ cookie pan).
The other suggestion I’d make is (and I bet most people do this anyway) when it comes time to remove them from the pan after your 5 minute cool down, (a) since the rolls baked over the edge of my baking pan, I took a knife and edged around it to separate any stuck/baked-on sides. Then (b) I placed the parchment paper on top of the rolls and I put my large bread board – see size as pan – over it and flipped it over quickly. You’ve got to aim though! You also might want to tap the baking pan before you raise it. ( But this what I did when I used the Karo instead of regular syrup, since karo hardens quickly) ,With the paper, and this recipe, they came out no problem! They tasted great -if a little gluppy : } but that’s fine with me! Breakfast & Dessert!
Zoha
Thank you so much for your detailed review and suggestions, I am sure many will find them helpful 🙂
Kerri S Loomis
This recipe sounds like the one! How much heavy cream can be poured onto the prepared rolls?
Zoha
Hi Kerri! I usually do 1/4 cup for a batch of this size 🙂
Liz
I had a recipe for sticky buns that I have been using for 30 yrs my dog ate it. I mixed the warm milk with the sugar and salt and yeast i whisked it until it turned frothy. I added it to my flour and added room temp eggs. I used my stand up mixer and made the dough. I took the dough and put it a bowl to rise. It never rose. I took it out and rolled it then cut them. Covered and waited an hour and a half. Didn’t rise. I cooked them anyway. They were soft and gooey. Then they got rock hard. I tried 5 times and was wondering if you could help me.
Zoha
Hi Liz! If the milk and yeast mixture became frothy, that means the yeast wasn’t expired. What was the room temp where you left the dough to rise? it’s possible it just needed longer.
Pearly Vance
Ty these are delicious
Zoha
Yay thank you!
Paula Lynn
Just absolutely delicious! Mine came out gorgeous! Your instructions were perfect!!
Zoha
So happy to hear that, thank you!
Sadie
Why not roll up the filled dough before cutting the buns?
Zoha
I get neater swirls if I cut and then roll 🙂
Pam
Can you make these and freeze them before baking or maybe parbake them? So many things happening in the kitchen on family mornings that it would be nice to be able to just “pop them in”.
Zoha
Hi Pam! Yes, you can definitely try doing that. Just bake them, then put them in the fridge overnight. When serving, reheat at 350F for ~5-8 minutes or so, then turn out and serve. The only potential issue is the nuts won’t be as crispy the longer they sit in the sauce, so you can determine the trade-off
Lily
I forgot the egg and used honey instead of maple syrup and it still turned out amazing!! Great recipe
Zoha
OH I am so glad!
Alice Kretchmer
This is a fantastic recipe. I will be making this again, it is on my BEST recipe list.
Thank-you for your sharing.
? and ☀️
Great recipe. I reduced the maple syrup and used less of the topping mix.
viji rajmohan
Hi, what would be a substitute for maple syrup? Thank you.
Angela
Hi, can you suggest a way to freeze these? maybe partially bake and then remove and freeze… then thaw and finish baking? If you did that, would you do the partial bake on parchment paper without the sticky topping, and add the sticky topping when doing the final bake? Thanks!
sherri
So delicious!! I have been trying to perfect my rolls and this is it!!! yum Easy to follow and fun to make. I did overdose on them and had to giveaway what was left. Only to regret my good intensions.