

This post may contain affiliate links
Add Bake with Zoha as a preferred source on Google and find more of my tried-and-tested recipes.
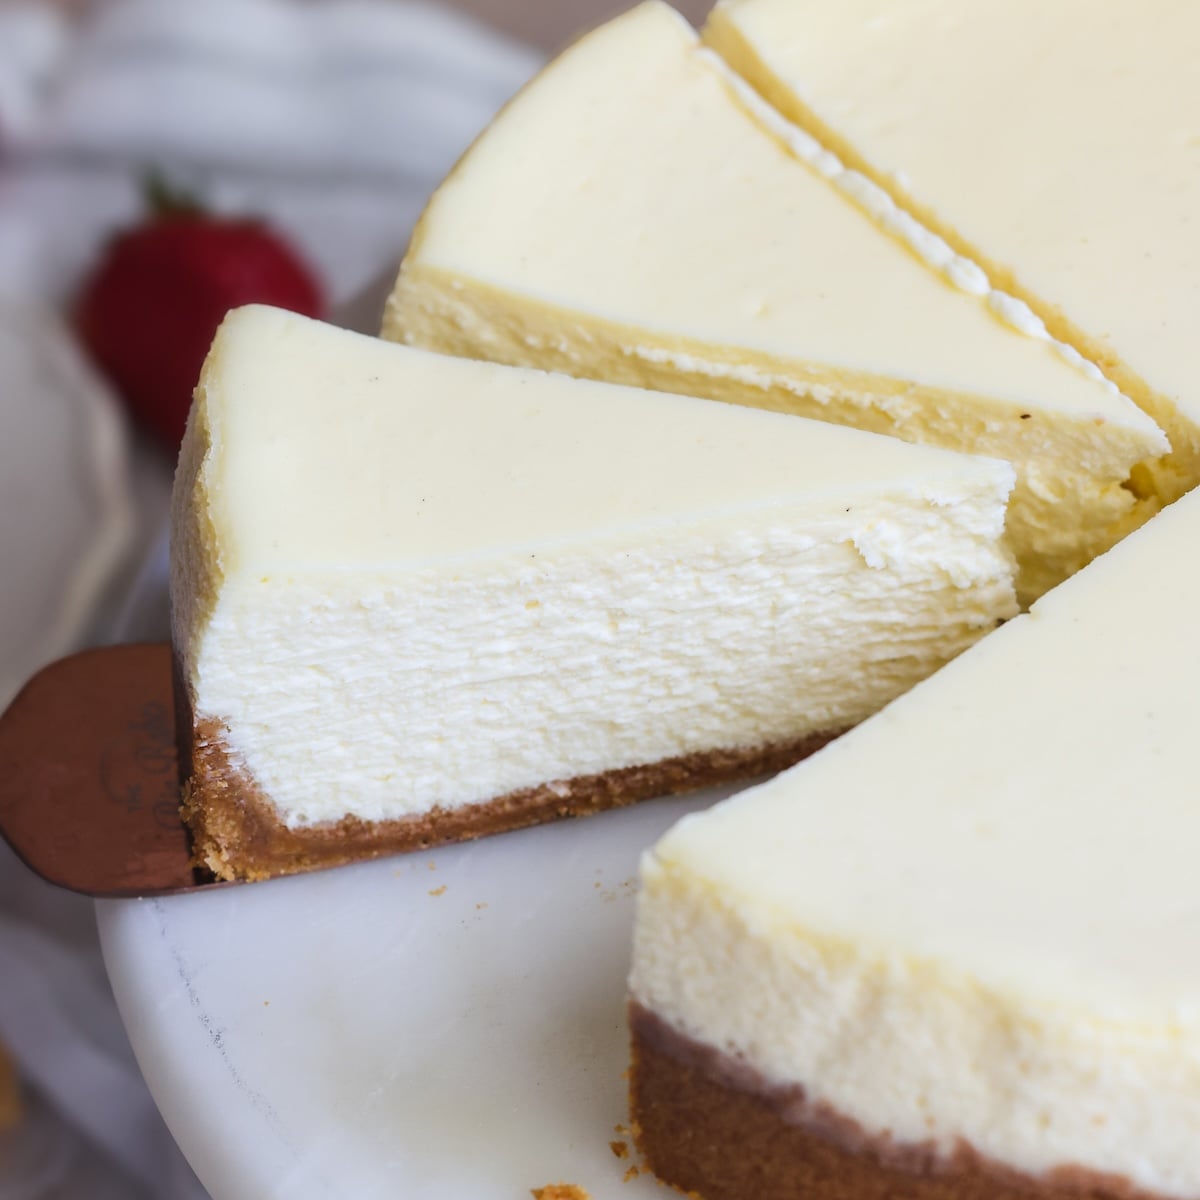
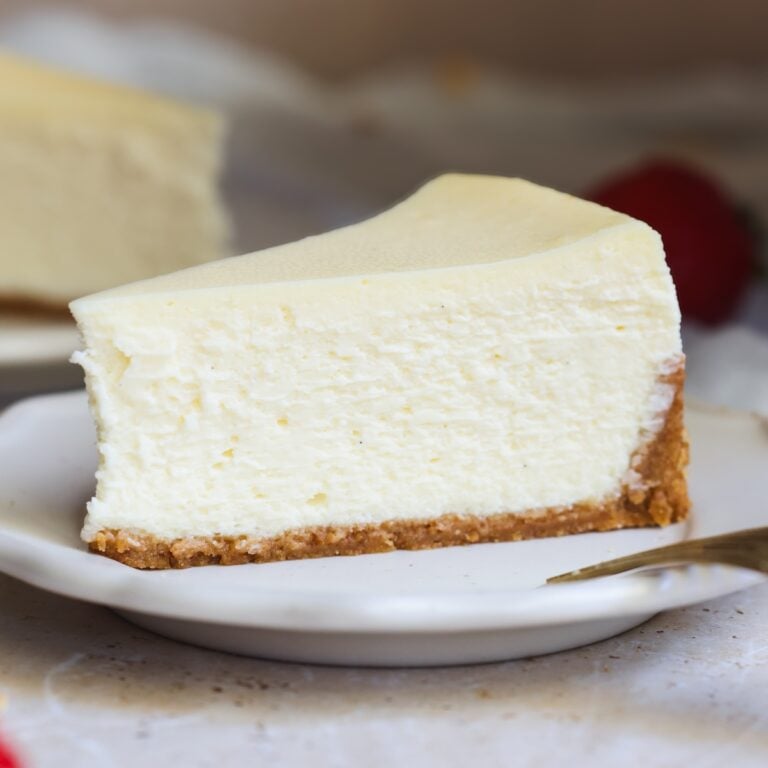
This is the single best cheesecake recipe you’ll ever try. Perfectly smooth and crack-free, it has a golden, crispy graham cracker crust, and a beautifully balanced flavor that is not too sweet nor too tangy. But what truly sets it apart is its unbelievably creamy, rich, melt-in-your mouth texture (not dry, eggy or crumbly – I’m looking at you, Cheesecake Factory!). The secret? Bake very low and slow in a water bath, and slightly underbake. Trust me, I’ve done the tests, and will prove that it’s worth it! And don’t worry – it is easier to make than you think.
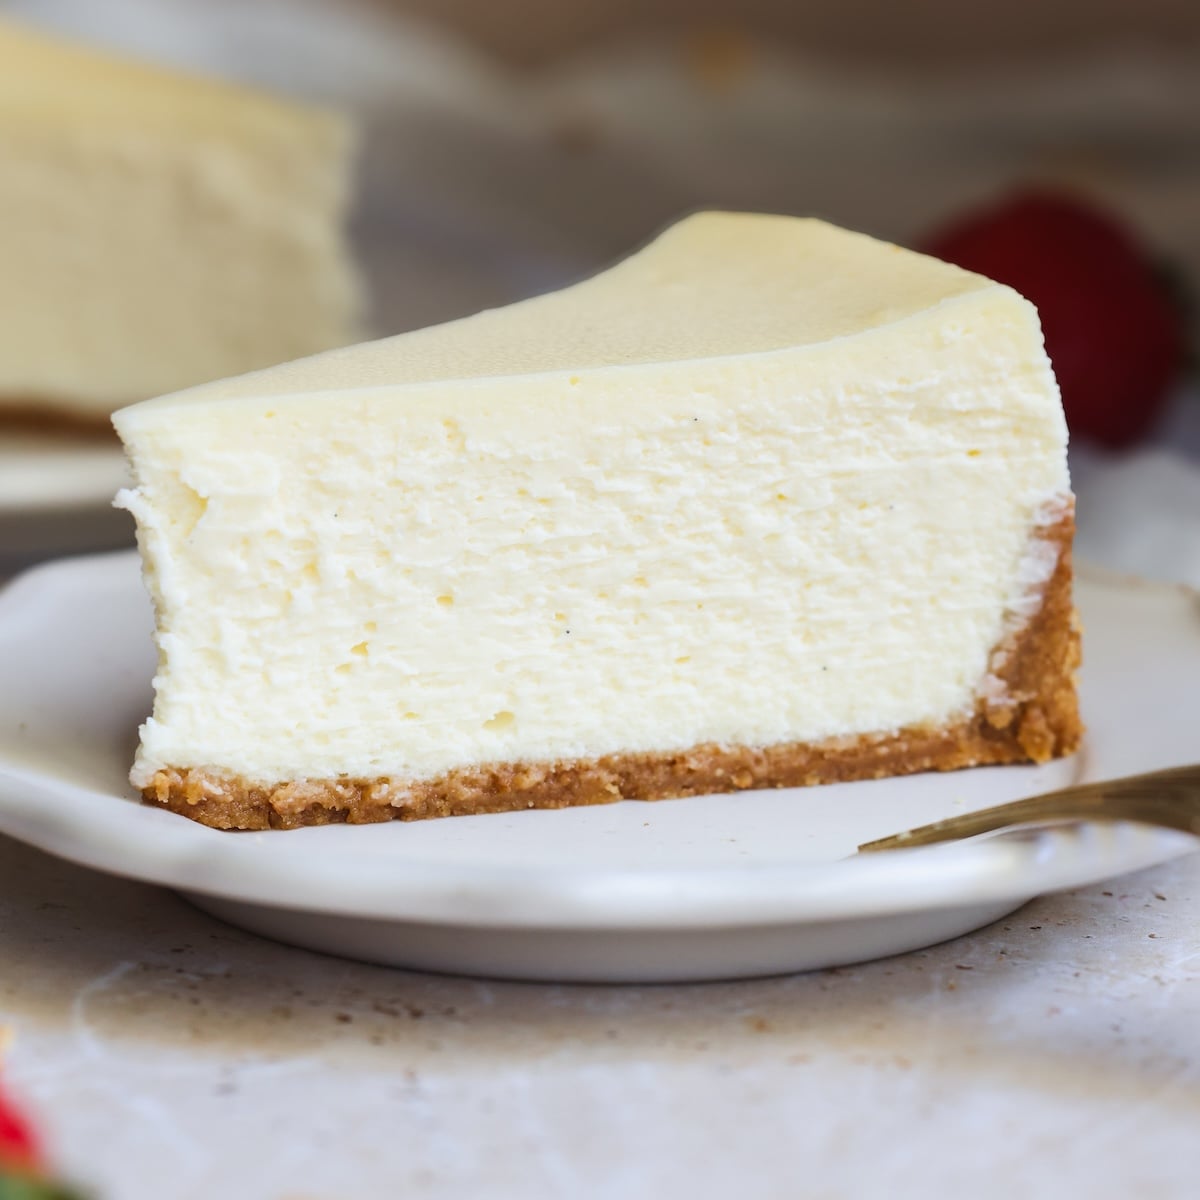
I’m a cheesecake fanatic (seriously, I used to eat 3 slices a day in college), so when I call this cheesecake the “best”, it is not an exaggeration. I have meticulously tested and perfected this recipe over 4 years, and it’s been a reader favorite on my blog for 3 years running. I’m sharing a video tutorial, step by step photos, and detailed tips to help you nail it, too – regardless of your baking experience.
I have tried so many cheesecake recipes over the past 40 years, and am always skeptical about others’ comments. This is THE best cheesecake I’ve ever had. It only gets better with each subsequent day. My quest is over.
– Tina, ★★★★★
My secret to the creamiest texture
Most recipes either over-bake cheesecakes, or bake them too fast without a water bath. This results in an eggy, dry texture that feels unpleasant after a few bites. My cheesecake is slightly underbaked by design: in a water bath, at 300F (lower than most recipes) for ~75-80 minutes. This prevents the cheesecake from heating too fast or rising too much. Once chilled, it sets up into a gorgeous rich, creamy and silky texture.
Of course, the ingredients matter too. This cheesecake is loaded with 4 blocks of full-fat cream cheese (Philadelphia preferred!), sour cream and heavy cream – my dairy trifecta!
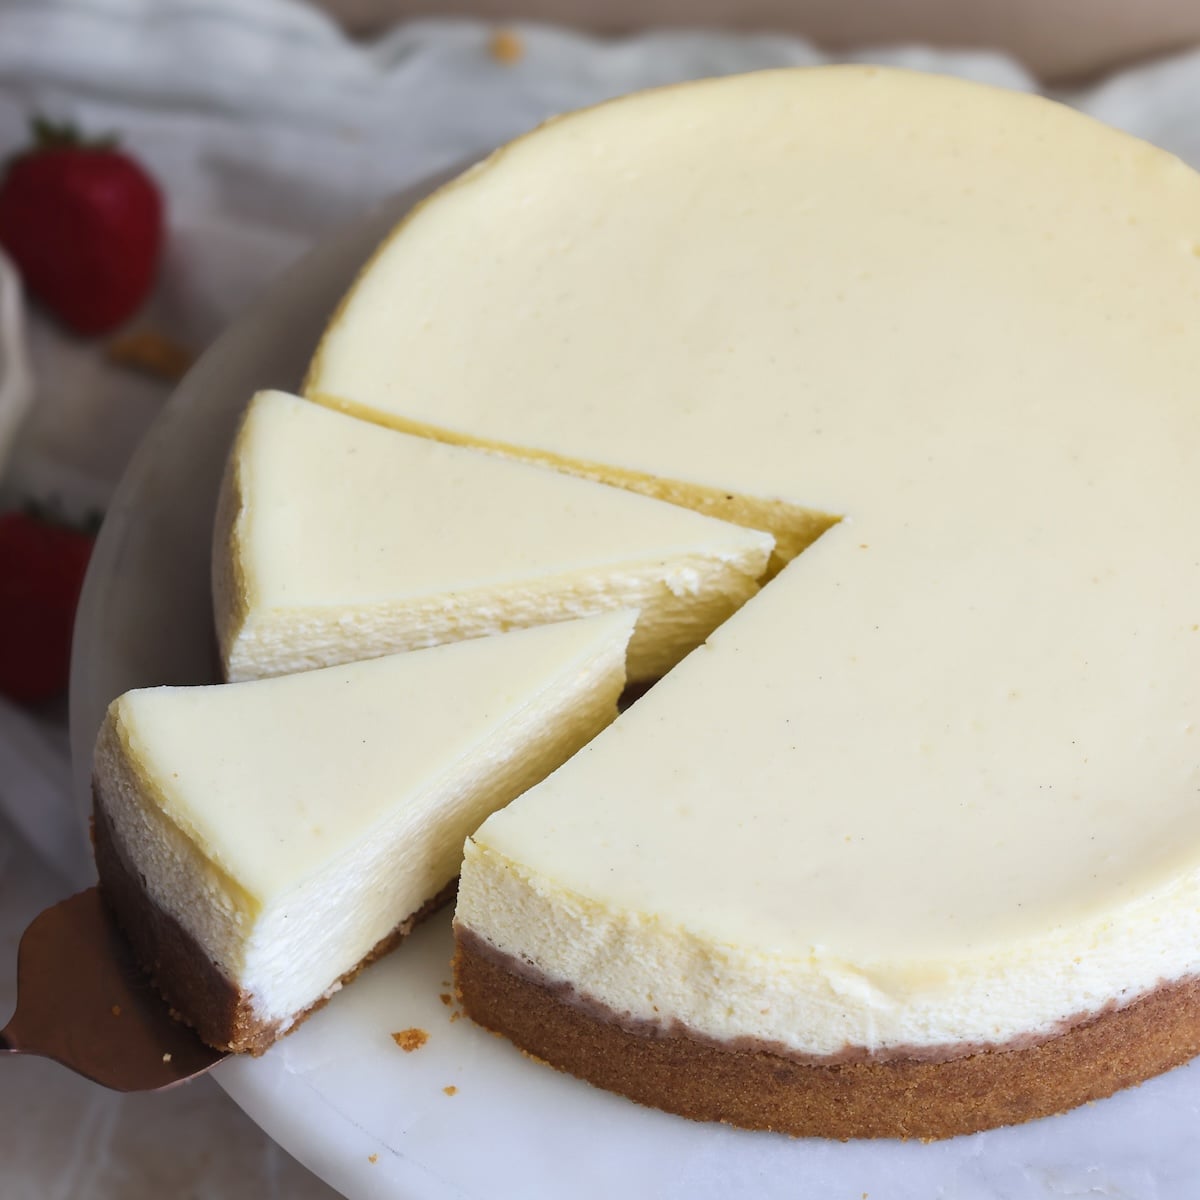
This is the creamiest cheesecake that I’ve made by far – and I’m no novice when it comes to baking cheesecakes!
– Pattie, ★★★★★
Yes, you do need a water bath!
I know water baths seem intimidating and can be tempting to skip, but I am going to convince you that they’re simple and absolutely worth it.
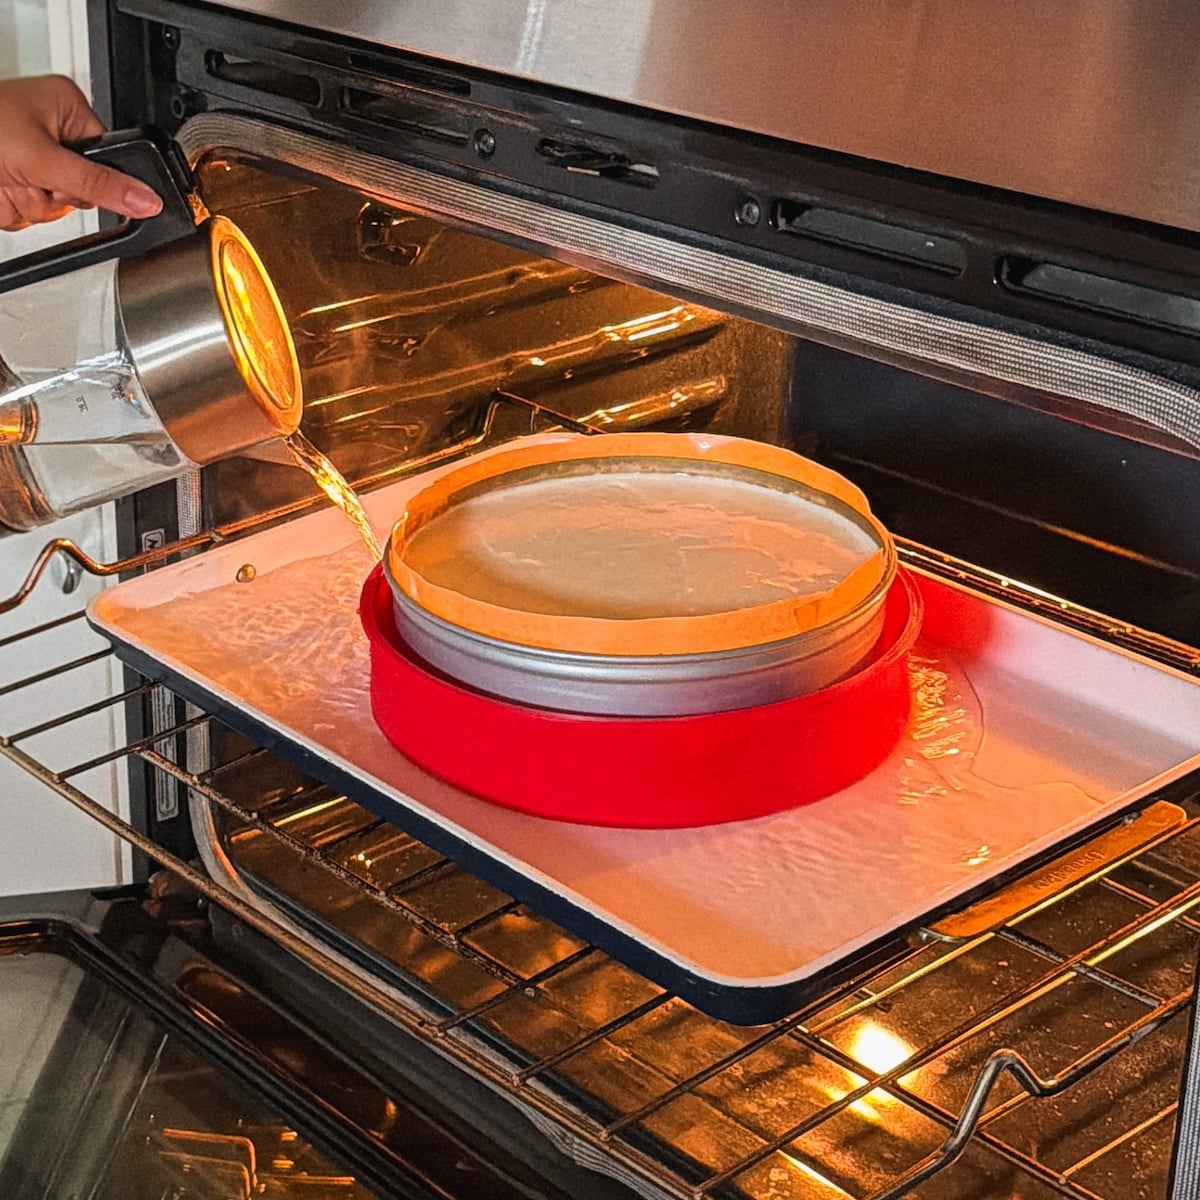
For a water bath, you place the springform pan with the cheesecake inside in a larger baking tray which is filled with ~1″ of boiling water, and place that in the oven to bake. The water never exceeds 212F (100C). This heats the cheesecake slowly and evenly while creating steam that keeps the top smooth and crack-free.
Some recipes suggest placing a separate pan of water on the lower rack instead, but I put this to test, and here are the mind-blowing results:
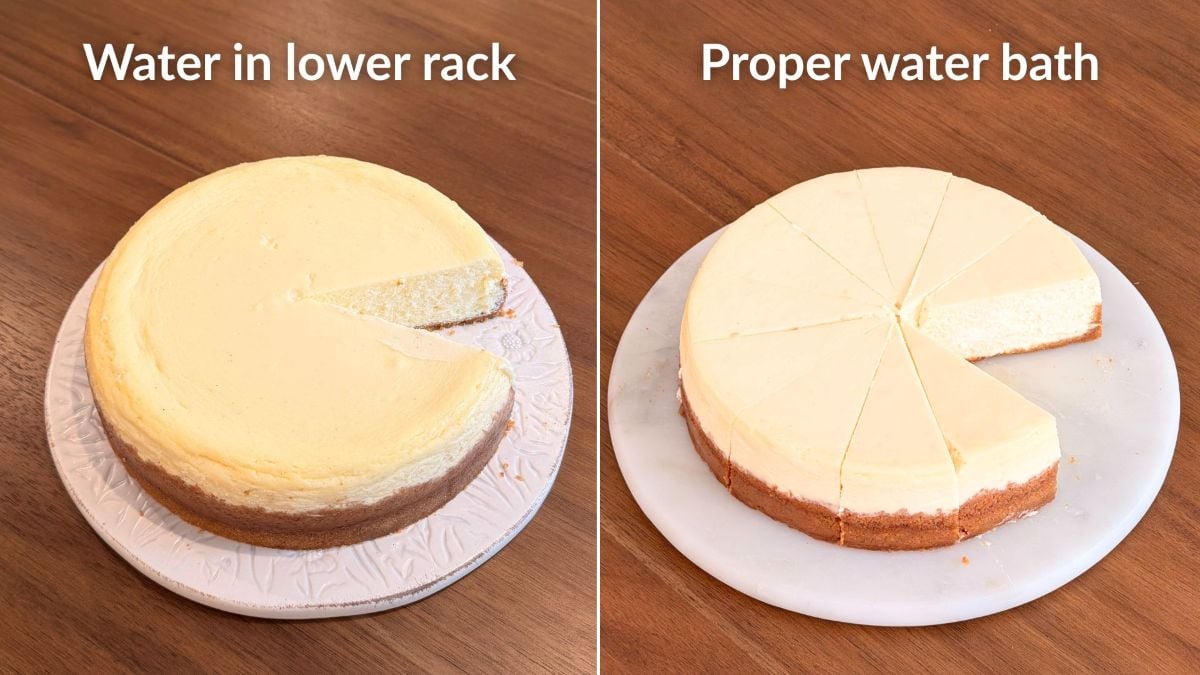
The cheesecake baked without a proper water bath is uneven, wrinkled, and slightly overcooked. The one with a proper water bath is lighter in color, perfectly smooth and straight, and evenly baked. No filter, no tricks – the proof is in the pudding. Bottom line: a proper water bath is a must.
2 ways to prevent water from leaking in
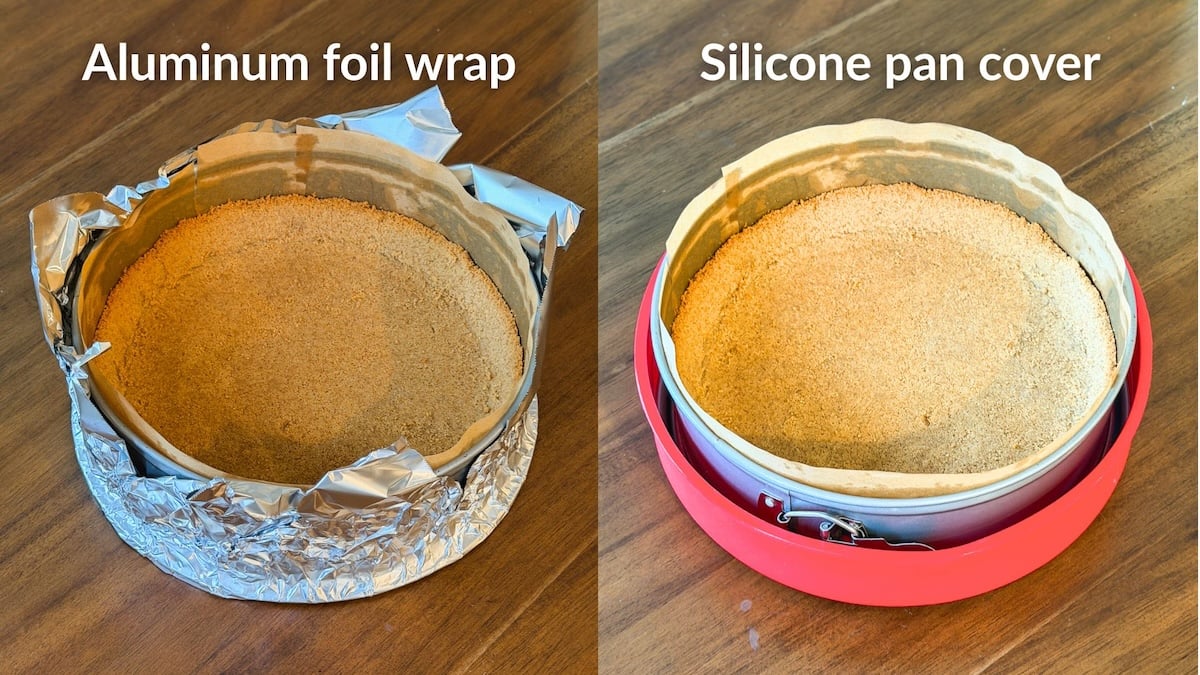
Water leaking into the cheesecake is a common concern when it comes to a water bath, but it’s easy to prevent. Firstly, you need to make sure you’re using a good quality, airtight springform pan (not old, loose ones!). Secondly, you wrap the pan on the outside for an added layer of protection. There are 2 ways to do this:
- Take 2-3 large sheets of aluminum foil and wrap them tightly outside the pan at different angles, rising almost to the top
- Use a silicon water bath protector which is designed specifically for this purpose!
Step by step photos
You can find the detailed recipe in the recipe card below, but let’s go over the steps with photos to help you visualize everything.
1. Make the crust
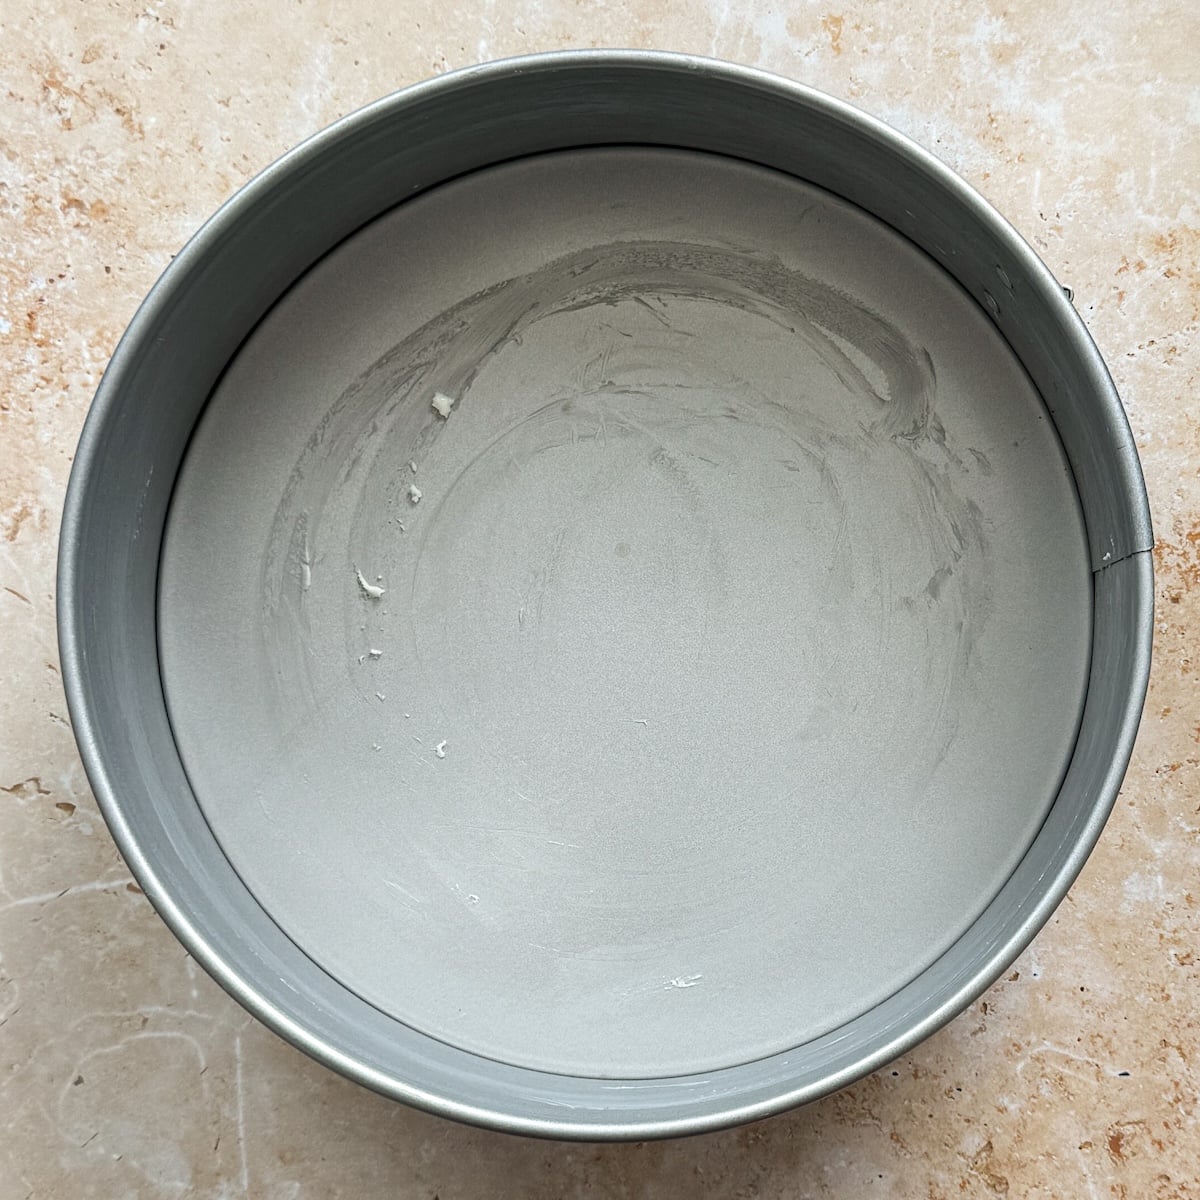
Brush a 9″ springform pan with butter.
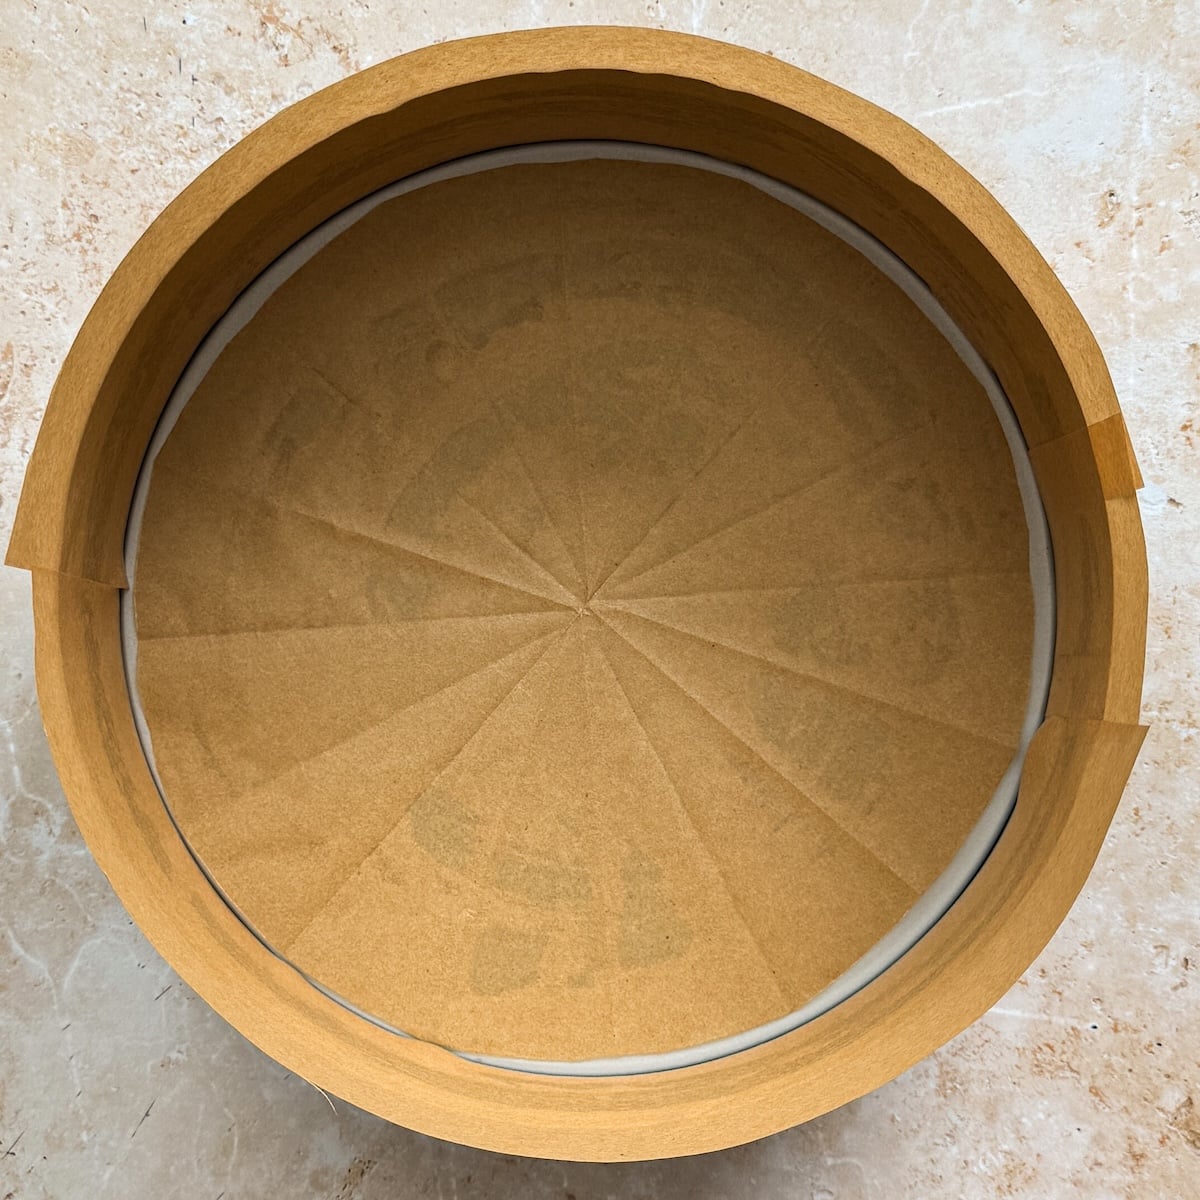
Then line it with parchment paper on the bottom and sides. This will not only help release the cheesecake easily, it will also prevent it from cracking as it cools.
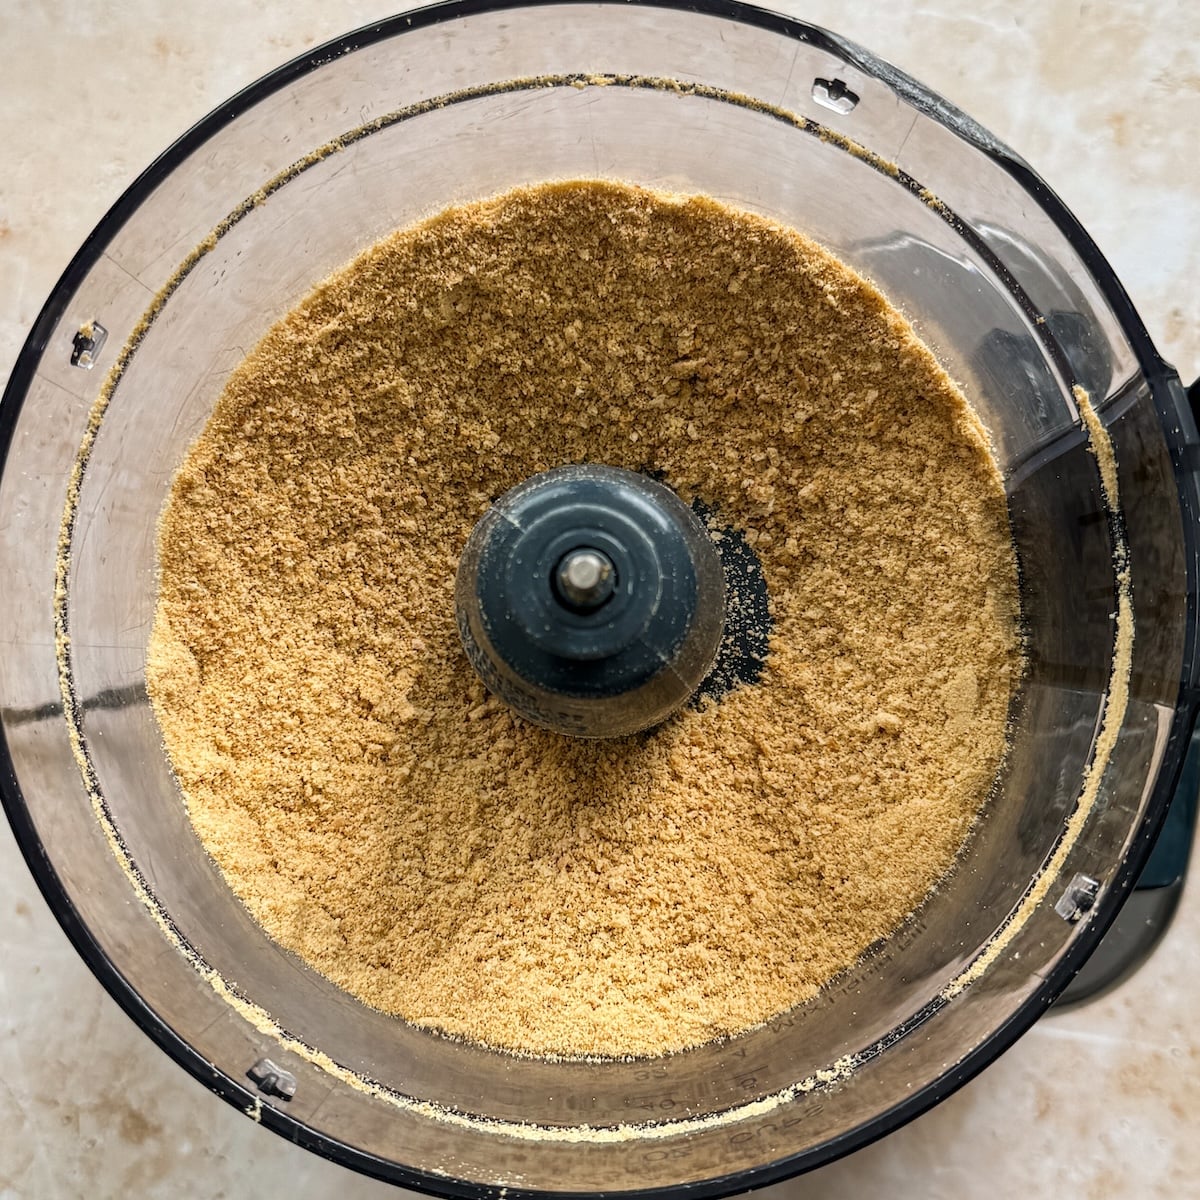
Grind graham crackers into a fine crumb.
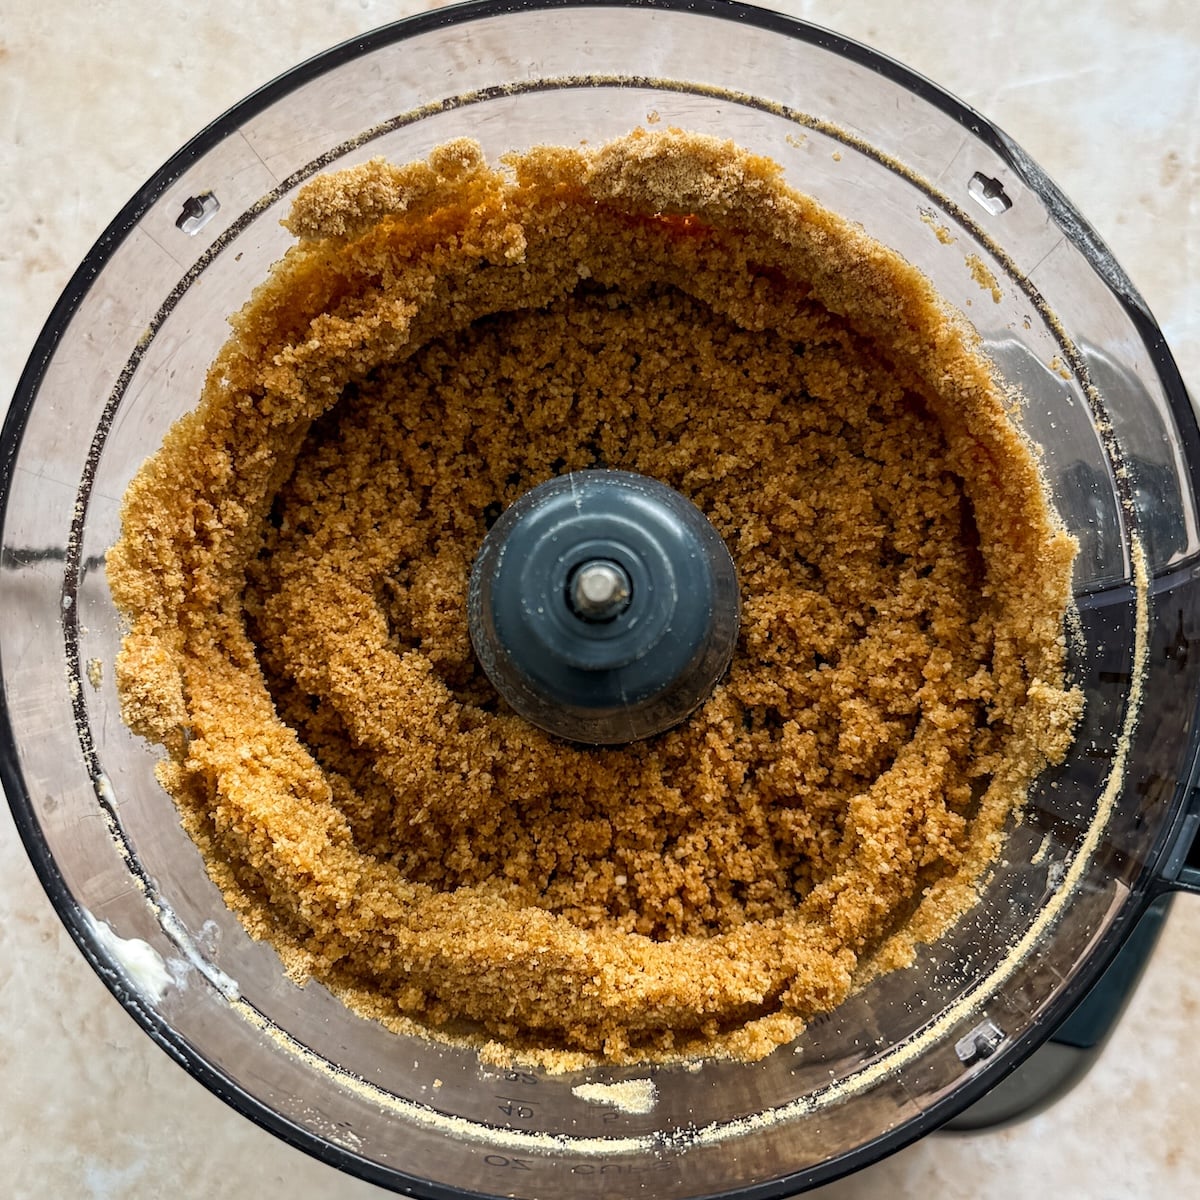
Add melted butter and pulse until combined.
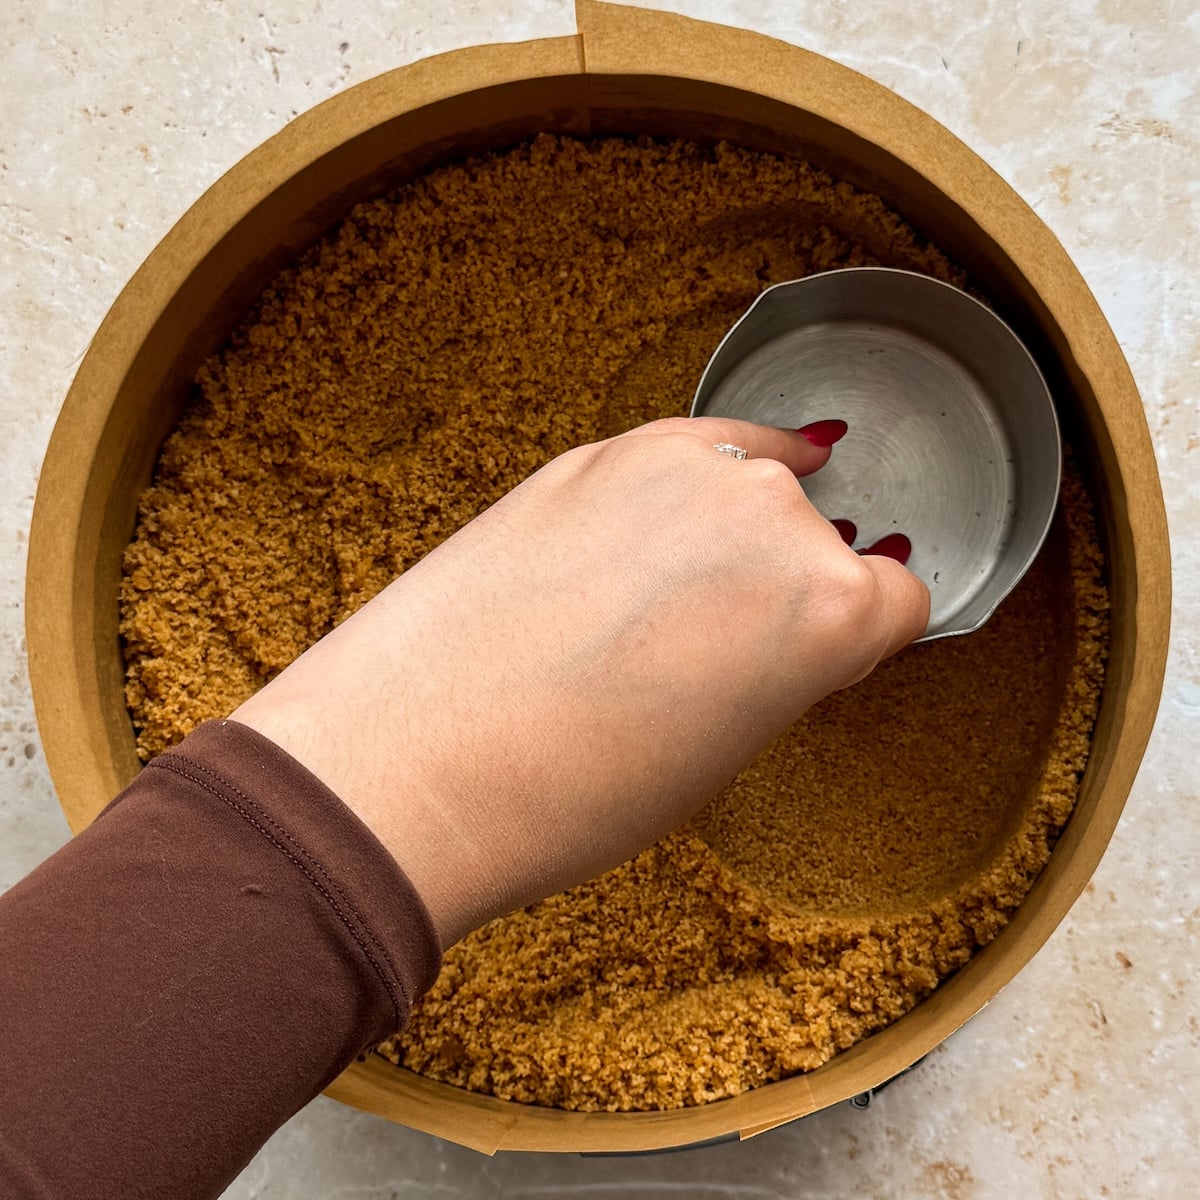
Press the crumbs into the pan to form a tightly packed crust – taking your time in this step will help achieve an even, crispy crust.
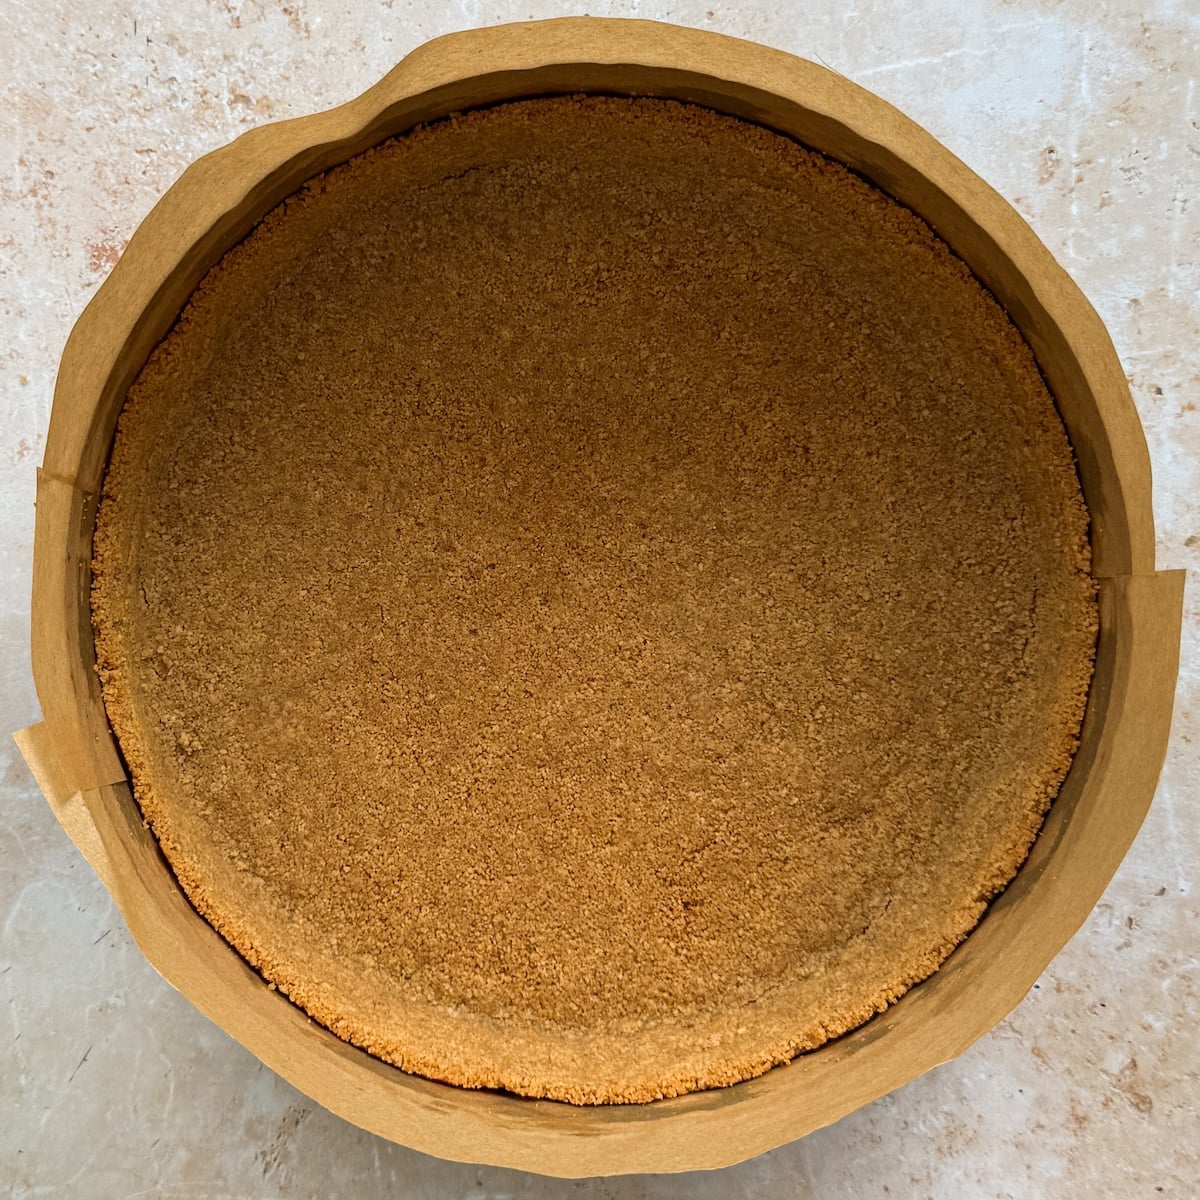
Bake the crust for 7-8 minutes and set aside. Once cooled, wrap the pan in aluminum foil on the outside, or place it inside a silicone pan protector.
Do you really need to pre-bake the crust?
After testing this recipe both with and without pre-baking the crust, I’ve found that pre-baking results in a more crispy and less oily crust. It takes no extra effort, you just need to plop in and out of the oven that you’re preheating anyway – so def do it.
2. Prepare the cheesecake batter
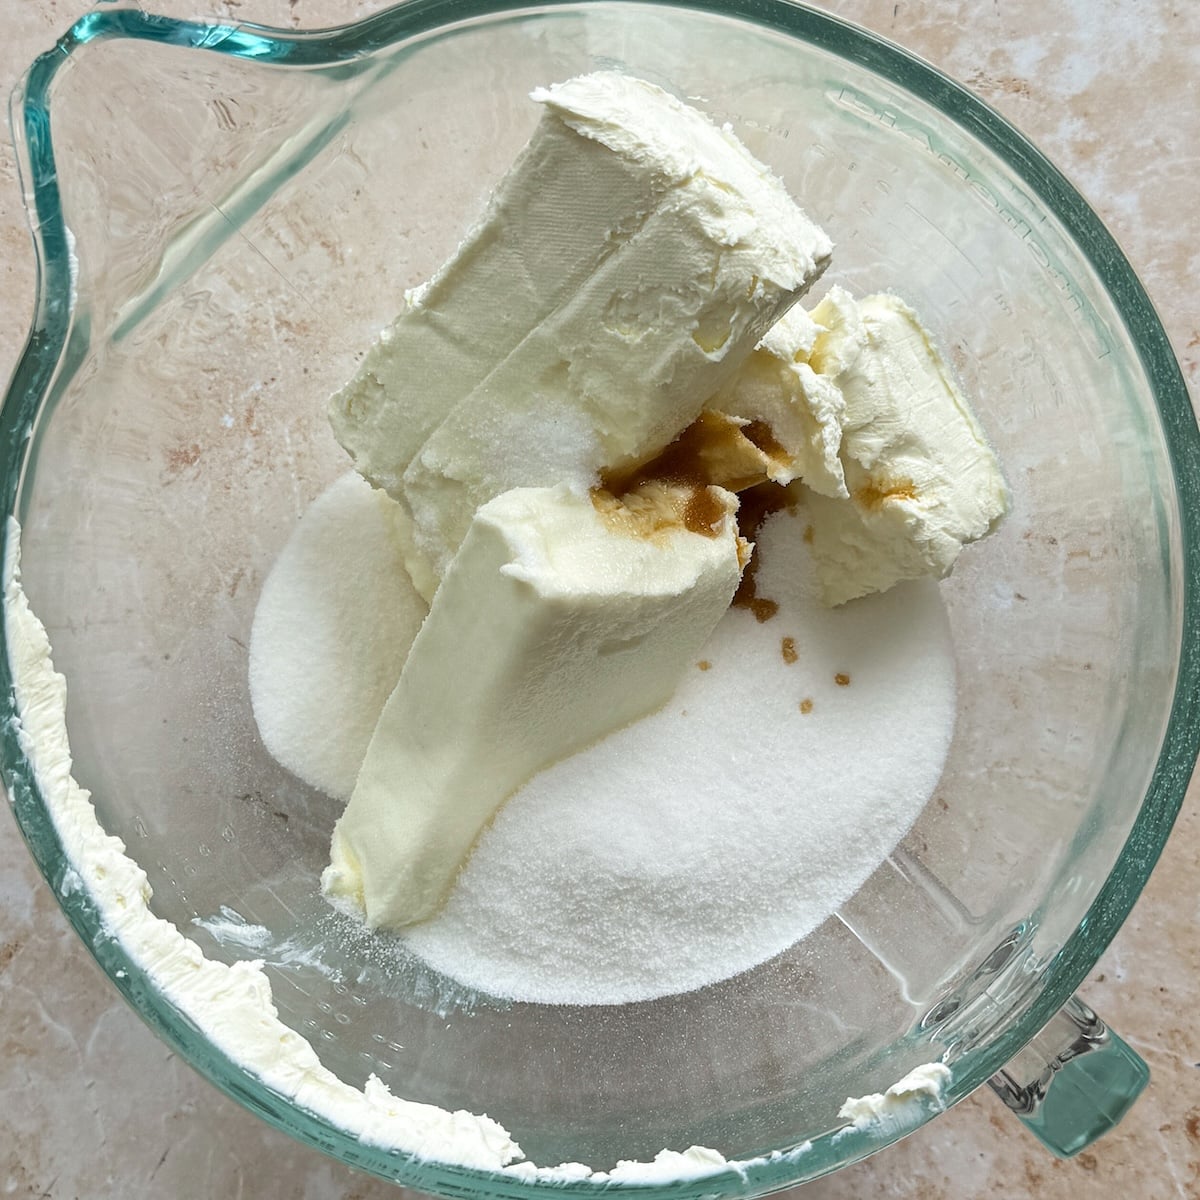
First, add the cream cheese, sugar, salt and vanilla to a bowl.
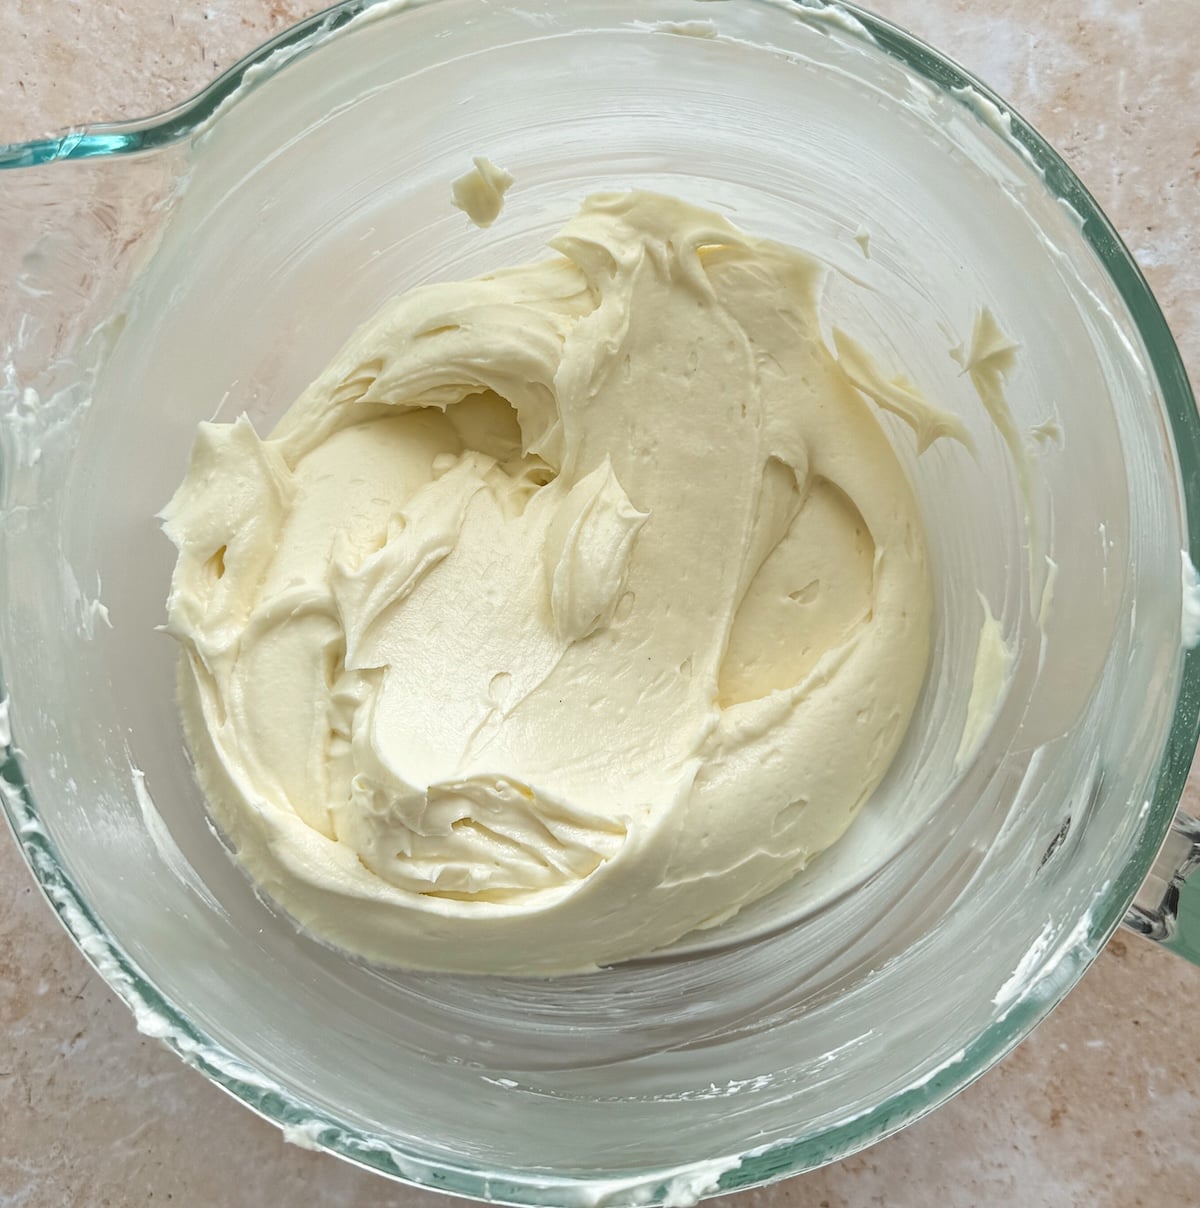
Whisk for 3-5 minutes until smooth and well-combined, scraping multiple times as you go.
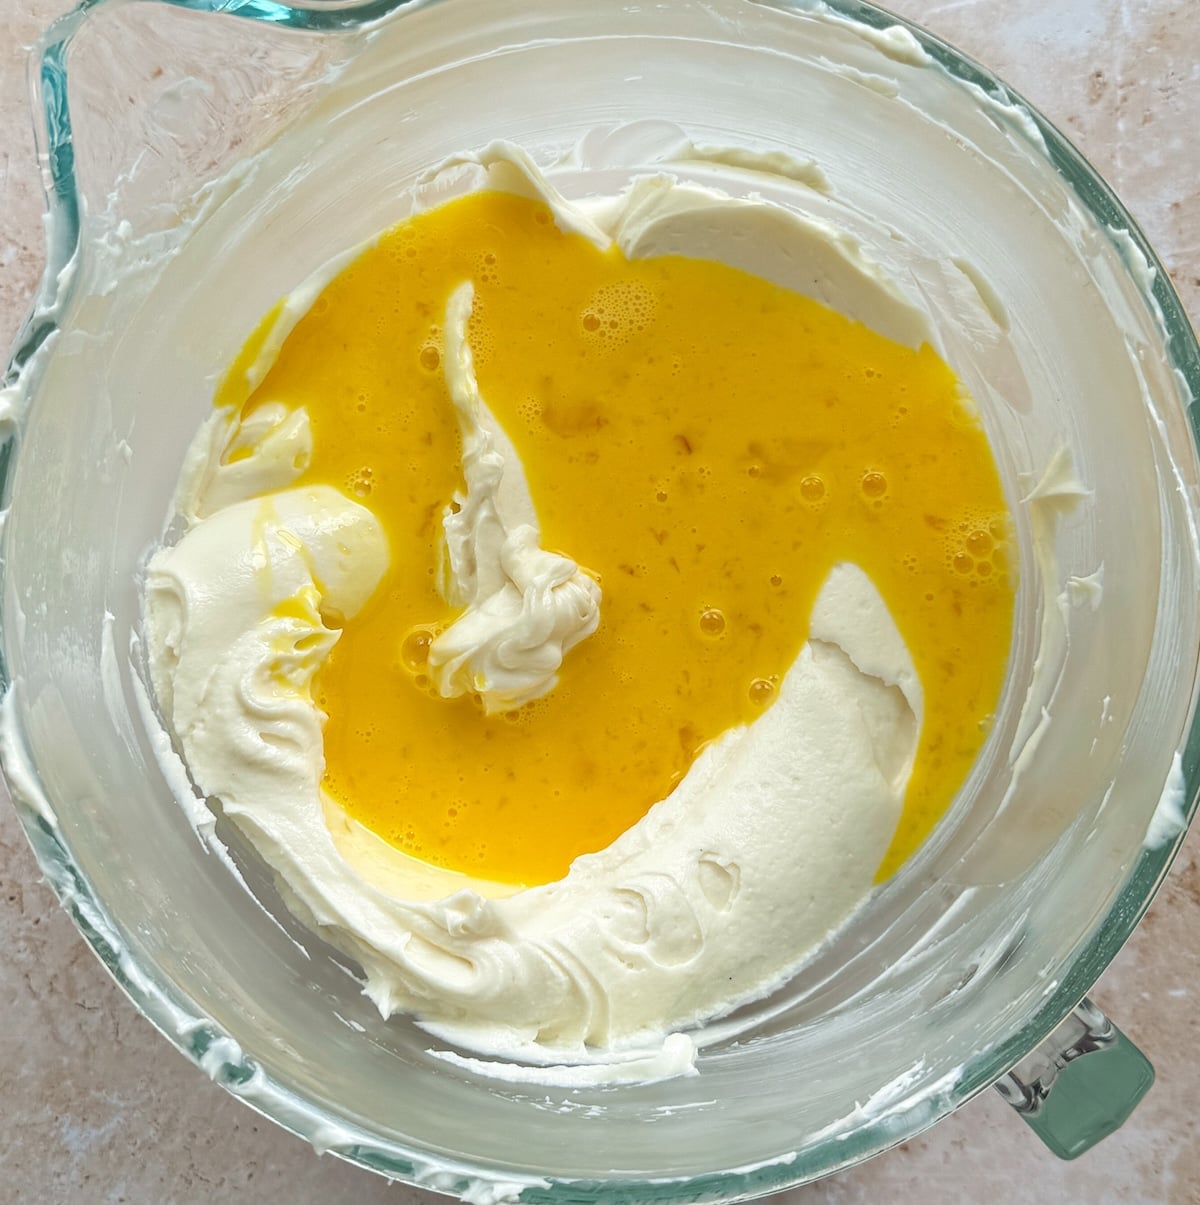
Break and lightly whisk the eggs separately, then add to the batter.
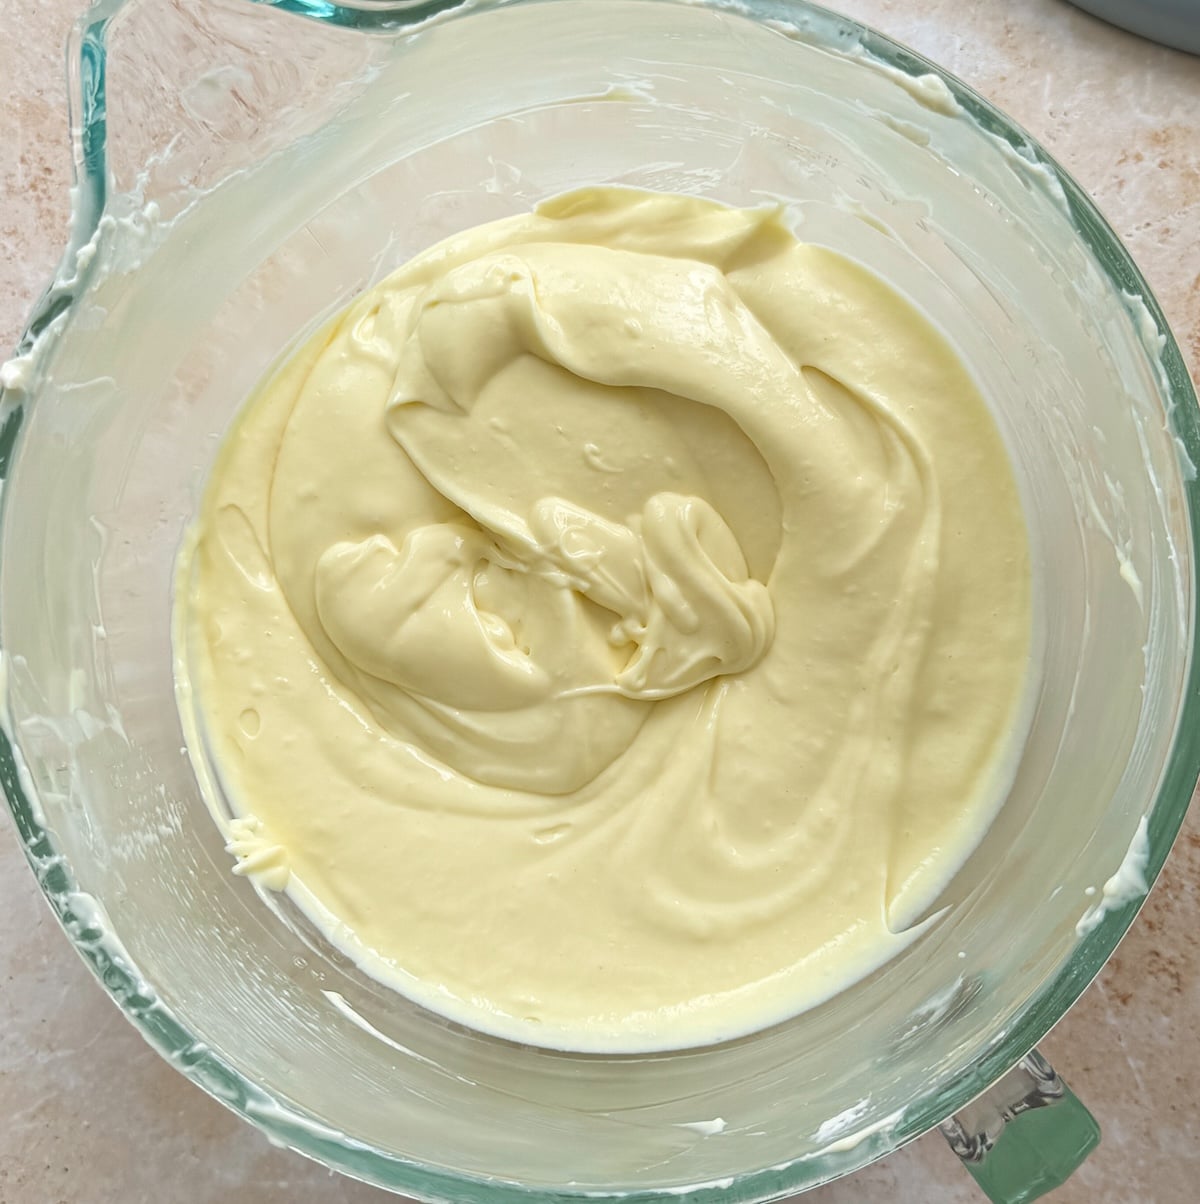
Whisk on low speed until the eggs are just combined.
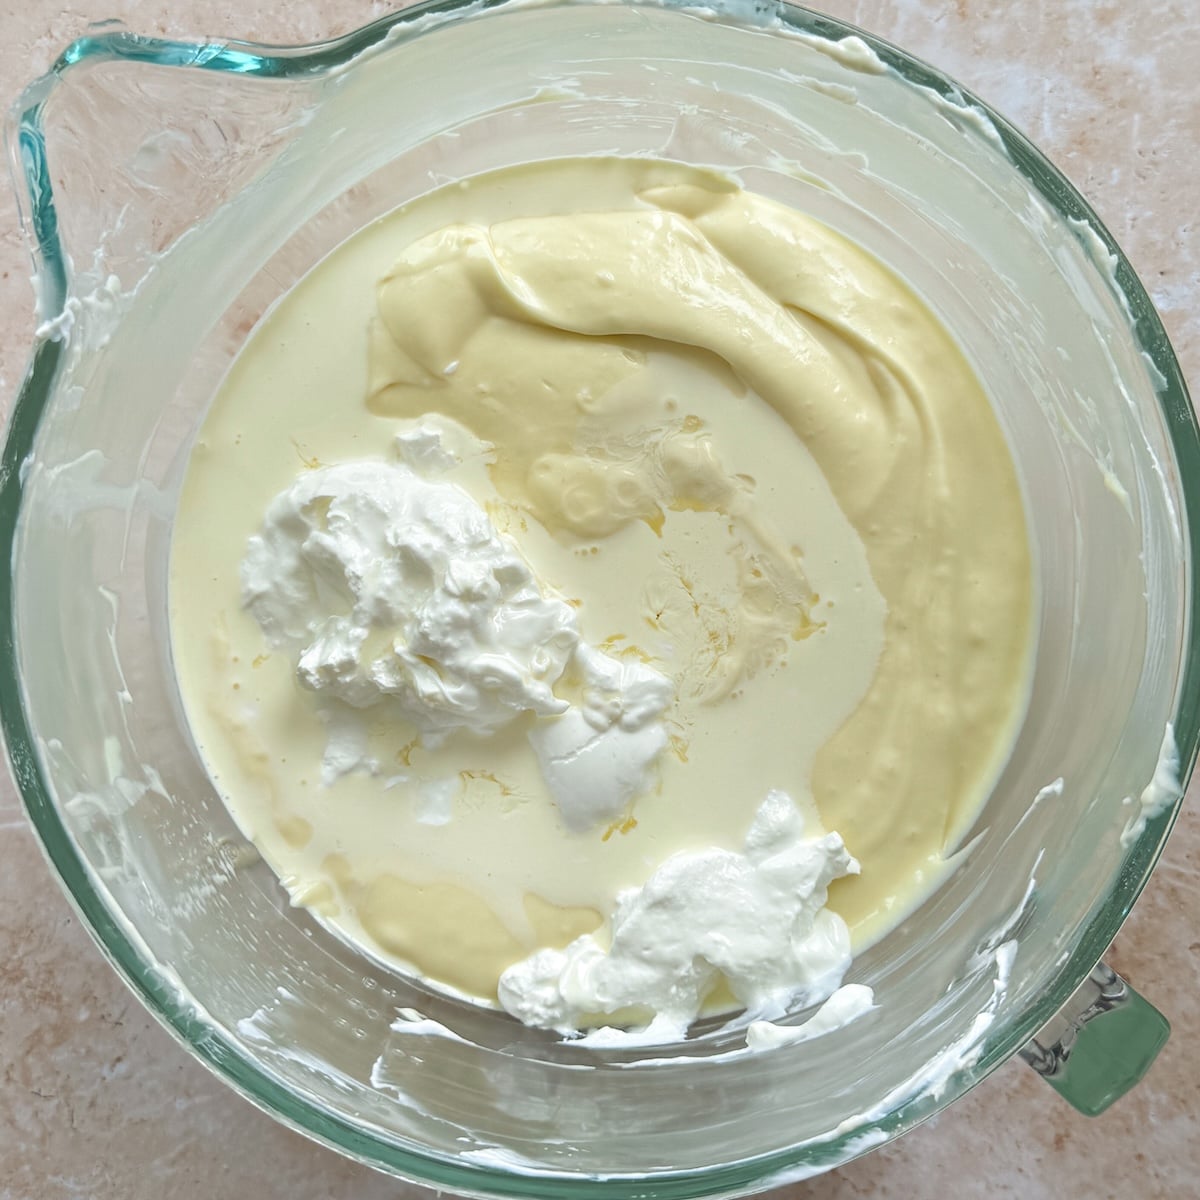
Add the sour cream, heavy cream, and lemon juice.
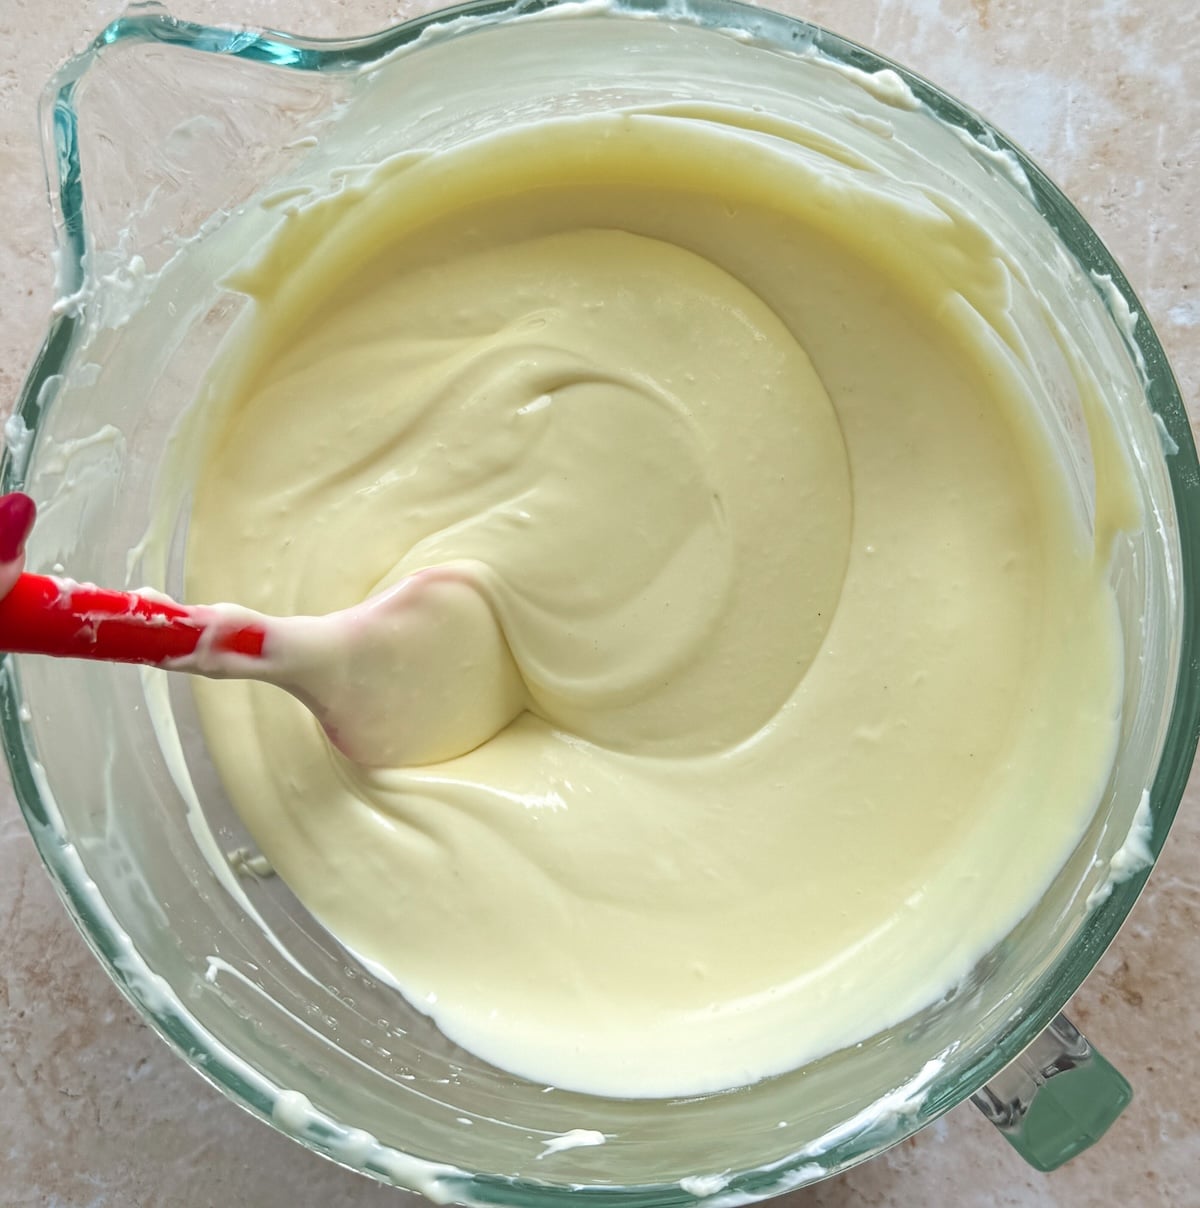
Whisk on low speed just until the ingredients are incorporated.
3. Bake & cool
Pour the batter on top of the baked crust, then gently tap out air bubbles.
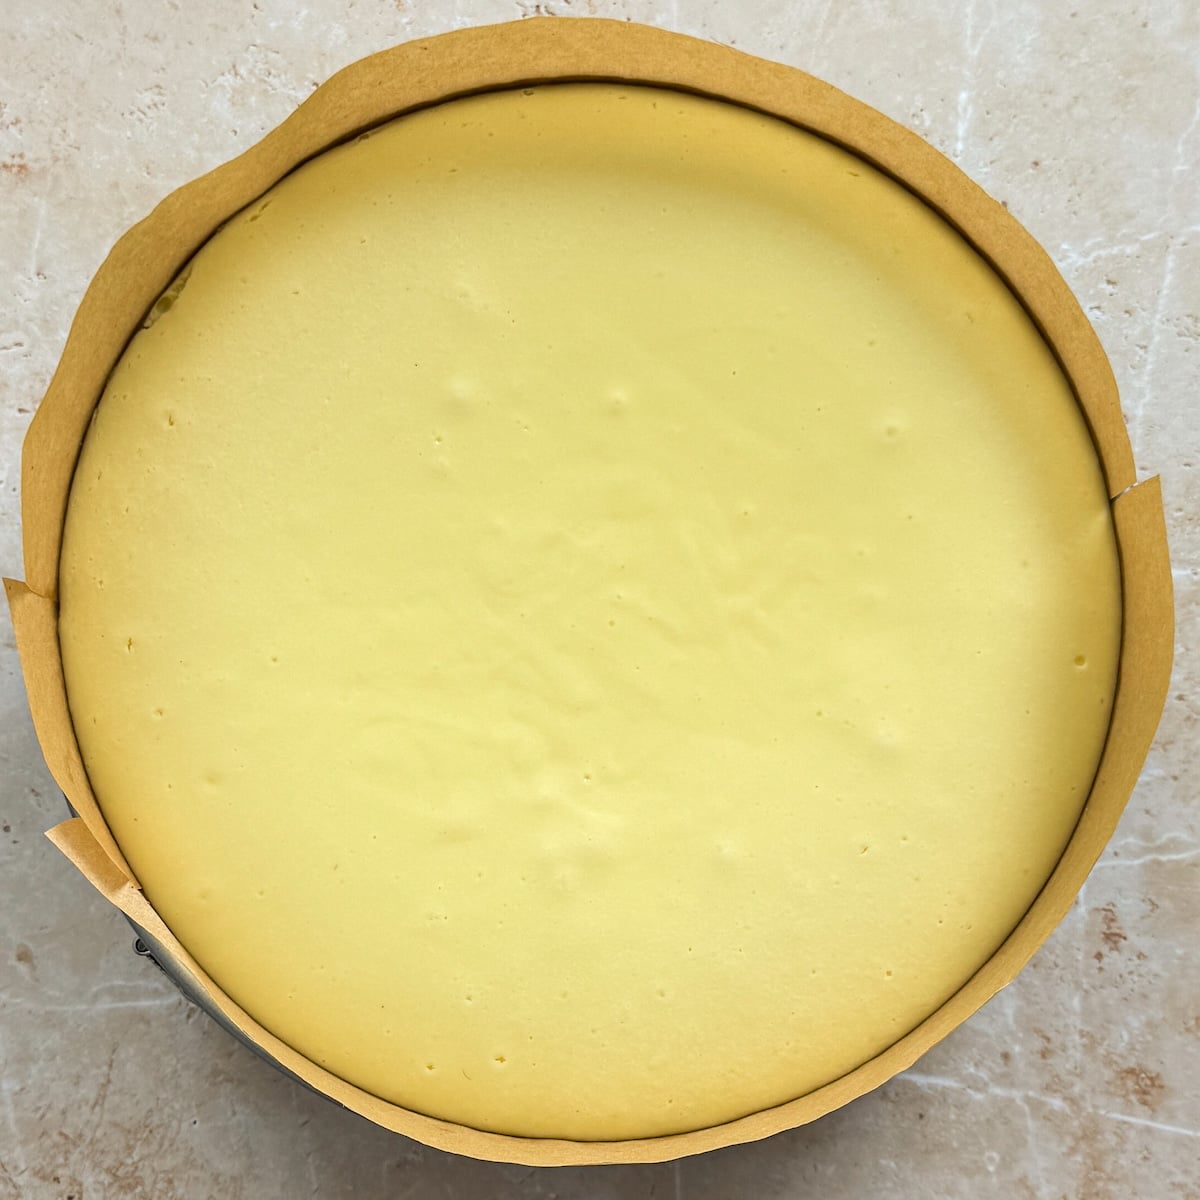
Bake the cheesecake low and slow in a water bath (more details below!).
Let the cheesecake cool at room temperature for 1 hour, then refrigerate for at least 6 hours or until firm to touch.
This cheesecake is phenomenal on its own, but if you want to add even more *pizzazz* to it, you can turn it into a Lemon Meringue Cheesecake with lemon curd and meringue on top, or a Strawberry Cheesecake by adding fresh strawberry compote!
Final tips before you make it
- Use high quality, full-fat ingredients, especially cream cheese (use blocks like Philadelphia), heavy whipping cream and sour cream (and if you don’t have access to sour cream, check my easy homemade sour cream recipe)
- Bring the ingredients to room temperature for at least 2 hours before starting so they mix evenly
- Scrape your bowl and whisk / paddle attachment multiple times while making the filling to prevent unmixed lumps of cream cheese
- Don’t over-whisk the eggs and creams. Whisk on low speed only until combined (30 seconds or less) – overmixing can incorporate a lot of air, which we don’t want
- Avoid sudden changes in temperature. Don’t open the oven door in the middle of baking, and let the cheesecake cool at room temperature before putting in the fridge
- Don’t rush the chilling process! This cheesecake needs to be fully chilled to set and maintain its creamy texture
The Creamiest New York Cheesecake
The creamiest New York cheesecake: rich and luscious with a crispy crust and perfect crack-free surface. Baked low and slow in a water bath and slightly underbaked for a silky texture!
Yield:12 servings
- Prep Time:
- 30 mins
- Cook Time:
- 75 mins
- Chilling Time:
- 7 hrs
- Total Time:
- 8 hrs, 45 mins
Email This Recipe
Enter your email and I’ll send this directly to you. Plus you’ll get new recipes from me every week!
Ingredients
Crust:
- 225g Graham Crackers (15 full graham cracker sheets)*
- 6 tbsp melted unsalted butter (85g)
Cheesecake:
- 32 oz full-fat cream cheese (4 8oz blocks or 910g), room temperature*
- 1 1/2 cups granulated sugar (325g)
- 1/2 tsp salt
- 1 tsp vanilla bean paste (or vanilla extract, but paste is superior)
- 4 large eggs, room temperature
- 1/2 cup full-fat heavy cream (120g), room temperature
- 1 cup full-fat sour cream (240g), room temperature*
- 2–3 tbsp freshly squeezed lemon juice*
Serving:
- Extra heavy cream or berries for decoration (optional)
Instructions
Prep:
- Bring all ingredients to room temperature
- Preheat oven to 300F (conventional / no fan)
- Prepare a 9″ springform pan. Lightly brush softened butter inside the pan and line it with parchment paper (I recommend a parchment circle on the base, and a separate strip of parchment along the sides of the pan).
Crust:
- Grind the Graham crackers in a food processor until they form a fine crumb. Add the melted butter and pulse until combined
- Transfer the crust ingredients to the prepared pan. Pack very tightly using the back of a measuring cup. You can push a little up the edges, or leave it all on the bottom for a slightly thicker crust
- Bake the crust in the pre-heated oven for ~7-8 min, then remove from the oven
Cheesecake:
- First, whisk the cream cheese, sugar, salt and vanilla for ~3-5 min until well combined and creamy. Keep scraping the sides and bottom of the bowl and the paddle / whisk to ensure everything combines evenly. I recommend using the paddle attachment of your stand mixer
- Break the eggs in a separate bowl and whisk lightly. Don’t overbeat because if the eggs get airy they will give a spongy texture to the cheesecake. Add them to the batter slowly and mix at a low speed until JUST combined
- Add the cream, sour cream, and lemon juice and mix at low speed until just combined. Keep scraping the bowl and whisk / paddle
- Prepare the pan with the baked crust for the water bath. Either wrap it tightly with 2-3 large sheets of aluminum foil on the outside, or gently place it inside a silicone water bath protector
- Pour the batter into the baked crust. Gently tap the cheesecake pan on the counter a few times to release any air bubbles; this will help prevent cracking
- Place a large tray in the oven and fill it with ~1 inch of boiling water. Place the cheesecake pan in the water and bake for about ~75-80 min in the middle rack. Don’t open the oven until at least 70 minutes. When done, the cheesecake should be set at the edges but be very jiggly in the middle (like jello!). The exact time may vary depending on your oven, the color of your pan(s) and how much water is in your bath – so trust the jiggle test over the clock!
- Cool the cheesecake for 1-2 hours at room temp. After this, place it in the fridge and chill for at least 6 hours (or overnight), uncovered, until it’s fully cooled and firm to touch. Fridges can vary, so make sure the cheesecake is fully set before removing from the pan (overnight is usually safe!). I chill the cheesecake with the aluminum foil / silicone protector still in place
Serving:
- Once the cheesecake has chilled, carefully remove it from the pan and transfer to a serving stand. If there are any imperfections, you can use a hot offset spatula to smooth them out
- Optionally, decorate the cheesecake with plain whipped cream and / or berries. Serve and enjoy!
Video Tutorial
Notes
- Parchment paper: Make sure to put a parchment circle on the bottom of the pan and parchment strips on the sides. The parchment on the sides will help make sure the cheesecake doesn’t stick to the edges of the pan. Cheesecake shrinks slightly as it cools after baking, and if it is stuck to the edges of the pan, it can crack. The parchment paper prevents this issue.
- Graham crackers: You can substitute them with Wheat Digestives in some parts of the world
- Sugar in crust: I originally shared this recipe with sugar in the crust, too, but have since updated to remove it as I find it better this way. If you want to sweeten the crust, too, you can update the crust quantities to 190g Graham Crackers (12 full sheets), 3 tbsp granulated sugar (35g), and 5 tbsp melted unsalted butter (70g)
- Cream cheese: Make sure to use full-fat cream cheese that comes in blocks, not tubs. Philadelphia is always a safe choice
- Sour cream: If you can’t find sour cream where you live, you can make your own at home with this recipe
- Lemon juice: Please don’t omit this! It adds a beautiful fresh tangy flavor that complements the cream cheese beautifully
- Convection (fan) oven: I highly recommend a no-fan setting for this cheesecake as fan forced ovens tend to run hot and can cause cracks. However, if you have no option and have to use a fan oven, reduce the temperature to 275F
- Make ahead: You can bake this cheesecake up to 2 days ahead of time, and keep it refrigerated in the springform pan. After the first night of chilling, cover the cheesecake with cling wrap. Remove from pan and decorate when ready to serve
- Freezing: This cheesecake can be kept in the freezer for up to 3 months; just make sure to cover it with cling wrap and place it in an airtight container. Let it thaw overnight in the fridge before serving

Comments
Maheen
Hi Zoha,
my son requested a cheesecake and bakes this one. its everything you described it as, silky, creamy and rich.
I didnt see may cornstarch in your written recipe and didnt add it…
thank you for sharing this recipe!
Zoha
So glad you liked it!!
Jamie-lee
Hi , can I use condensed milk instead of sugar? and how many ml of condensed milk? thank you
Zoha
Hi! I do not recommend that, I haven’t tested this recipe with condensed milk
April
how do you make this a pumpkin cheesecake?
Zoha
Hi April! I haven’t tried that myself but my best guess would be to replace the heavy cream with pumpkin puree, and adding cinnamon or other spices along with the sugar at the start
Carol T
Every cheesecake I’ve ever made before has cracked. I made your recipe for a memorial service at my church. It came out perfectly. I baked for 80 minutes and added 1 Tbsp of cornstarch like you mentioned in the video. I had to use a hand mixer though because I don’t own a stand mixer. There were no cracks and the parchment paper peeled right off. Everyone complimented me on the cheesecake and I had no leftovers. This will be my go-to recipe whenever I need a New York cheesecake.
Zoha
Awh, thank you so much for the kind review, Carol! I really really appreciate it.
Theresa
Hello! for the Best Cheesecake Ever – I don’t see any flour or cornstarch. Am I missing something or is it just not needed?
Also, do you think I could add lemon zest to make it a “lemon” cheesecake?!
Looking forward to making it 🙂
Zoha
Hi Theresa! I used to add cornstarch but no longer do it and it’s not needed. And yes to lemon zest! I have a lemon meringue cheesecake recipe on my blog, too 🙂
Ann Winter
the only mistake I made was in buttering the pan before placing the parchment. I used 5 tablespoons of butter in the pan. it came out fantastic though and other than that error I would definitely make it again. fabulous cheesecake
Zoha
Oh, you only need a tiny tiny amount of butter! Glad it worked out though 🙂
Julie Montoya
Hi Zola,
I notice in your cheesecake recipe one says use corn starch and the other does not . They are both your ny cheesecake. What is the difference? I love your cheesecake
Zoha
Hi Julie! I used to add cornstarch but recently updated the recipe without cornstarch. It’s not needed 🙂
Elm
Hi Zoha, my cookie base turned out super soggy, even though I wrapped the pan in a few layers of aluminum foil. So I don’t think the water leaked in. Do you have any tips to prevent this from happening again?
Fatima Ashraf
My search for the ultimate New York style cheesecake ends here!!
Zoha
WUHU!!
Tania
Hello Zoha! I would love to halve the recipe, so if I use a springform tin with half the volume, how long should I bake it for? Have you ever tested it, or can you give recommendations as to what I should look out for to take it out at the right time and not overbake it?
Zoha
HI Tania, it would really depend on the size of the tin and how deep the batter is. I am not comfortable giving you a recommendation as i have not tried it myself
Eliza M
I used biscoff cookies instead of grahams and reduced the sugar to 1 cup. It was great! Easily the best cheesecake I’ve had in a very long time. I also put the baking dish of boiling water on the shelf beneath the cheesecake because my springform pan leaked and ruined my first crust. But it set perfectly after 75 minutes! Cooled on the counter for almost two hours then put it in the freezer for an hour since I made it day of. No cracks and the consistency was perfectly creamy!
Zoha
YUM I need to try with biscoff again!
anam
Hi Zoha! I absolutely love your cheesecake recipe and got tons of compliments on the cheesecake. Just one question, is there any way I could use stevia powder instead of sugar for a healthier version?
Zoha
Hi Anam! unfortuantely I cannot recommend that as the sugar plays many roles, not just sweetness, and the stevia will heavily impact the texture.
Rov
Can I use a hand mixer and also how much of the ready graham crumbs should I use? The honey maid kind. Thanks
Celena
Hi Zoha!
I have never made this cheesecake before but for practice, i would like to make this in a 4 inch pan. May you please tell me the exact grams for this? Thank you
SJ
Third time using this recipe, and this time I added pumpkin spice and a big scoop of pumpkin purée to it for Thanksgiving. So versatile and SO GOOD!
Neva
Looks so good!!
Reah L.
1st time ever making cheesecake and this is the recipe I chose, it was AMAZING!!
Couple things I did different though was put a pan of water on the rack below my cheesecake pan. I tested my spring pan in water before putting my crust in and it leaked like crazy so I wasn’t about to risk anything, not even with foil 😅
Also, when the 75min was up I checked to make sure it was done then shut off oven and left the oven door cracked open for like an hour.
No cracks, came out absolutely perfect! 🥰
Purvi
I’ve made this recipe TO THE T a few times and it’s always flawless/perfect. My family and friends look forward to it whenever I suggest bringing it for gatherings or events. I’ve followed countless cheesecake recipes and Zoha’s is by far the best one yet!
Nancy H.
Can you substitute pure vanilla for the vanilla bean paste? If so, how much vanilla would you use?
Kim
Amazing cheesecake! Exactly the right texture (most cheesecakes seem waxy) and I have made so many variations on this one recipe. Our favorite is to sub speculus cookies for the crust, add some as a middle layer then get the butter and melt to spread on top!! I have no need to ever search for another cheesecake recipe.