
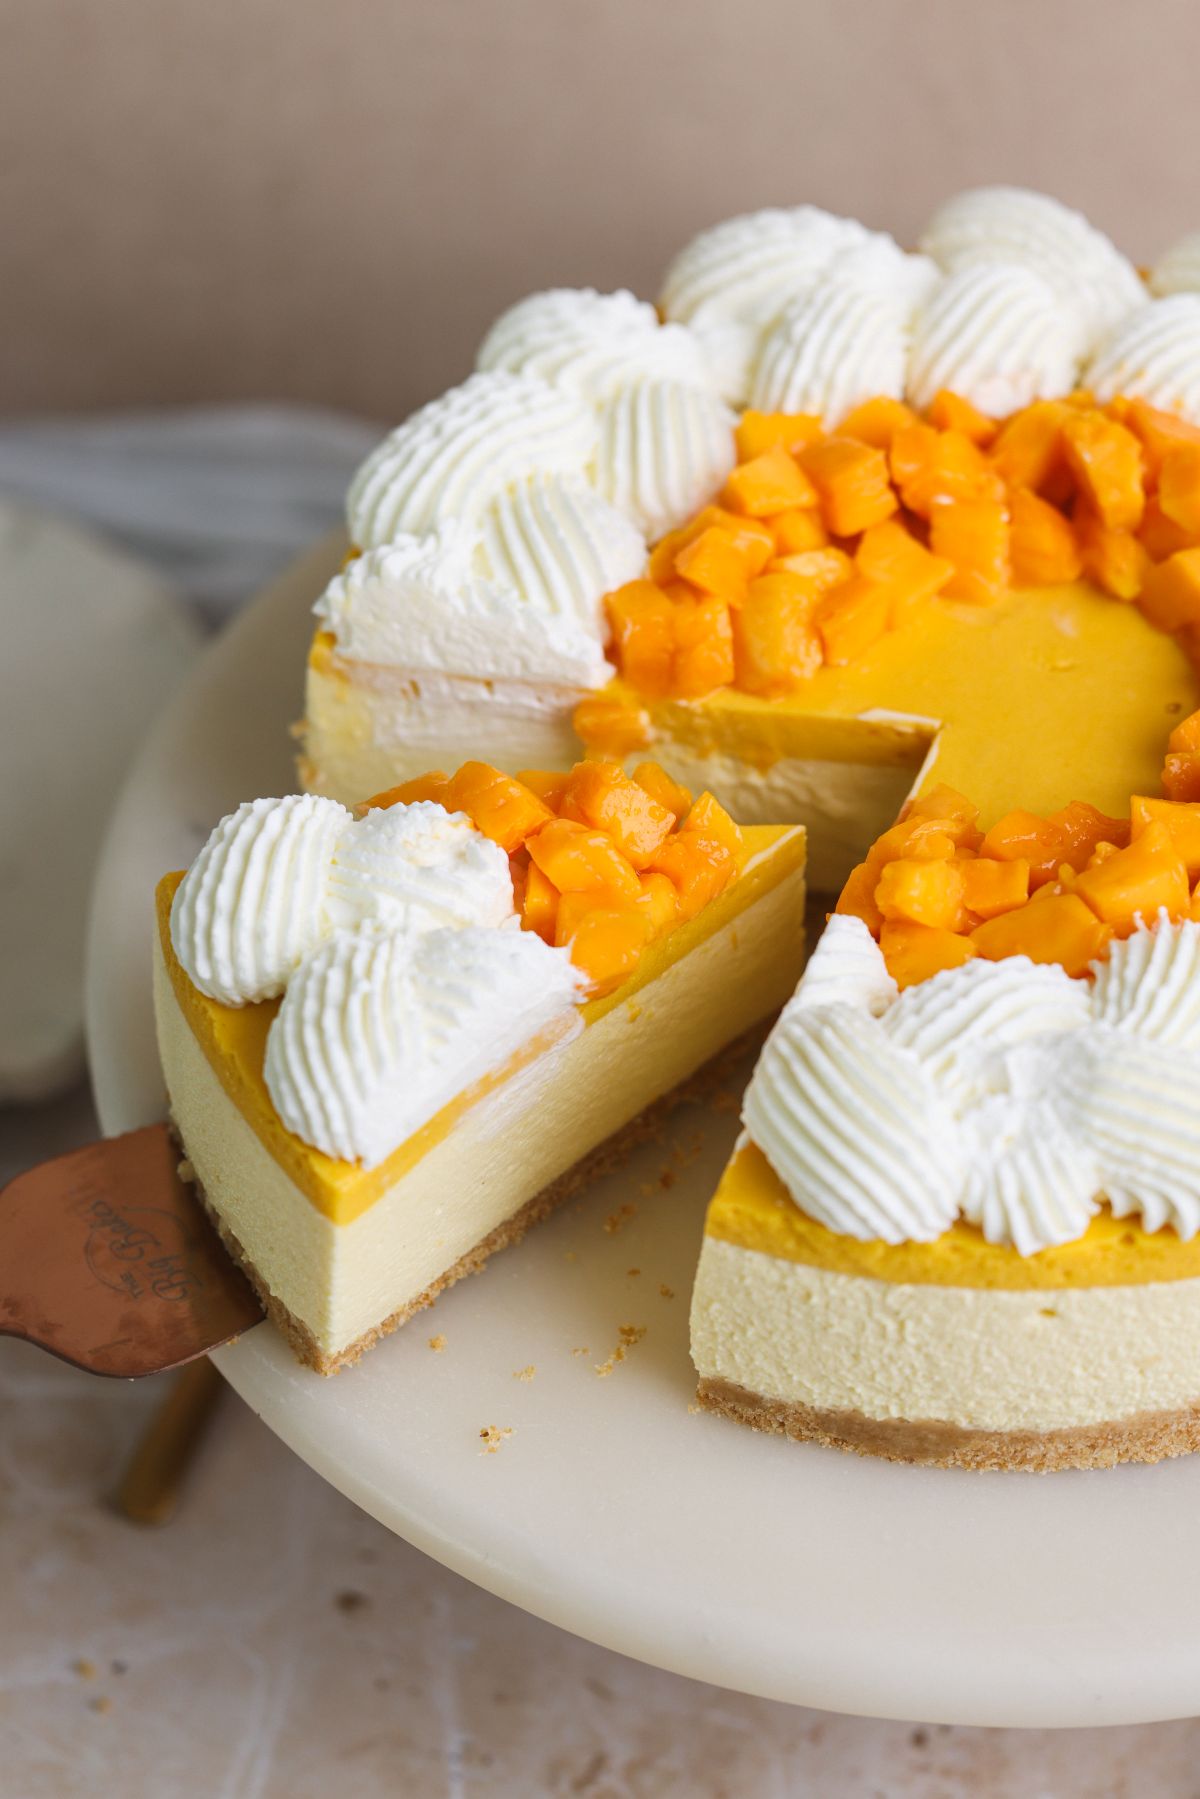
This No Bake Mango Ice Cream Cheesecake is the creamiest, dreamiest, most irresistible mango dessert. Made with just 5 ingredients and barely any effort, it's packed with mango flavor and sets up beautifully. The secret? Mango ice cream!

It has taken me 3 years and countless failed attempts to perfect this recipe. It was surprisingly difficult to achieve a strong mango flavor while also getting the cheesecake to set properly. Turns out, mango ice cream is the perfect hack - it has a strong mango flavor and sets far more easily than fresh mango pulp! Trust me - you need to try this one.
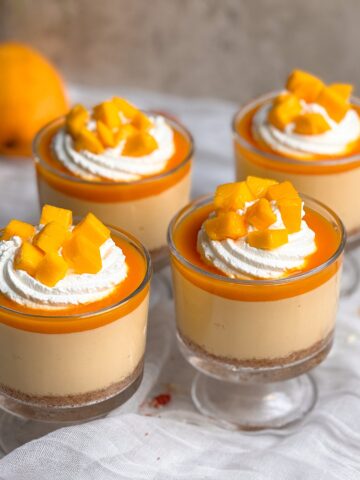
Can't find mango ice cream? Check out my no bake mango cheesecake cups which use mango pulp instead!
Why you'll love this recipe
✨It is unbelievably easy. The cheesecake filling comes together with just 3 ingredients: cream cheese, mango ice cream, and gelatin! Honestly, the hardest part is waiting for it to set overnight… but it is so worth the wait.
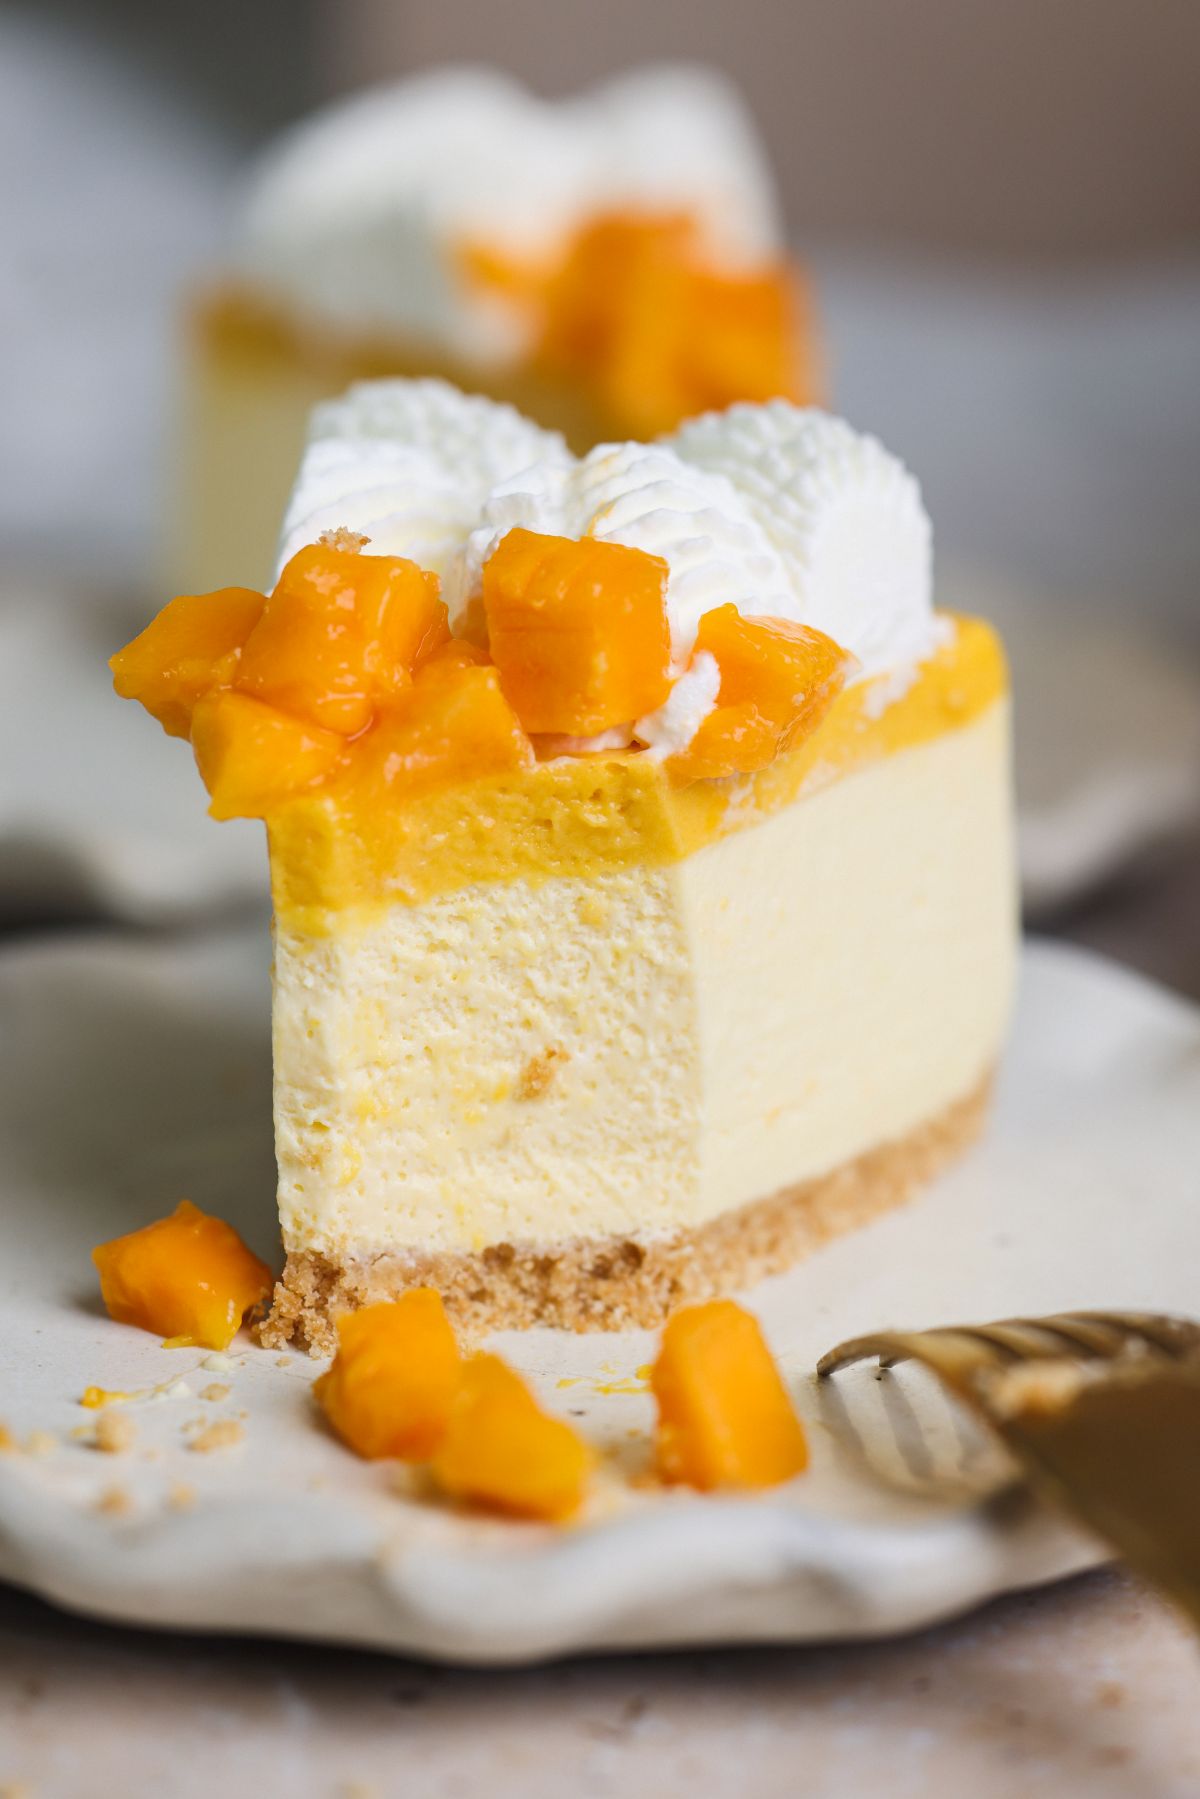
🥭It tastes divine. You get hit with the beautiful flavor of mango as soon as this cheesecake enters your mouth, followed by the yummy tang of cream cheese. It is perfectly balanced, not too sweet and garnished with fresh mango to tie everything together.
🍰The texture is sublime. The cheesecake is incredibly creamy, rich and luscious. It sets up perfectly in the fridge and holds shape at room temperature without being gummy like some gelatin desserts can be!
Components
This cheesecake is made with 3 layers, one of which is optional:
- The crust. I make it using Nilla wafers and melted butter, but you can also use classic graham crackers instead
- The mango cheesecake filling. This filling is made with cream cheese, mango ice cream and gelatin, and is the heart of the cheesecake
- Mango pulp cream (optional). This is a thin layer made with mango pulp, ice cream and gelatin. I add this for a stronger mango flavor and to give the cheesecake visual contrast, but it is completely optional!
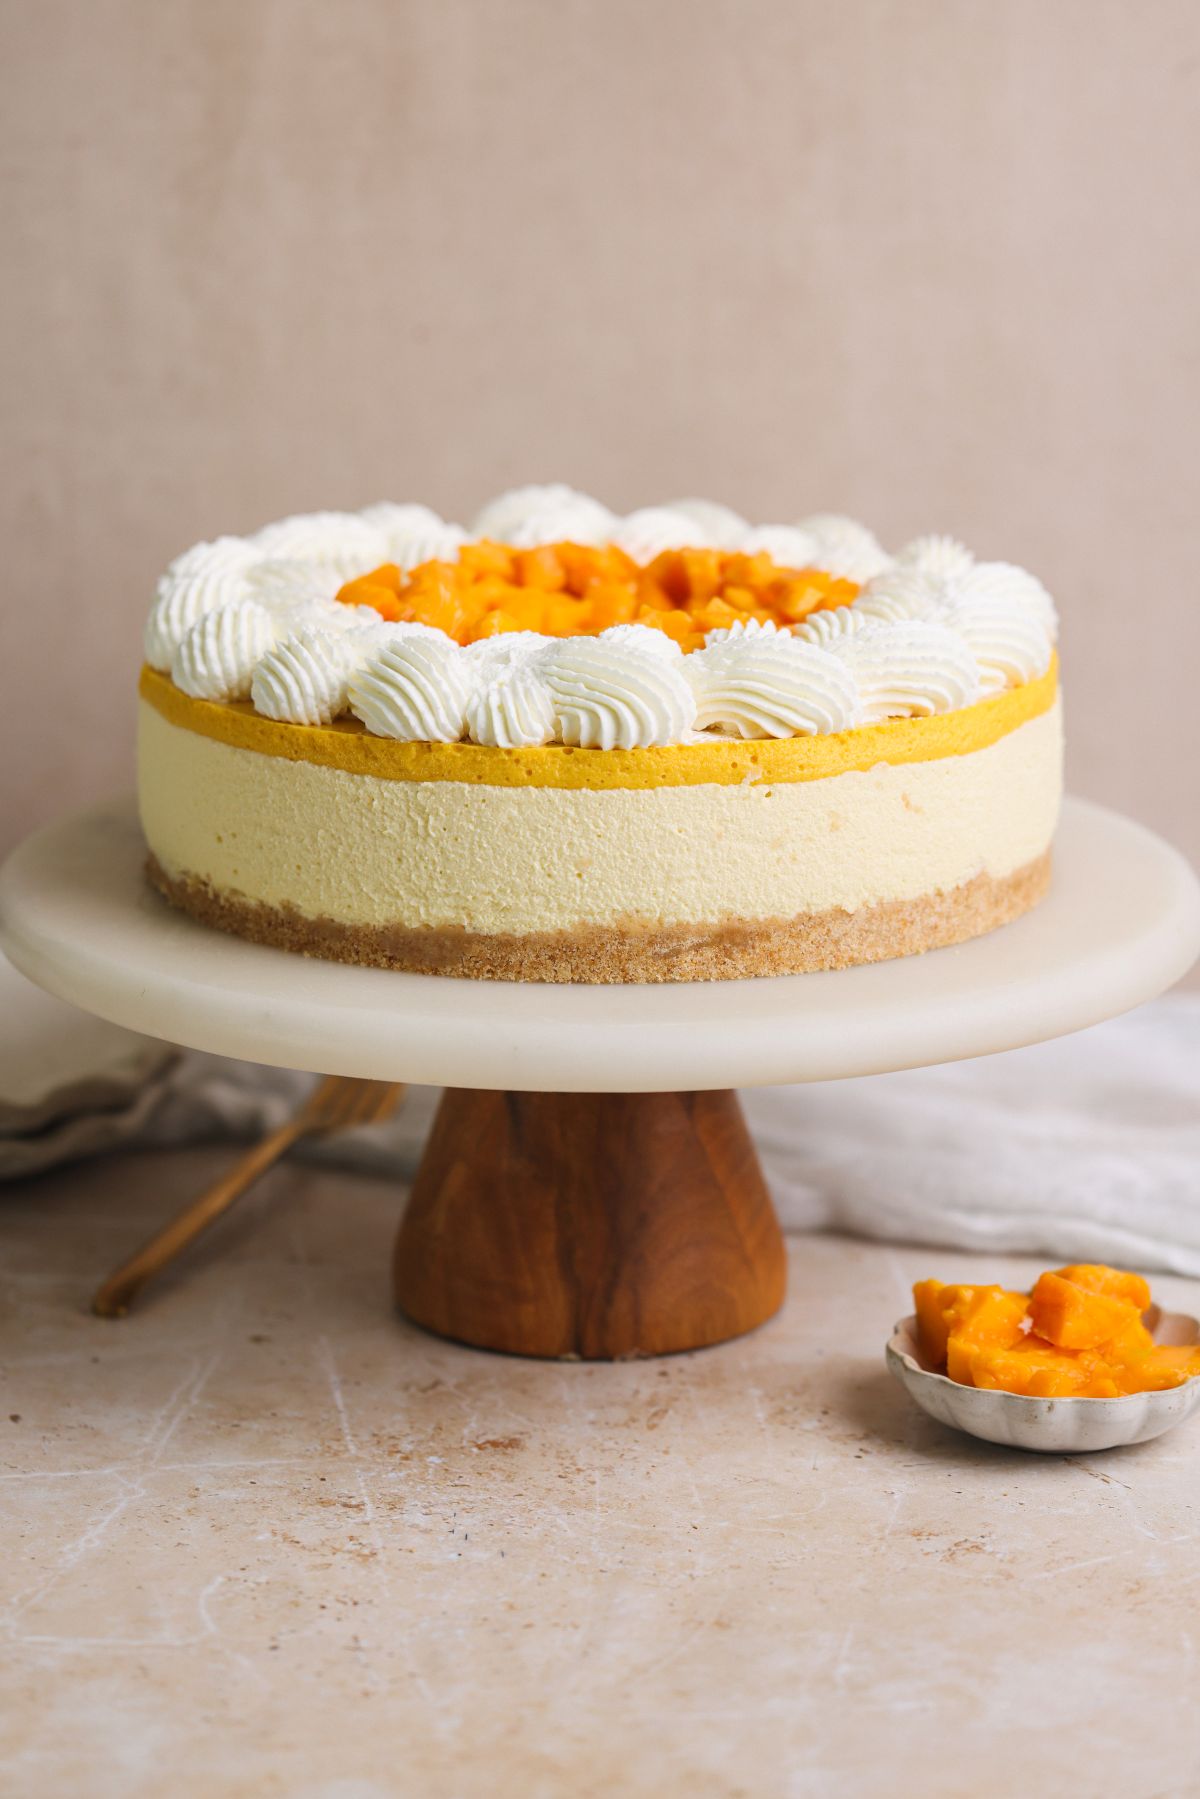
I recommend topping the cheesecake with fresh mangoes and whipped cream to finish it off, but you're welcome to decorate how you like.
How to use gelatin
I know many people find gelatin intimidating, but it is actually very easy to use. This recipe uses powdered gelatin (this one is also halal!), which is easier to measure and more commonly available than gelatin leaves / sheets. Here's how to use it:
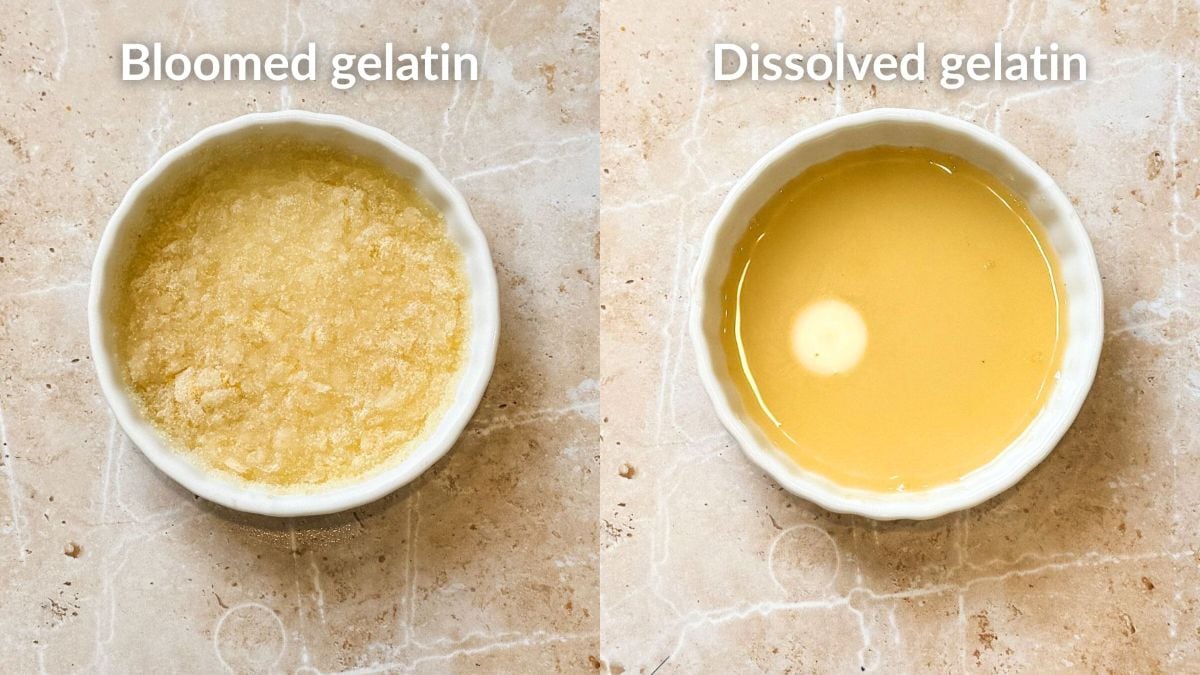
- Bloom the gelatin. Blooming simply means soaking the gelatin in cold water to hydrate it, which ensures it dissolves properly. To do this, add ice cold water to a bowl and sprinkle over the gelatin powder. Give it light stir, then refrigerate for ~10 minutes until the mixture solidifies
- Heat to dissolve the gelatin. Once the gelatin has solidified in the fridge, it is time to dissolve it. To do this, microwave the mixture in 15 second increments, gently stirring in between, until the gelatin dissolves in the water and no lumps remain
- Mix it in the dessert. The dissolved gelatin is now ready to be mixed into the dessert, which, in this case, is the cheesecake mixture
See, not so hard, is it!?
Step by step photos
The detailed recipe with ingredient quantities and instructions is in the recipe card below, but let's go over the steps with photos to help you visualize everything:
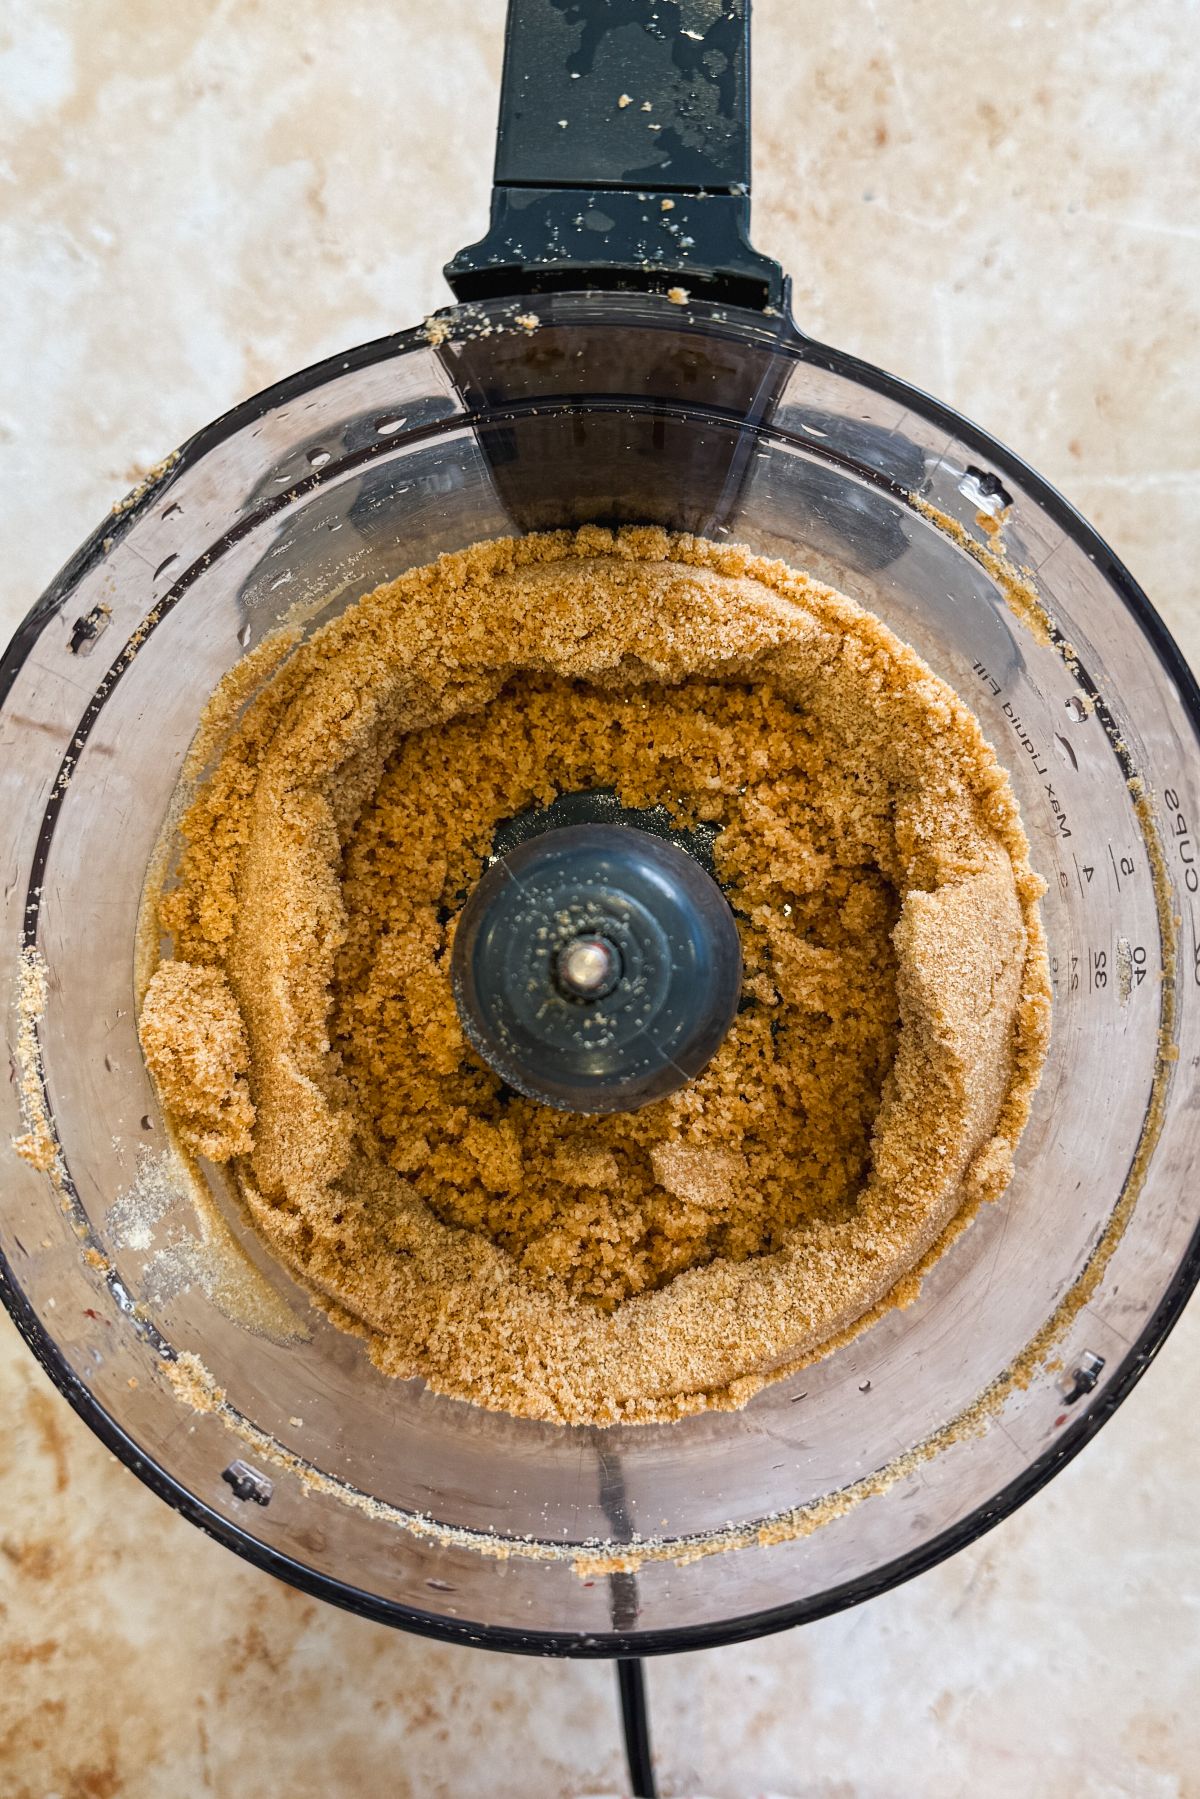
Grind the nilla wafers until a fine crumb forms, then mix in melted butter.
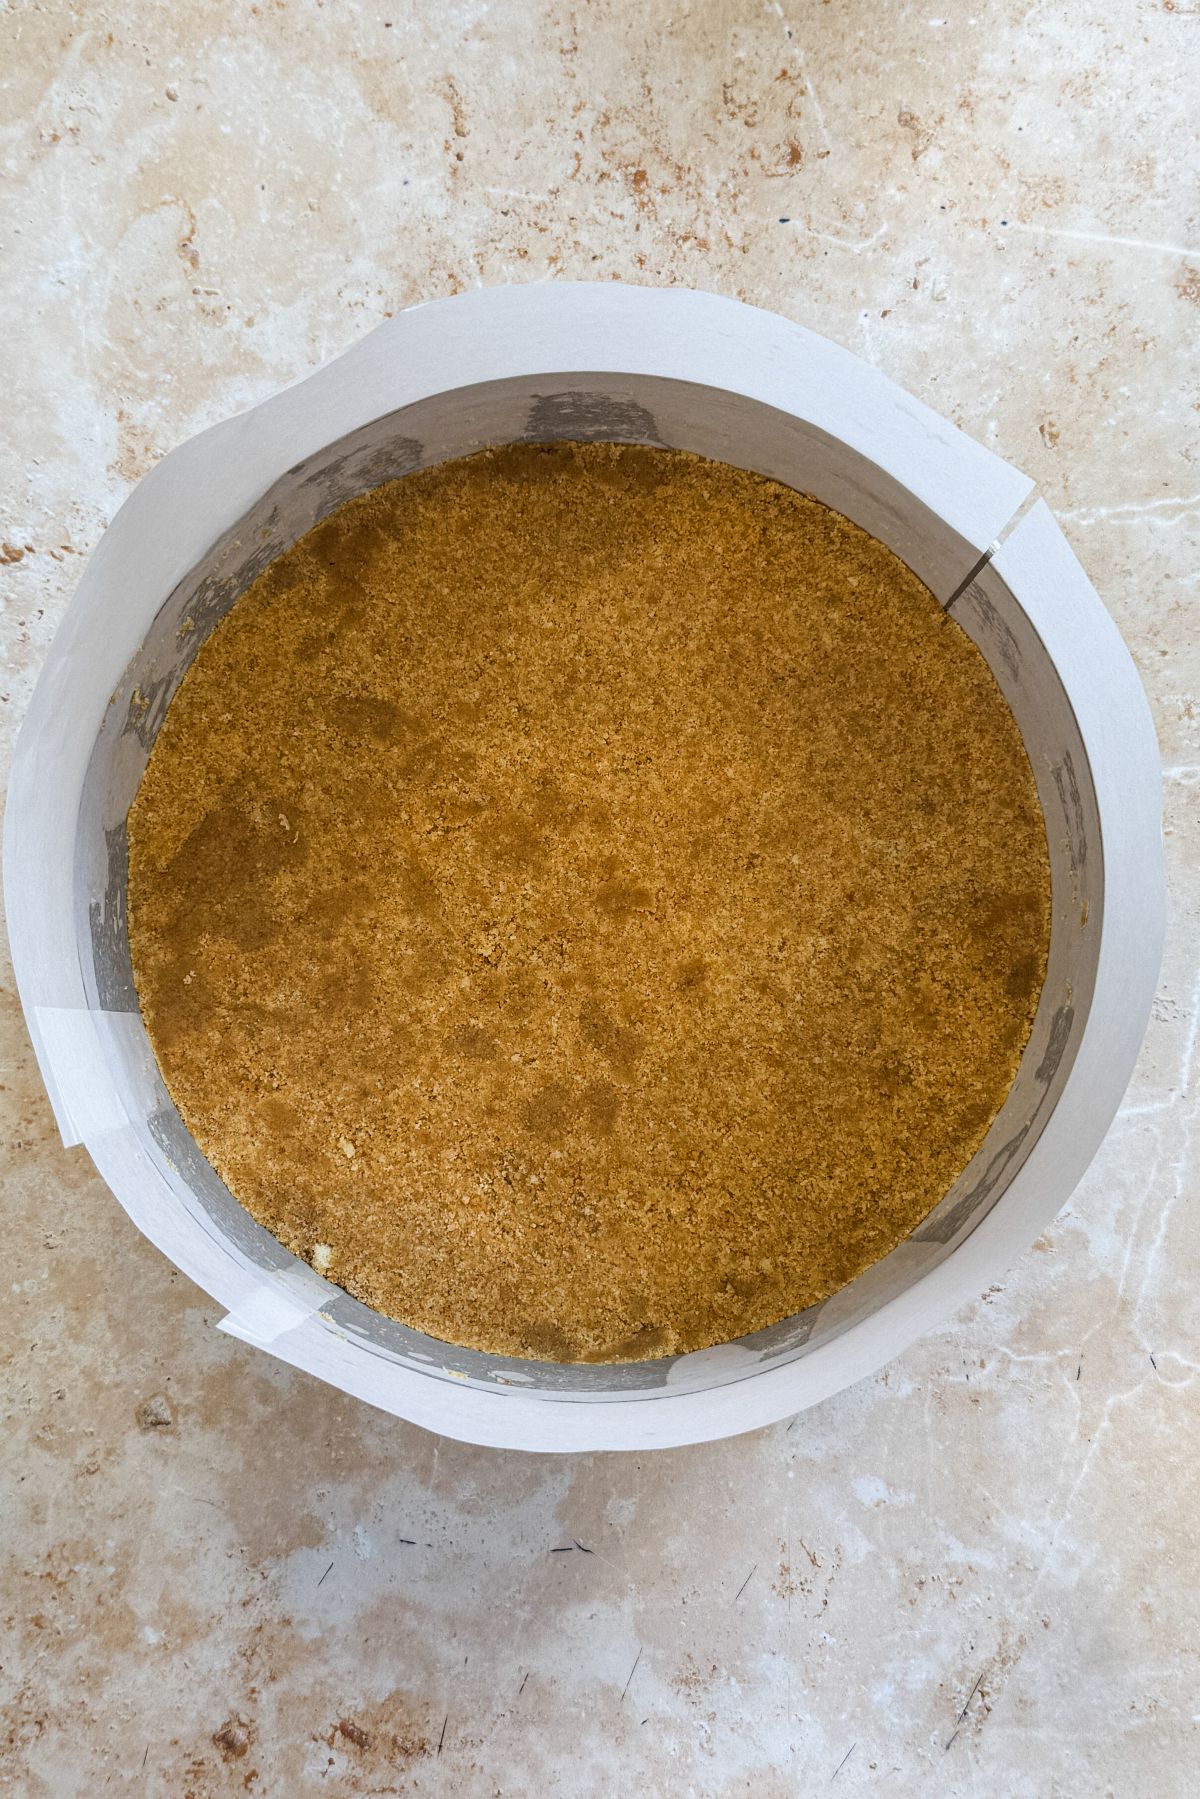
Transfer the crumbs into a 9" springform pan lined with parchment paper, and pack down tightly to form a crust. Place in the fridge to set.
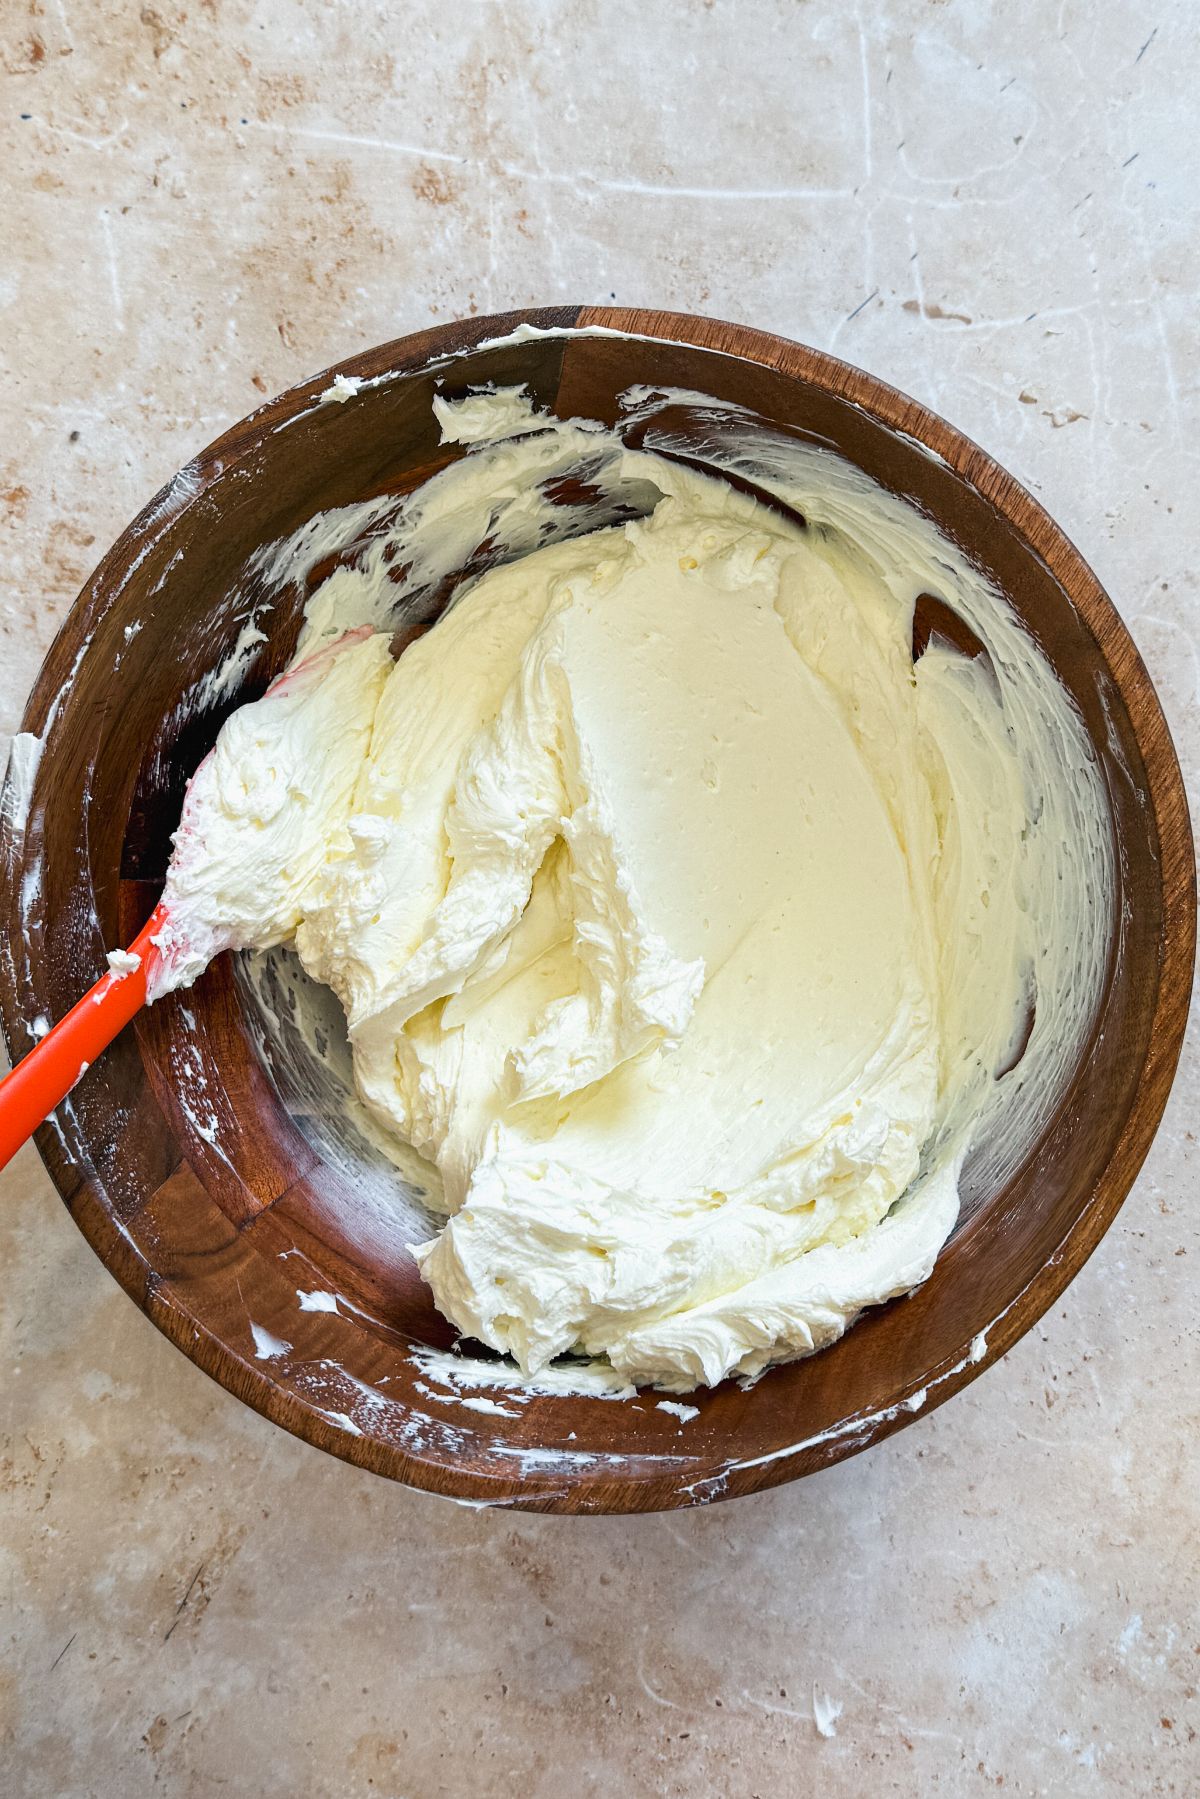
For the cheesecake, whisk the room temperature cream cheese until it is creamy.
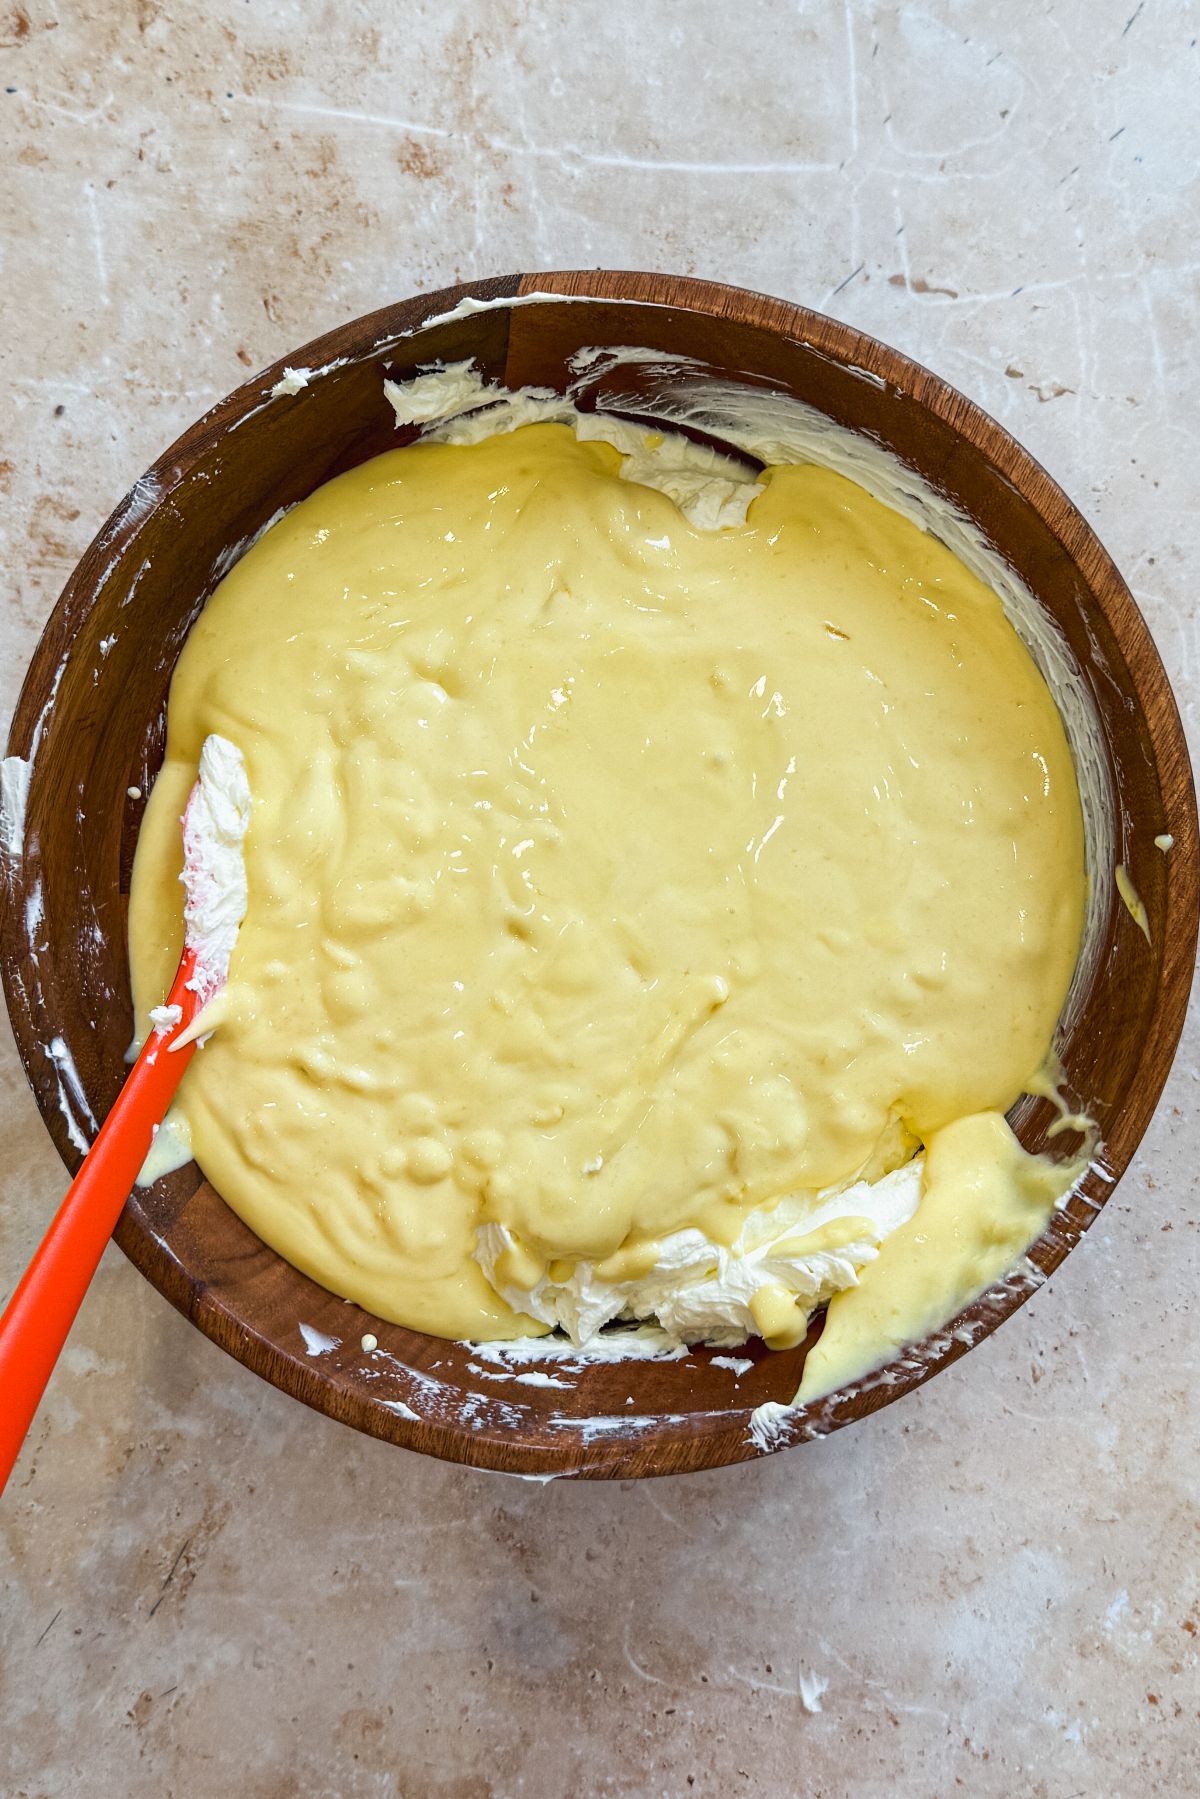
Pour in the melted mango ice cream, and whisk until properly combined.
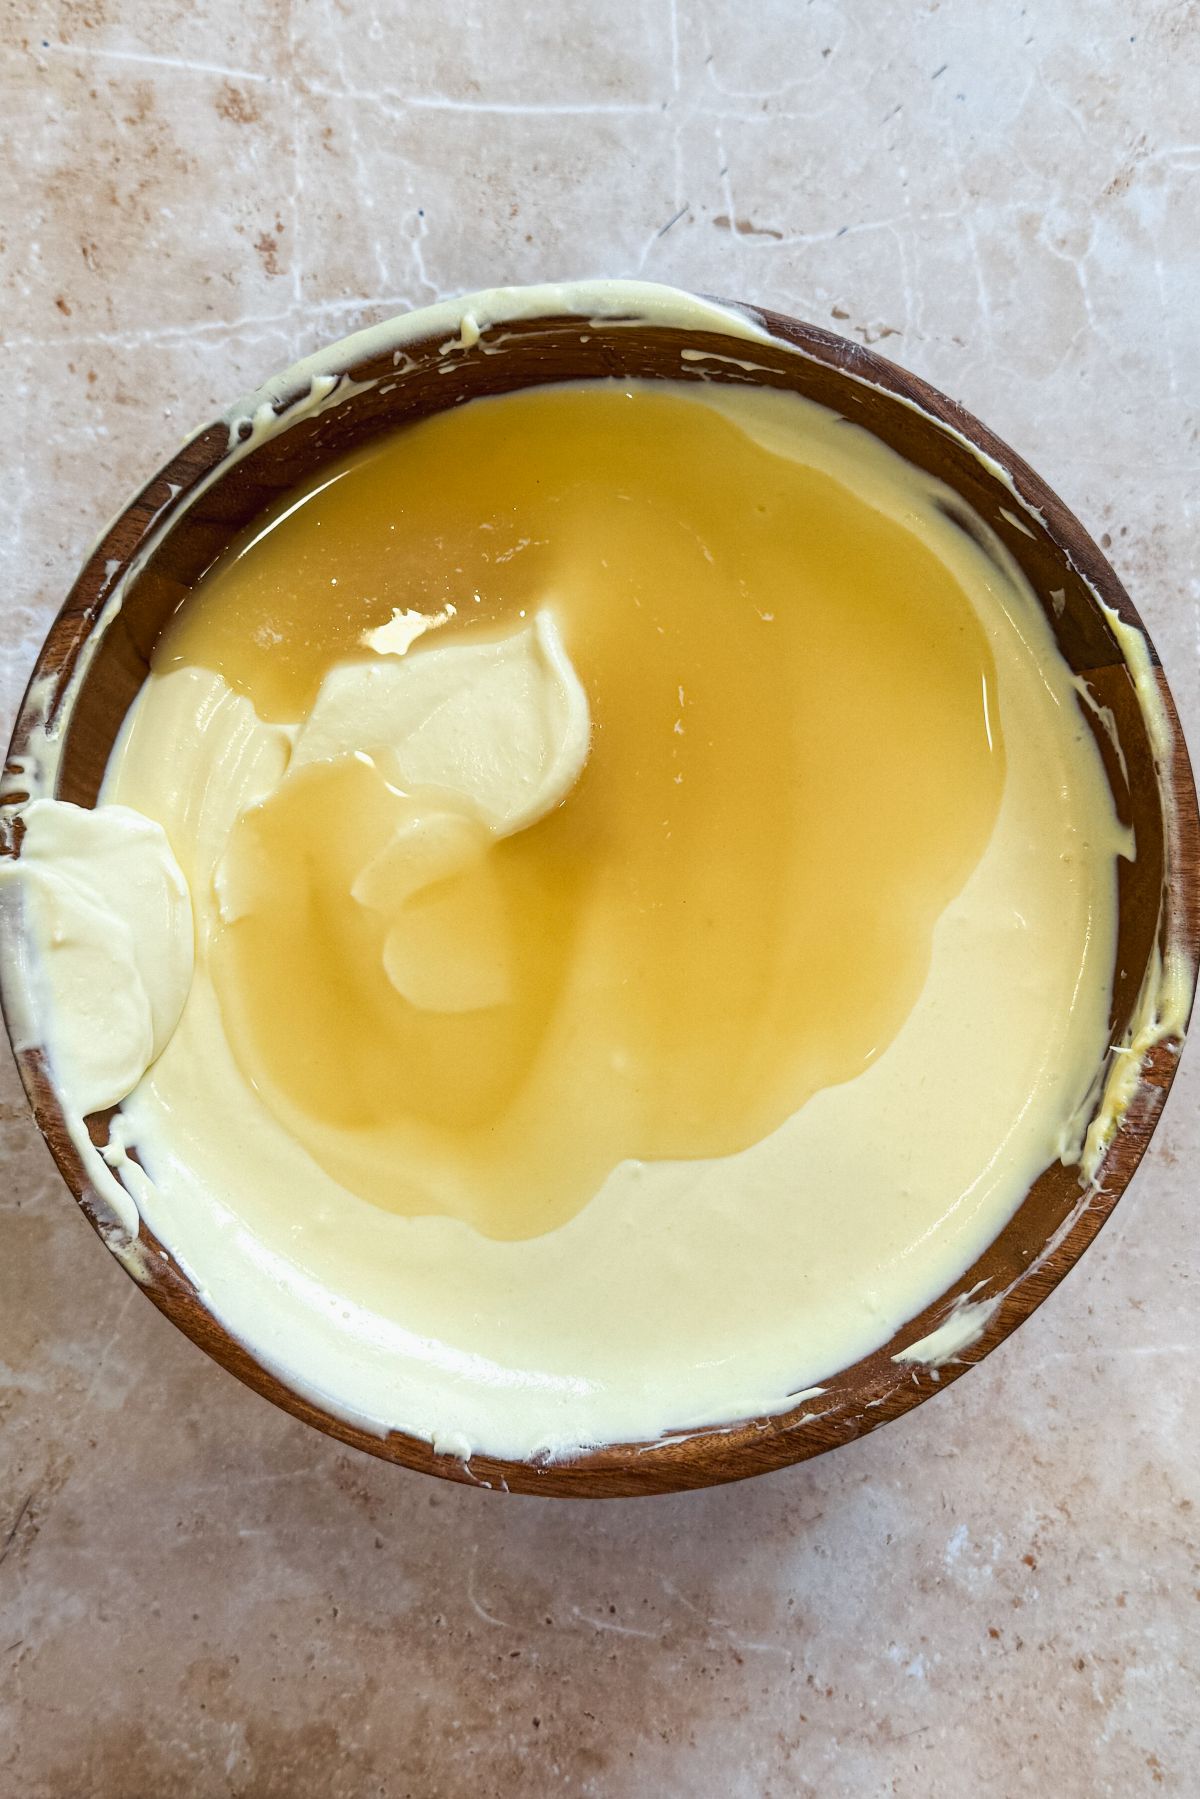
Separately, bloom and dissolve the gelatin (see details above), and pour it into the mixture.
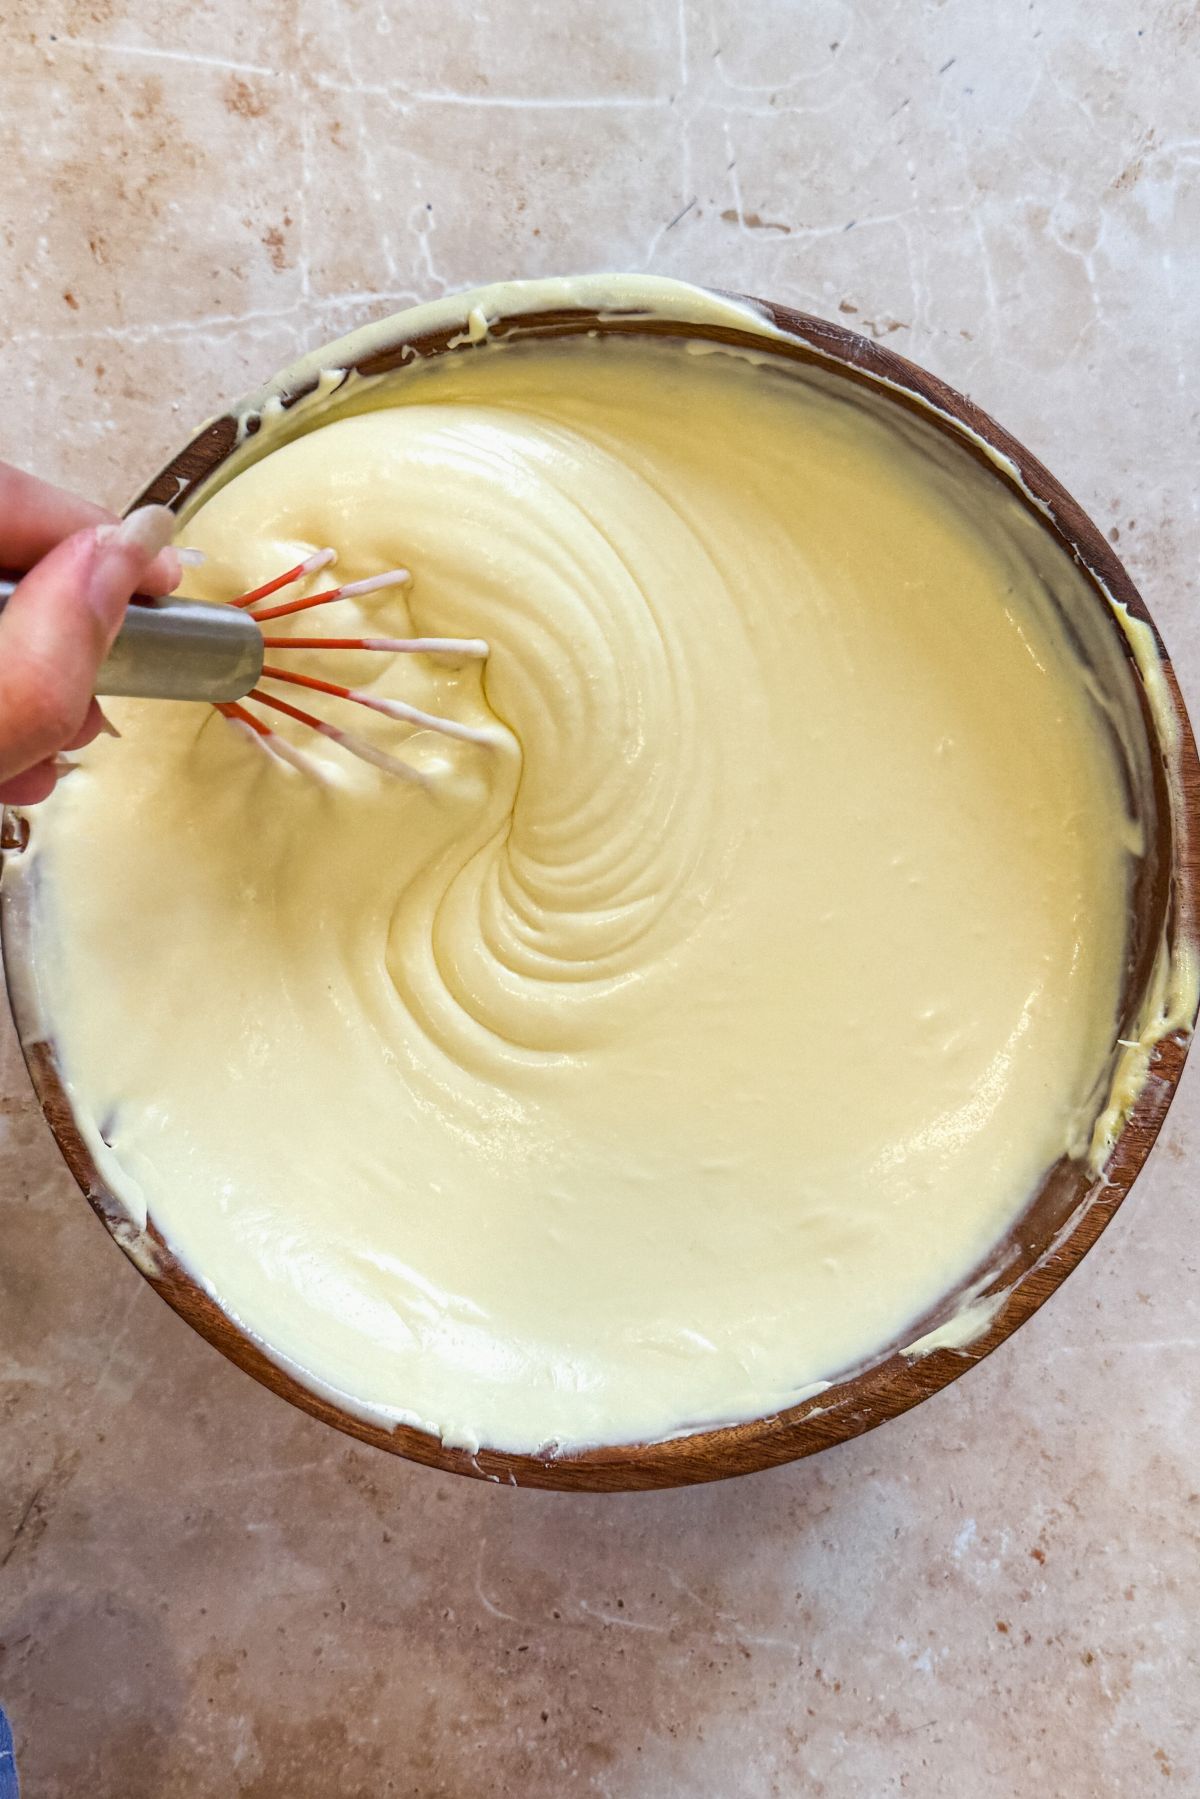
Whisk until the gelatin has completely dissolved in the cheesecake filling.
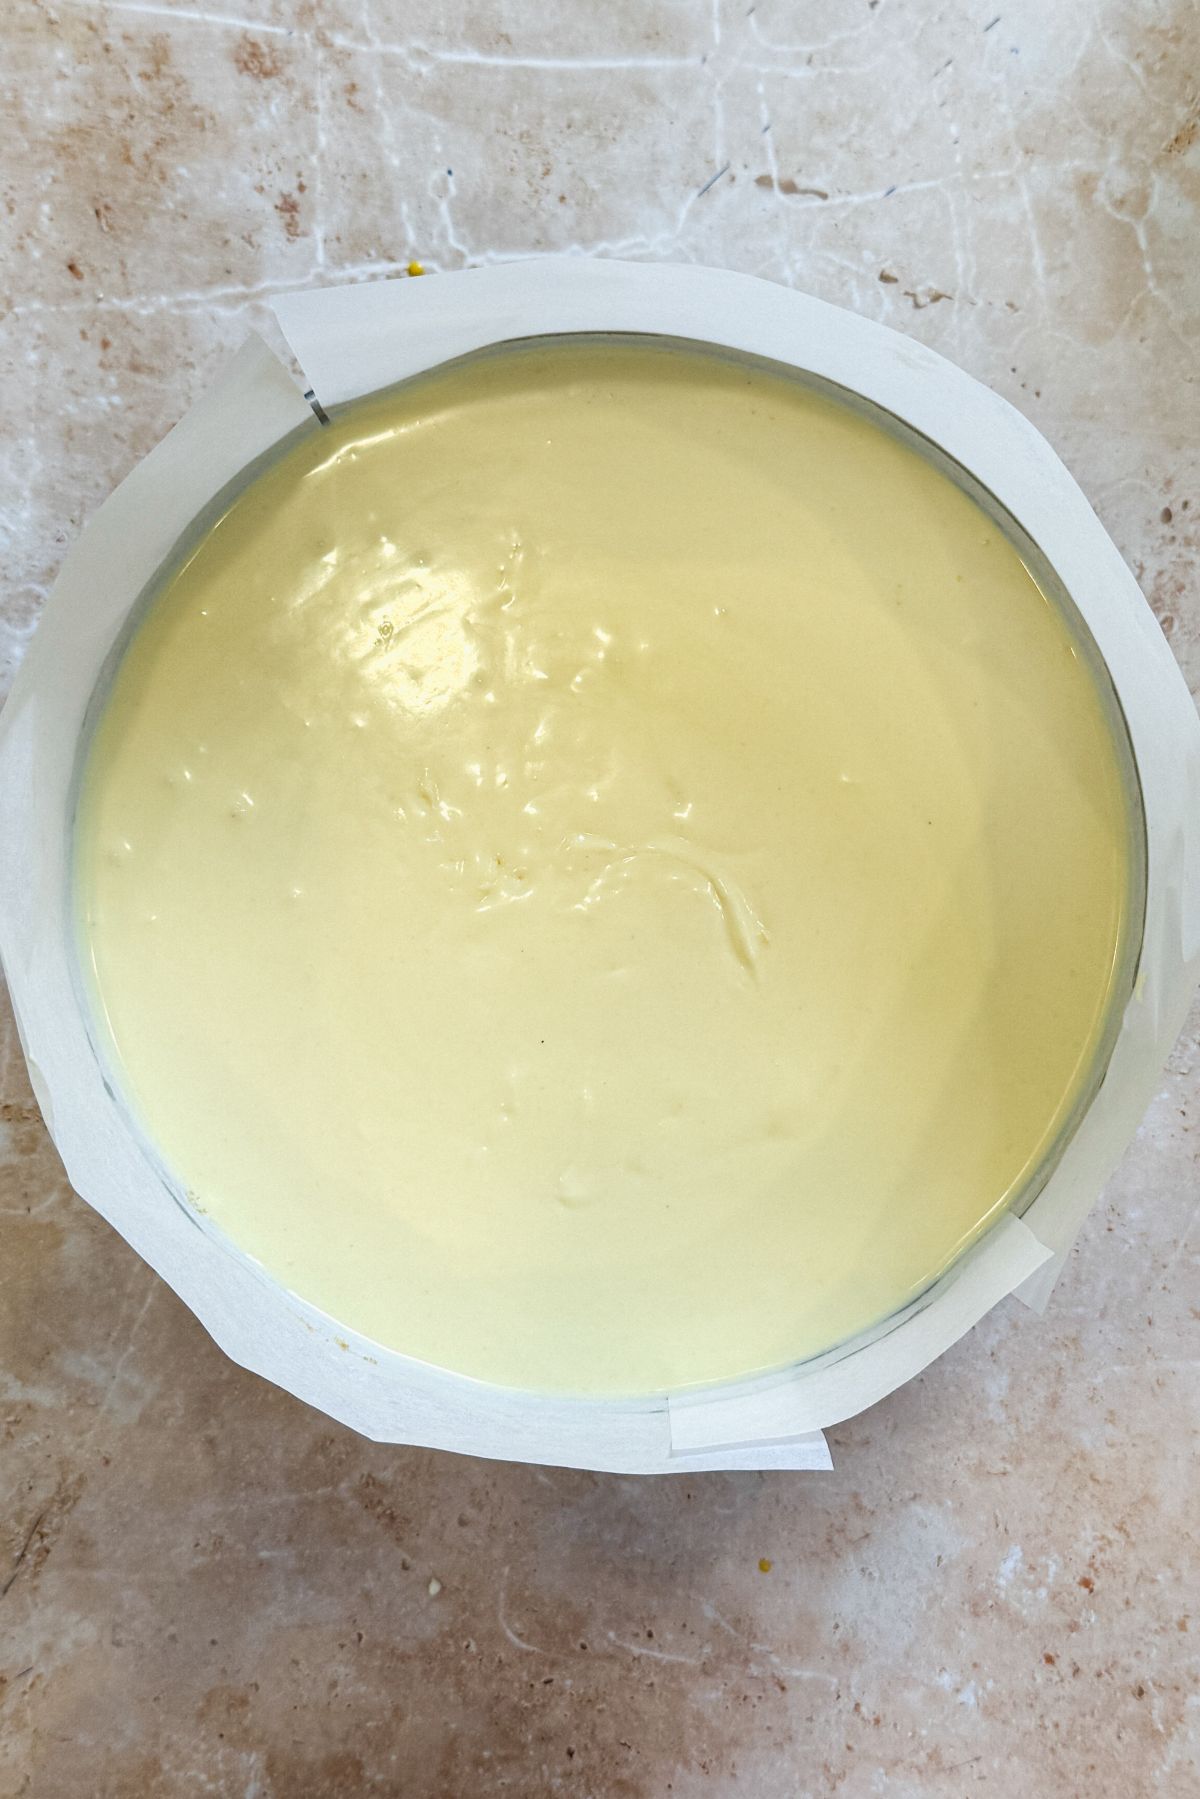
Pour the mixture onto the crust, and refrigerate to set.
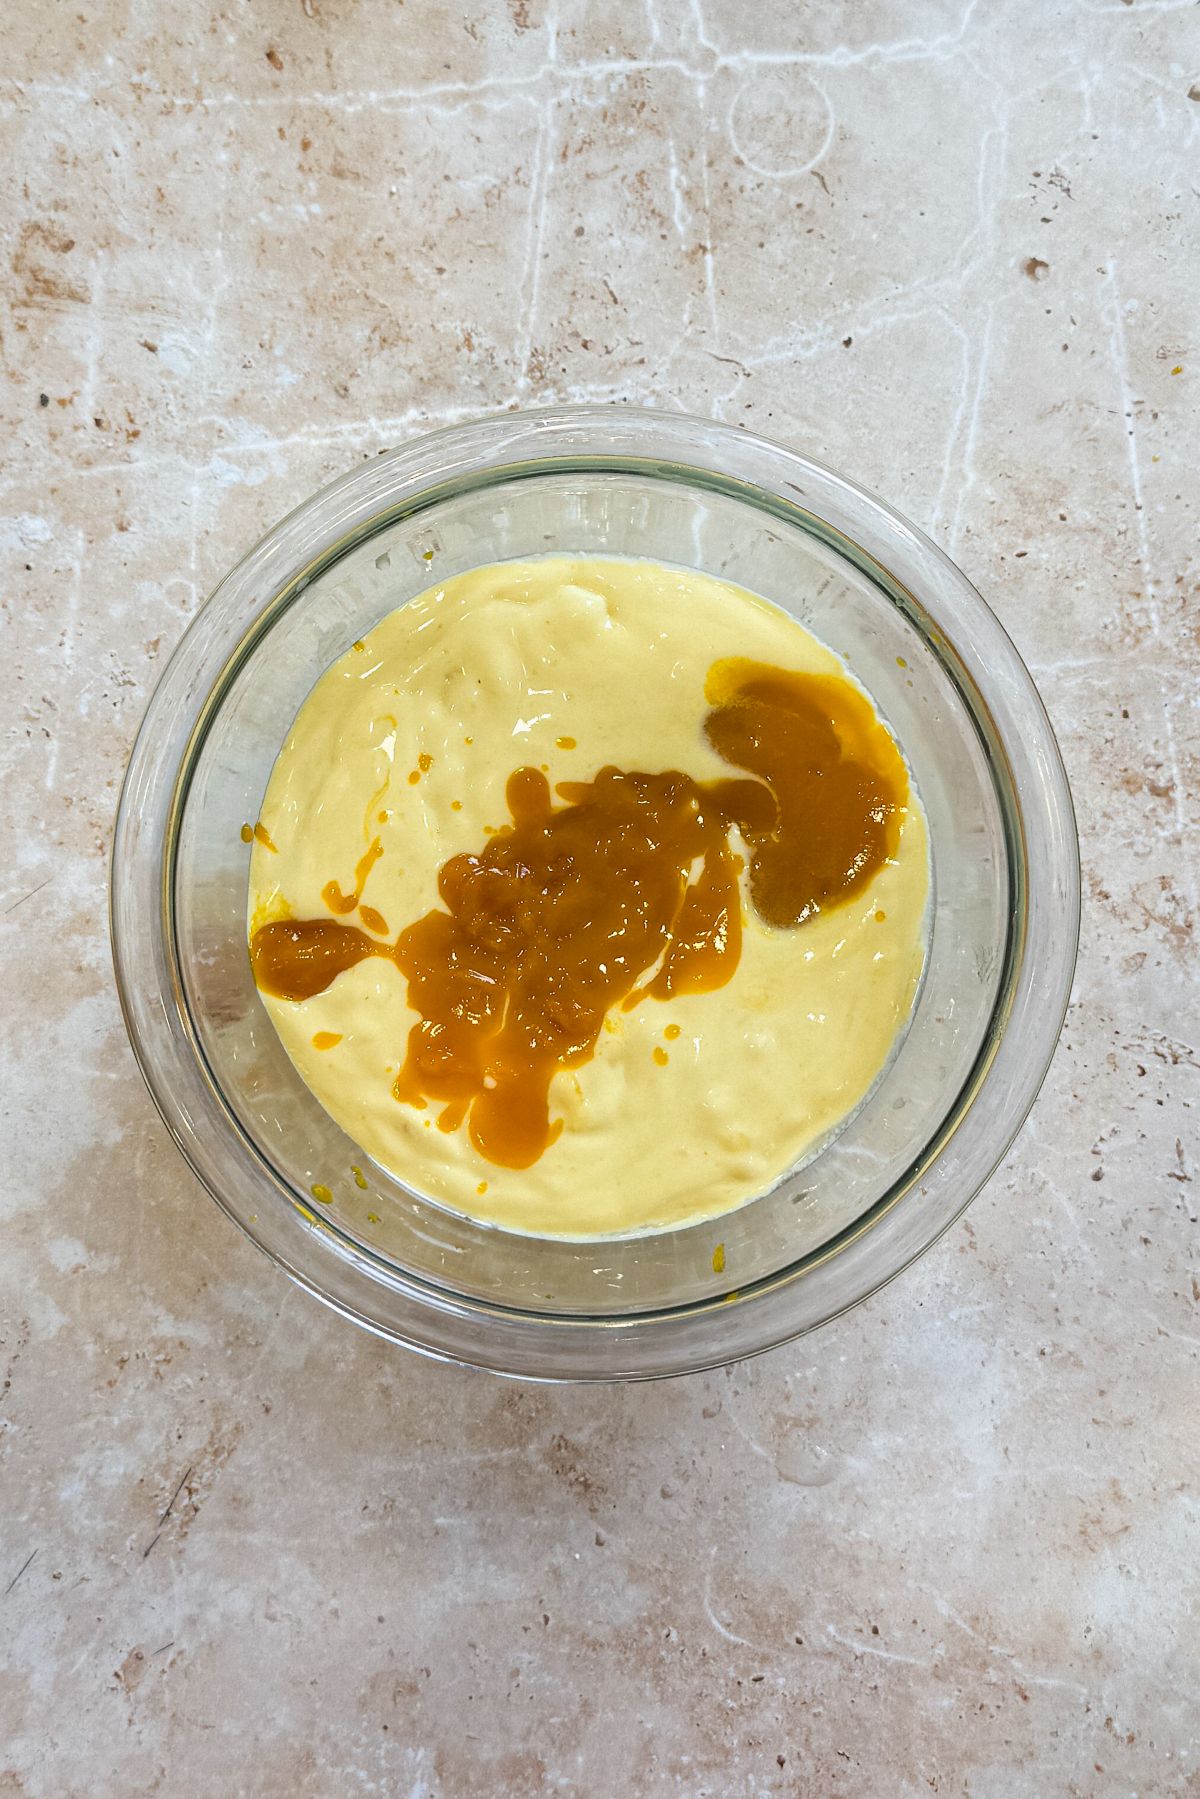
For the optional mango pulp cream layer, add reduced mango pulp, mango ice cream and dissolved gelatin to a bowl.
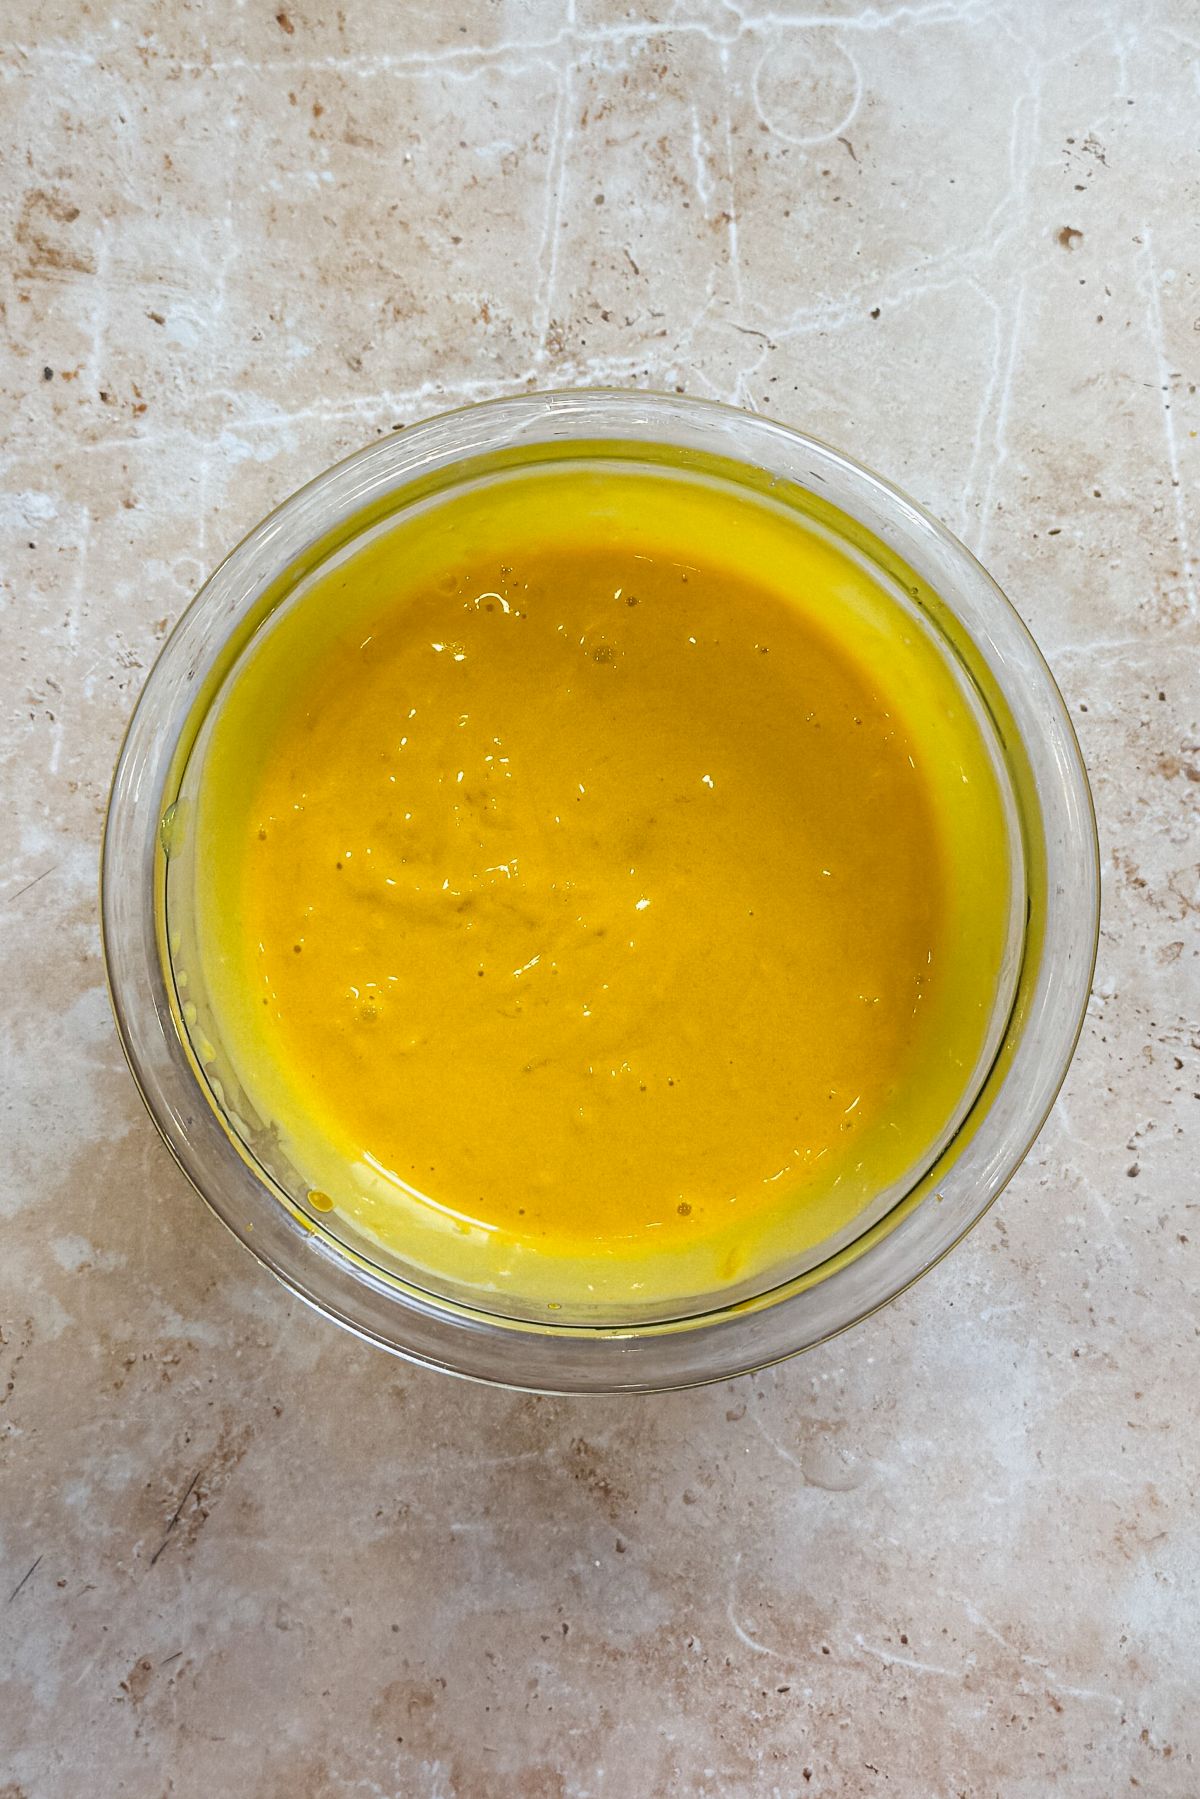
Whisk until the three ingredients are combined.
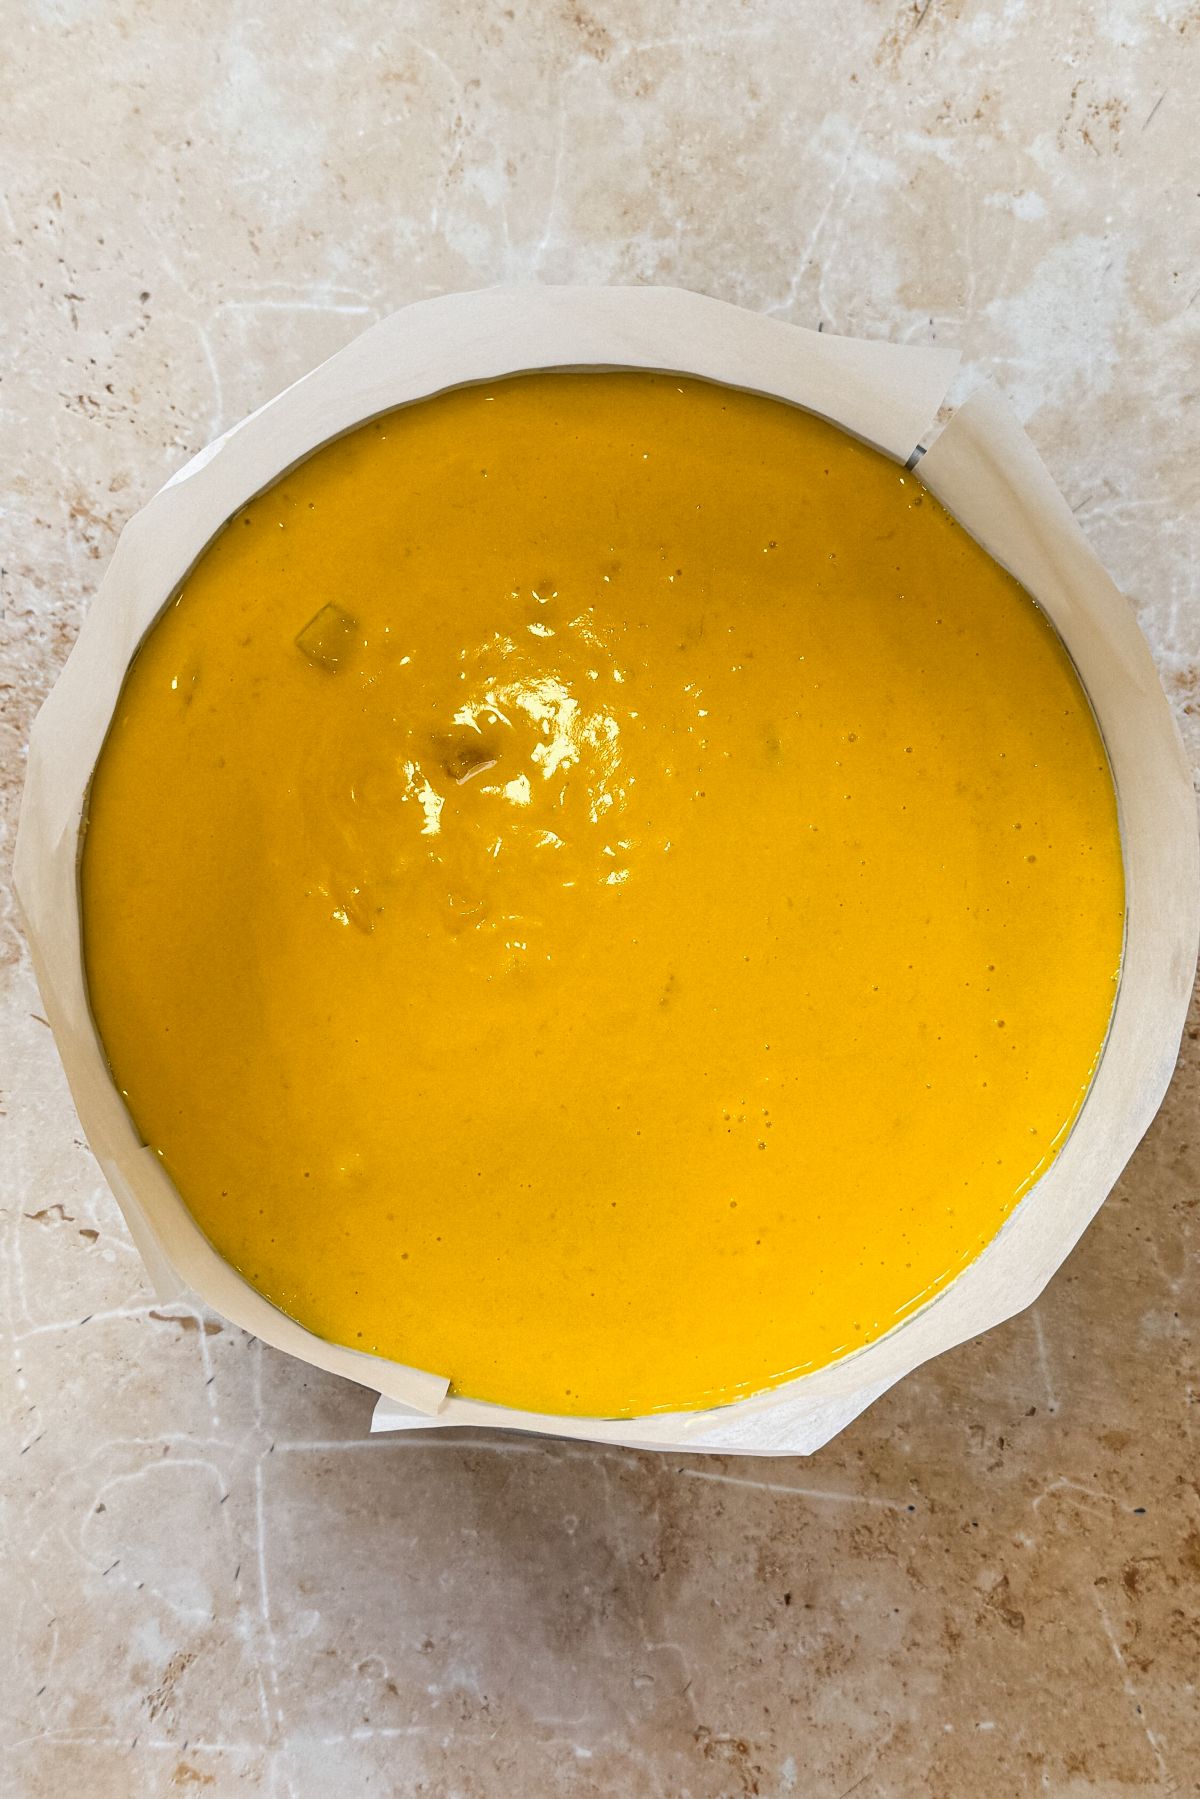
Pour the pulp layer on top of the cheesecake layer after it has set, and refrigerate again.
Once the cheesecake is fully set, carefully remove it from the pan and transfer to a cake stand. Decorate with fresh mangoes and whipped cream, and serve!
Pro tips
- Bring the cream cheese and ice cream to room temperature. The cream cheese should be completely soft and the ice cream should be fully melted, otherwise they won't mix properly
- Prepare the gelatin properly! Please read the section about gelatin above and bloom and dissolve it properly. If in doubt, it is better to start again and get it right before you add it to the cheesecake mixture
- Let the cheesecake layer set before adding the pulp layer. If you try to rush this, the pulp will mix in with the cheesecake layer and ruin the look. To be on the safe side, gently pour a spoon of the pulp mixture onto the cheesecake layer first to ensure it is set, and then add the rest
- Let the cheesecake chill overnight. The worst thing you can do is rush the chilling process and unmold the cheesecake before it sets, so be patient!
- Don't leave the cheesecake out for too long. Depending on the room temperature, this cheesecake will hold shape for 1-2 hours, but it is best to keep it chilled and not leave it out for extended periods of time

No Bake Mango Ice Cream Cheesecake Recipe
Description
An incredible no bake mango cheesecake made with mango ice cream for the most delicious mango flavor and creamy texture!
Ingredients
Crust:
- 200g Nilla Wafers or Graham Crackers
- 5 tbsp unsalted butter, melted (70g)
Mango cheesecake:
- 24 oz cream cheese (3 8oz blocks or 680g), room temperature
- 28 fl oz mango ice cream (3 ⅓ cups or 700g), fully melted at room temperature*
- 6 tsp gelatin powder
- 6 tbsp ice cold water (90g)
Mango pulp cream (optional):
- 1 cup mango ice cream (210g), fully melted at room temperature
- 1 cup mango pulp (230g), cooked down to ½ cup
- 2 tsp gelatin powder
- 2 tbsp ice cold water (30g)
Decoration (optional but recommended):
- 1-2 fresh mangoes, cubed
- 1 cup heavy whipping cream, whipped to stiff peaks
Instructions
Crust:
- Brush a 9" springform pan with softened butter, and line it with a circle of parchment paper on the bottom, and strip(s) of parchment paper along the edges. Set aside
- Blitz the Nilla wafers in a food processor until they form a fine crumb. Add the melted butter and blitz again to combine
- Transfer the crumbs to the prepared pan, and press down tightly using the back of a measuring cup or large spoon to form a tight, even crust
- Place in the fridge to set while you work on the cheesecake layer
Mango cheesecake:
- Add the cream cheese to a bowl, and use an electric mixer (or stand mixer with paddle attachment) to whisk until it is creamy, taking care not to overmix. Scrape the bowl once or twice to ensure there are no unmixed lumps
- Add the melted mango ice cream, and whisk again for ~1-2 minutes on medium speed. Scrape the bowl in the middle to ensure all the cream cheese mixes with the ice cream. The mixture should be smooth and slightly fluffy. Do not overmix
- Separately, prepare the gelatin. Pour the ice cold water to a small bowl with a wide surface area. Sprinkle over the gelatin. Gently stir once to ensure all the gelatin is soaked. Place in the fridge for ~10 minutes until the mixture becomes fully sets. Then microwave in 15 second increments, stirring in between, until the gelatin has completely dissolved in the water and there are no lumps remaining
- Pour the dissolved gelatin mixture into the cheesecake mixture, and whisk until just combined
- Pour the cheesecake mixture on top of the crust in the springform pan. Gently shake the pan to spread the mixture, and place back in the fridge to set
Mango pulp cream (optional)*:
- Add the mango pulp to a saucepan, and cook and stir on low heat until the pulp reduces to approximately half its original volume. Let it cool down for 5 minutes
- Mix the pulp with the melted mango ice cream
- Prepare the 2 teaspoon gelatin in 2 tablespoon water just like you did in step 3 of the mango cheesecake above
- Add the dissolved gelatin to the pulp mixture and whisk to combine
- Make sure the cheesecake layer has set for at least 2 hours so when you pour the pulp mixture on top, it does not mix with the cheesecake layer. You can test this by gently pouring a spoonfull of the pulp mixture onto the cheesecake and making sure it is sitting on top instead of mixing in. Gently pour the entire pulp mixture on top of the cheesecake, then place the whole thing back in the fridge
Decoration & serving:
- Let the cheesecake set overnight for 12+ hours until it is fully set
- Chop the fresh mangoes and whip up the heavy cream
- Remove the cheesecake from the fridge. Open the sides of the pan and carefully peel off the parchment paper
- Carefully transfer the cheesecake to a serving stand. Pipe on the whipped cream around the edges, and garnish with the chopped mangoes
- Slice, serve & enjoy!
Video Tutorial:
Notes
- Mango ice cream: Make sure to use good quality, cream mango ice cream (NOT mango sorbet) for this recipe. The yummier the ice cream, the yummier the cheesecake will be. I used Haagen Dazs creamy mango ice cream, and needed 2 14 oz containers for the cheesecake layer, and another container for the pulp layer with some left over
- Mango pulp cream layer: If you're adding this layer, you can either prepare it along with the cheesecake layer and leave it out at room temperature while the cheesecake layer sets, or you can prepare it after the cheesecake layer has already set. Just make sure you don't put the pulp mixture in the fridge while you're waiting for the cheesecake layer to set, as it will start to set in the bowl!
- Make ahead: You can prepare this cheesecake 2-3 days in advance, including the crust, the cheesecake layer and the mango pulp layer. Just keep the entire cheesecake refrigerated in the pan, and remove it from the pan to decorate when you are ready to serve. Although this cheesecake has gelatin and is stable, it is best enjoyed cold and will start to lose shape if left out for extended periods of time in hot weather. Therefore, keep it chilled as much as possible!
Related recipes
Here are some more mango recipes to make use of mango season:


emjay says
Looks so good. A question about the ice cream though, if we can’t find it could we use vanilla also? Would it work with pulp added to it?
Also, you say to check out your other cheesecake cups recipe, do you mean we should use that instead of this ice cream mixture? Results the same?
Zoha says
Hi Emjay, my other recipe (no bake mango cheesecake cups) doesn't use ice cream and uses pulp instead. So you can check out that recipe. Kindly don't replace the ice cream in this recipe with pulp as it won't work well 🙂
Benita Ninan says
Tried this recipe today. It was a crowd pleaser. The texture was great and the flavors were amazing. Just the right amount of sweetness and a lovely light texture. Will definitely make it again!
Zoha says
YAYYY thanks so much! I am so glad you loved it
Abeer says
Hi, I have a question regarding melted ice cream. I was making my cheesecake yesterday night , had my ice cream out in room temperature to melt it completely but accidentally my cream cheese flipped from the counter 😢 Im gonna get new cream cheese now and put that melted ice cream in the fridge. My question is can i still use that ice cream? Is it safe to use it? How did you melt your ice cream, leaving in the fridge for hours or room temperature?
Zoha says
Hi Abeer! Just taste the ice cream, if it tastes fine I think it should be safe to eat. I also left mine at room temp for a couple hours 🙂
Abeer says
Hi Zoha, I already made it, and it was one of the creamiest cheesecakes I've ever had. I made it for a potluck at work and everyone loved it and finished it instantly. I think putting ice cream in cheesecake was a brilliant idea. You're a genius. Thanks so much for the wonderful cheesecake recipe, which is going to be my favorite of all. ❤️
Zoha says
AWWW Thank you SO much! I am so glad you liked the recipe!!!
Rana says
Hi !!Can i use this recipe and add it in cups instead?? Or should I just use your no bake mango cheesecake cups recipe… which tastes better??
Zoha says
Yes, that should be totally fine! 🙂 They both taste good, just depends which ingredients you're more comfortable with
Katrina Hegna says
could I use mango jam I made add vanilla ice cream? if so I am going to try thru this!
Zoha Malik says
Hi Katrina! Unfortunately I cannot guarantee how well that will work as I haven't tested that myself. If you try, let us know how it goes 🙂
Sana S. says
I made this yesterday for a potluck and got rave reviews! Everyo single person loved it!
Zoha Malik says
WOO!!
Sana S. says
I would like to make this again but in a larger quantity. Do you think i can double it and fit it in 9 by 13 glass pan?
Zoha Malik says
Hi Sana! Yes, that should be ok 🙂 just serve directly from the pan with a spoon!