

This post may contain affiliate links
Add Bake with Zoha as a preferred source on Google and find more of my tried-and-tested recipes.
This is the BEST Chicken Biryani recipe with step by step instructions and photos which will help demystify everything for you. With this recipe, you will be able to make the perfect biryani: perfectly cooked rice, tender chicken, lots of potatoes and masala, and an unbelievable harmony of spicy and tangy flavors in every bite. A spoon-full will take you straight to Pakistan!

If you’re having a hard time trusting me, this recipe comes from a die hard Karachi foodie (my sister in law), and we all know Karachi has the best biryani in Pakistan. Believe me, no one will eat this and say it tastes like pulao!
Read the full blog post below for detailed notes, tips, tricks, photos and videos.
WHAT IS BIRYANI?
Biryani is a delicious and aromatic dish that hails from the Mughal empire in the Indian subcontinent. It is a rice pilaf cooked with various spices, meat or fish, and vegetables.
Debates about the “right” way to make biryani, or the “best” type of biryani are truly endless. Indian vs Pakistani, Hyderabadi vs Karachi, dum biryani vs marinated biryani, tomatoes or no tomatoes, potatoes or not potatoes. We can go on and on and on. But the simple fact is that the beauty of biryani lies in this diversity of flavors, textures, and methods. Each rendition is special in its own way.
Karachi biryani vs Hyderabadi biryani
This recipe specifically is for a Karachi street style biryani. Although I have never eaten Hyderabadi (Indian) biryani myself, I understand from my research that there are a few main differences between the two:
- Karachi biryani uses more masala (spices) while Hyderabadi biryani lets the flavor of the meat shine
- Karachi biryani uses both yogurt and and tomatoes, while Hyderabadi biryani skips the tomatoes resulting in less “masala”
- Karachi biryani fondly uses potatoes while Hyderabadi biryani does not
THE STORY BEHIND THIS BIRYANI RECIPE
Biryani is something that has always intimidated me, even as someone who loves cooking, and I have had far too many failed attempts in my past. So I had honestly given up hope, until I visited my sister in law. She’s from Karachi and a self-confessed biryani fanatic.. and the biryani she cooked was truly lifechanging.
So I took no time getting down to business, and made her teach me everything. I was surprised to learn she uses boxed spice mixes, because I had used the same mixes before and my biryani was nothing like hers. But I learned that what makes her biryani special is the ingredients she uses and how she uses them. More on that later!
Anyway, I was in Pakistan recently and started craving this biryani. Call me crazy, but I decided to make a huge amount for my entire family. And by some miracle, the biryani turned out amazing. Everyone was obsessed with it, especially my uncle, who said this was the first time he had eaten biryani in Punjab that didn’t taste like pulao.
My confidence in my biryani making skills = revived.
And here we are.


WHAT MAKES THIS CHICKEN BIRYANI SPECIAL
So you may be wondering what makes this Chicken Biryani recipe special, if it uses boxed spice mixes commonly used in Pakistan. Well, there are few things that make this recipe special and incredible:
- A combination of 2 types of Biryani masalas, added in abundance. This recipe uses both Shan Bombay Biryani Masala and Sindhi Biryani Masala, and the ratio of spice to everything else is higher than usual. You can order these spices on Amazon or easily find them in Indian / South Asian grocery stores
- Extra yogurt. This adds a fresh flavor and more masala, which we love!
- Lots of sliced lemon. Thinly sliced lemon along with its peel is added to the biryani masala, and adds a wonderful tangy and slightly bitter kick to the biryani
- Lots of dried aloo bukhara (plum). This adds texture, moisture, and the most delicious sweetness to the biryani! You can find this in Indian / South Asian supermarkets
- A unique way of cooking the tomatoes. In every biryani recipe I have ever seen, tomatoes are chopped and cooked down at the beginning to make a “masala”. This recipe, however, adds the tomatoes towards the end and keeps them in slices. They become soft but hold on to their shape, and provide a unique juicy texture and flavor to the biryani
METHOD WITH PHOTOS
Detailed instructions are provided in the recipe box at the bottom of this post, but let’s go over the steps with photos to help you visualize everything:
First, go ahead and prep all the ingredients so they are ready to go:

For the biryani masala, start by frying the onion in oil until it becomes golden:


Add the ginger garlic paste and cook for a minute. Then add the chicken and cook on high heat until it looks light brown:


Then, add the yogurt, salt, masalas and potatoes and toast for a few minutes:


Add the sliced lemon, cover and cook until the potatoes are just cooked through:


Stir in the dried aloo bukhara and green chilies:


Now, for the fun twist! Add the tomatoes on top of the masala in a layer along with some mint and cilantro. Cover and cook until the tomatoes have softened:


With that, the biryani masala is done! Now go ahead and boil the rice until it is just cooked through but still has a bite to it:


Finally, it’s time to layer! In a clean pot, add a third of the rice and drizzle over some food color and mint and cilantro. Then layer on half of the biryani masala:


Repeat this until all layers are done, you will end with a third and final layer of rice on top:


The last (but not least) step is to give the biryani “dum” (steam). Place the heavy-bottomed pot on the smallest burner on the lowest heat setting with weight on top, and cook until steam rises through the rice. Then go ahead and very gently mix the biryani (you don’t want to mix it all the way, just give it a few flips):


Serve with yogurt raita, and enjoy!!

IMPORTANT TIPS
Perfecting Biryani is not an easy task, so I strongly recommend reading through and following these tips!
Avoid multitasking
If you’re a beginner to biryani, don’t try to multitask. First prep all ingredients, then cook the biryani masala, then boil the rice, then layer and steam. You can start multitasking by boiling the rice while the masala is cooking once you gain some more intuition and experience!
Use your judgment instead of blindly following timestamps
It is important to be paying attention to every step and what outcome you need to achieve, instead of following the recipe times to a t. How long a step takes for you may not be the same as it takes for me, due to different ingredients, pots, stove types, etc. So when cooking potatoes, check with a fork whether they’re at the right stage of doneness. When cooking rice, check frequently whether it is still hard or not.
Don’t alter the recipe too much
I recommend giving this recipe a go first before you try to customize it. I do NOT recommend skipping or substituting any ingredients. However, if you want:
- You can adjust the quantity of green chilies up or down to get your desired level of heat
- You can reduce the amount of lemon and dried aloo bukhara if you’re not sure if you like them, but don’t reduce by more than half

FREQUENTLY ASKED QUESTIONS
How to achieve tender chicken in biryani
The key to get tender and soft chicken as opposed to dry and chewy is to use bone-in chicken instead of boneless. You can use any part of a chicken, but I like to use chicken leg quarters and specifically ask for them to be cut into medium pieces (this means a drumstick will likely be cut into 2 pieces). The smaller pieces allow for better cooked chicken and more flavor.
How to perfectly cook rice for biryani
This is arguably the most important part of a biryani recipe. The rice is parboiled (i.e., not fully boiled) at first and completes its cooking in the “dum” stage. At the end, it should be fluffy and perfectly cooked, with each grain standing up on its own. If the rice gets mushy or overcooked, the biryani will be ruined. So here are a few tips:
Use Sella rice
Sella rice is partially pre-cooked long grain basmati rice with the husk still attached. The husk increases the cooking time of this type of rice and makes it much more resistant to becoming mushy. This is a great type of rice to start with if you’re not experienced with biryani!
If you feel comfortable with cooking rice, you can also use long grain basmati rice.
Wash the rice thoroughly
Rinse the rise at least 4-5 times in cold water until the water appears more clear. This will remove its starchiness. Then soak it in cold water while you prepare the biryani masala.
Cook to 75% of the instructions to parboil
Each brand and type of rice will have a different cooking time. So my recommendation is the follow the cooking instructions given on the package, but aim for 75% of the cooking time. For example, if your pack instructs boiling for 10 minutes, you should be aiming for 7-8 minutes instead.
Check for doneness constantly
At the 50% mark, start watching the rice closely, scooping out a little bit every 30 seconds and pressing between your fingers (or teeth) to check for doneness.
Undercooked rice will have a raw, hard center, which can be felt when biting into it and seen as a white opaque middle if you break the kernel. Overcooked rice will be fully cooked and start to break easily if mixed. Perfectly parboiled rice for biryani is just cooked – the kernels swell up, don’t have an opaque raw middle, but still have a bite to them (i.e., not mushy or soft).
When I cook with Sella rice, I add the rice to boiling water and cook for 8-10 minutes.
What if I accidentally overcook rice for biryani?
Check the rice once it is cooked and strained by gently pressing it between your fingers.
If it breaks easily but is not mushy, it is just slightly overcooked. At this stage, you have the option to skip the dum (or reduce the dum time) to avoid making the rice mushy.
If the rise gets mushy if you press on it, it is too overcooked. At this stage, I don’t recommend using the rice at all as the biryani will be ruined. Instead, save it for another use and make a new batch of rice.
How to give “dum” (steam) to biryani
In the dum stage, the biryani masala is layered with the rice and cooked on low heat until steam penetrates through the layers. This is an important step as it enhances the flavor of the biryani.
In order to give dum effectively,
- Ensure the rice is perfectly parboiled, and both the rice and the masala are hot
- Use a heavy bottomed, straighted edged dutch oven pot. The biryani will take longer to steam but the rice won’t burn as easily on the bottom. If you don’t have this kind of a pot, use any large pot you have but place a flat griddle underneath
- Use a large spoon to poke holes through the layers of the biryani to allow the steam to penetrate easily
- Cover the pot tightly. You can wrap a tea towel around the lid, place it on top of the pot, and place some heavy weight on top. This will allow steam to build up inside
- Cook on very low flame, ideally the smallest burner, to avoid burning the biryani
- Check for the steam. When close to beind done, lift just an edge of the lid and see if you see steam escaping. If not, you likely need to cook a bit longer!
Can I swap the chicken for a different type of meat?
I don’t recommend swapping the chicken for a different type of meat in this recipe as I have only tested it with chicken.

If you’re a fan of Pakistani flavors, check out these recipes:
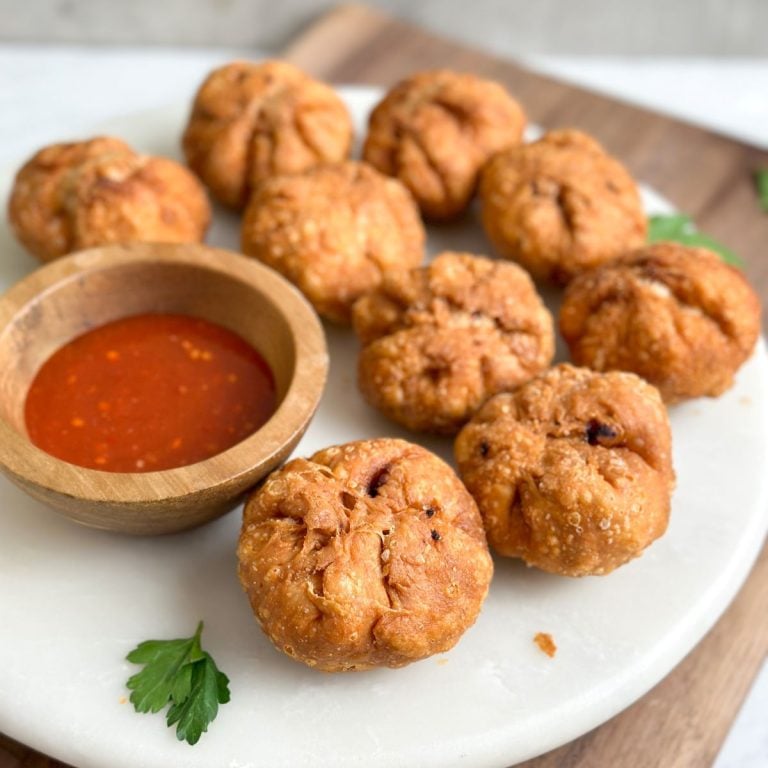 Pakistani Chicken Kachori Recipe
 Chicken Tikka Paratha Rolls
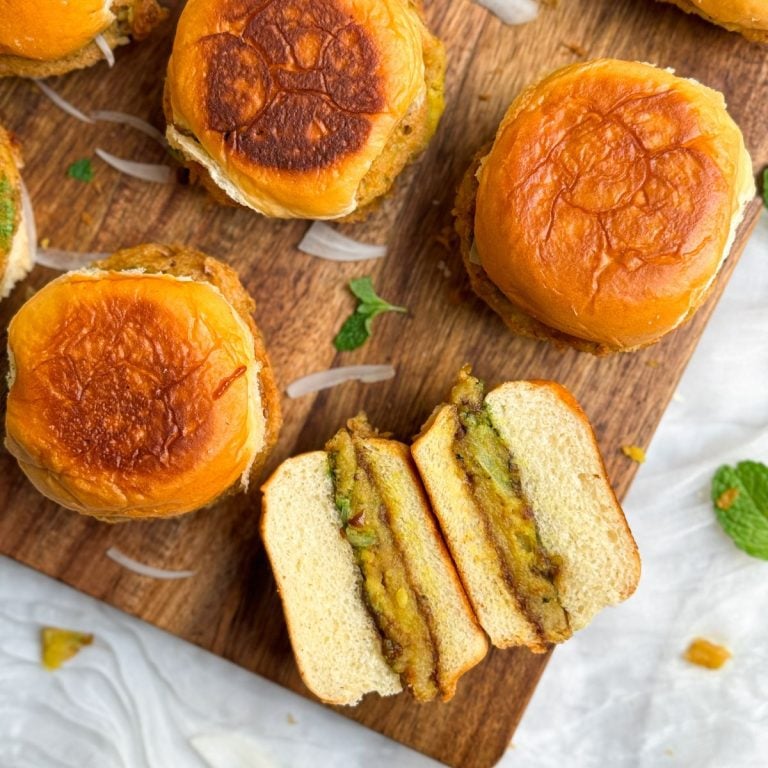 Aloo Bun Kabab
 Tandoori Chicken Naan Buns
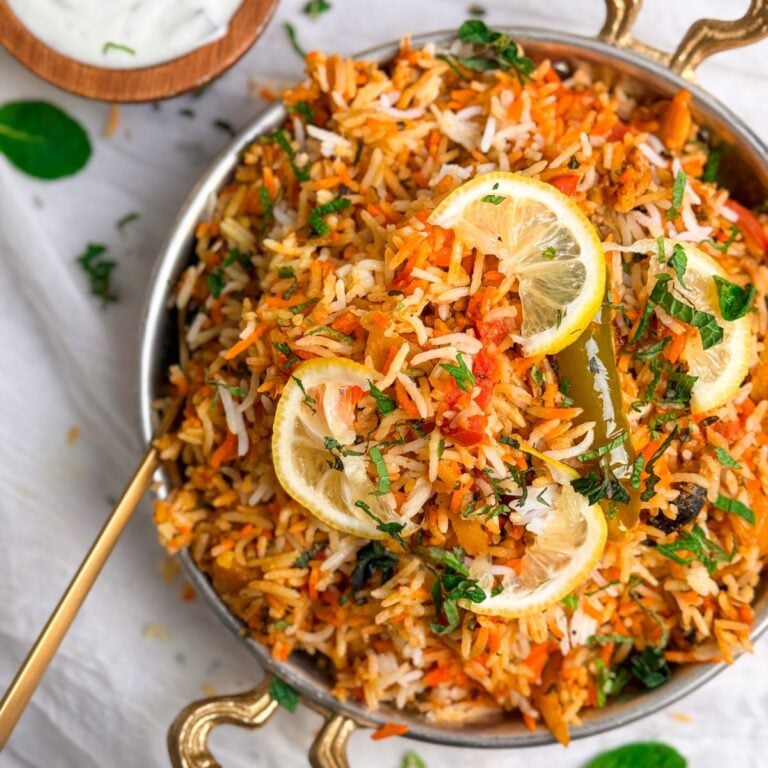
BEST CHICKEN BIRYANI (KARACHI STYLE) RECIPE
The perfect Karachi style chicken biryani: perfectly cooked rice, tender chicken, lots of potatoes and masala, and an unbelievable harmony of spicy and tangy flavors in every bite.
Yield:10 servings
- Prep Time:
- 30 mins
- Cook Time:
- 1 hr, 30 mins
- Total Time:
- 2 hrs
Email This Recipe
Enter your email and I’ll send this directly to you. Plus you’ll get new recipes from me every week!
Ingredients
Biryani Masala:
- 1/2 cup oil
- 2 small or 1 large onion, thinly sliced (~250g)
- 4 tbsp ginger & garlic paste
- 2 lb chicken with bone, cut into medium pieces
- 3/4 cup plain yogurt
- 2–3 tsp salt (to taste)
- 1 pack Shan Bombay Biryani Masala
- 1/2 pack Shan Sindhi Biryani Masala
- 3 russet potatoes, cut into 1/2″ slices (~550g)
- 1–2 large lemons, thinly sliced (100-150g)
- 3/4 cup dried aloo bukhara (plum)
- 6 tomatoes, cut into thin slices (600g)
- 6–8 green chilies, cut into long slices (serrano preferred)
- 1 cup chopped fresh cilantro
- 1 cup chopped fresh mint
Rice:
- 4 cups Sella rice (800g)
- 12 cups water
- 1–2 tsp salt (or to taste)
Layering:
- 1/4 tsp yellow or orange food color mixed in 2 tbsp cold water (I use this one)
Raita for serving (optional):
- 2–3 cups plain yogurt
- 1 cucumber, finely chopped
- 1–2 tsp cumin seeds
- Pinch of salt
Instructions
Prep:
- First, prepare all the ingredients
- Wash and rinse the rice 5-6 times until the water becomes clearer, and soak it in cold water
- Slice and chop all the vegetables, and gather everything else in front of you
Biryani Masala:
- Heat the oil in a large pot
- Add the onion and cook it on medium high heat for 8-10 minutes until it becomes golden
- Add the ginger & garlic paste and saute for 1-2 minutes until it no longer smells raw
- Add the chicken, and cook on high heat for 5 minutes. This will give the chicken a light brown color and get rid of the raw smell
- Add the yogurt, salt, Bombay Biryani Masala, Sindhi Biryani Masala, and potatoes. Stir and fry on high heat for 2-3 minutes to toast the spices and make them fragrant
- Add the sliced lemon
- Reduce the heat to low, cover, and cook until the potatoes are just cooked through (but not fully soft). This can take anywhere from 10-20 minutes depending on how big your potatoes are cut. Check after every 5 minutes
- Halfway through cooking the potatoes, add the dried aloo bukhara and green chilies, and stir them in
- Once the potatoes are just cooked through, remove the lid. Keep the heat on low, and layer the sliced tomatoes on top of the masala. Sprinkle 2 tbsp each of the cilantro and mint on top (you won’t use all of the cilantro and mint in this step)
- Cover the pot with the lid and cook for about 10 min on low heat to soften tomatoes
- Remove the lid and cook for 2-3 more minutes on medium heat. Then turn off the heat
- At this point, the biryani masala should be very fragrant, the potatoes should be fully cooked through, and there should be a good amount of masala without being watery. If there’s too much liquid, cook down a bit more without a lid
- Cover the masala and keep it hot
Parboiling rice:
- Follow the instructions given on the package of the rice to boil it in water with salt, but reduce the cooking time to ~75% and check frequently after the 50% mark
- To cook Sella rice, I add the soaked rice to boiling water, and cook it for ~8-10 minutes before draining
- The rice should be just cooked through (i.e., no raw middle) but should still have a firmness / bite to it. Drain the water by transferring the rice to a rice colander
Layering:
- To a clean, large heavy bottomed Dutch oven pot, add a third of the rice on the bottom. Drizzle over some food color (mixed in water) and sprinkle over a third of the remaining cilantro and mint
- Then add a layer of half of the biryani masala
- Repeat with another third of the rice, food color, cilantro, mint. Add the remaining biryani masala, and add a third and final layer of rice, food color, cilantro and mint on top
Steaming / Dum:
- Use the back of a large spoon / dowel to poke 3-4 holes through the layers of the biryani
- Wrap the lid of the pot in a large tea towel and cover the pot. Place it on a small burner on medium heat, and put some weight on top of the lid (e.g., a mortar and pestle). After 5 minutes, reduce the heat to the lowest setting
- Allow the biryani to steam for ~20 minutes. You will know it is done if you slightly lift the lid and see steam escaping
- Turn off the heat and let the biryani rest for 5 minutes
- Carefully and very gently mix the biryani. Use a large metal spoon or rice fluffer, and mix in a scooping motion just 5-6 times. The biryani does not have to be fully mixed; overmixing will risk breaking the rice
- If you are serving the biryani in a different dish, you can skip the “mixing” and simply scoop the biryani into the dish, making sure to dig deep with each scoop. This will naturally mix the layers
Serving:
- Make the raita by mixing together the ingredients
- Serve the biryani while hot with the cold raita, and enjoy!!
Video Tutorial
Notes
- Please read the blog post above in order to get this recipe right. You will find pictures of each step, important tips, and answers to frequently asked questions about the rice and steaming


Comments
Besoftpro
Nice.
Zoha Malik
Glad you liked it!
Duaa
Hi Zoha! Can I reduce the chicken (to around 500 grams) without reducing the quantity of any other ingredient? We don’t like that much chicken in our rice. Thank you!
Zoha Malik
That should be ok 🙂
shoheil bhanji
wish you had a step by step video of your biryani.
Faye
Omg Zoha I picked your recipe because my super sweet cousin is named Zoha and because you put potatoes in your biryani (you gotta have potatoes!) This was my first time making biryani and this recipe is PERFECT!
Zoha
AW I AM SO HAPPY!!!
Zita
I’m well used to Pakistani cuisine, I know it’s supposed to be spicy and each to their own, but it was too spicy for us, even after adding only half of the spices and green chillies. Otherwise, everything was excellent and the instructions were very helpful. I haven’t cooked biryani for years but it looks amazing, which is an accomplishment for me. Thank you!
Zoha
Thank you for the review, Zita 🙂
Rahma
Finally found my ideal biryani recipe! My karachi-ite husband approves.
Zoha
Aww, thank you SO much!
Sandhya
Wow, I wish I could make this at home with your recipe, but it probably won’t turn out like the biryani I had at Fully Biryani Spot! 😋🔥 Damn, it was soooo good! The quantity was perfect, and I just loved their mutton biryani 🍖🍚. The spices on the chicken fry 🍗 and the gravy were just out of this world! 😍 I’ll never forget that taste. If you want to try it, contact them here: Fully Biryani or call 8438169299. 📞🍽️
Asra
This recipe is worth making!! I’ve tried so many Biryani recipes but this one is a keeper
Grace
mind blowing recipe! I am a picky eater and this is amazing! thank you for the detailed recipe and instructions.
Asma Amer
Made one more time. Vowed one more time. 👏🏻👏🏻👏🏻
century-foods
Thanks For your wonderful recipe. I like it. Keep up-to-date with more recipes!!
Acai
zoha, can I use 1/2 packet of bombay biryani masala and 1 packet of sindhi biryyani masala? cuz that’s what I have now🤭🥺
Rik
I’ve been trying to find the perfect biryani recipe for years and this one is it! Thank you for sharing! It is delicious and my whole family loves it (even the aunties ;))
Fatima
Thank you for sharing this incredible recipe! I tried it, and it turned out absolutely delicious 😊
Zoha
Thank you SO much!
hema
Made biryani for the first time using this recipe and it came out amazing! Thank you so much!
Zoha
Made my day!!
Abdullah Yusuf
Using a premade masala packet makes this recipe accessible to super beginners but also makes it kinda unoriginal. Beginners should just follow the instructions on the packet.
Radhika Raghvendran
I made this today and it turned so good! My husband said it’s the best biriyani I’ve ever made. Followed your recipe exactly, except I marinated the chicken overnight. And added fried onion while layering. Thank you Zoha!!
Zoha
AHHHHH what an absolute honor! Thank you so much!
RD
Can I make the biryani masala a day in advance and make the rice/do the layering the day I want to eat it?
Zoha
I think that should be fine! Make sure to separately reheat the masala with a splash of water before the layering
Asma Amer
Made many times. Rocks every time. ❤️❤️❤️
Thanks for an awesome recipe with clearest instructions.
Zoha
Thank you so so much!
Rida
Hey Zoha! So I have an electriv hob/stove and by the end of cooking the masala, my chicken came out shredded mostly. Is that how its supposed to be? It looks pretty much like what you have shown in the photos. Ive made the masala today and will add to the rice tomorrow. Let me know.
Zoha
Hi Rida! The chicken should still be intact. The best way to ensure that is to make sure you saute the chicken until it changes color before adding the tomatoes.