
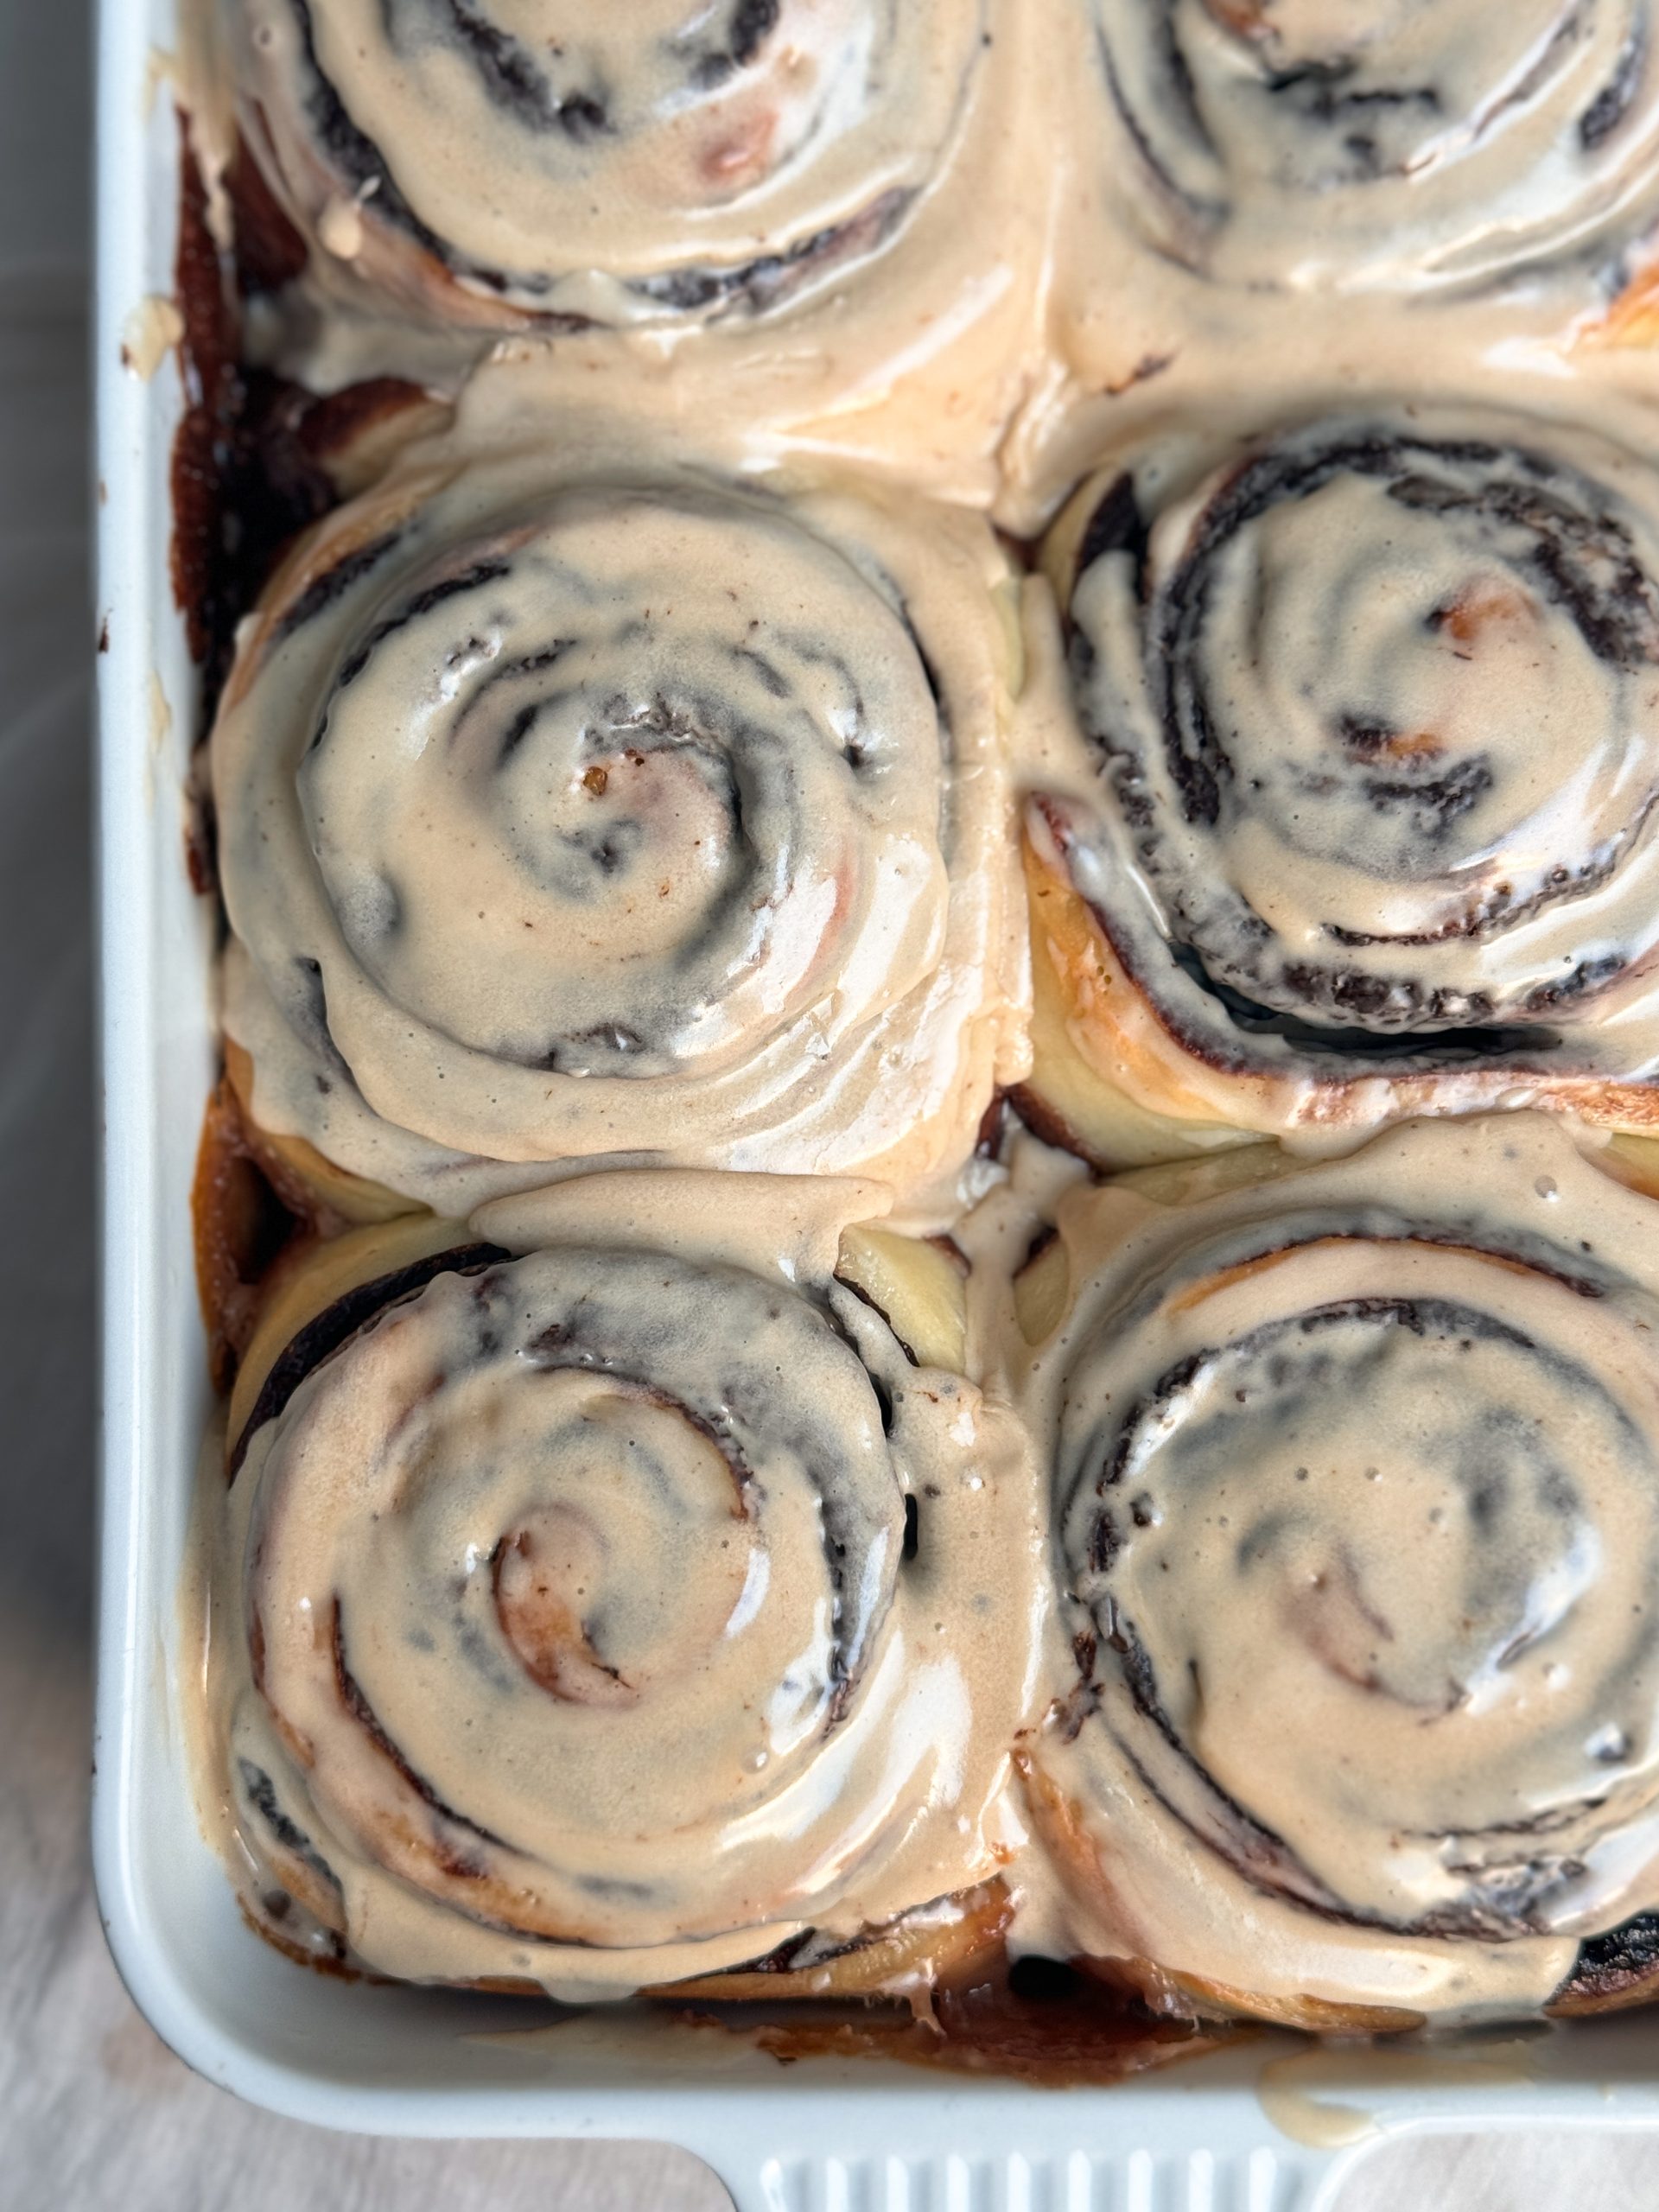
These Super Soft Chocolate Espresso Rolls are the version of cinnamon rolls made for chocolate lovers: unbelievably pillowy, moist bread filled with a decadent dark chocolate espresso filling and covered in espresso icing.
When I tried these rolls, I was spellbound for at least a minute (I have the video if anyone wants it). They are, hands down, one of the best desserts I have EVER eaten. And like most of my recipes, this recipe is simple and fuss free, and these rolls can be made without a mixer! And with that, I hope I have convinced you to give this recipe a go.


Jump to:
INGREDIENTS NEEDED
Here are the ingredients you will need for this recipe (as always, I must remind you to please scroll down to the recipe card for the quantities):
Bread dough:
- Warm whole milk; ideally between 100-110F. The temperature of the milk is important to activate the yeast
- Sugar
- Active dry yeast - you can also use instant yeast. In that case, skip the step of resting the milk, yeast and sugar and simply combine all ingredients and knead
- All purpose flour
- Egg
- Salt
- Unsalted butter, softened - I leave the butter outside for around 1 hour
Chocolate Espresso filling:
- Dark or semi sweet chocolate depending on how dark you like your chocolate. You can also use milk if you want, but in that case you may need to reduce the sugar
- Unsalted butter
- Heavy cream (use any kind of cream you have access to)
- Brown or white sugar
- Cocoa powder
- Instant coffee - you want the kind of coffee that dissolves in water; I recommend Nescafe
Assembly:
- Heavy cream - I love to drench any kind of rolls in heavy cream right before baking as it makes them ultra soft and moist!
Espresso icing:
- Icing sugar
- Instant coffee
- Cream or milk

HOW TO MAKE SUPER SOFT CHOCOLATE ESPRESSO ROLLS
Let's go through the steps one by one:
1. Knead the dough
In the bowl of your stand mixer (or regular bowl), add the warm milk, yeast and sugar. Whisk and wait for 10 minutes or until the mixture looks frothy. This step is not needed if you are using instant yeast.

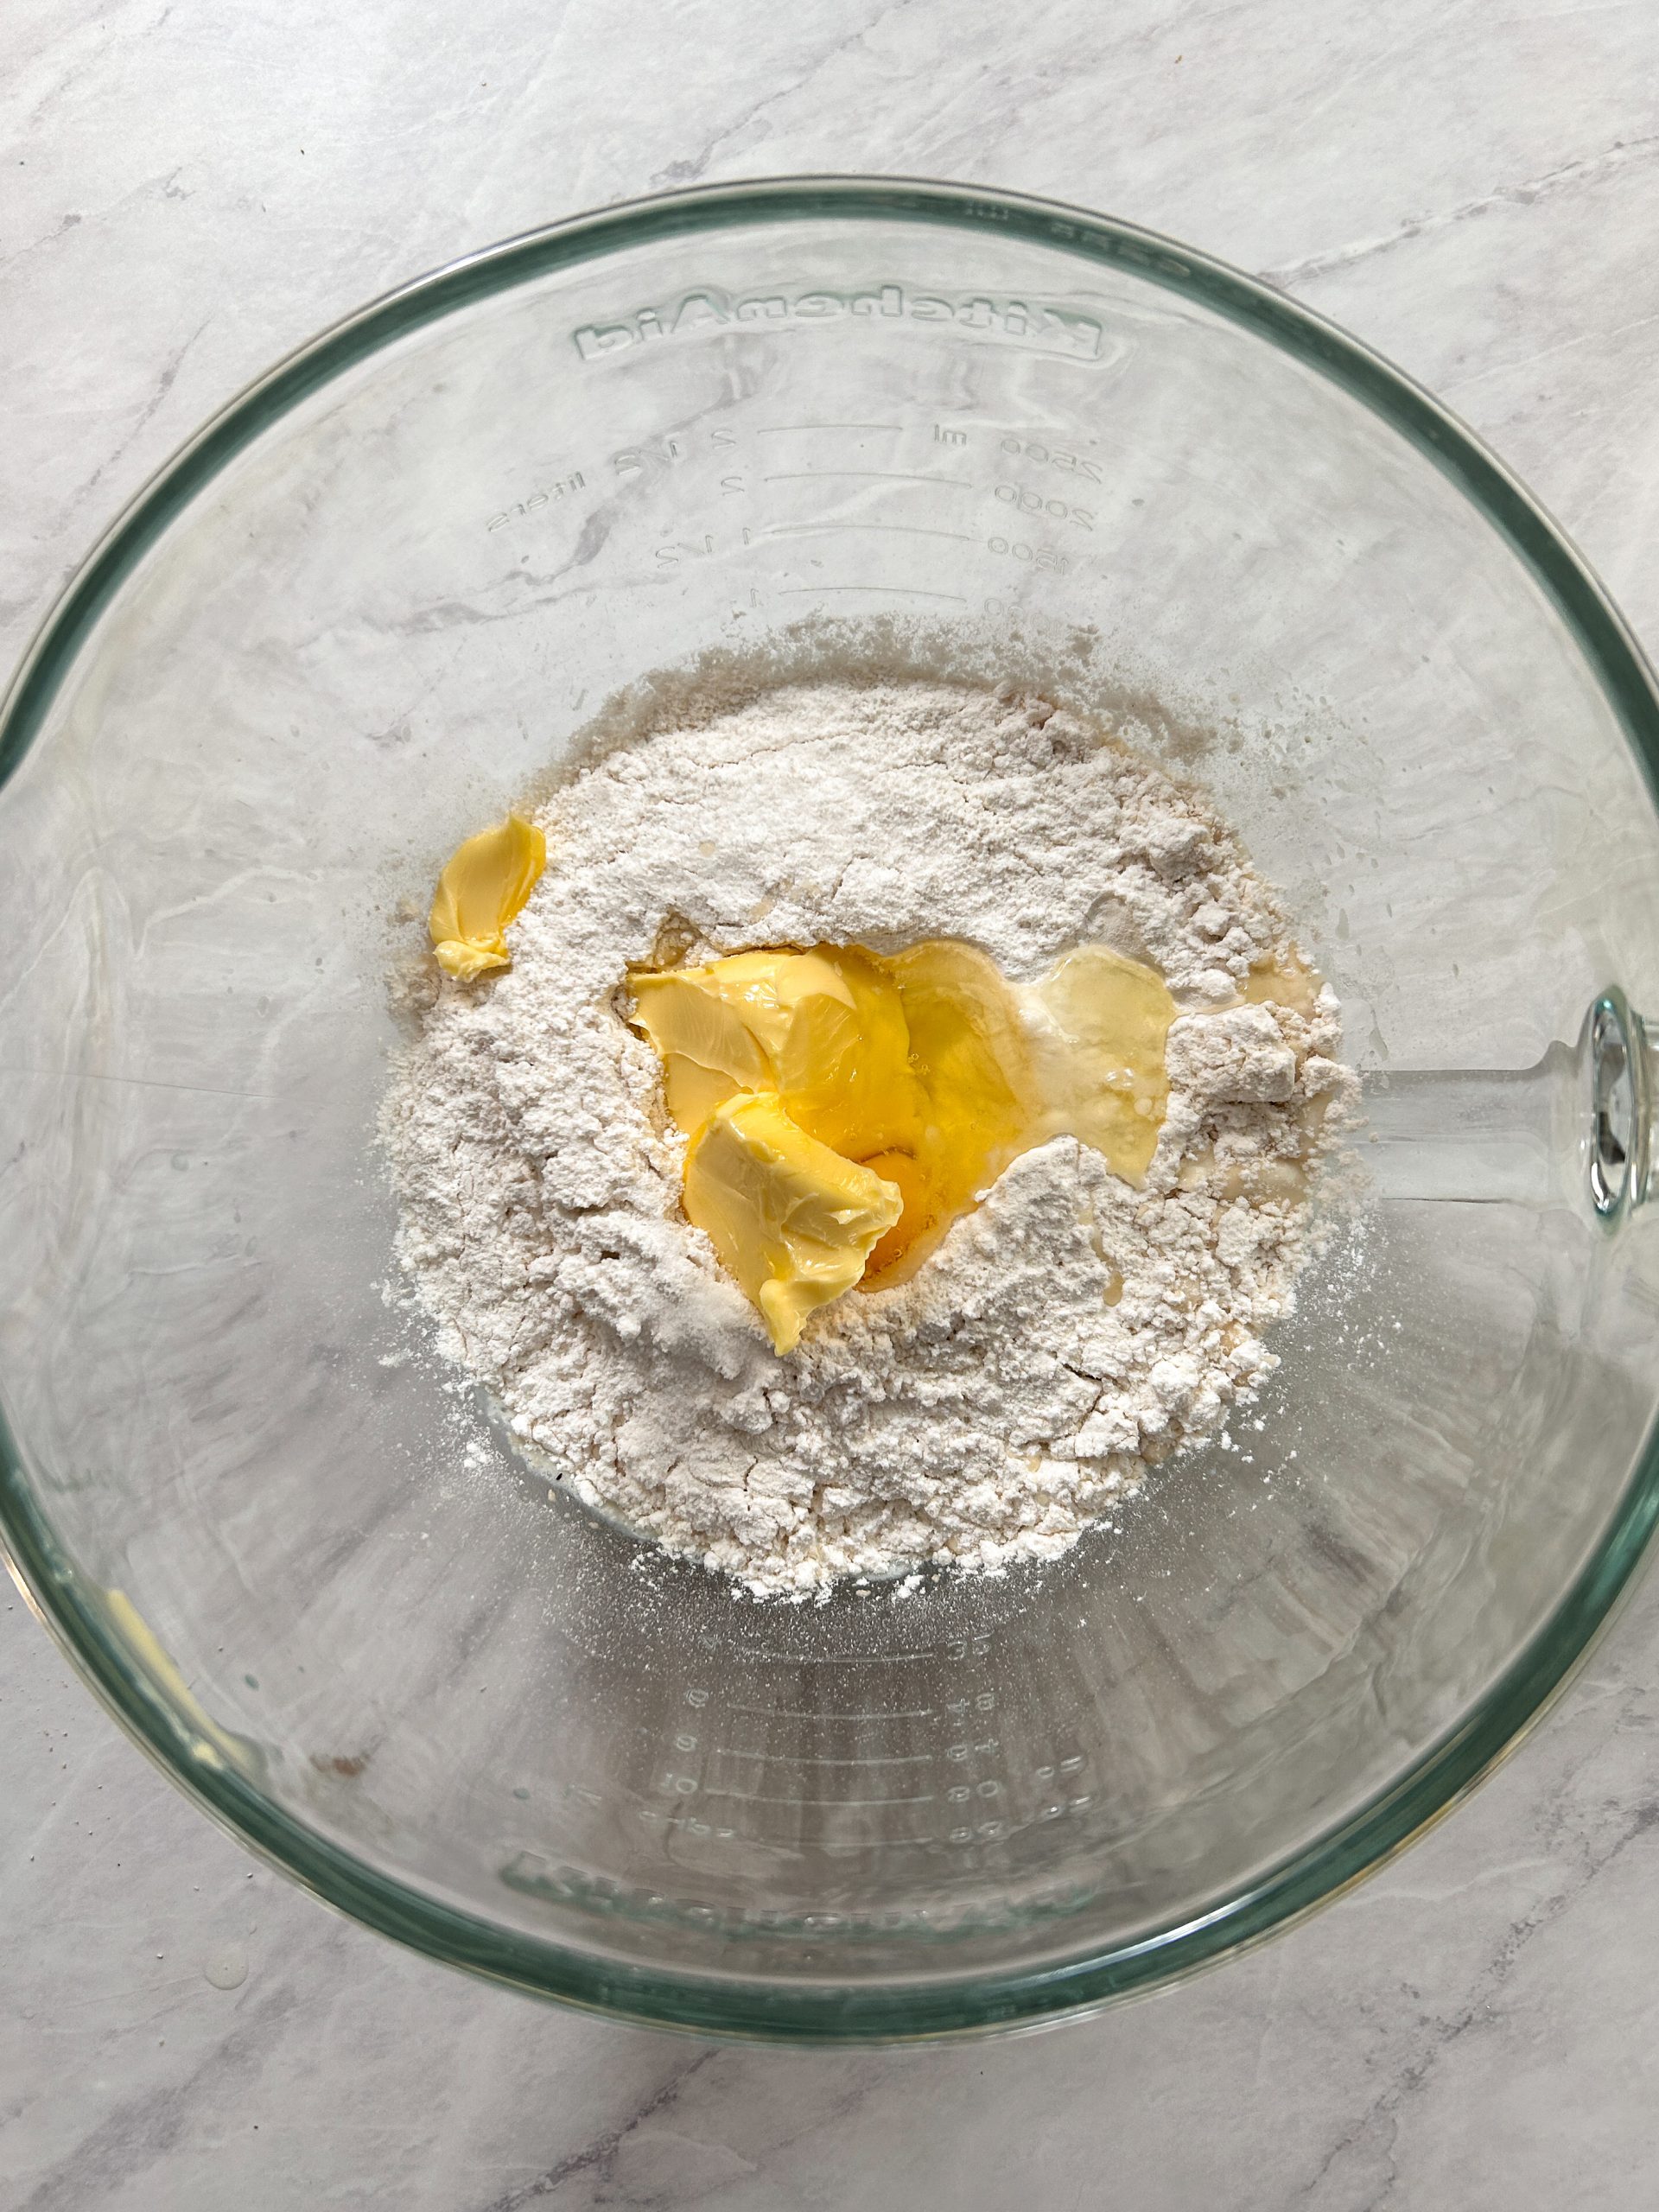
Add the remaining ingredients for the dough, and knead until the dough is smooth, soft and stretchy. There are two ways you can do this:
Option 1: Kneading with a stand mixer
Use the dough hook attachment of your stand mixer (this is the one I use) and knead on medium high speed for 7-10 minutes, until the dough pulls away from the edges of the bowl, becomes smooth to touch (instead of sticky), and is very stretchy. You should be able to pull it into a thin sheet without it breaking ("window pane test").
Option 2: Kneading by hand
First, use a large wooden spoon to mix the ingredients until they start to form a dough. Then, lightly dust a clean work surface with flour and turn out the dough. Using clean hands, start working the dough in a "push, pull" motion.
Now, here's the deal: this WILL be a sticky mess. The dough has a lot of liquid content (which is how the rolls become so soft), but don't be discouraged and don't add more flour. Turn on your favorite show / podcast, and keep kneading the dough for a good 8-10 minutes.
A scraper like this one will be very useful in pulling the dough off the surface and keeping things clean. As you knead, the flour will absorb more liquid, develop more gluten, and become stretchy and smooth.
You will know the dough is done when it doesn't stick to your hands anymore (you will have to clean your hands first), is very soft, and very stretchy.
2. Proof the dough
This is the first rise. Transfer the dough to a clean, oiled bowl, cover with cling wrap, and rest for ~60-90 minutes in a warm place. I like to place it in the oven with the oven light turned on (the oven is off, obviously). It should double in size, and, when poked gently, spring back part of the way.


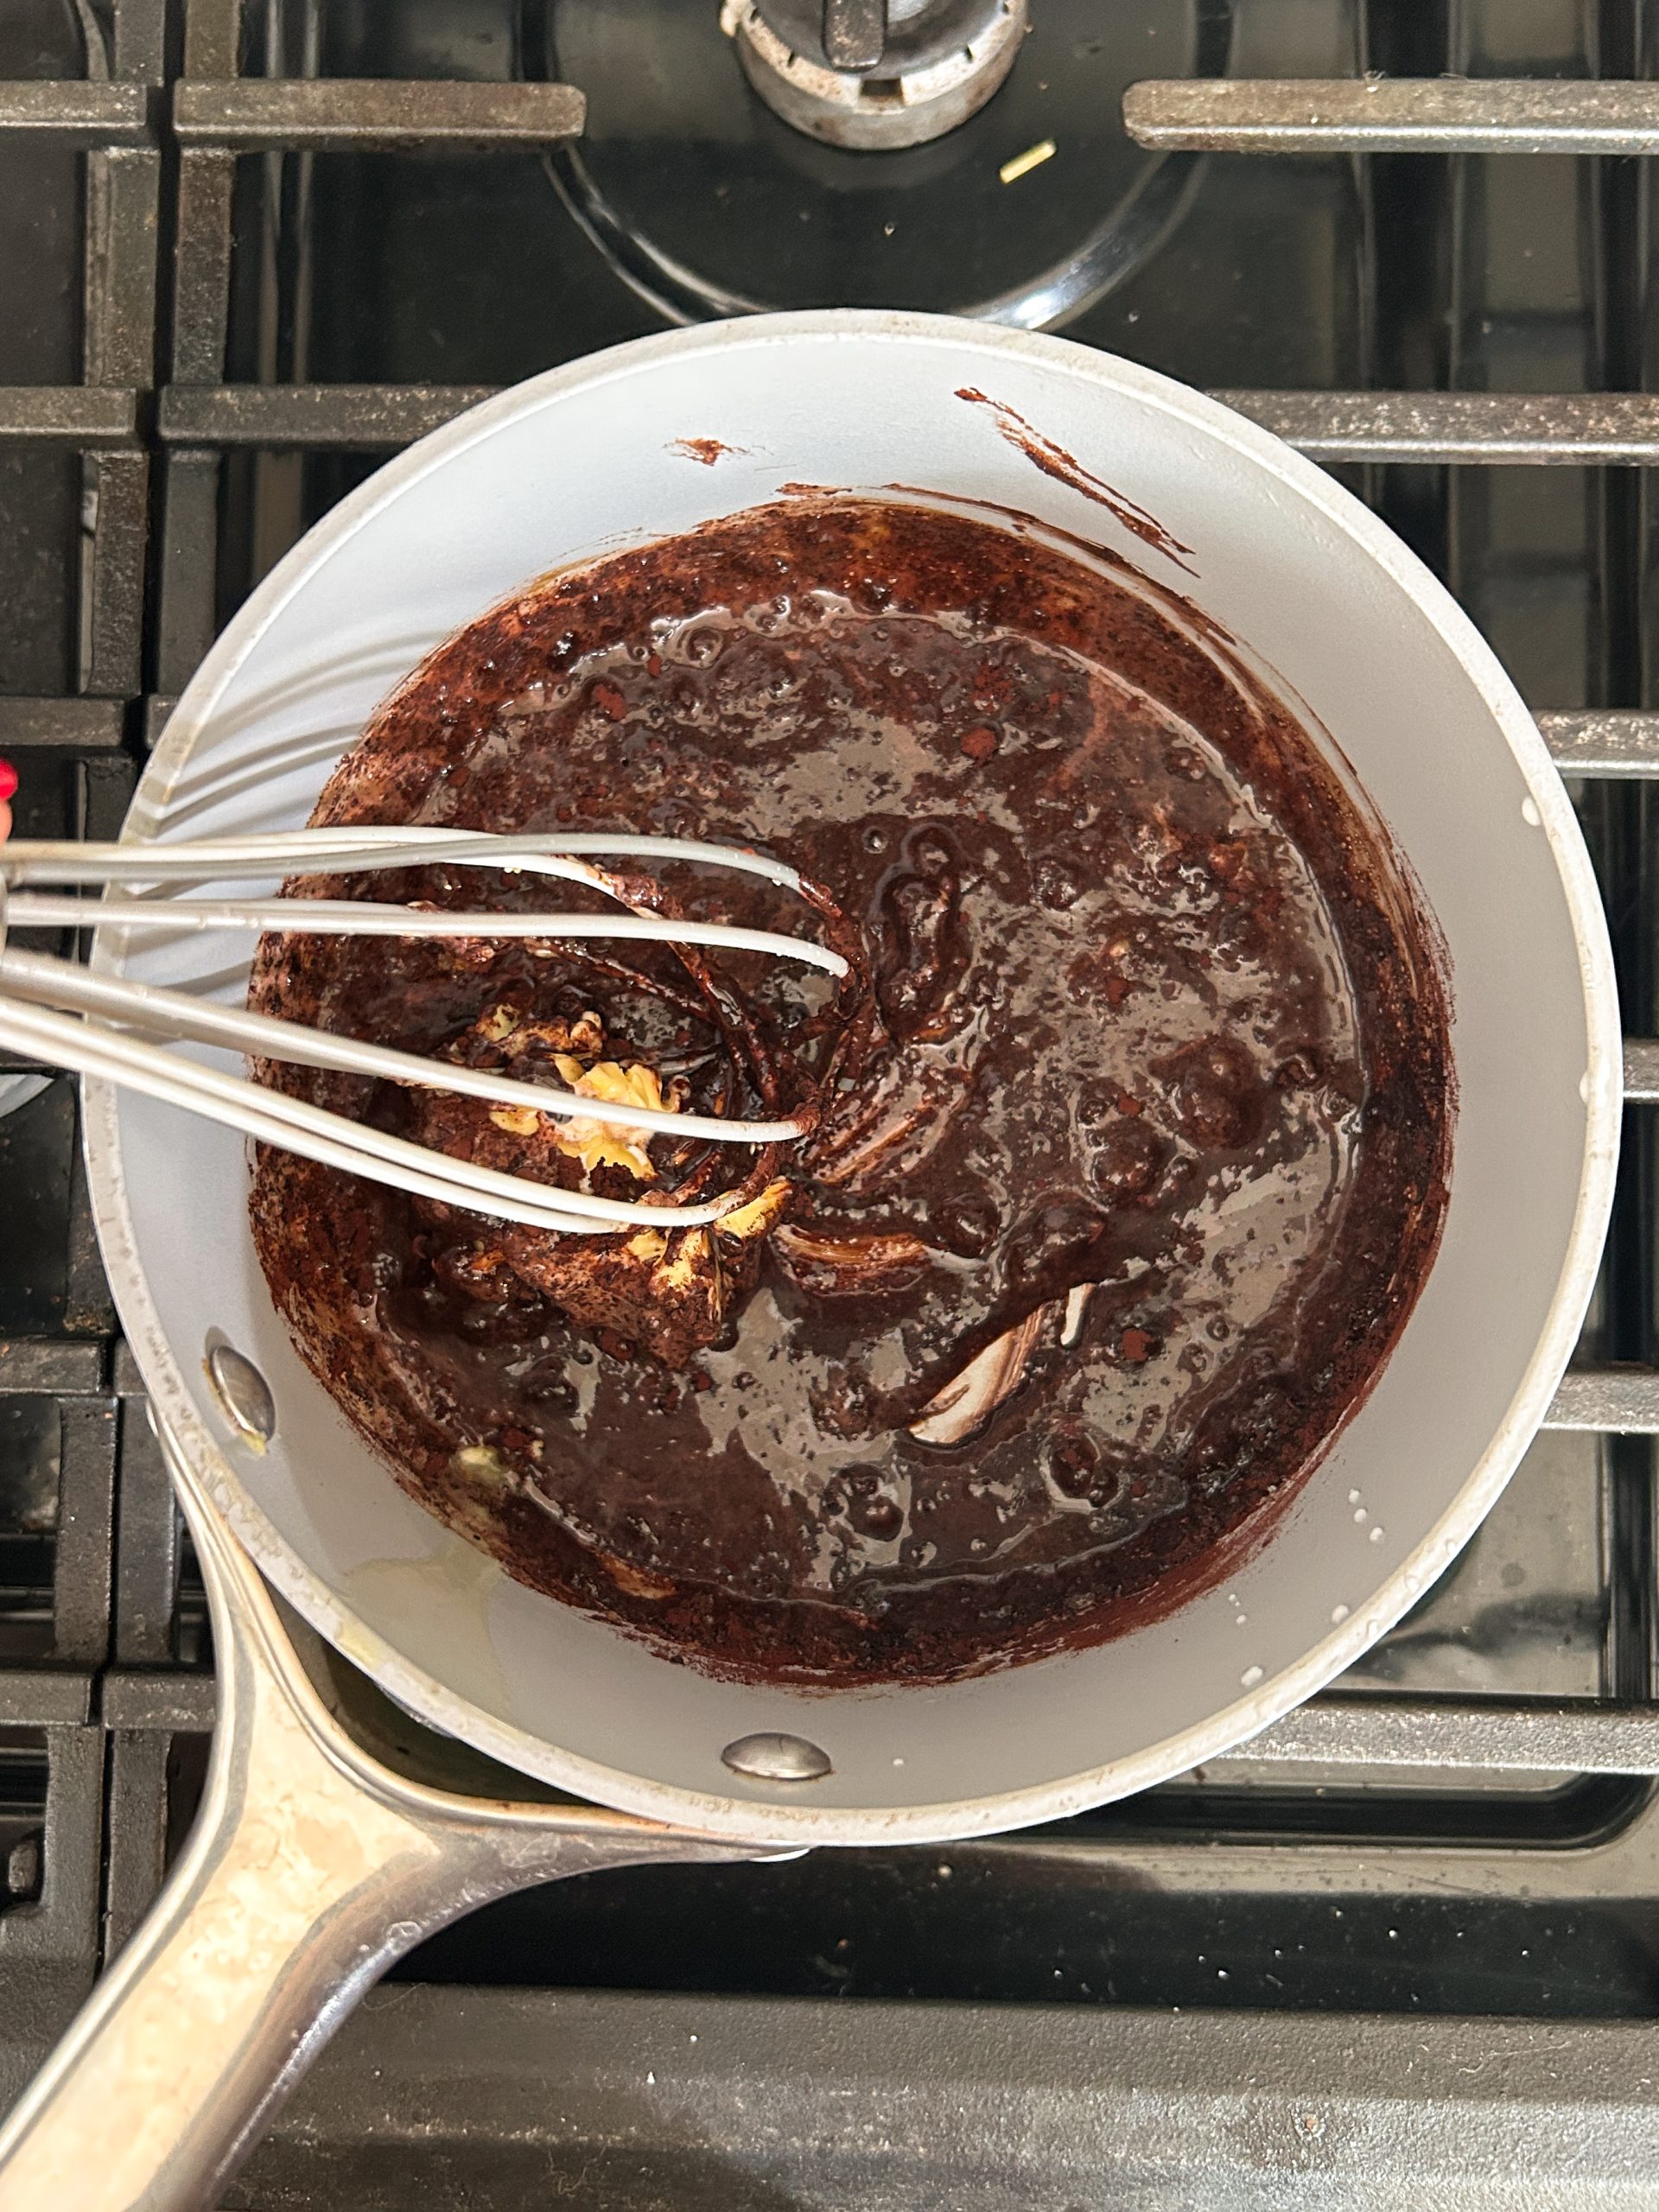
3. Prepare the chocolate espresso filling
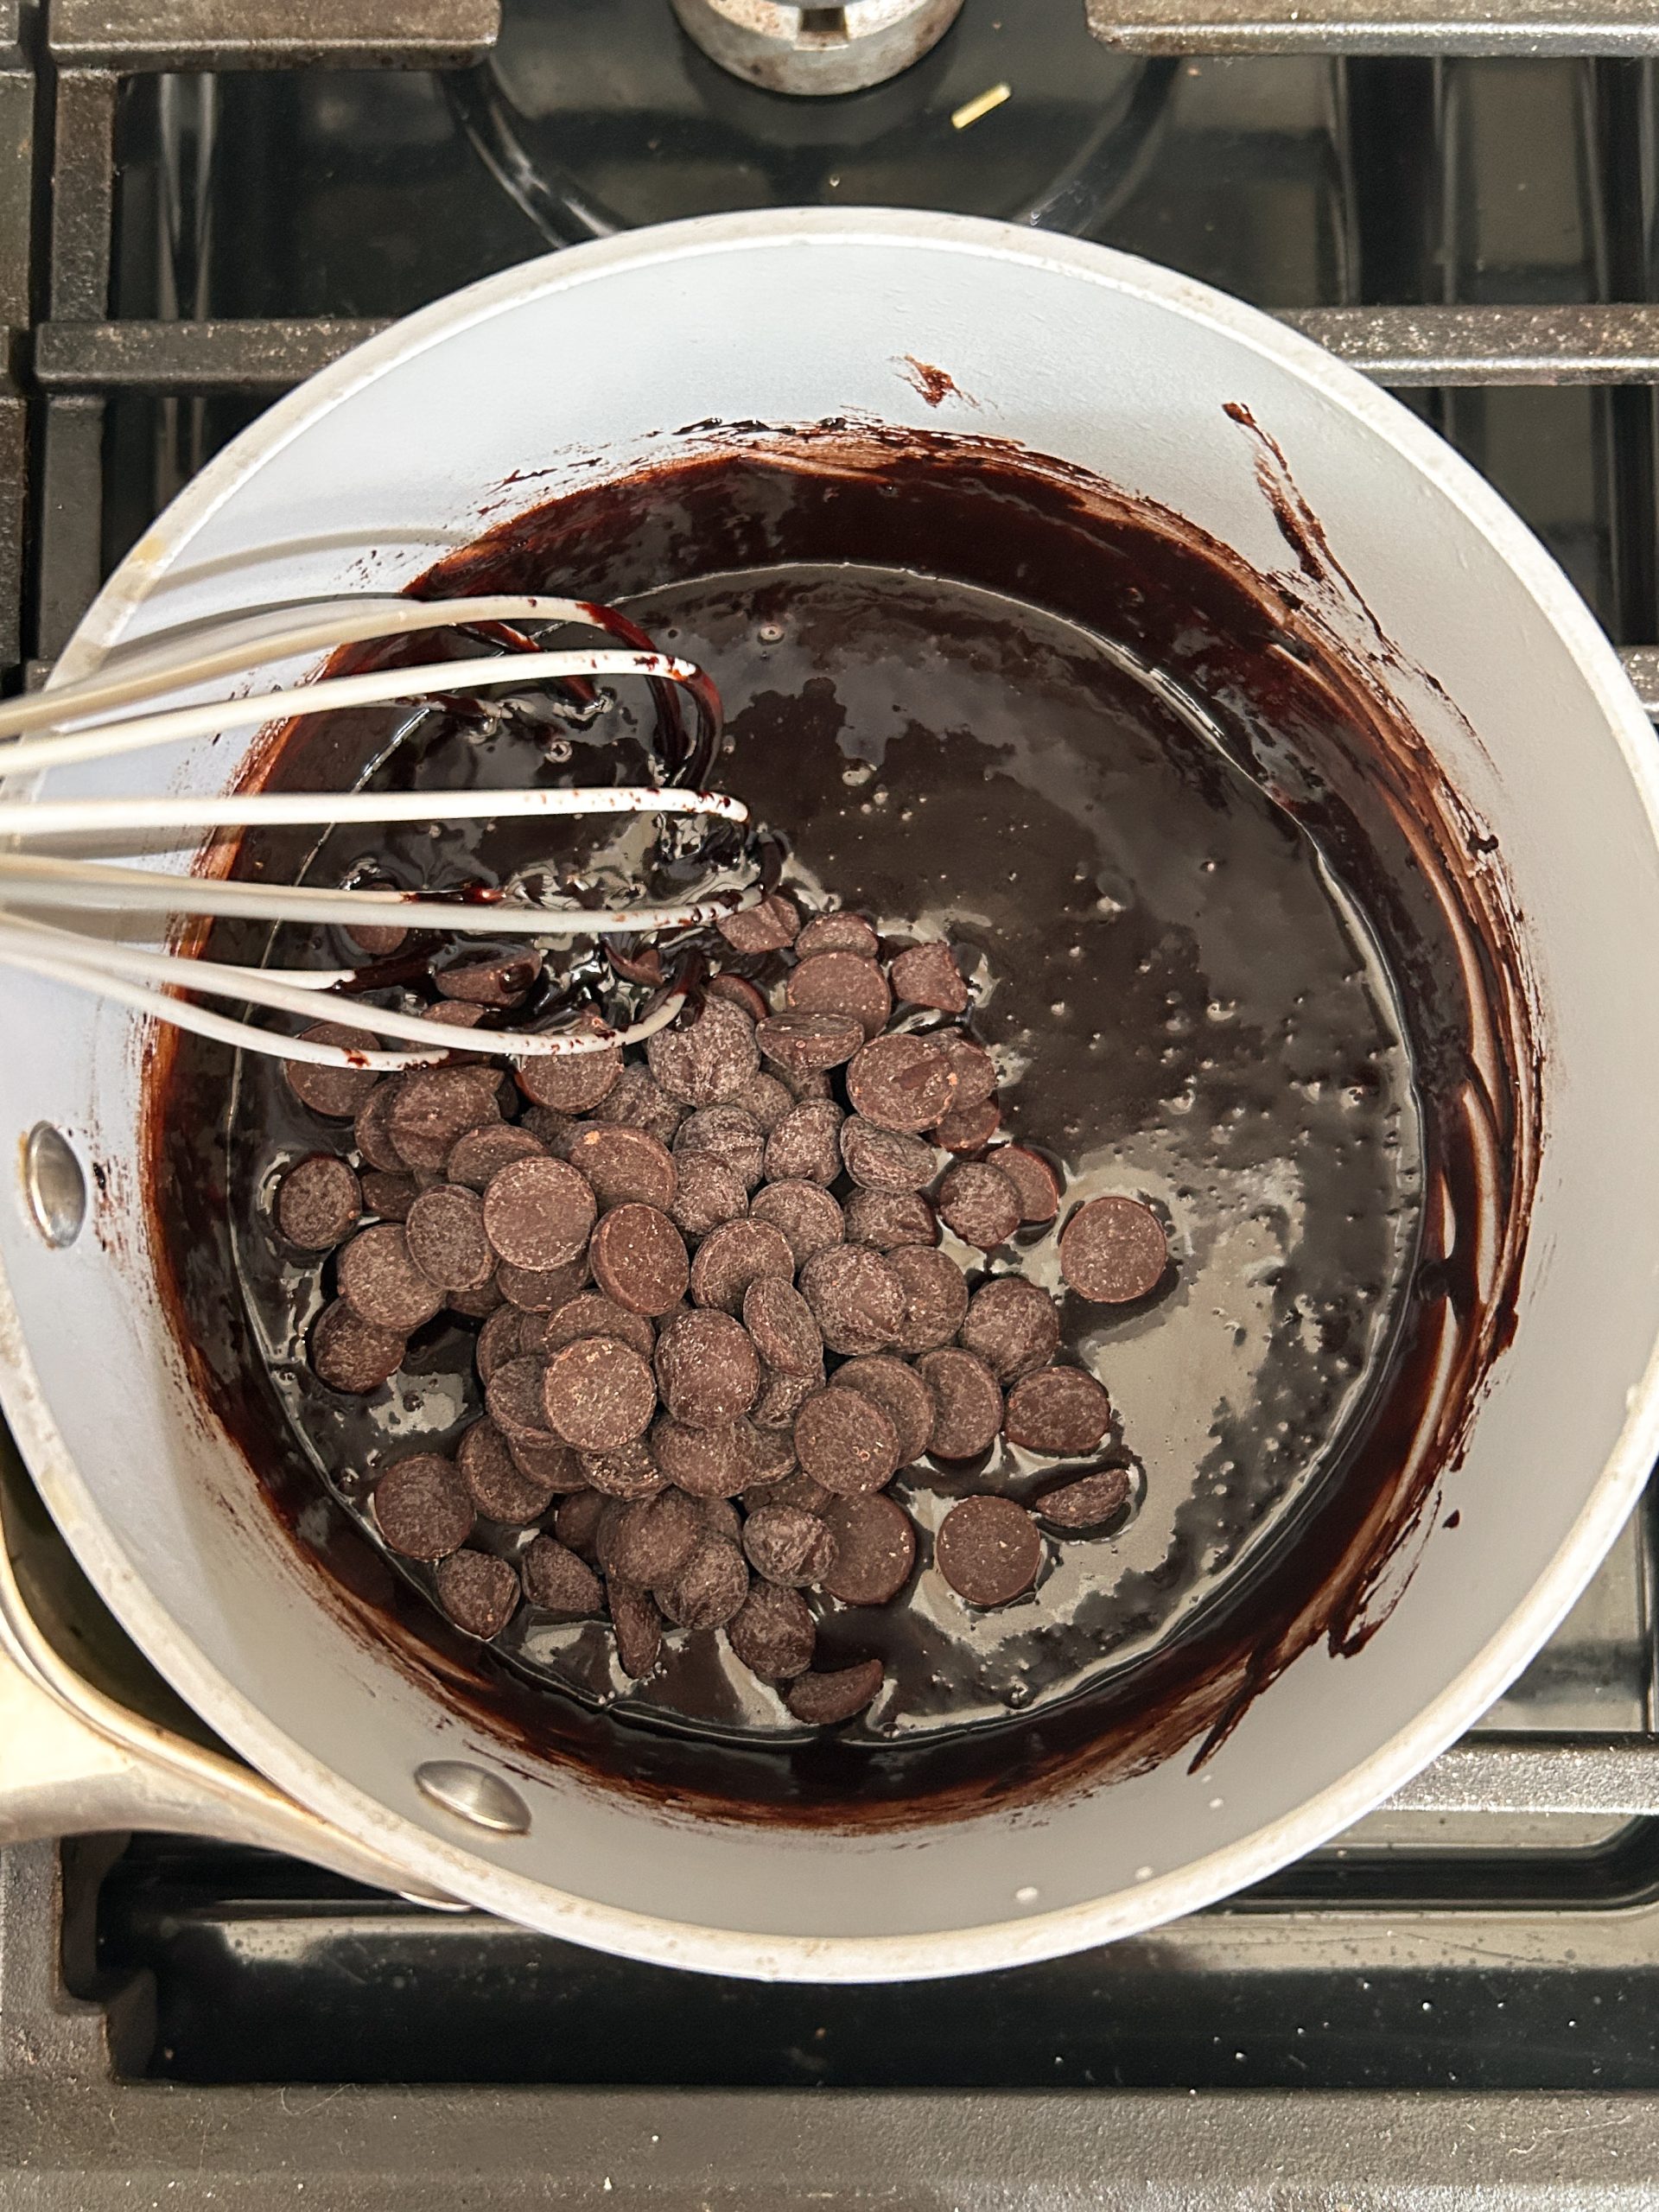
In the meanwhile, for the filling, add the butter, cream, coffee and sugar to a nonstick saucepan. Place on medium low heat and stir until everything is melted. Then add the chocolate (chips or chopped) and stir until the chocolate has melted. Be careful not to overheat this mixture as that can cause chocolate to seize up and split. Once you have a smooth mixture, let it rest and cool down.

Important note: the amount of sugar, coffee, and cream in this filling is flexible and dependent on your preference. Start with a smaller amount of sugar and coffee, taste and add more if you'd like. If the mixture looks too thick, add more cream. The ending result should be a thick sauce which will become spreadable once it cools down.
4. Shape the Chocolate Espresso Rolls
Once the dough has risen and the filling has cooled, it is time to assemble!
Prepare a baking pan or dish by brushing butter on it. I used a 7x11" ceramic dish, but this recipe also works well with an eighth sheet pan.
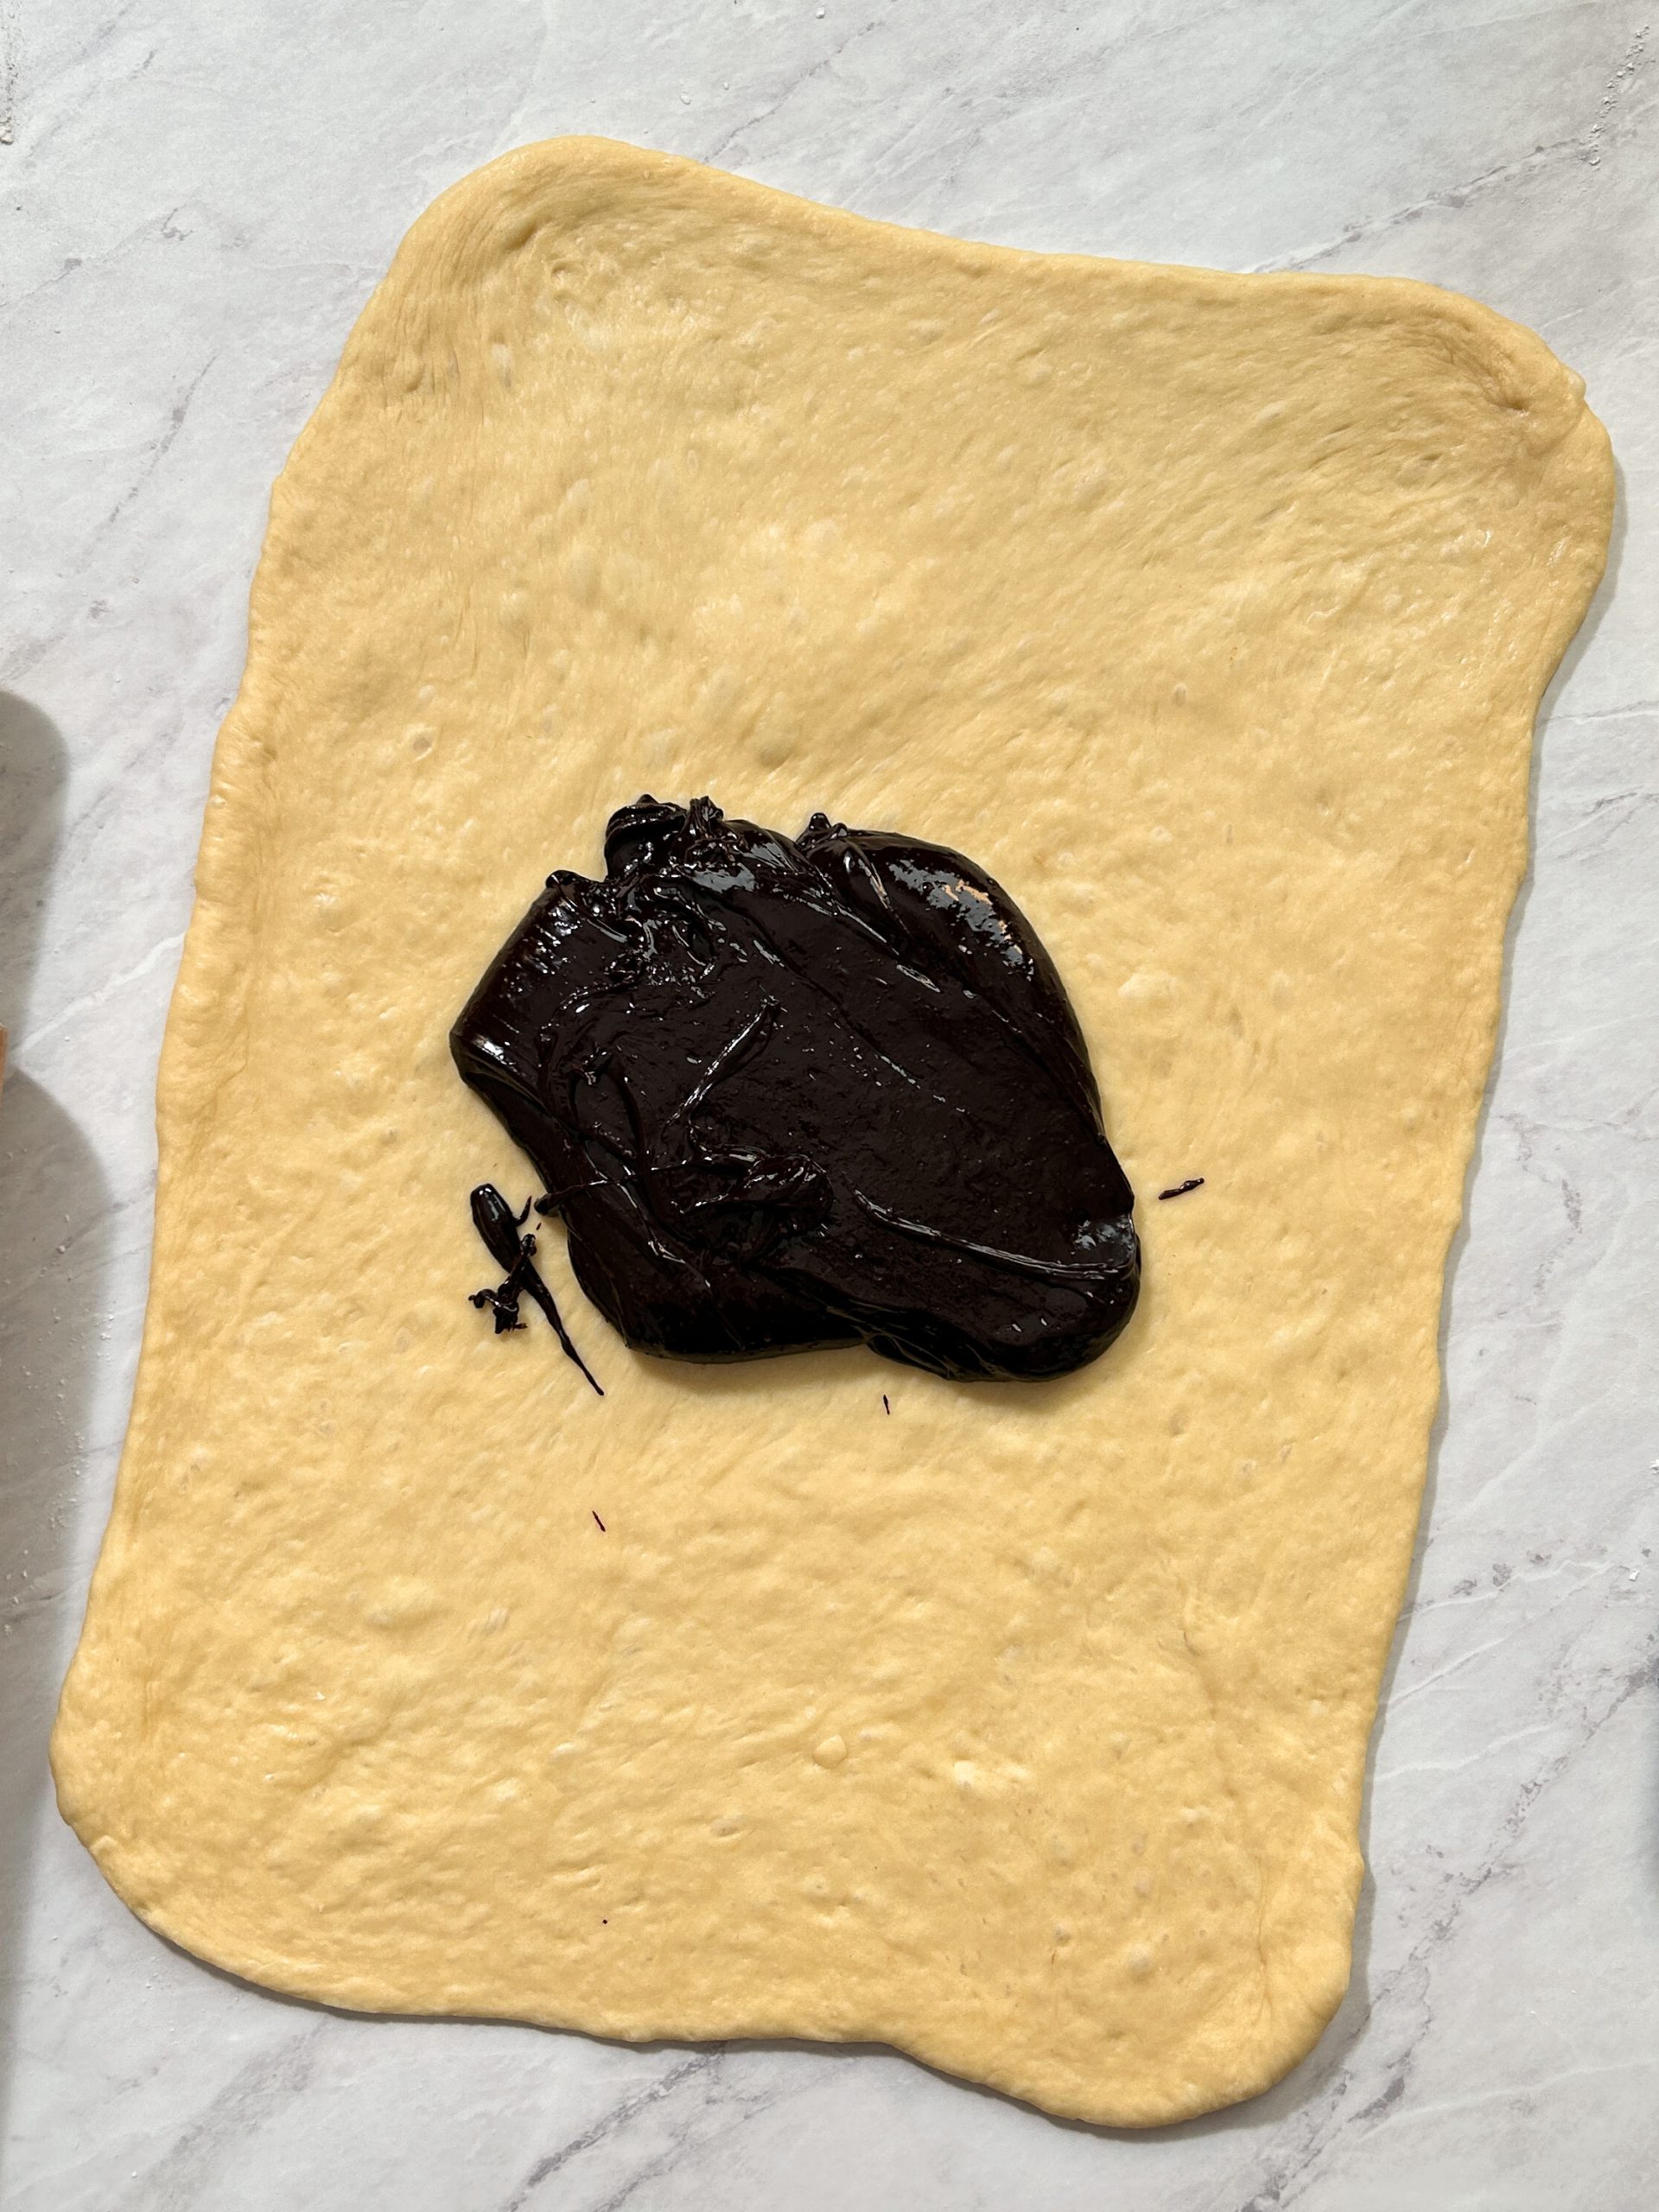
Place the dough on a lightly floured surface, and roll it out into a 12x14" rectangle. The dough should be so soft that it should be really easy to roll it out and shape it with your hands so it is as neat of a rectangle as possible.
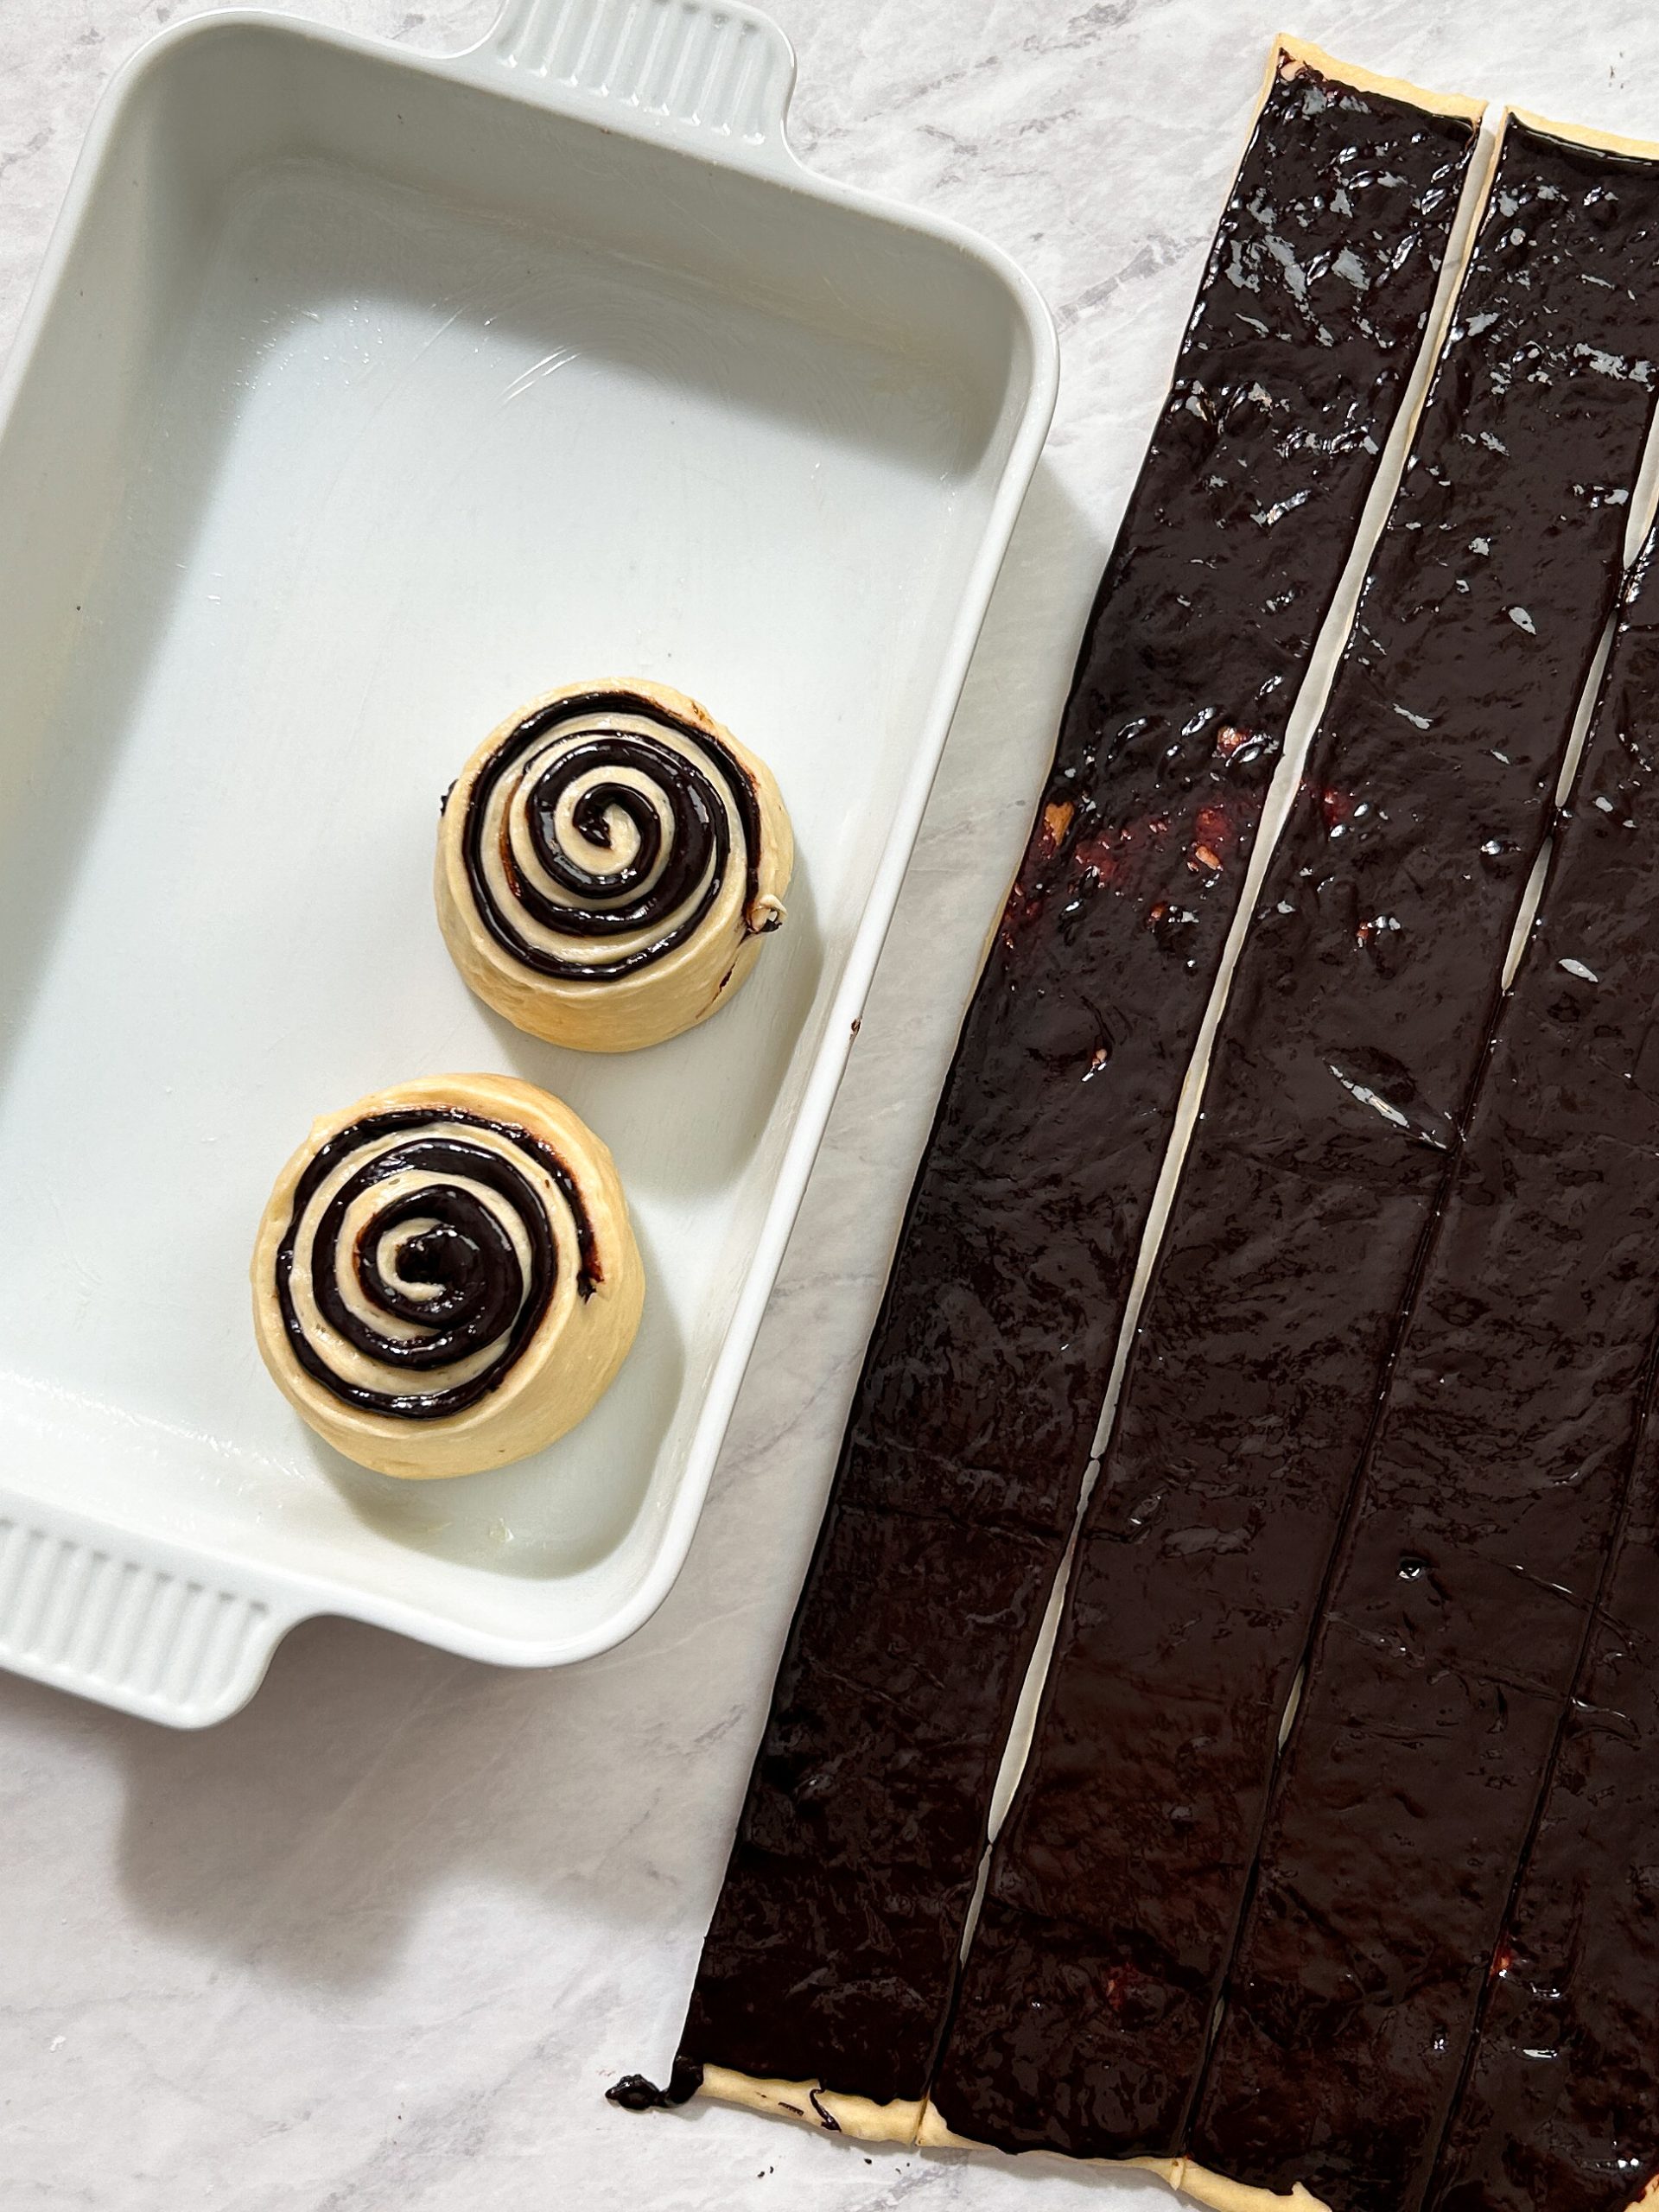
Spread the chocolate espresso filling as evenly as possible using an offset spatula.

Then, divide the rectangle into 6 strips, each strip 2x14". Roll each strip individually into rolls, and place them in the dish / pan you are using to bake.
I love to use this method of dividing into strips and rolling individually as opposed to rolling up the whole rectangle and then cutting into individual rolls using a knife or floss. It makes perfectly shaped rolls with little to no mess. Seriously, try it and you will be convinced!

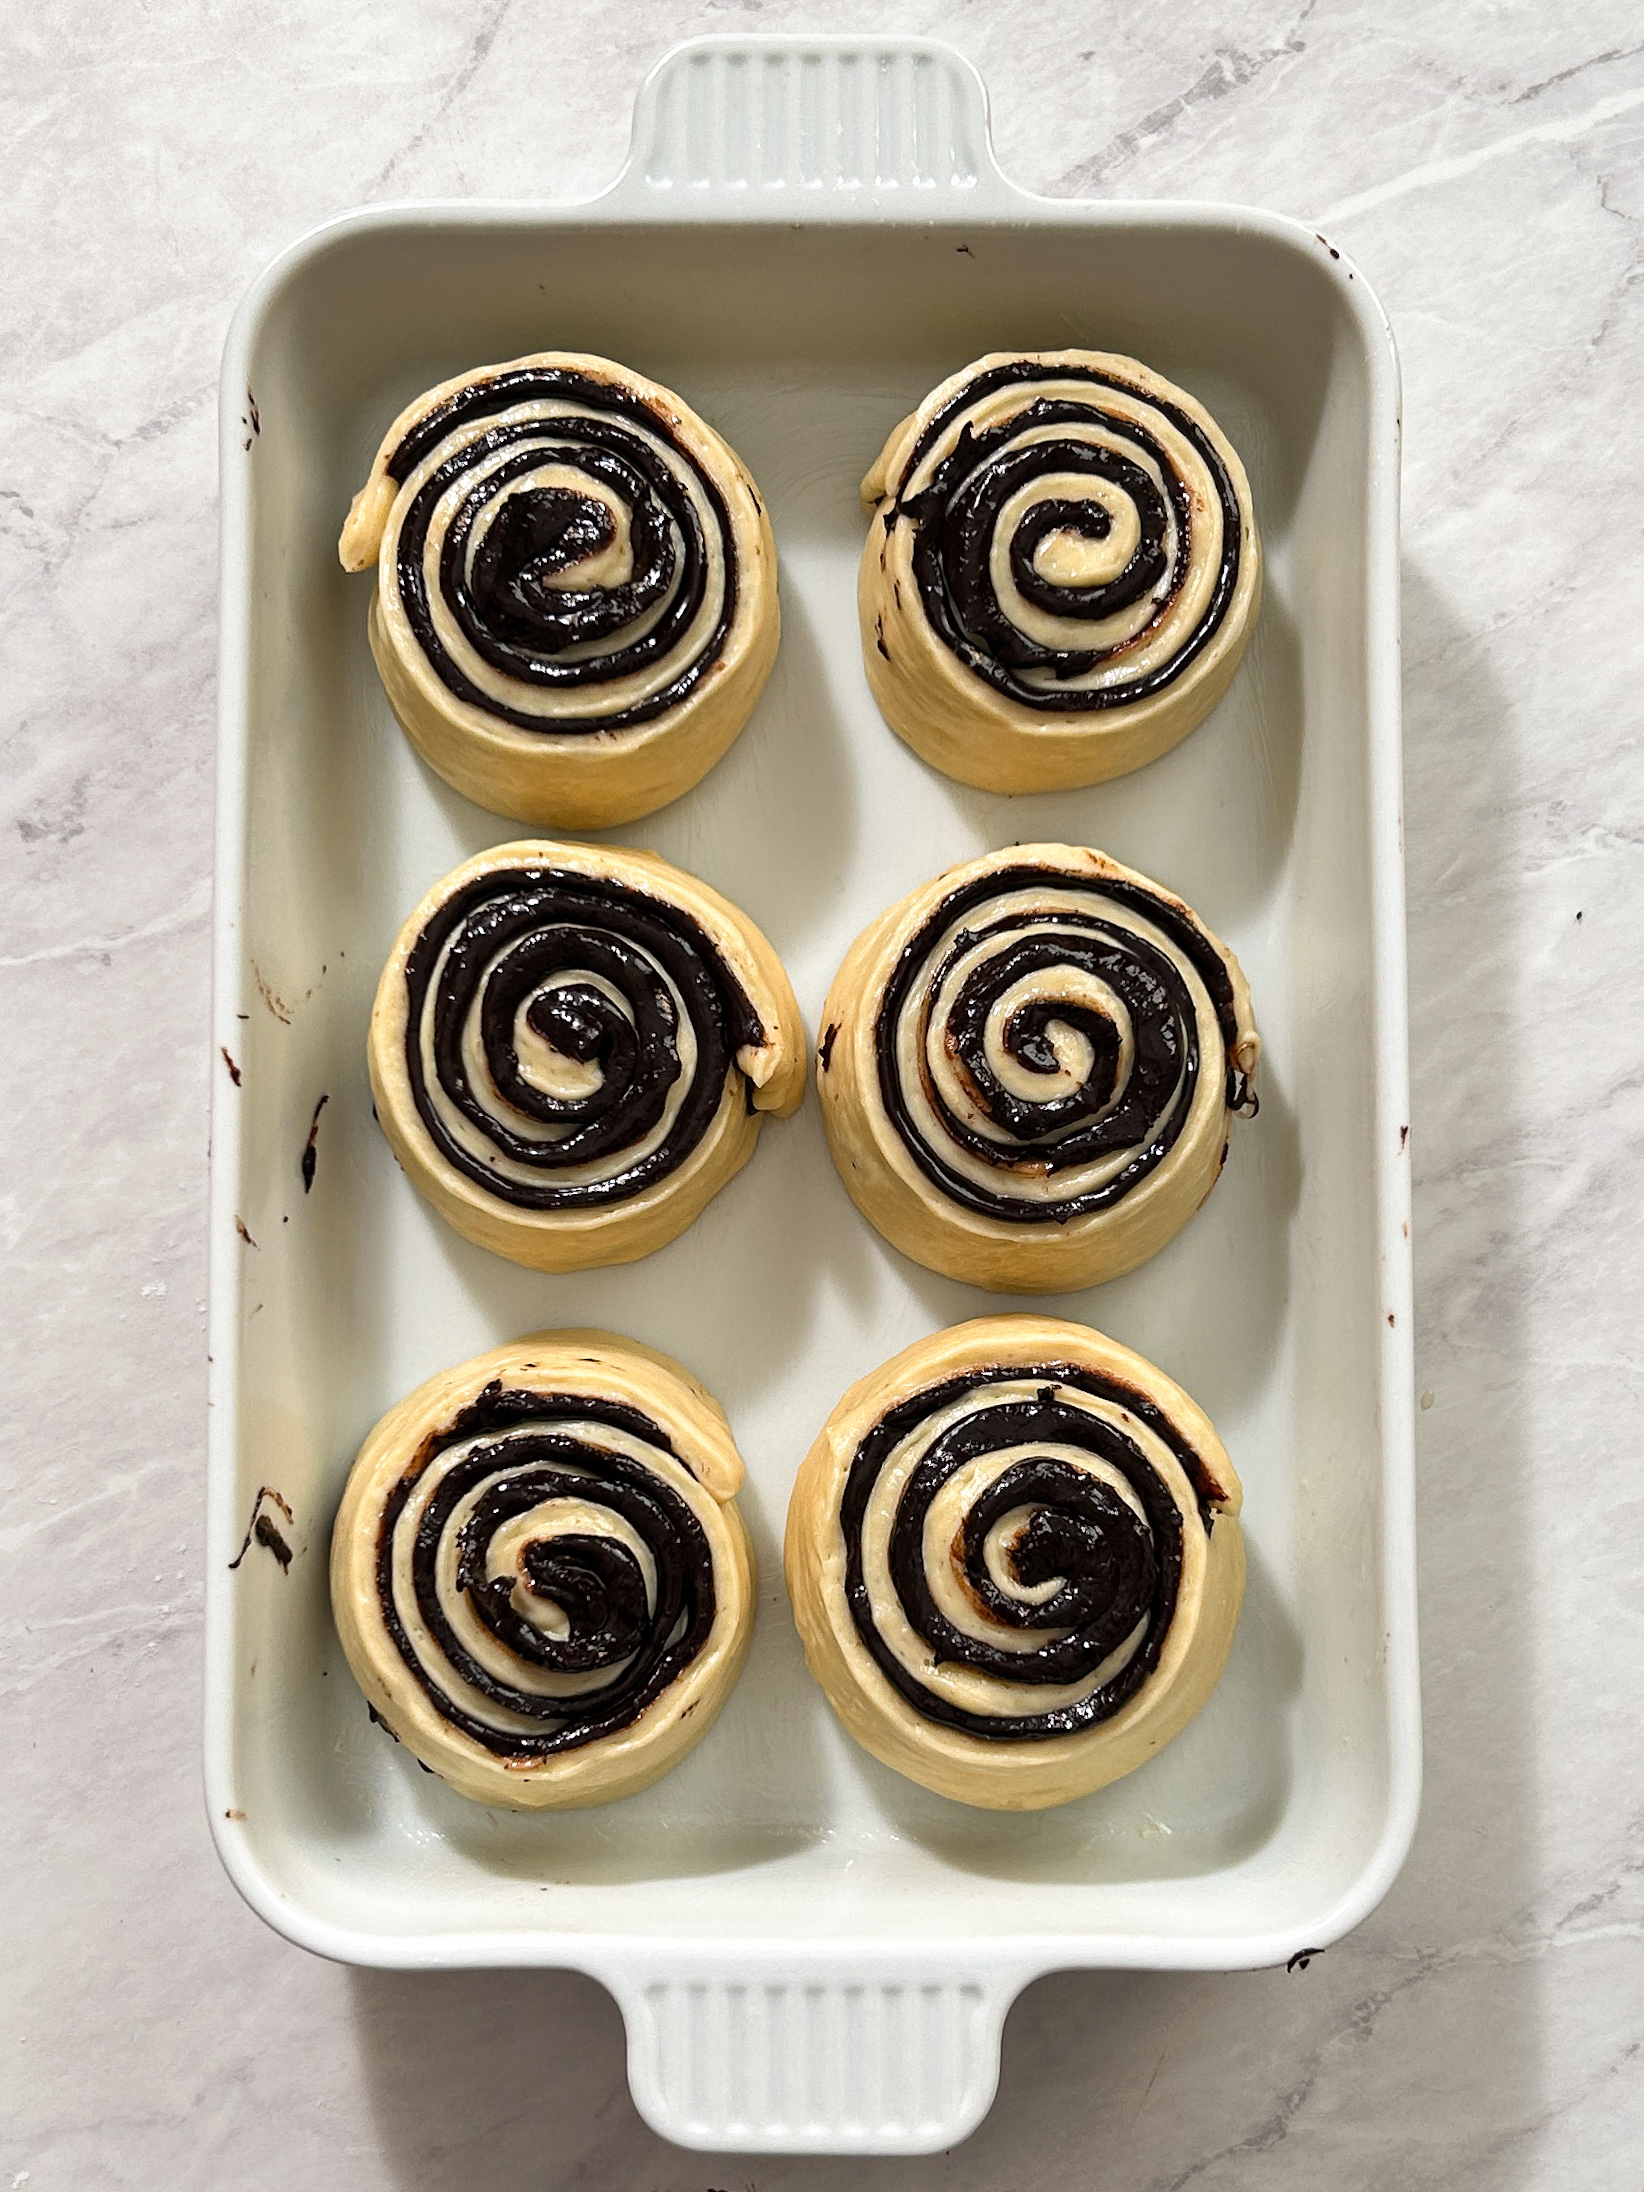
5. Allow time for a second rise
Place the shaped rolls in a warm place for 30-45 minutes until they look puffed up. This is called the second proof.

In the last 20 minutes, preheat your oven to 375F (the rolls should not be in the oven, of course).
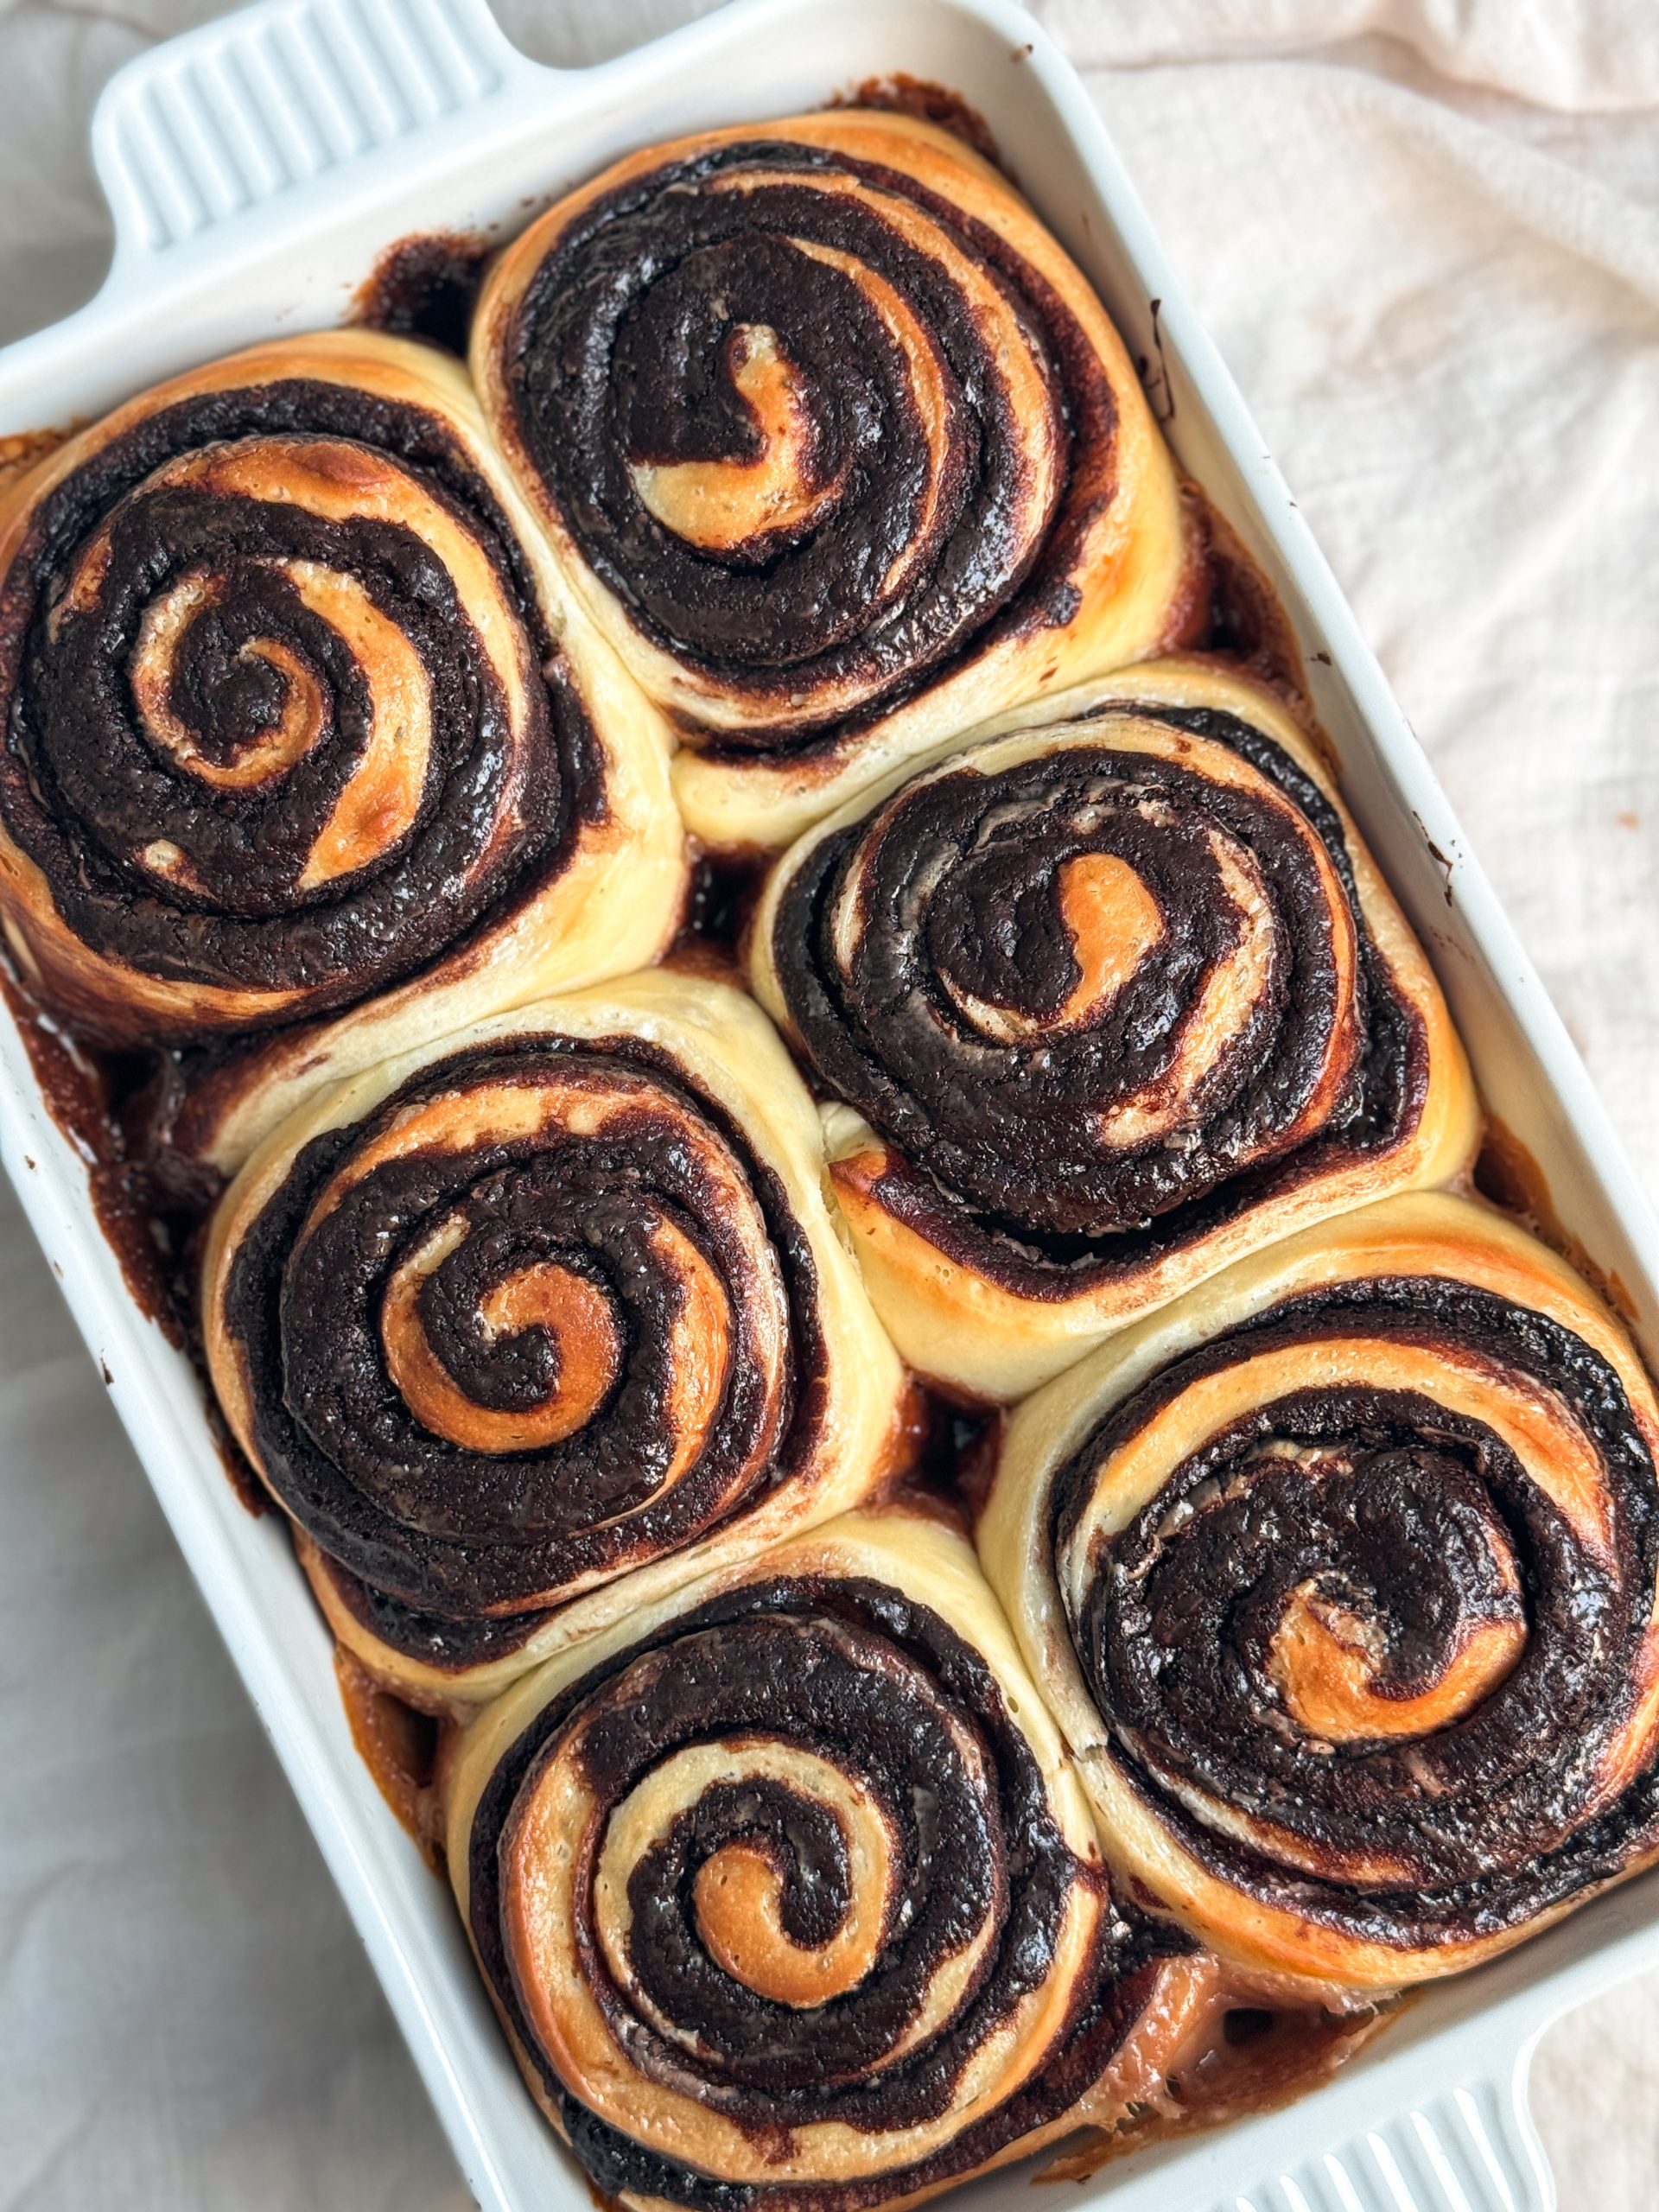
6. Time to bake!
Drench the chocolate espresso rolls in heavy cream, trying to pour it evenly on top of the rolls. Place in the oven and bake for 20-25 minutes until the rolls have a light golden color on them.
7. Ice them up!
Prepare the quick coffee icing by mixing the icing sugar, instant coffee and cream or milk until a smooth icing is formed. You can easily adjust the thickness to your liking by adjusting the amount of cream added.

Cover the rolls with icing while they are still warm.
8. Serve & enjoy!
It is time to serve the warm rolls, dive in, and go to chocolate heaven!

RELATED RECIPES
If you like this recipe, you should check out my other bread recipes too!!! Here are my favorites:

FREQUENTLY ASKED QUESTIONS
If you don't consume eggs, you can replace the egg in the dough with ¼ cup of full fat yogurt.
Yes, you can. If using instant yeast, just combine all ingredients of the dough and knead.
If you don't like dark chocolate, you can use milk chocolate but then reduce the amount of sugar in the filling according to your taste.
No, you can also knead this dough by hand. Read my tips above in this blog post.
You can store these rolls in an airtight container at room temperature for up to 2 days. Any longer than that, store them in the fridge and microwave for 10-15 seconds before enjoying.
Yes! If you do, use a 9x13" pan to bake them.

SUPER SOFT CHOCOLATE ESPRESSO ROLLS RECIPE
- Total Time: 3 hours including rest
- Yield: 6 large rolls
Description
The softest Chocolate Espresso Rolls made with unbelievably pillowy bread, a decadent dark chocolate espresso filling, and a simple espresso icing.
Ingredients
Bread dough:
- ⅔ cup whole milk (160g), warm (100 to 110F)
- ¼ cup sugar (50g)
- 2 teaspoons active dry yeast
- 2 ½ cups all purpose flour (325g)
- 1 large egg
- 1 teaspoon salt
- ¼ cup unsalted butter, softened (60g)
Chocolate espresso filling:
- 3 tbsp unsalted butter (42g)
- 4-6 tablespoon heavy cream
- 4 tbsp brown or white sugar (adjust quantity to your liking)
- 2 tbsp cocoa powder
- 1-2 teaspoon instant coffee powder
- 100g semi-sweet or dark chocolate (chopped chocolate or chocolate chips)
Assembly:
- ¼ cup heavy cream (60g)
Coffee icing:
- 1 cup powdered sugar (130g)
- ½ tsp instant coffee powder
- 2-4 tablespoon heavy cream depending on how thick you want the icing
Instructions
Dough:
- Add the warm milk, yeast and sugar to a bowl and stir. Wait for 10 minutes or until the mixture looks frothy
- Add the remaining ingredients of the dough and knead for 7-10 minutes (you can do this by hand or using a stand mixer with a dough hook attachment; see notes in the blog post above) until the dough is smooth, soft and very stretchy
- Transfer the dough to a clean bowl with a little oil spread inside. Cover with cling wrap and place in a warm humid place for 60-90 minutes until the dough roughly doubles in size
Chocolate espresso filling:
- While the dough is rising, prepare the filling. Add the butter, heavy cream, cocoa powder, coffee and sugar to a nonstick saucepan. Place on low heat and stir until everything has melted and combined
- Add the chocolate and stir until it melts (you can do this over low heat or turn off the heat altogether)
- Adjust the amount of coffee, sugar or cream depending on the flavor you want. The ending result should be a thick sauce that will become spreadable as it cools
- Let the sauce cool down
Assembly:
- Once the dough has risen and the filling has cooled, it is time to assemble. Prepare your baking pan or dish with a little butter
- Turn out the dough on a lightly floured surface, and roll it into a 12x14" rectangle, using your hands to keep the sides as straight as possible
- Spread on the chocolate espresso filling evenly
- Divide the rectangle into 6 strips, each 2" wide and 14" long
- Carefully roll up each strip to form individual chocolate espresso rolls
- Place the rolls inside the baking pan / dish, and place in a warm place for another 30-45 minutes until the rolls look puffed up
Bake:
- In the last 20 minutes of the second rise, turn on the oven to 375F (conventional, no fan)
- Once the rolls have risen again, carefully pour over the cream evenly on top of each roll. it will flow down, don't worry
- Bake for 20-25 minutes until the rolls have a light golden color on them
Frost & serve:
- Prepare the icing by whisking together the ingredients, adjust quantities as needed
- Spread the icing on the rolls while they are still warm
- Serve & enjoy!!
Video Tutorial:
Notes
- I recommend storing these rolls in an airtight container in the fridge, and microwaving before eating them as they are best warm!
- See the blog post above for tips on kneading the dough by hand vs using a stand mixer
- Prep Time: 45 min
- Cook Time: 25 min
- Category: Dessert
- Cuisine: American`
Note: This post contains affiliate links.


Tooba Sohail says
These turned out exactly as she mentioned! Super soft and perfect for chocolate lovers.
Thank you for sharing such amazing recipes always and making bake time fun and simple 🙂
Also, i added 1/4 tsp of cocoa powder in the glaze too & loved it.
Zoha says
YUM. Thank you so much!
Fatima says
I have tried these roll and they are out of the world. Taste is very unique and different and sooo soft . I much appreciate the talent of you Zoha you're a great chef
Amina says
These were insanely good. My exact thoughts were actually "out of this world good" but I see someone else actually already left a review with the same thoughts. Made these for a friend and had to make a double batch so ai could steal a few for myself because they are so irresponsible. They were somehow both fluffy and flaky while also being so soft and moist. Better than cinnamon rolls and I love cinnamon rolls more than almost anything.
F says
I have tried these roll and they are out of the world. Taste is very unique and different and sooo soft . I much appreciate the talent of you Zoha you're a great chef
Zoha says
Yay! Thanks so so much
Narmeen says
So pillowy and incredibly soft!! Unreal recipe with the perfect ratio of espresso to chocolate flavor. I did have to adjust the glaze to be double what the recipe says.
Zoha says
I am really happy to hear that, Narmeen. Thank you for the review 🙂
Khadija says
Comes out perfect every time I try
Zoha says
Yay!! Delighted to hear that.
Inga says
These were amazing!
The coffee chocolate filling is heavenly and everyone loves them! Thank you for this delicious recipe. 🙂
Zoha says
So so happy to hear that! Thanks Inga
Atrooba Ahmed says
I tried this recipe twice and both times it turned out amazing. Everyone loved it ❤
Zoha says
Yay 🙂 Thank you Atrooba!
Candace says
They were amazing!
Zoha says
YAY!
Katie Snyder says
Could I make the rolls, allow them to rise, and refrigerate over night to bake in the morning? I am hoping I could prepare them ahead of time so that I can bake them the morning I plan to serve them.
Kristen says
hi Katie, did you try this? I'm wanting to do the same thing but not sure if it'll work or not
Zoha says
Hi Kristen and Katie! I find that doing both rises at room temperature gives the best result. Fridge proofing makes them less soft. If you must, do the first rise in the fridge overnight, and do the second rise (post shaping) at room temp. It's likely you need to do a slightly longer second proof if the dough is cold to begin with.
Joe Daly says
In Boston we would say these Roll deserve the highest honor that they are Pissa
Wardah says
I’ve made this recipe more than ten times by now. It’s just perfect!
Zoha says
WOWWWW I need to make it more clearly haha
Janet Smithers says
They were absolutely delicious!!!... I am trying to pace myself not to eat in one sitting... 😂
Zoha says
Hahaha I totally understand what you mean! I went nuts for these
Fatma says
hyyy zoha,the best recipe for the rolls , turned out so pillowy n fluffy n soft oh myyy I love it and recommend everyone to try it .
Zoha says
AWWW thank you Fatma!!
Rachel says
Hi Zoha! Instagram follower here. Congrats on your fast-approaching mommyhood!
I made these for the first time last evening. I like to bake things to sell at the office--it's an easy way to pick up extra pocket money. I allowed them to do their second rise overnight, in the fridge, so I could bake them off fresh this morning. They were an absolute HIT!! Long after I had run out, I had people at my office door wanting more!
The only change I made (besides the overnight rise) was that, instead of slicing the dough longways, I did it shortways, so I got 10 medium cinnamon rolls instead of 6 big ones. And even still, I came up short! I will have to make more this week!
I've also made your cheesy garlic bread, which was delicious. In the coming weeks, I plan to make your famous classic cheesecake, as well as the brookies you posted today on IG.
Thanks so much for your recipes and sunshiney energy!
xoxo @captain.rachel
P.S. -- I'll send u a picture on IG!
Fatima Idrees says
I tired the recipe and it turned out perfect... people who ate these rolls asked for the recipe as they are heavenly good💫
loved these!
Bia says
I made it today and they were absolutely divine in taste—rich, decadent, and truly heavenly.
However, the process of making them was quite challenging. The filling was incredibly messy to work with, which made rolling and cutting the dough a real struggle. I ended up cutting 8 pieces instead of the recommended 6, and thank goodness I did! Any larger, and the rolls would’ve overflowed right out of the dish.
If you’re up for a bit of a baking adventure, the taste is definitely worth the effort—but be prepared for a messy kitchen along the way!
mila says
absolutely LOVE this recipe!!! the rolls turn out soooo soft and delicious!
one question though, because the dough is so soft i find the rolling up bit quite difficult 🥲 when i try to roll them up the way you’ve instructed, the roll just loses its shape and kind of melts (??) into the tray. (they do taste just as good though)
do you have any tips for how to roll them up as neatly as you do?
(i don’t overfill it because i follow your recipe and measurements exactly)
please help me out here!!
Tina says
These were out of this world. Way better than a cinnamon roll. Thank you for sharing, a new favourite!
Silvia says
I have made these yesterday and I can't stop eating them! The dough recipe is so simple and super effective, the rolls are the softest I've ever had/made. The filling is sublime, so decadent and rich but not overly sweet. I will definitely be making these again!
Zoha says
I am so glad you love them as much as I do! THANK YOU!
Fatima Idrees says
I bake these a lot and they are super yum😋
But I need to make a change this time and so I have “A QUESTION” that can I store them in the freezer for a day or two without baking and then bake them when I need
Kindly answer please
Thankyou!
Zoha says
Hi! I recommend refrigerating after baking instead of freezing before 🙂
Claire says
Sooo good 😋 doubled the recipe and 3/4 the pan was gone in 20 minutes! I did brown butter in the rolls and filling because I had some on hand and it made them even better! For the glaze I did 2 shots of espresso and added cocoa powder.
Zoha says
Aren't they just amazing!? So glad you loved them too
Devaki says
hi plz cn u recommend wht cn we replace for eggs in this recepie
Nemo says
Made this recipe recently and was a huge fan! I used dark chocolate for the filling and followed the rest of the recipe exactly. It was enjoyed a lot by my family and myself! Will be making this recipe again soon!
Hanaa says
Hello! Is it possible to make 12 small rolls instead of 6 large ones?
Thank you!
Zoha says
Hi Hanaa! You can definitely play around with that; just be sure to adjust baking time. Smaller rolls will take less time to bake.
Hanaa says
These are the best cinnamon rolls I have ever tried, the chocolate and coffee flavour are so good, and the dough is soft and fluffy. They were easy to make and taste amazing. Will be making it again for sure!
Zoha says
Yay, you made my day! Thank you!