
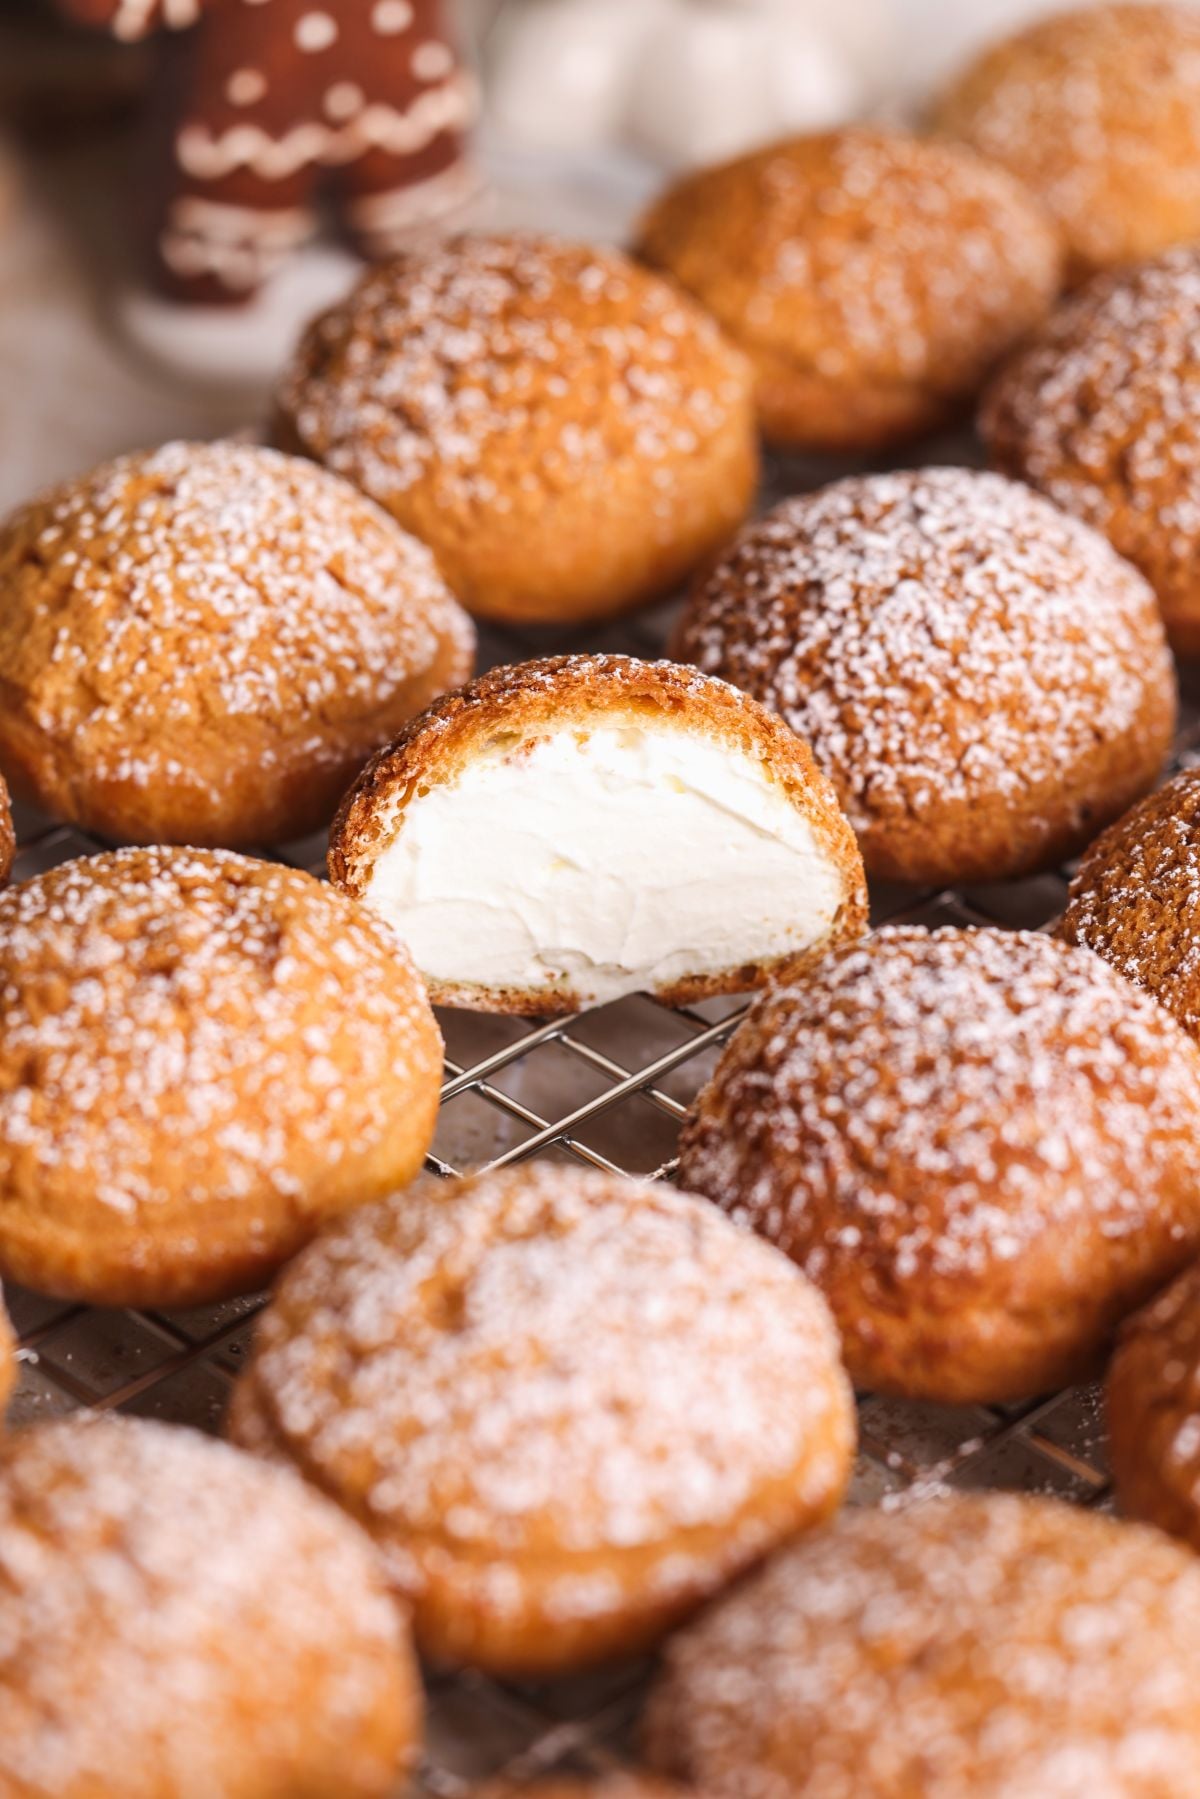
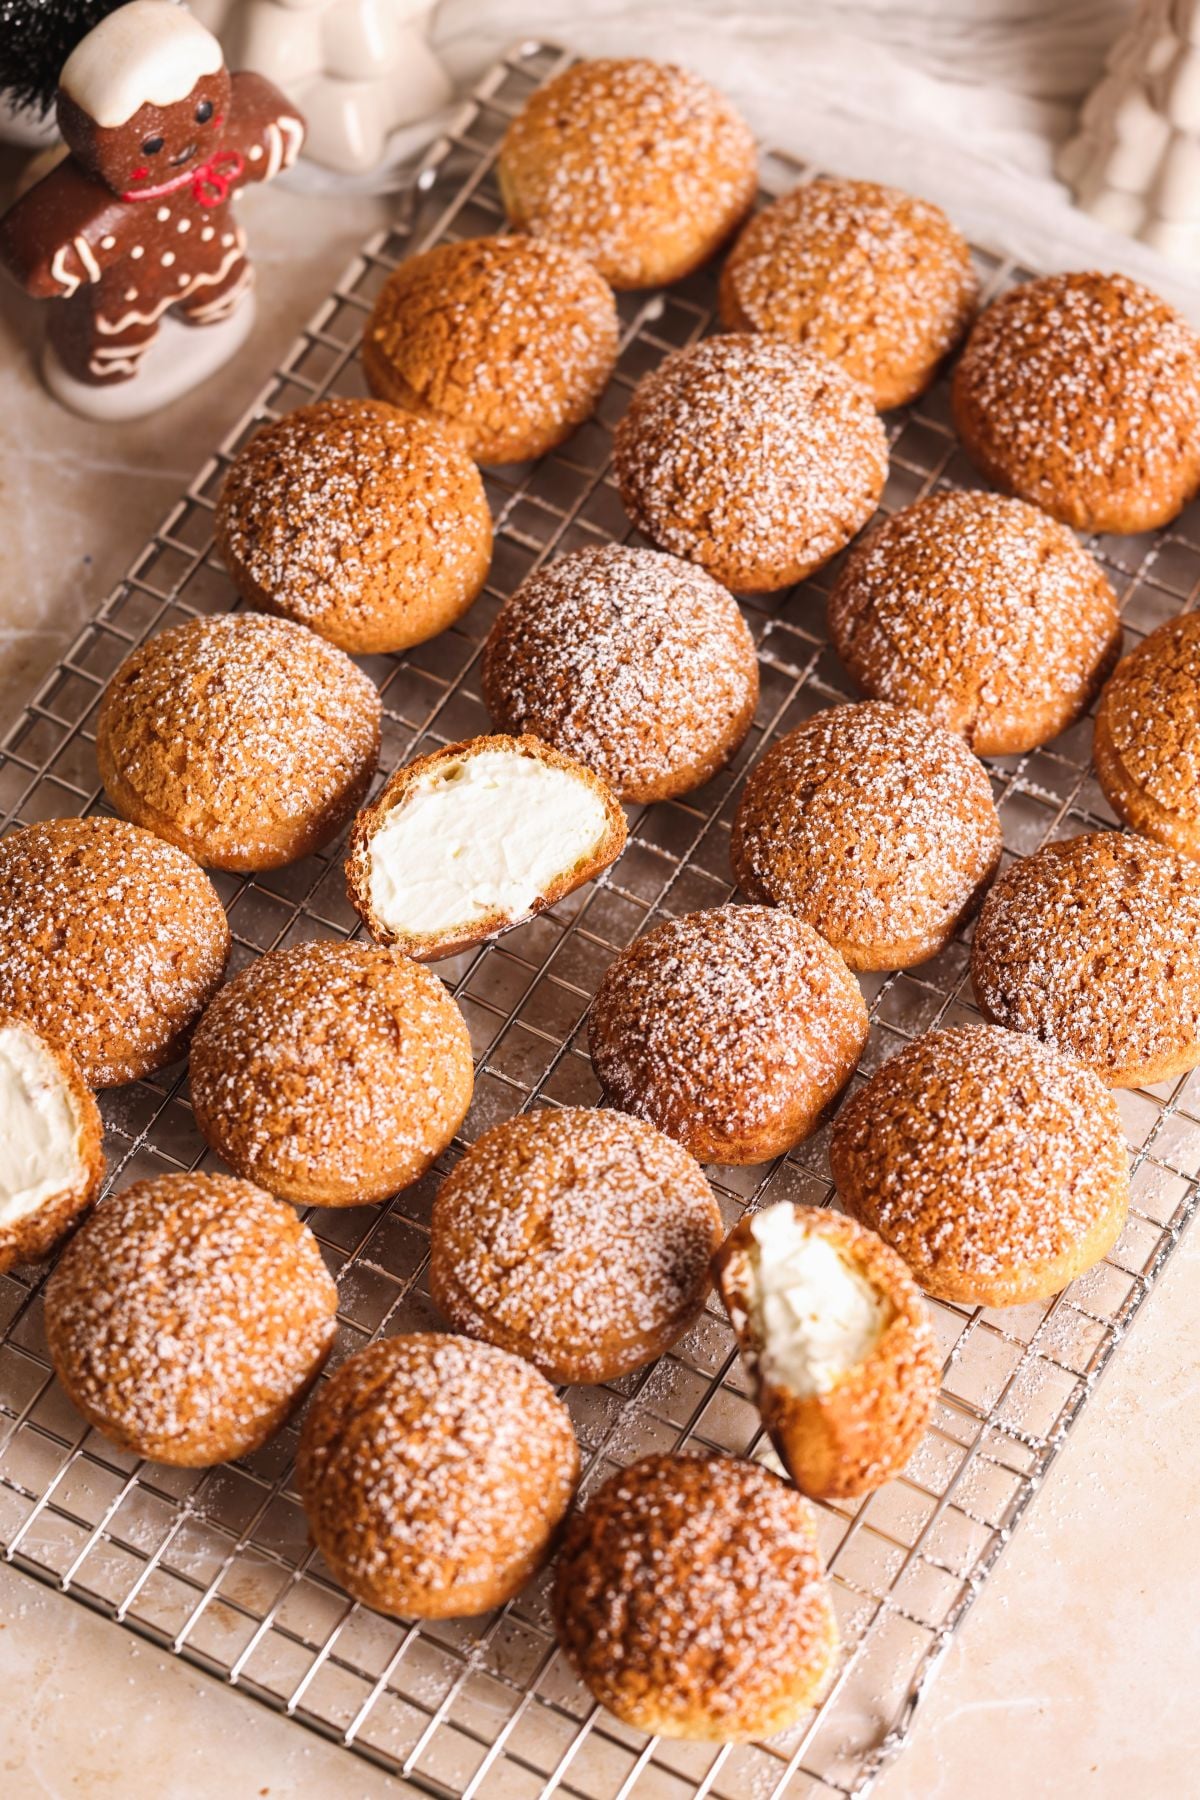
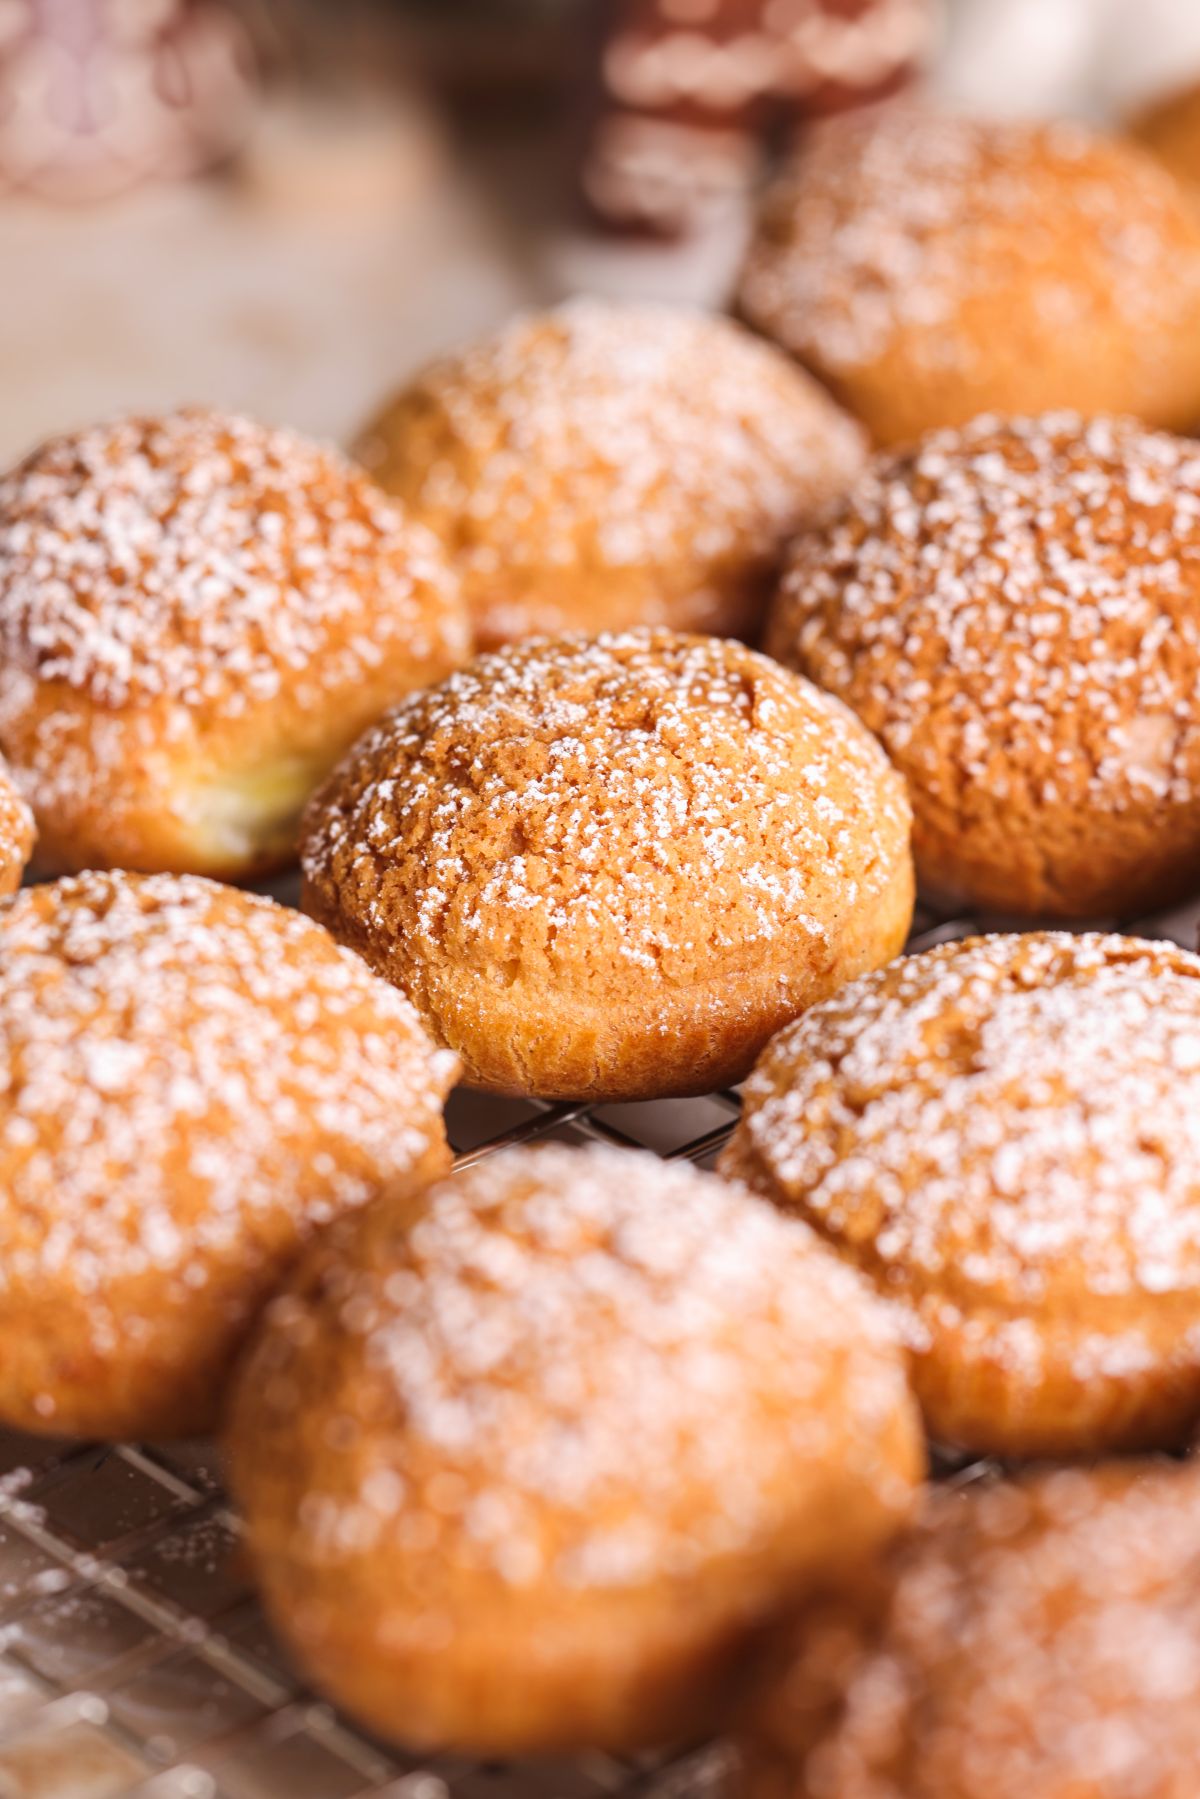
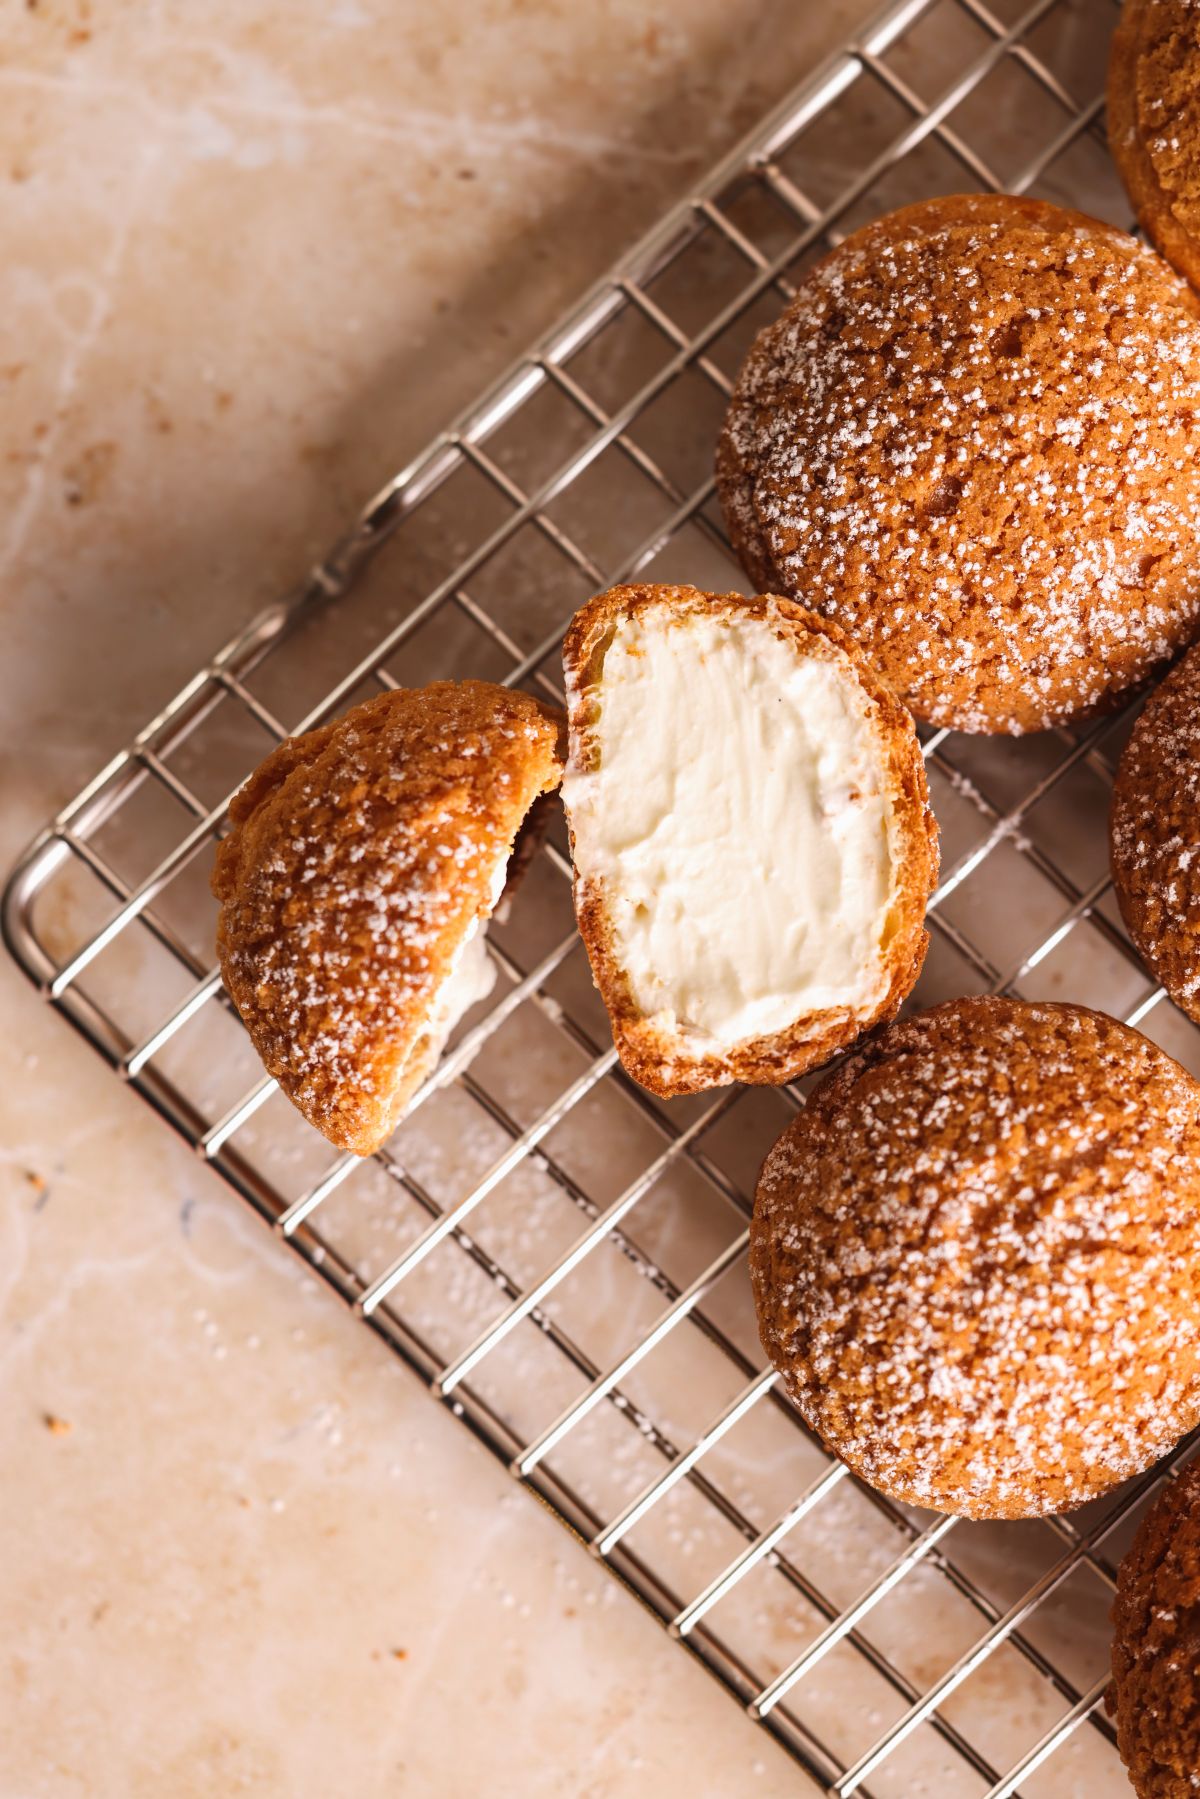
These are *the* cream puffs (aka choux buns or profiteroles) that got me rave reviews from Gordon Ramsay on Next Level Baker! They are made with classic choux pastry shells that puff up beautifully with hollow centers, topped with a crispy craquelin crust, and filled generously with a silky, light cheesecake whipped cream. These cream puffs are perfect to serve large groups (this recipe makes 50!), versatile as you can easily switch up the filling, and, once you understand the basics, I'd even call them simple!
In this recipe, I will walk you through every step of the process, from achieving the right choux pastry consistency to baking and filling, so you can master this easy but technical French dessert.
Jump to:
I made these for Gordon Ramsay
I recently competed in Gordon Ramsay's first ever baking competition show, Next Level Baker, and made these cream puffs in the 90 minute Tropical challenge. While I had practiced choux pastry ahead of the show,I still found it intimidating. To my disbelief, the judges gave rave reviews, with Chef Ramsay calling them "incredible", "exceptional", "exotic" and "absolutely perfect"! Yes, I'm still pinching myself.

3 components of these cream puffs
These cream puffs (profiteroles) are made with 3 simple components:
- Choux pastry shells. Choux pastry is a thick batter like pastry that is piped into small rounds and baked. During the process of baking, the moisture in the pastry evaporates and creates steam, which causes the pastry to rise and create hollow shells. It is quite technical, though, so more details on perfecting it below!
- Craquelin discs. Craquelin is a simple biscuit made of butter, sugar and flour. It has a crumbly texture similar to pie dough, and is rolled into a thin sheet, chilled, and cut into discs that go on top of each choux dollop. It melts onto the choux buns as they bake, helps them rise more evenly, and creates a delicious crispy crust. Although optional, I highly recommend adding it to elevate your cream puffs!
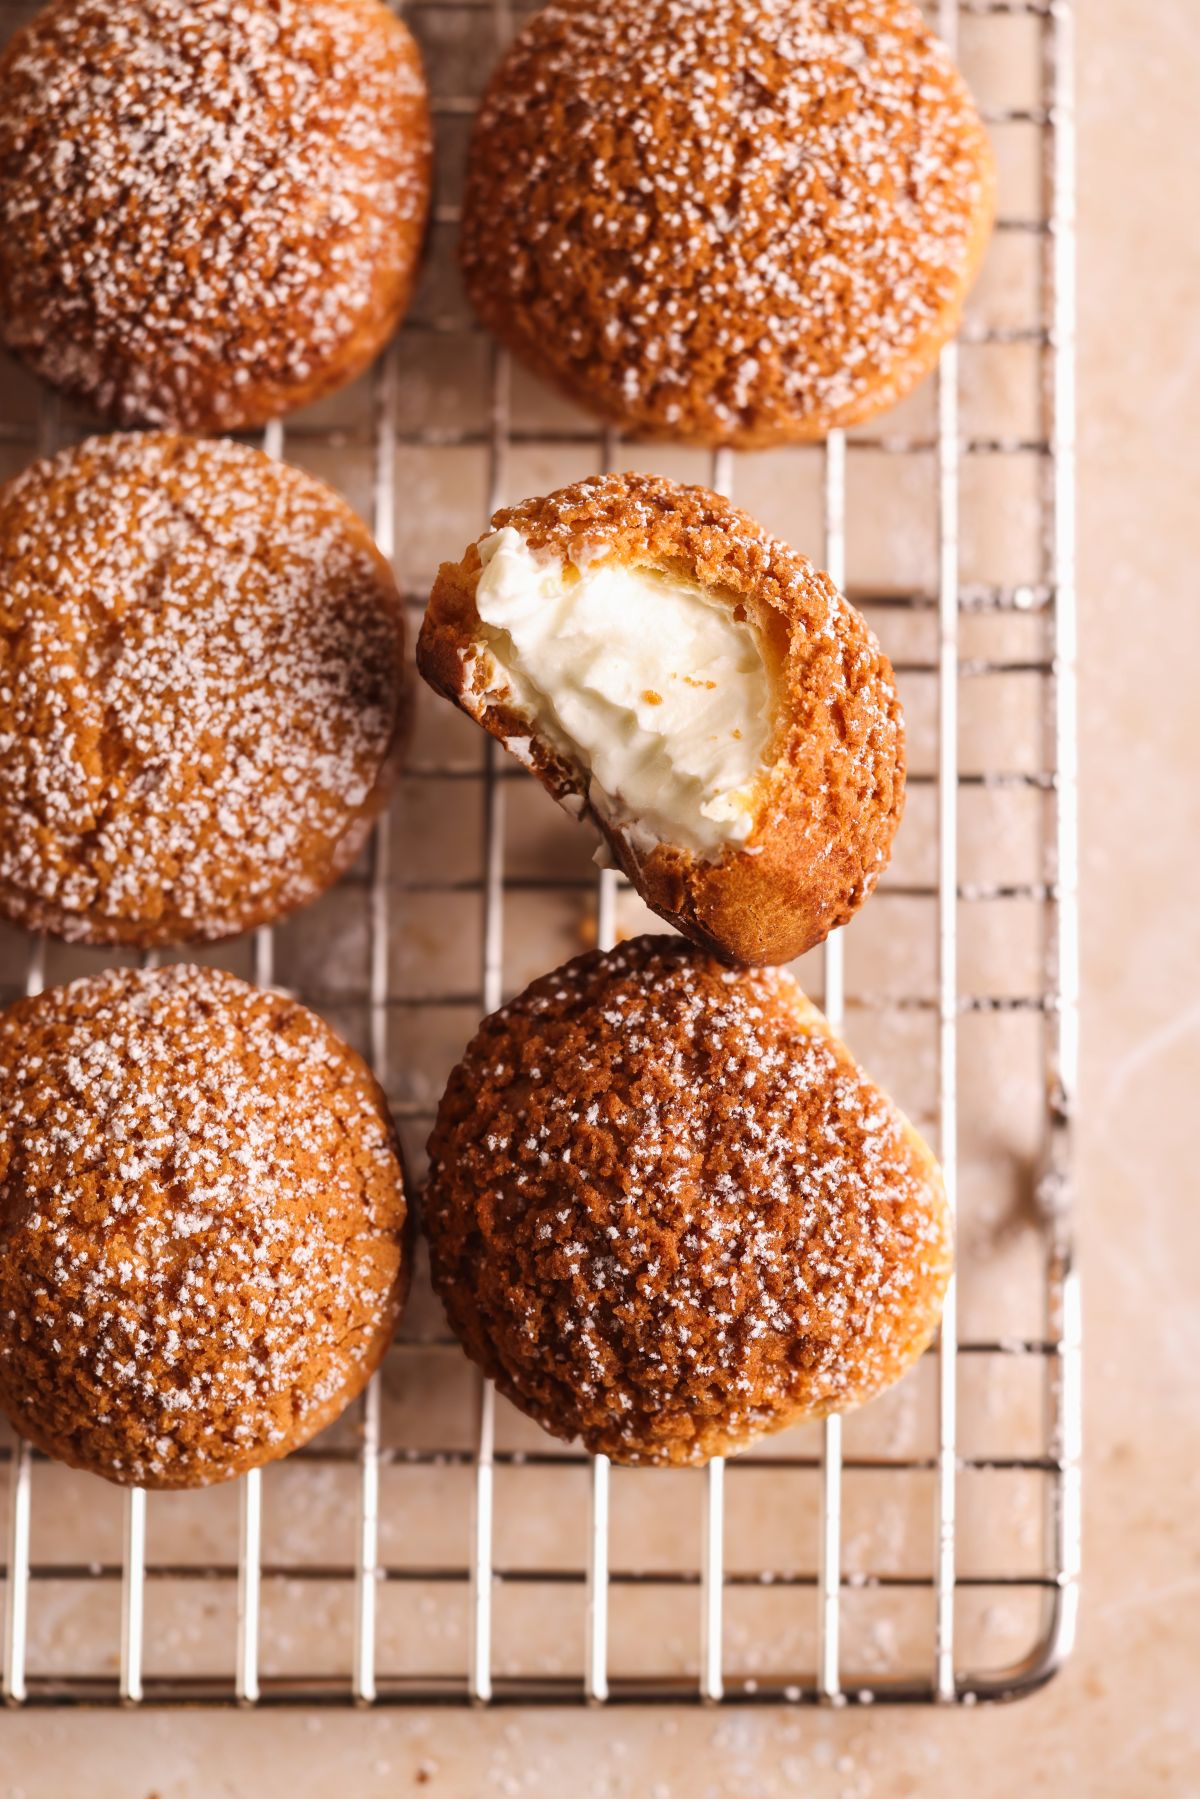
- Cheesecake whipped cream filling. Each cream puff is filled with a simple whipped cream that has cream cheese in it! The cream cheese adds a cheesecake like flavor and also stabilizes the whipped cream
Perfecting choux pastry
It's all about the egg!
Choux pastry is notorious for being tricky, and rightfully so. After a lot of experimentation, I have found that perfecting choux pastry mostly comes down to the amount of egg mixed into it at the end. If you don't add enough, it doesn't rise and ends up dense. If you add too much, it rises too much and deflates.
Based on different factors, such as the size of your eggs and how much you dry out the mixture on the stove, the exact amount of eggs can vary every time, and come down to fractions. The key is to break down the eggs separately, and add them to the choux pastry a little at a time, whisking thoroughly between each addition and checking the consistency. As soon as the choux pastry reaches the desired consistency, you stop adding more egg.
What is the right consistency for choux pastry?
Choux pastry should be smooth and shiny, and when you lift the mixture using a spatula, it should fall off slowly but in a continuous ribbon that eventually breaks off and leaves behind a tapered, smooth V shape. Let's take a look together.
Here is choux pastry that is NOT ready:
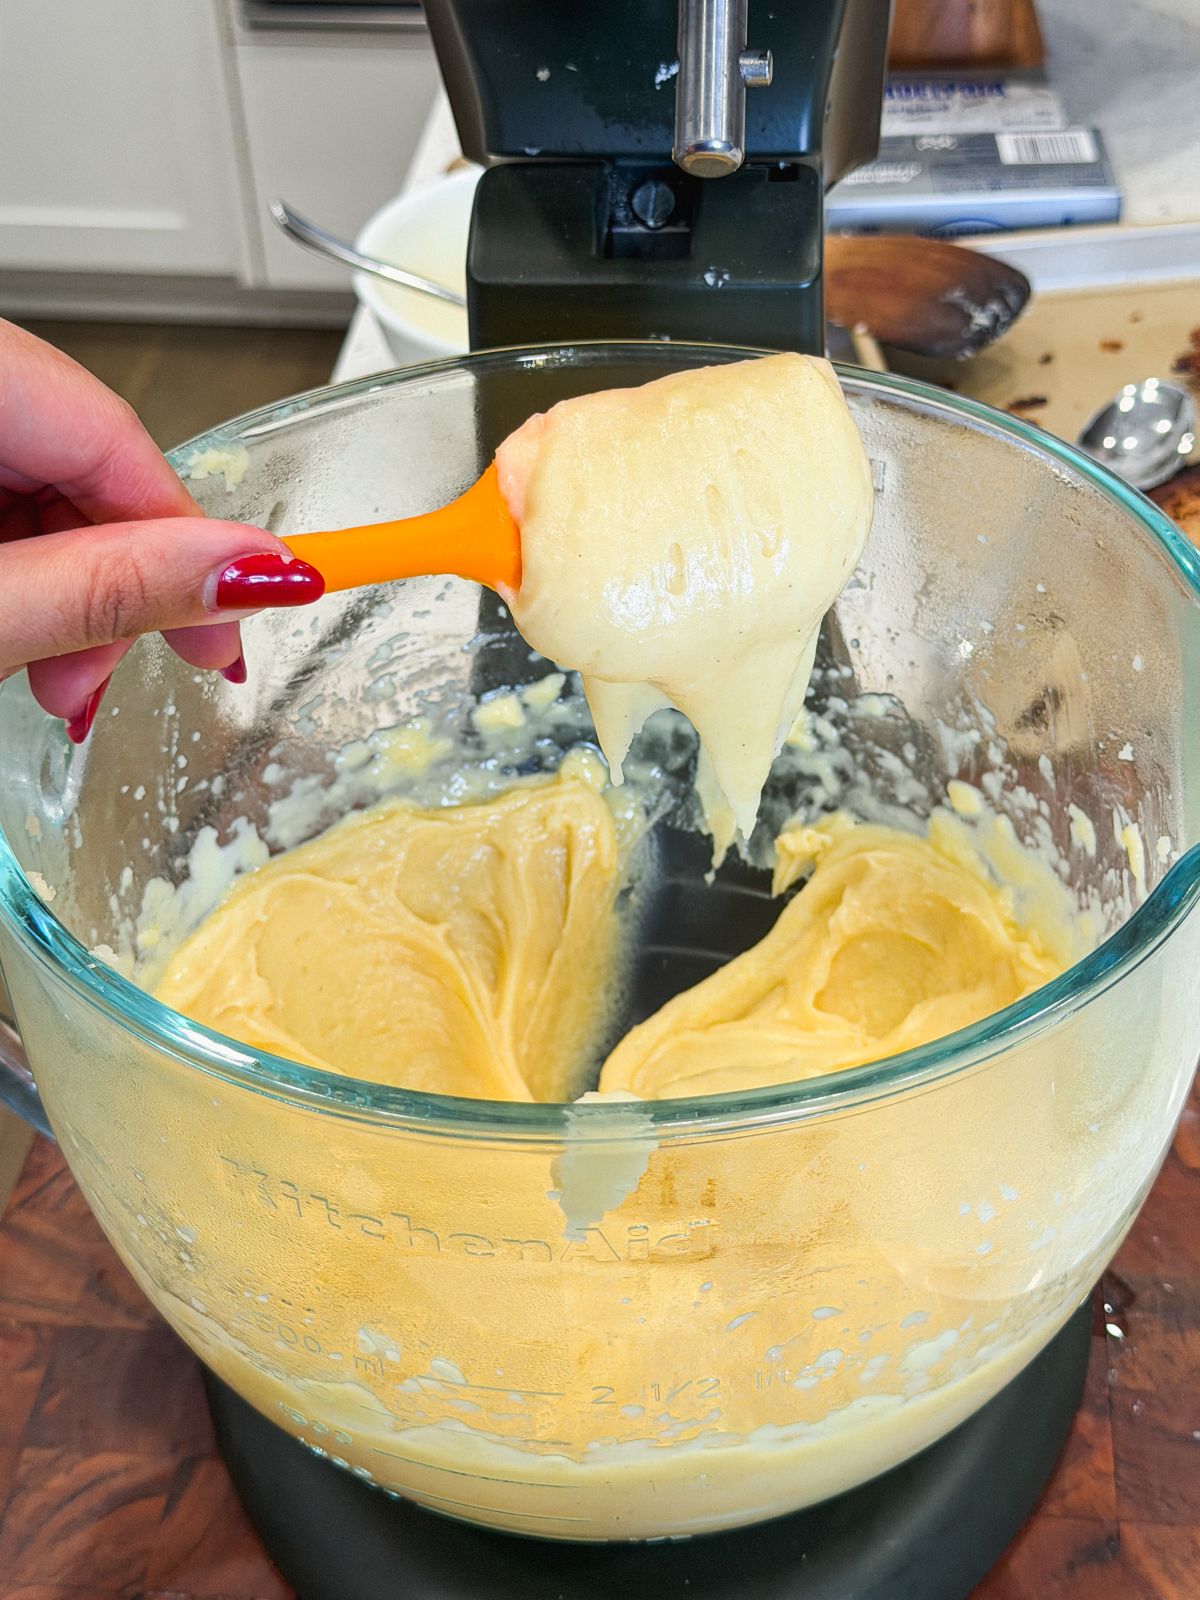
This choux pastry falls off the spatula in a clump, leaving behind a rough shape. This needs more egg.
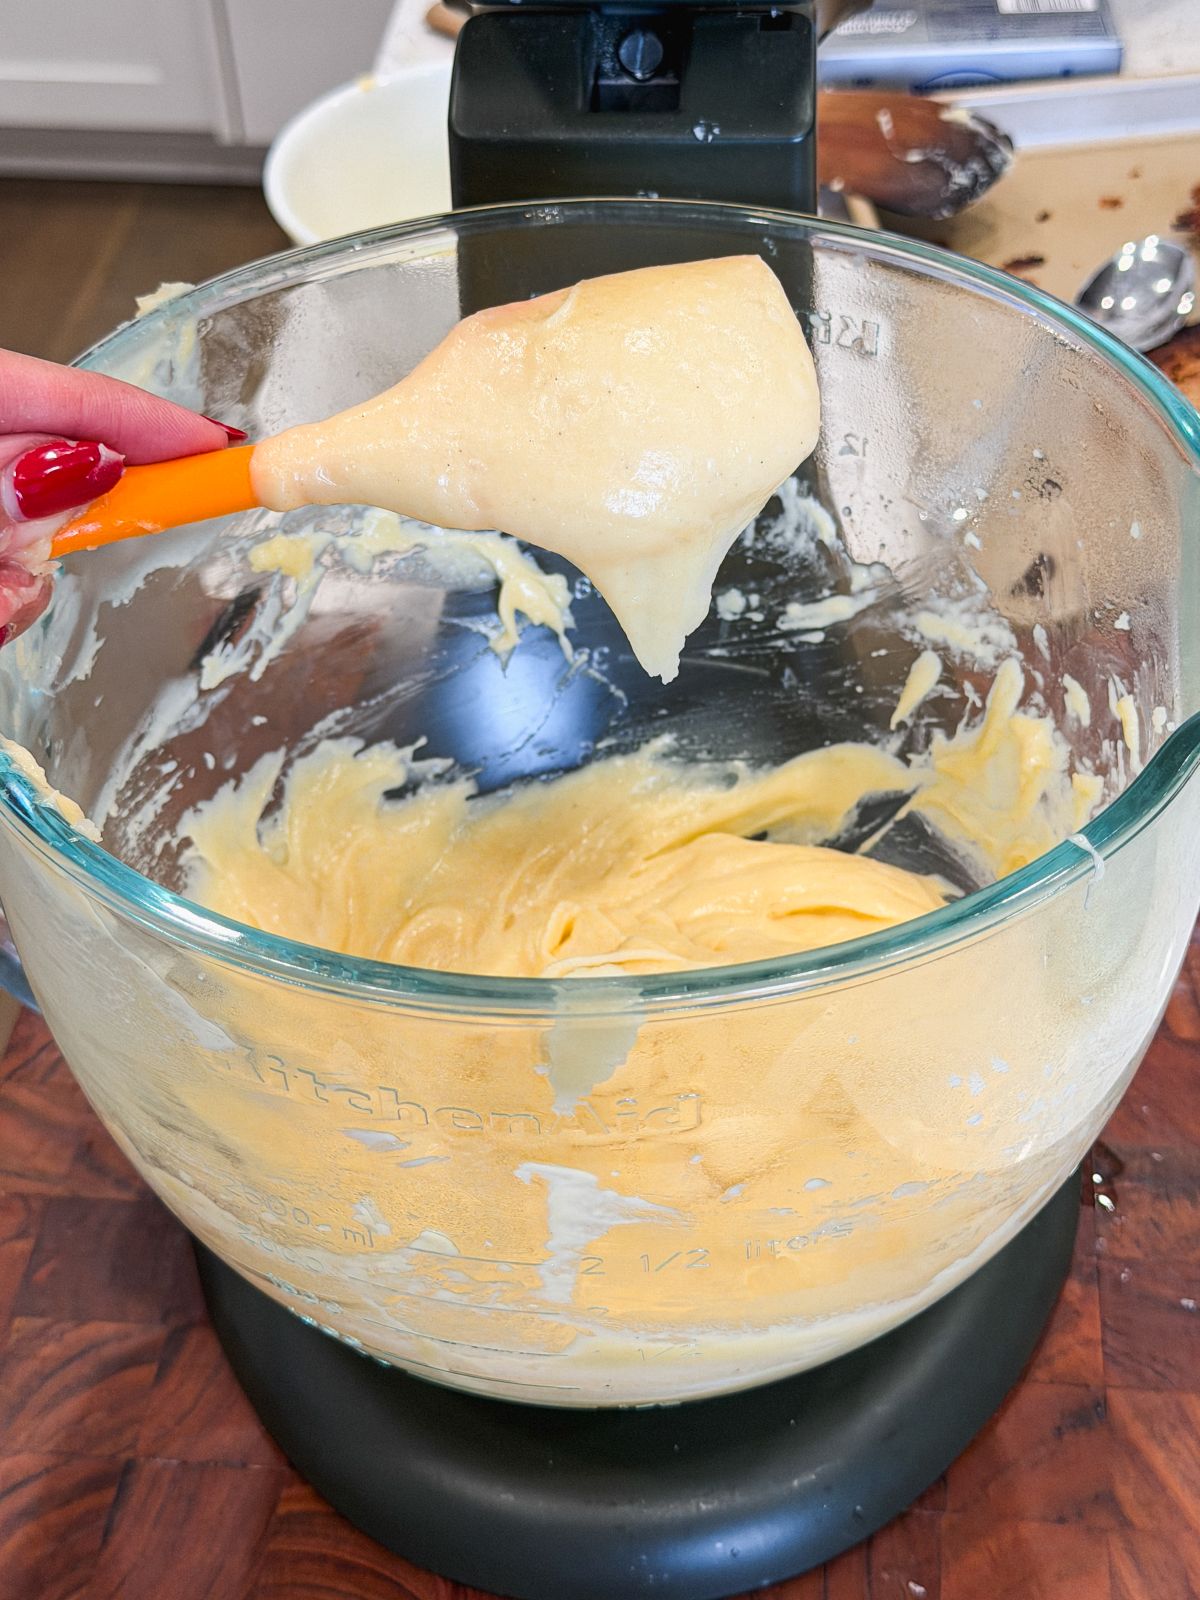
This choux pastry has started looking shiny and smooth, and leaves behind a V shape when it falls off the spatula. However, it stills breaks off instead of forming a ribbon, and the V shape isn't smooth and tapered. This needs just a little more egg.
Here's choux pastry that IS ready:
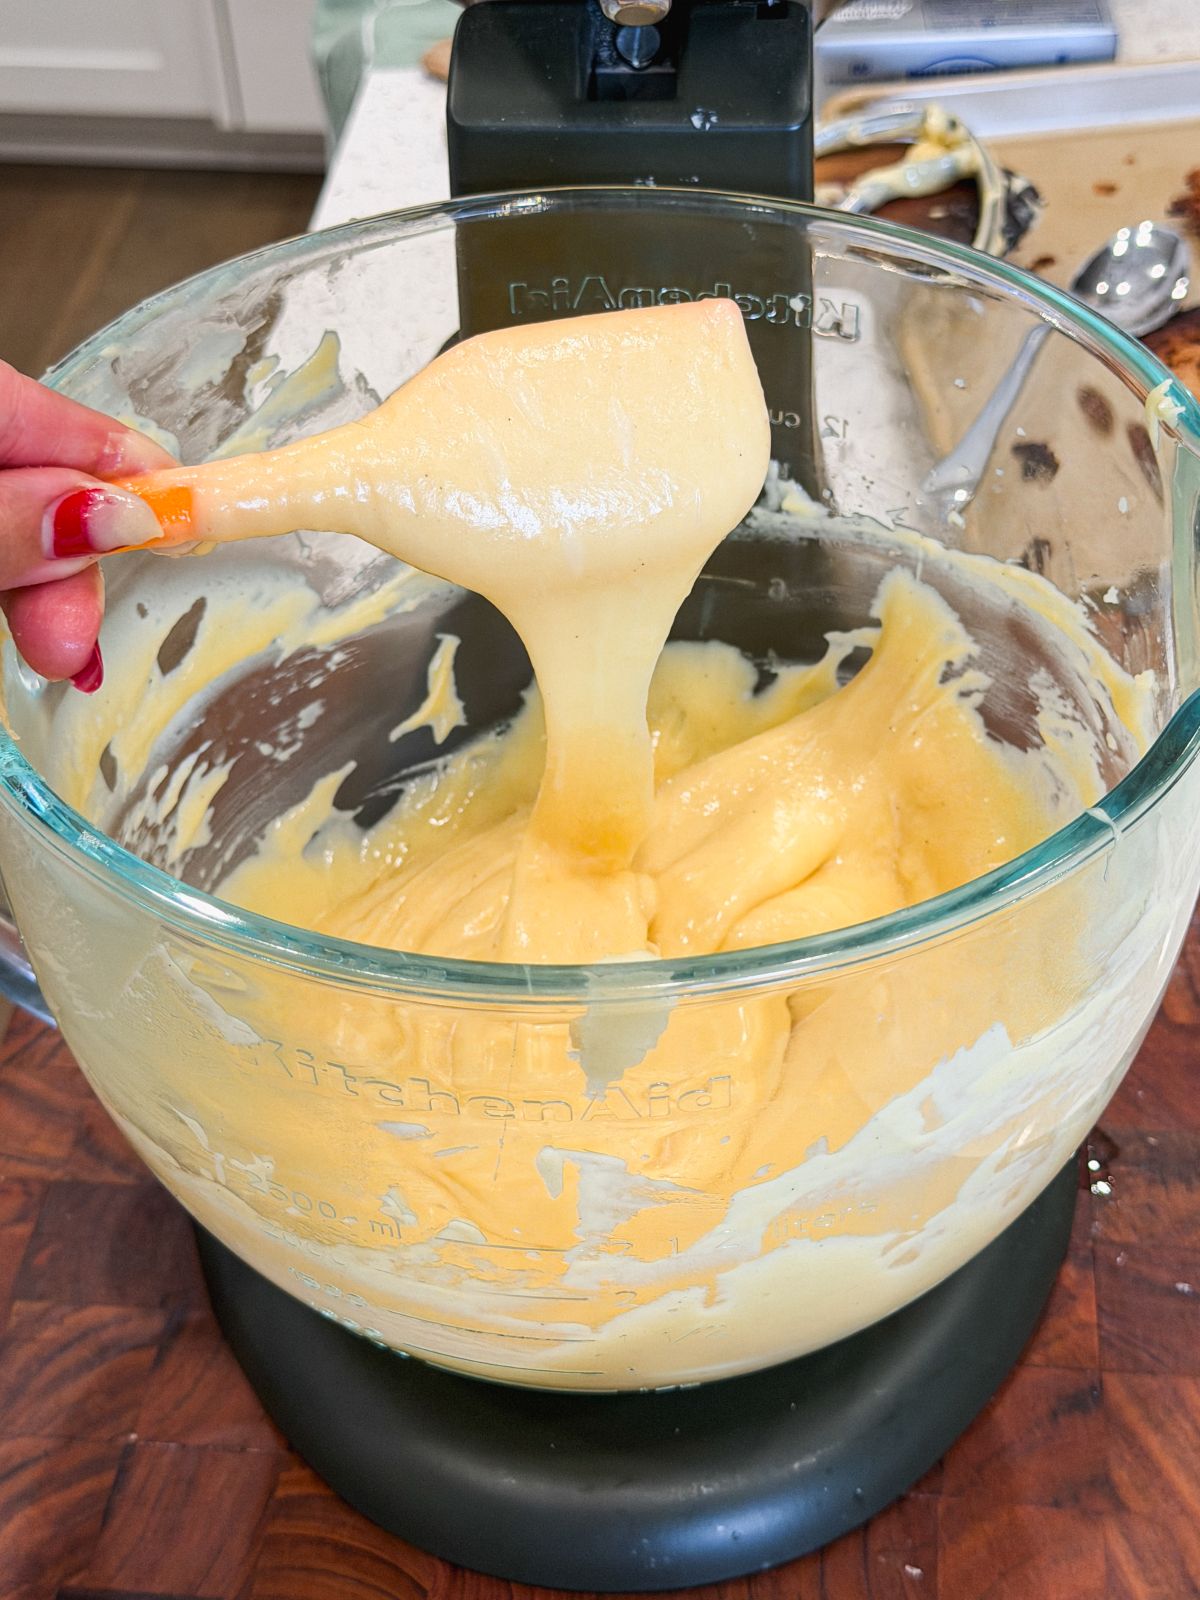
The choux pastry is now very smooth and shiny. When you lift the spatula, the pastry falls off in a slow but steady ribbon instead of breaking off.
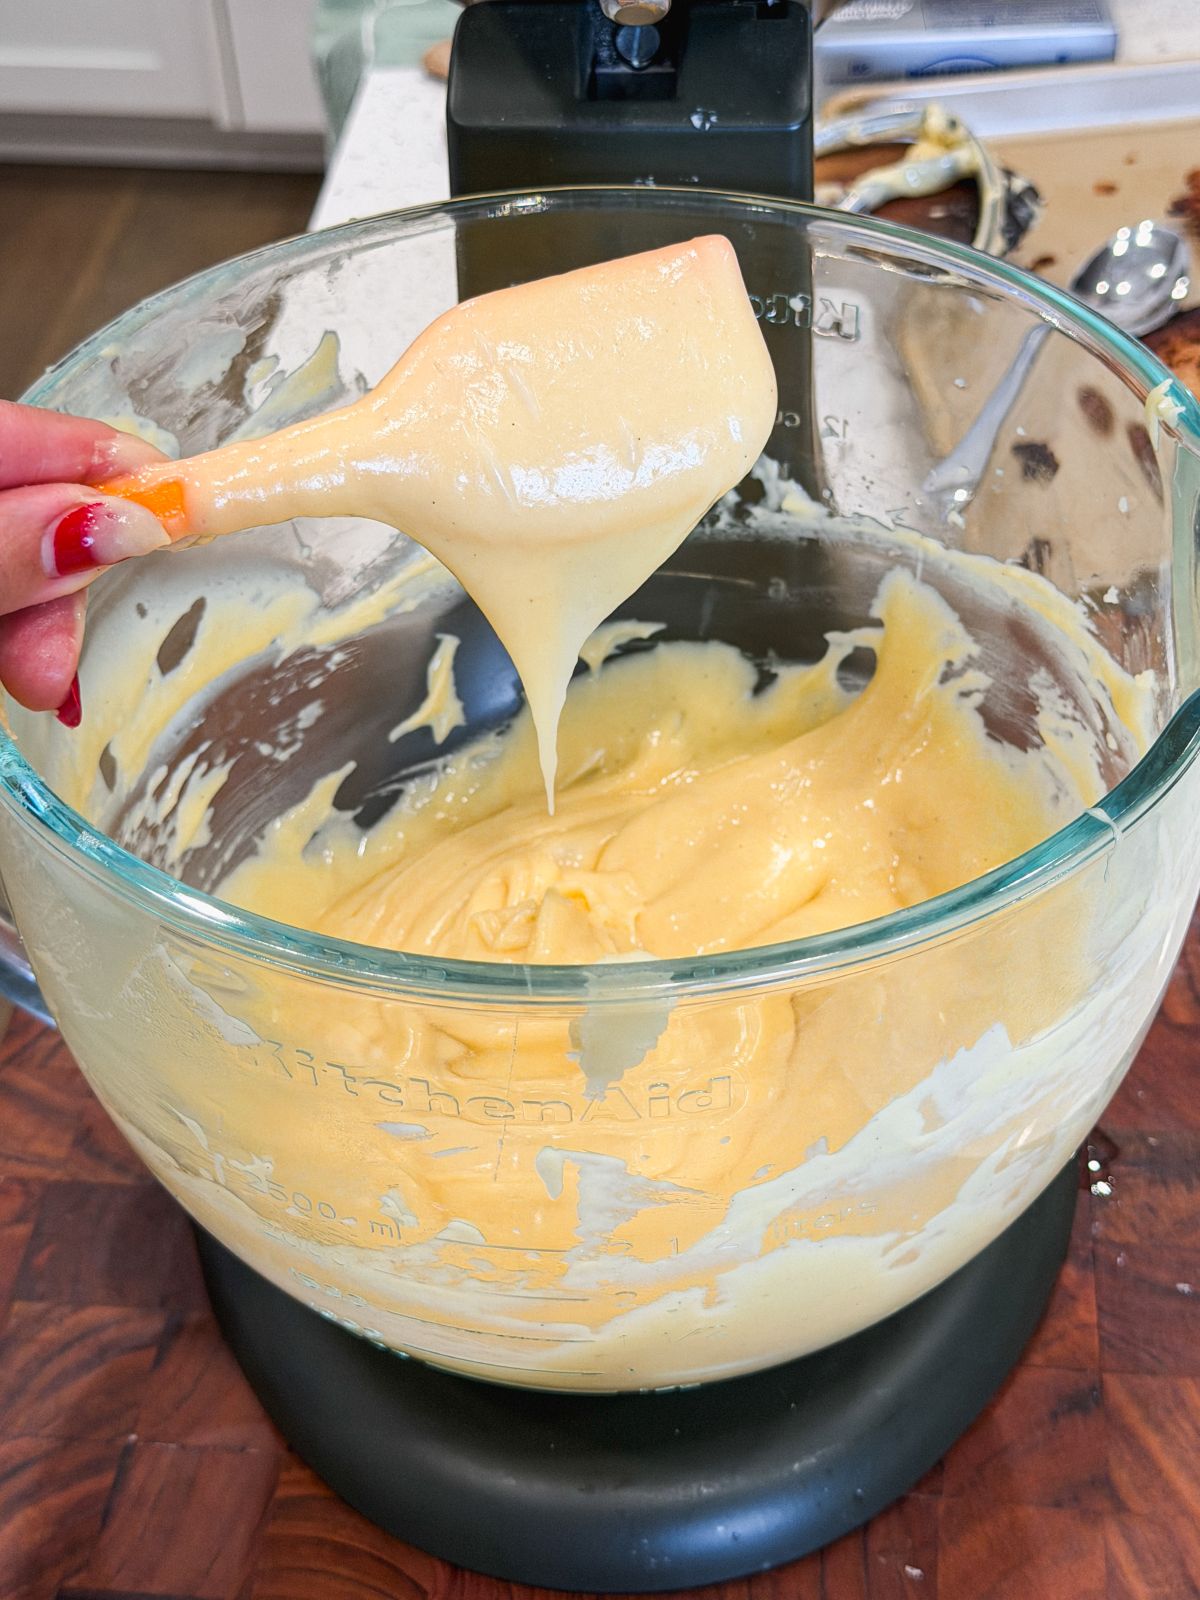
The ribbon eventually tapers off, leaving behind a smooth V shape.
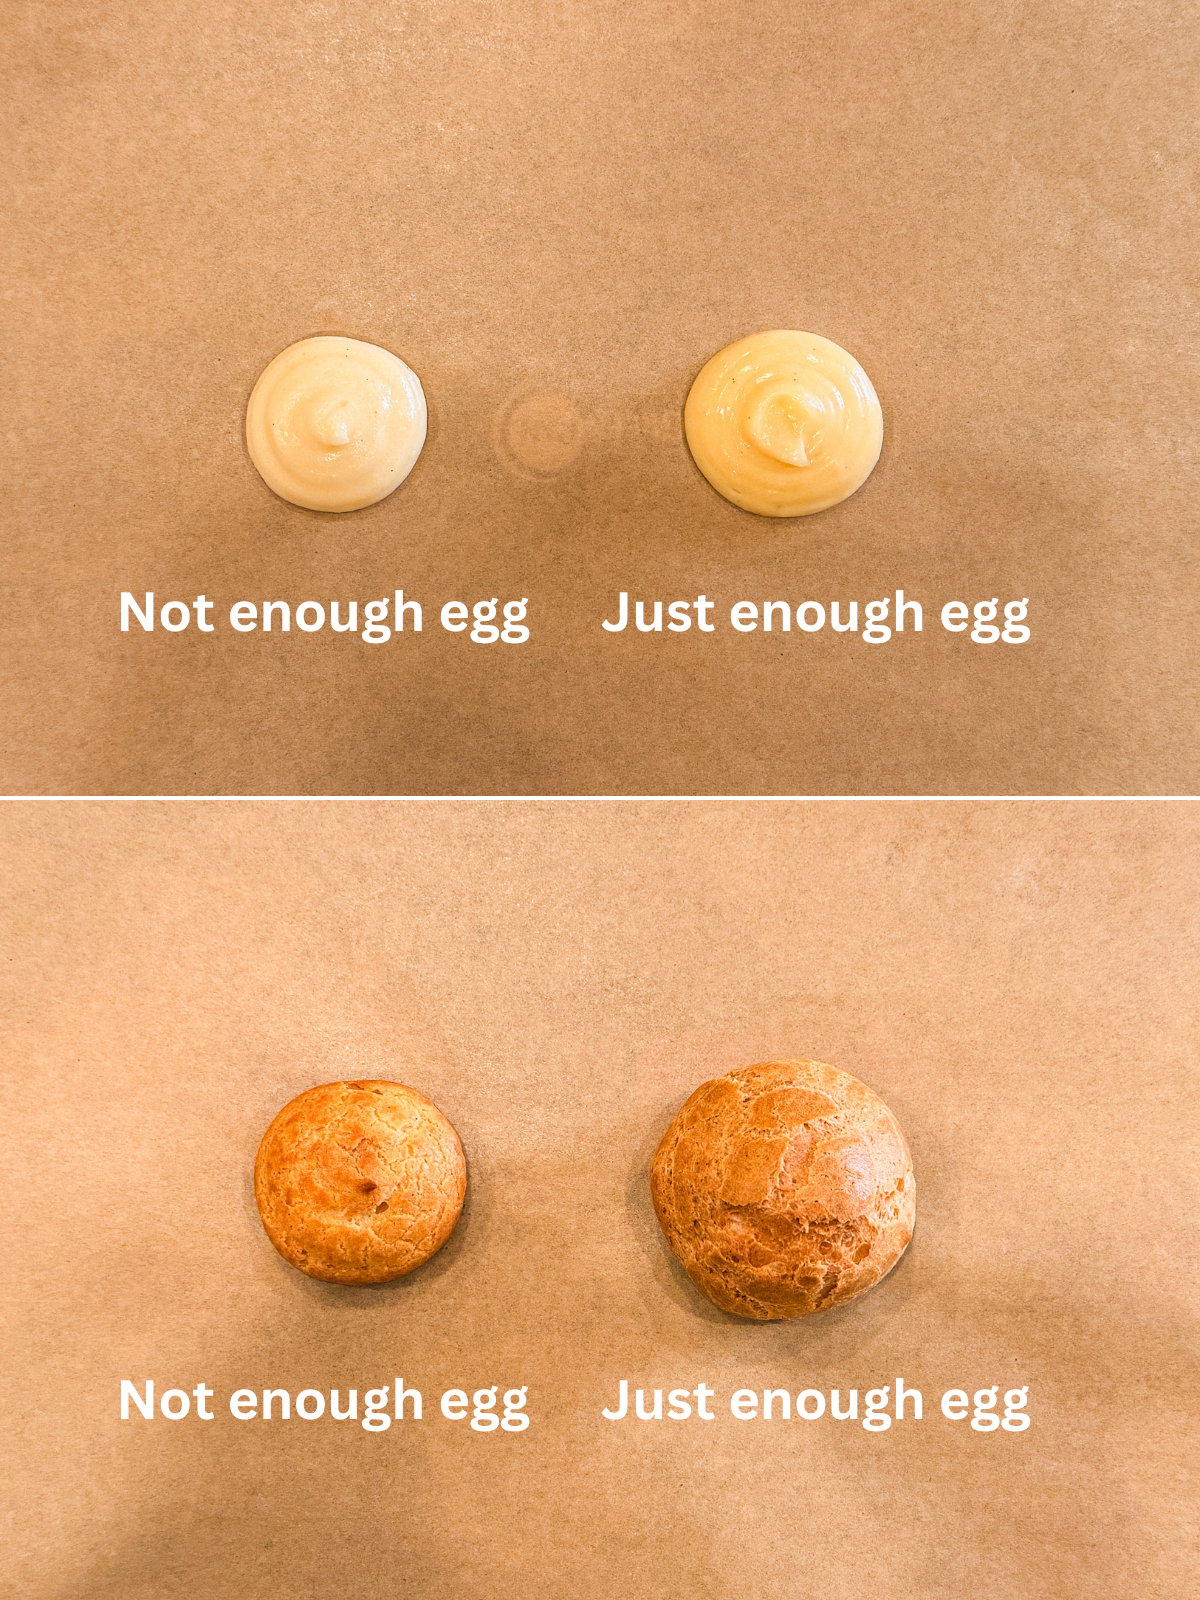
To further demonstrate the importance of the amount of egg, see the image below. The choux pastry on the left was forming a V on the spatula, but it wasn't smooth and the pastry was not falling off in a ribbon. Less than half of an egg helped get it to the right consistency, which is on the right. The difference in how much the cream puffs rose is crazy!
3 helpful tips
Here are 3 more tips for you:
- When checking for the consistency, check multiple times with a spatula. Sometimes it takes a few tries to figure out if the pastry is falling off in a ribbon yet or not.
- Be careful to not add too much egg. The pastry shouldn't be runny, or falling off the spatula too quickly, and should still be thick enough to hold shape (see image above!)
- If you're not sure whether you've added enough egg, pipe one choux bun and bake it as a test. If it is dense and doesn't rise, you need more egg. The rest of the choux pastry can rest, covered, while you bake the test bun!
Step by step photos
Let's quickly go over the steps with photos to help you visualize this cream puff recipe:
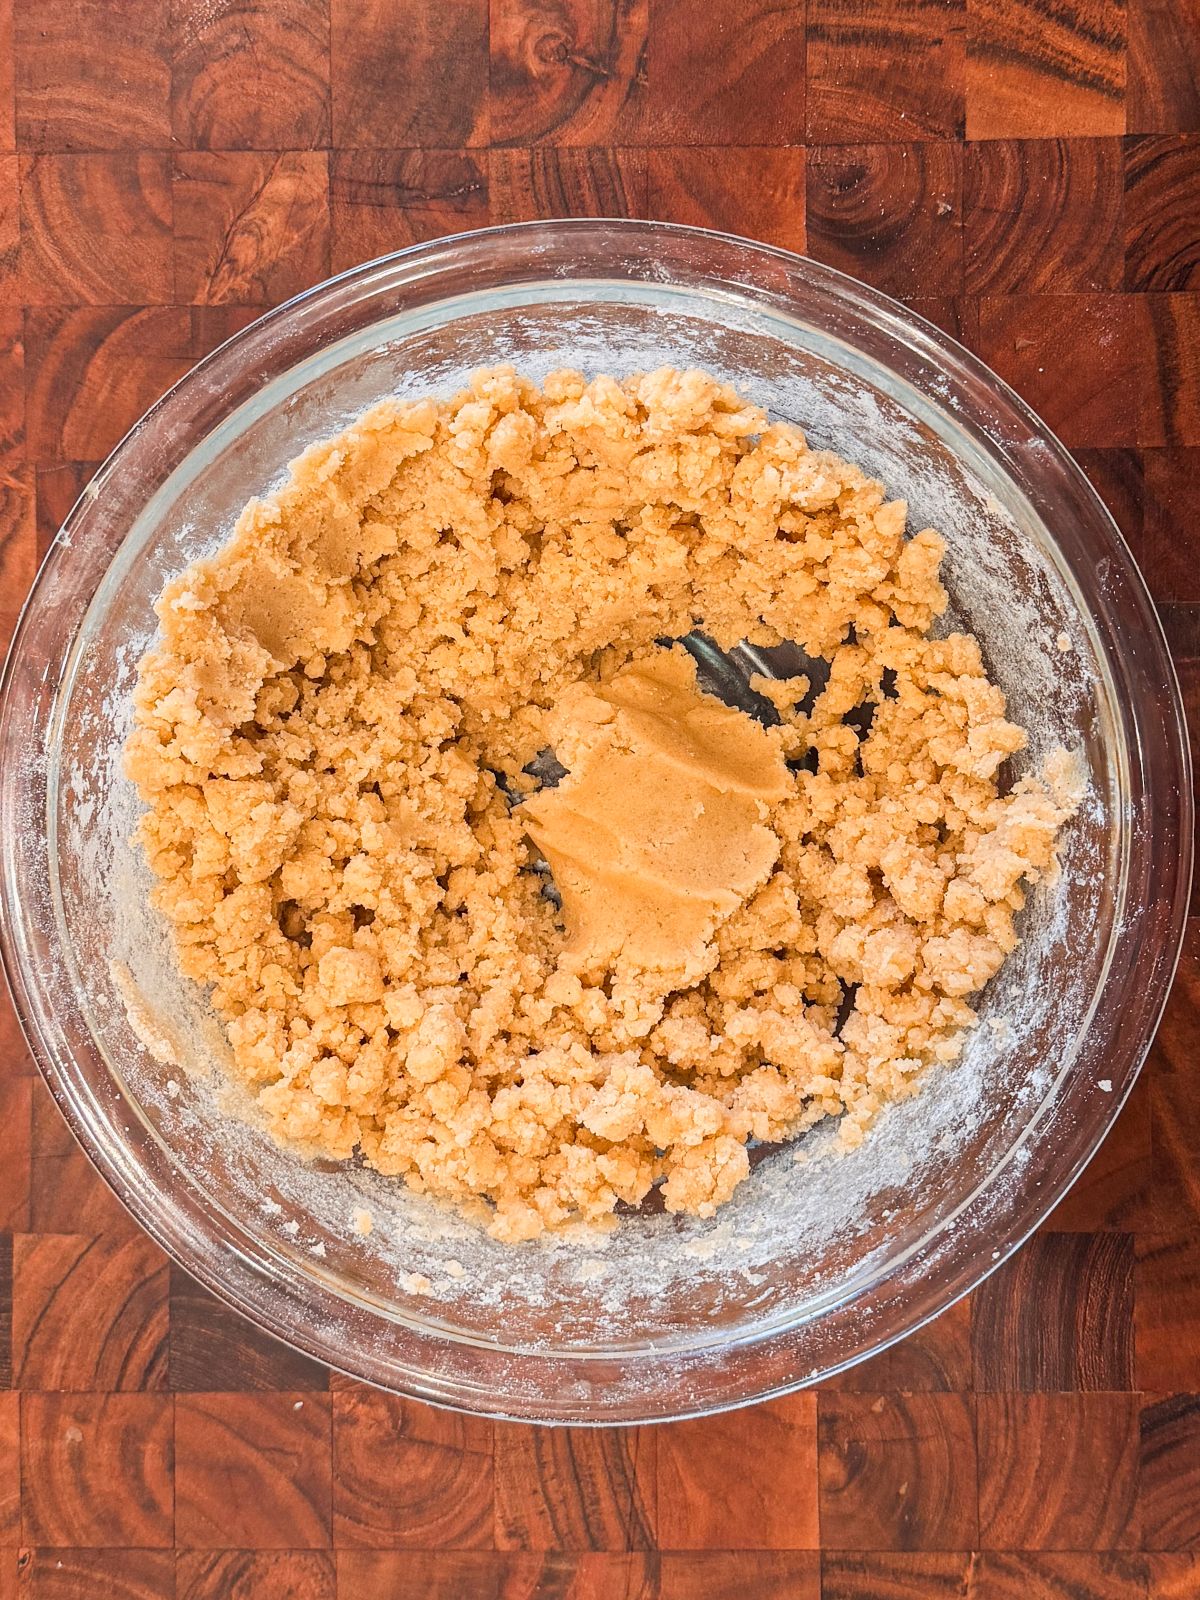
For the craquelin, whisk the butter, sugars and vanilla until creamy. Then add the flour and whisk until a crumbly mixture forms (similar to pie dough!)
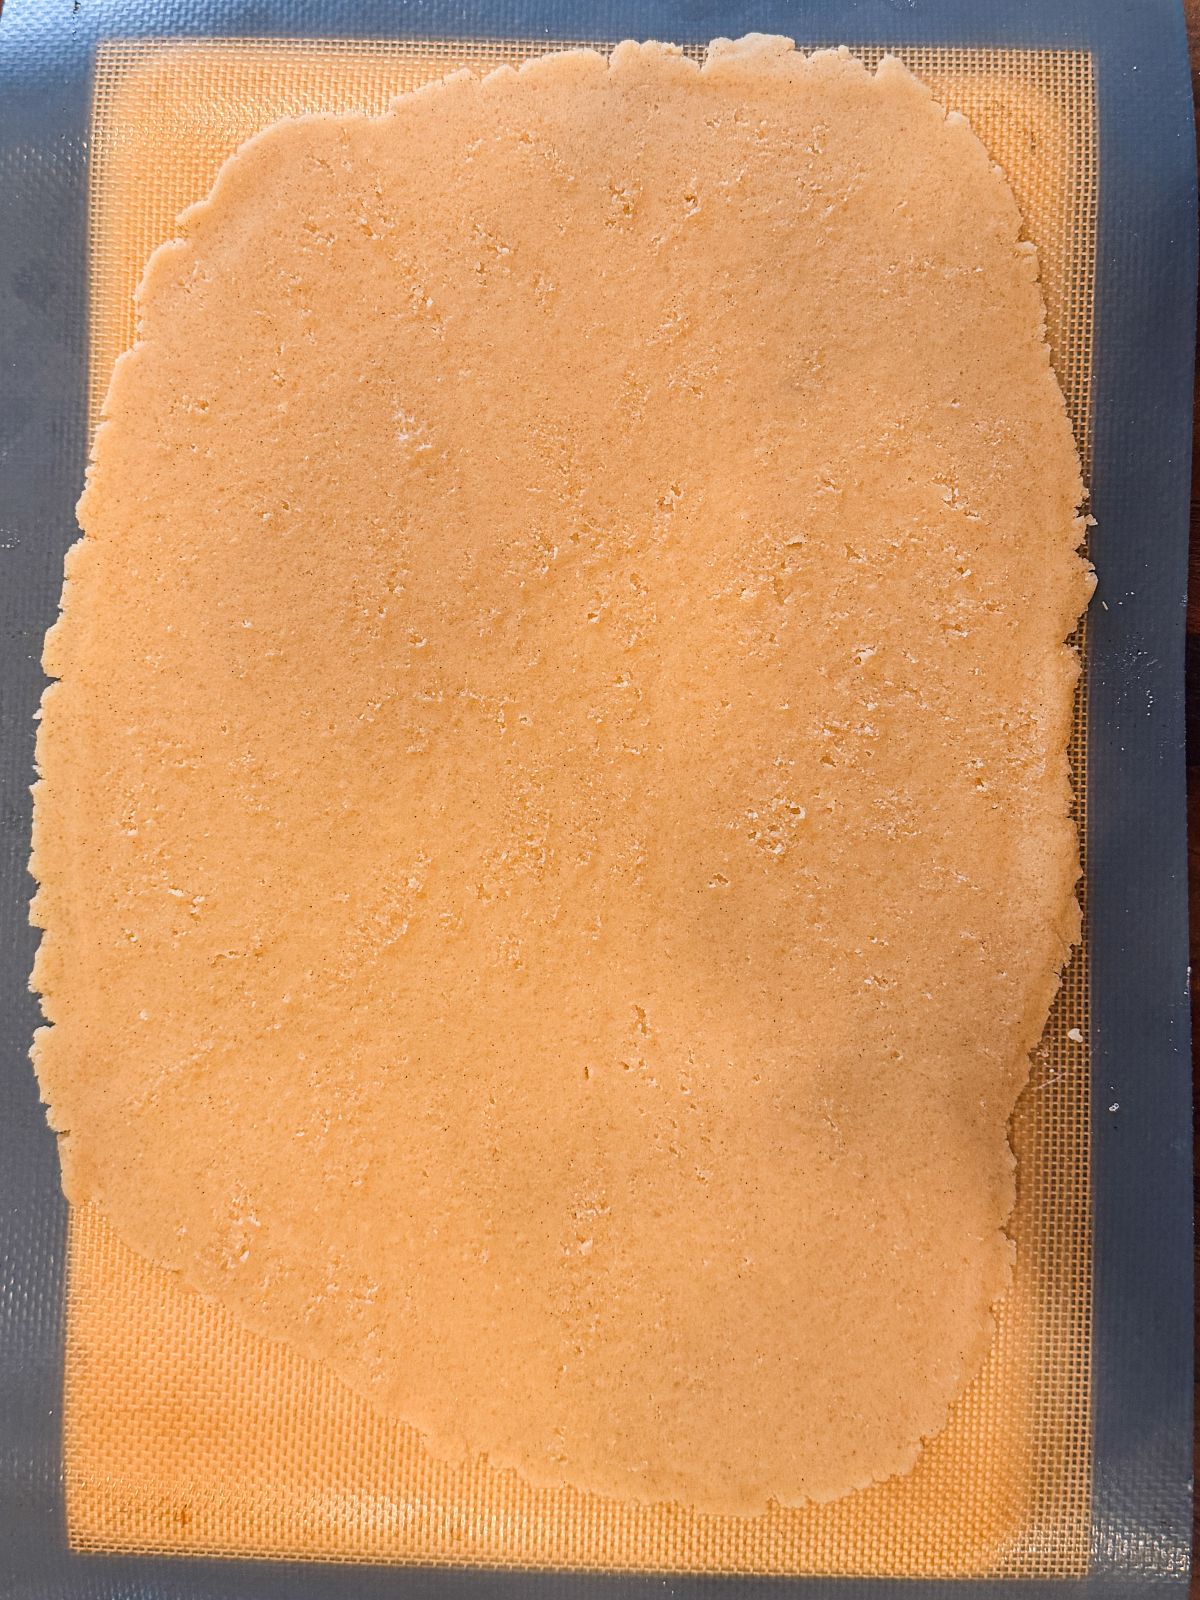
Place the mixture on parchment or a silicone mat, cover with parchment and roll out into a thin sheet (~¼" thick). Place in the freezer.
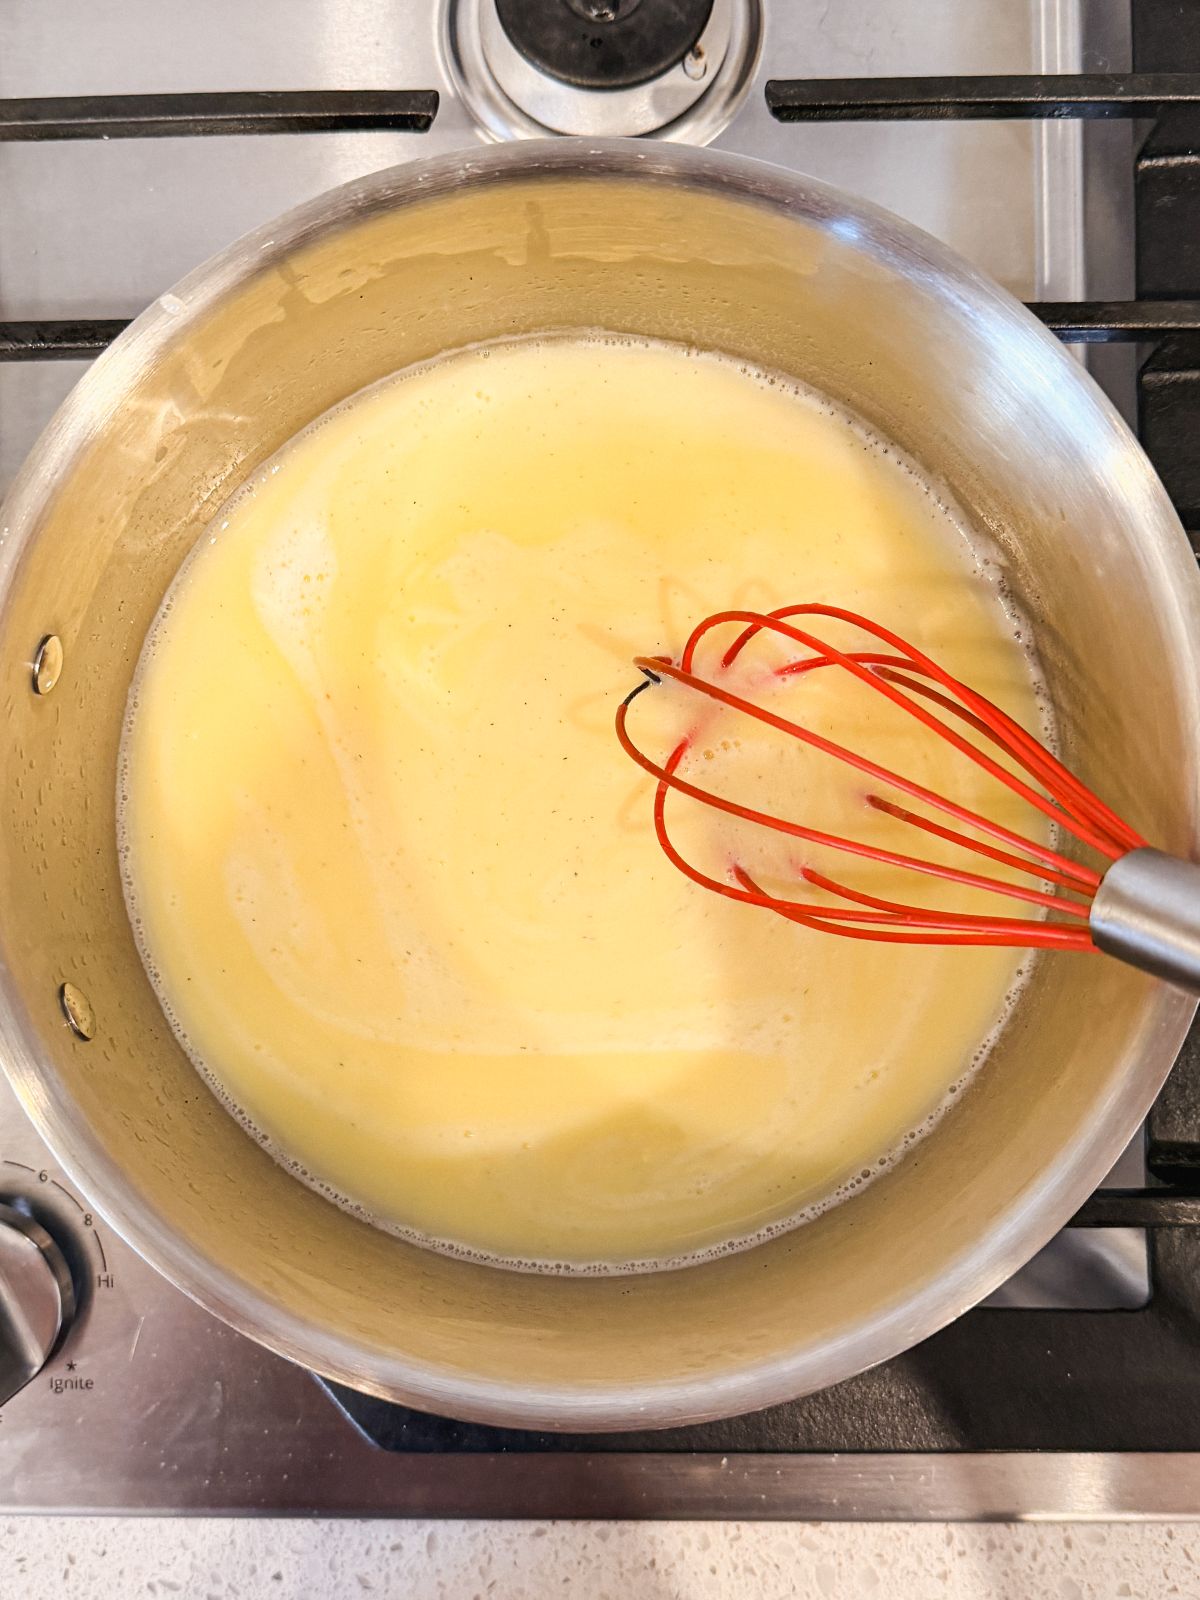
For the choux pastry, start by adding all ingredients except the flour and eggs to a saucepan. Cook and stir until the mixture starts to boil.
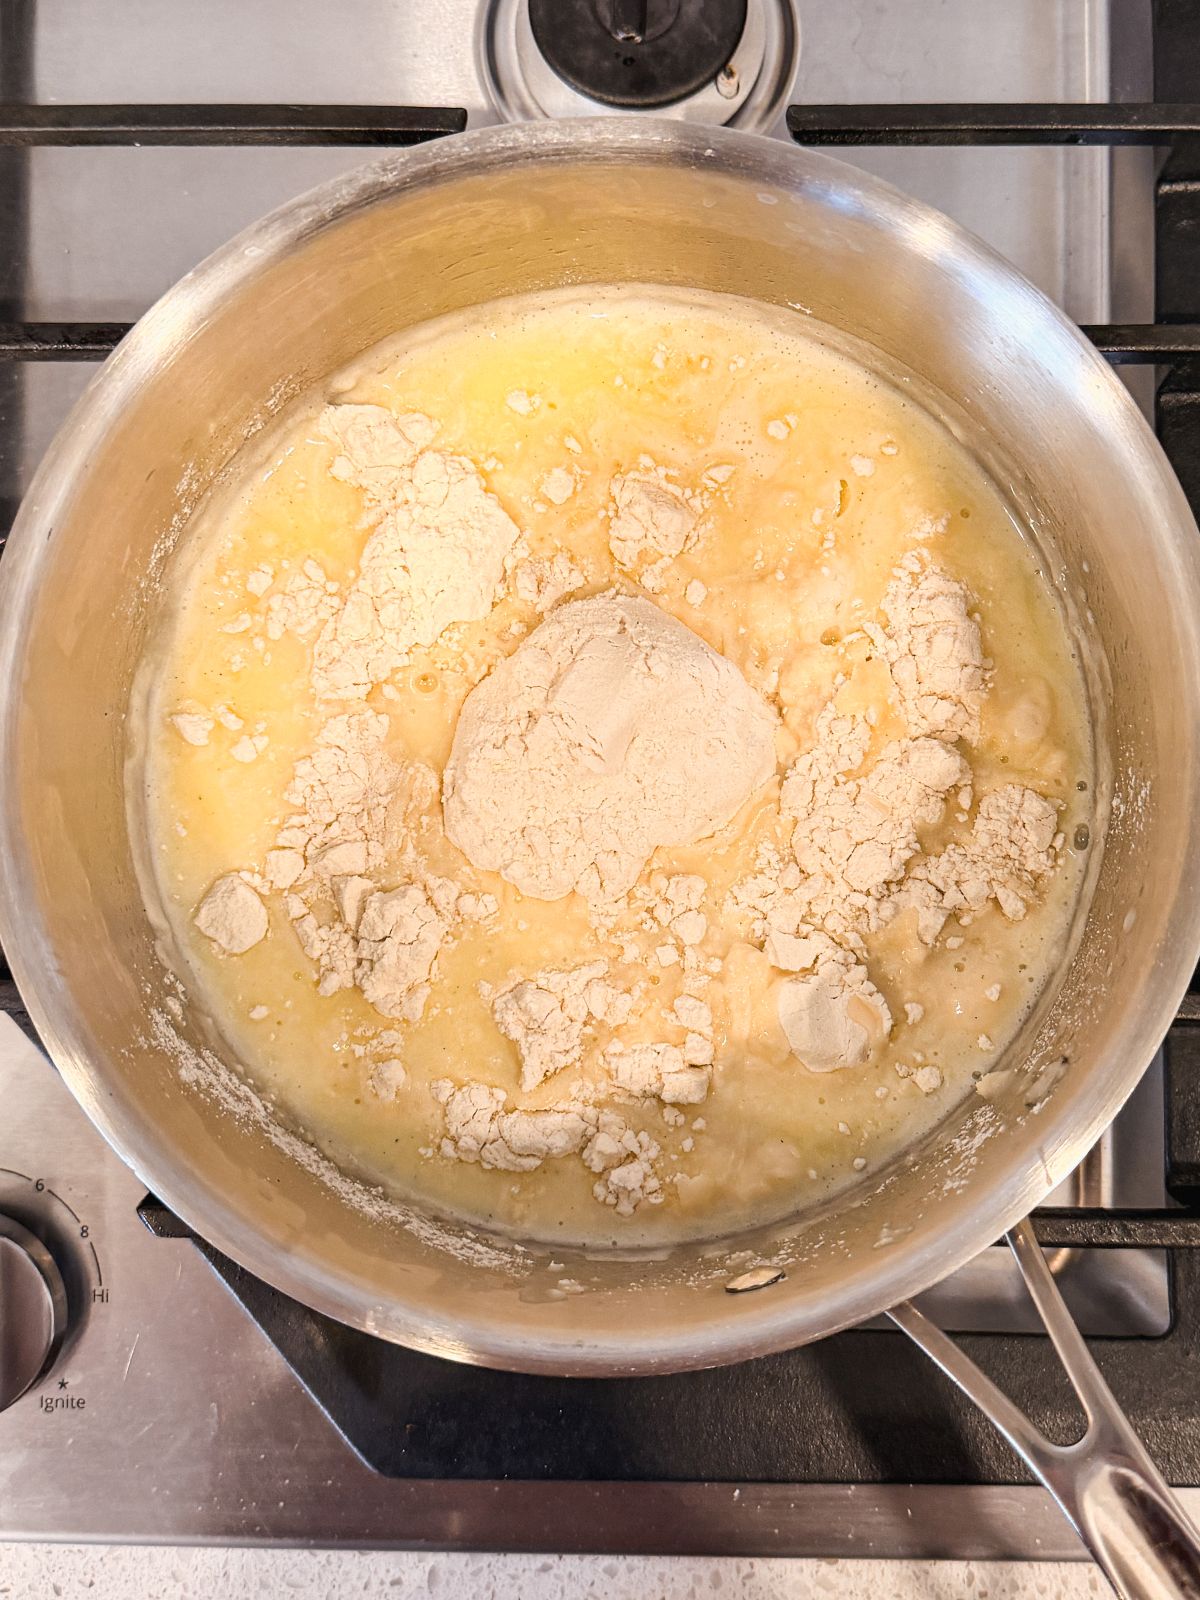
Remove from heat and add the flour. Use a wooden spatula to mix in the flour and break any lumps, until the mixture turns into a smooth dough ball.
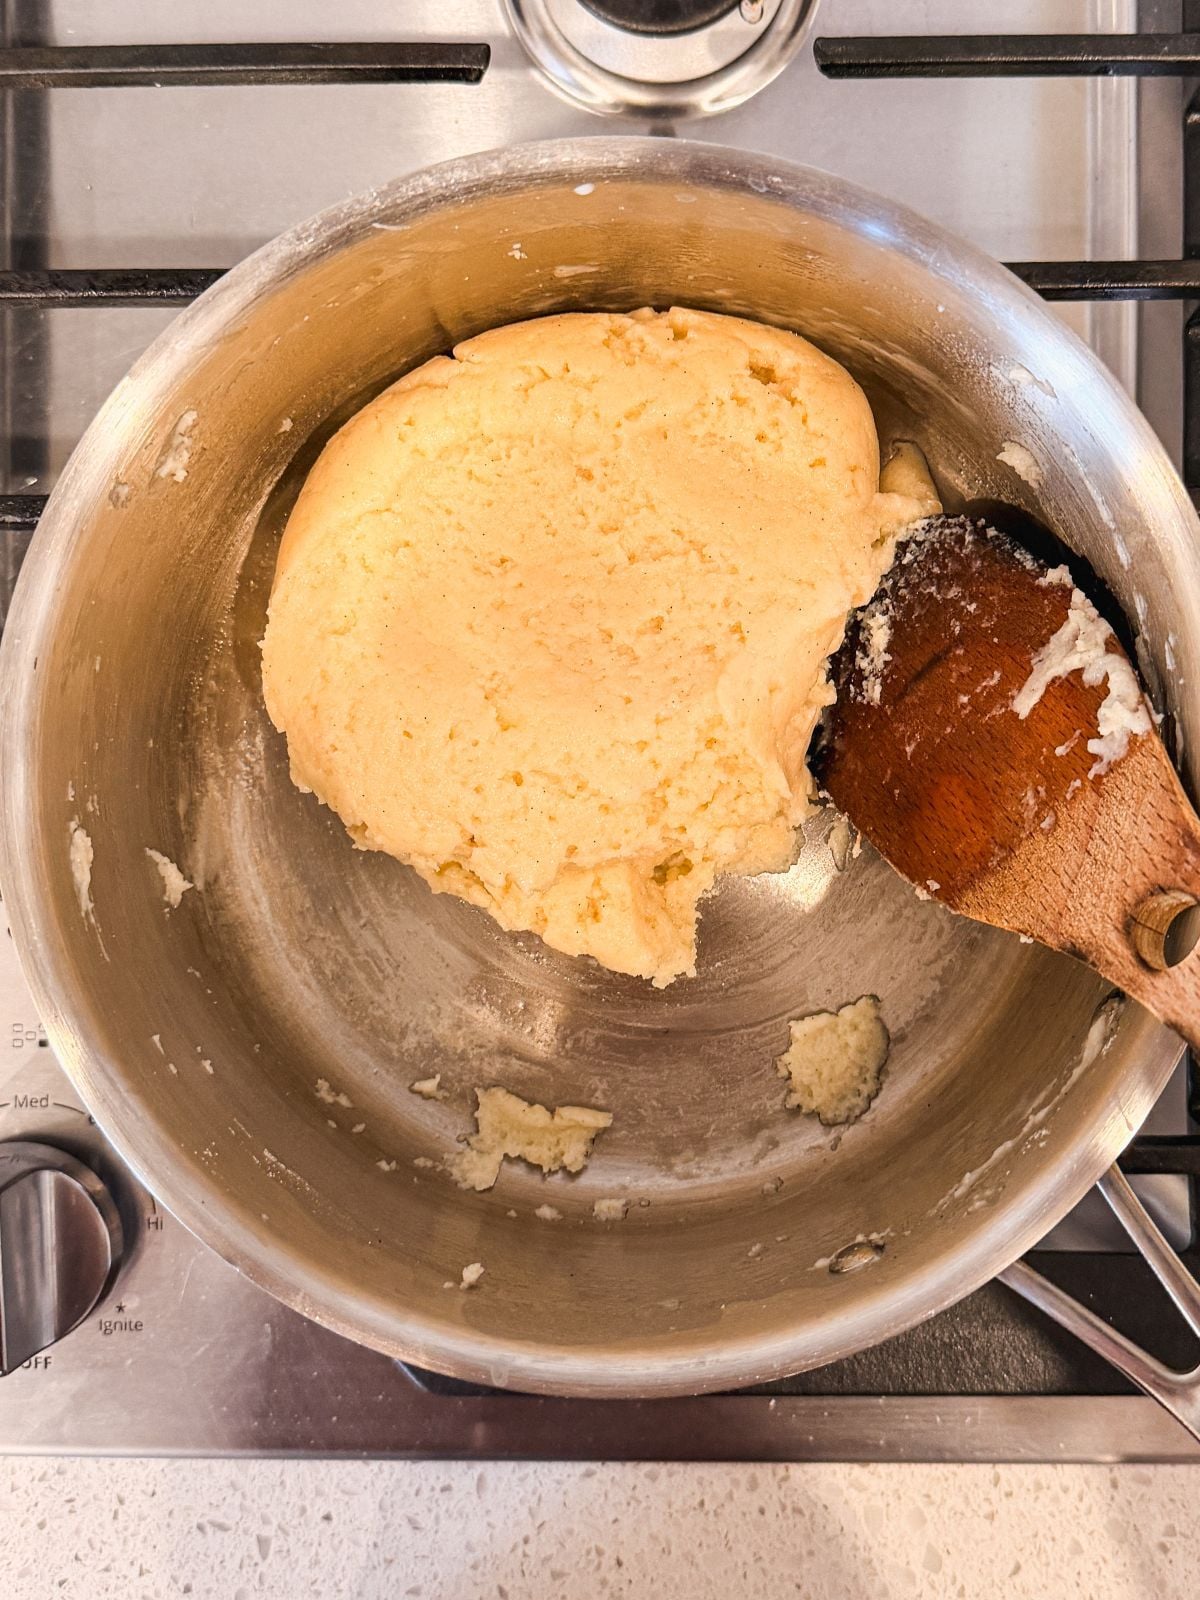
Return to heat on low flame, and keep cooking and mixing for 2 minutes. This step helps strengthen gluten and reduce moisture in the dough. Remove from heat and cool down for 5 minutes.
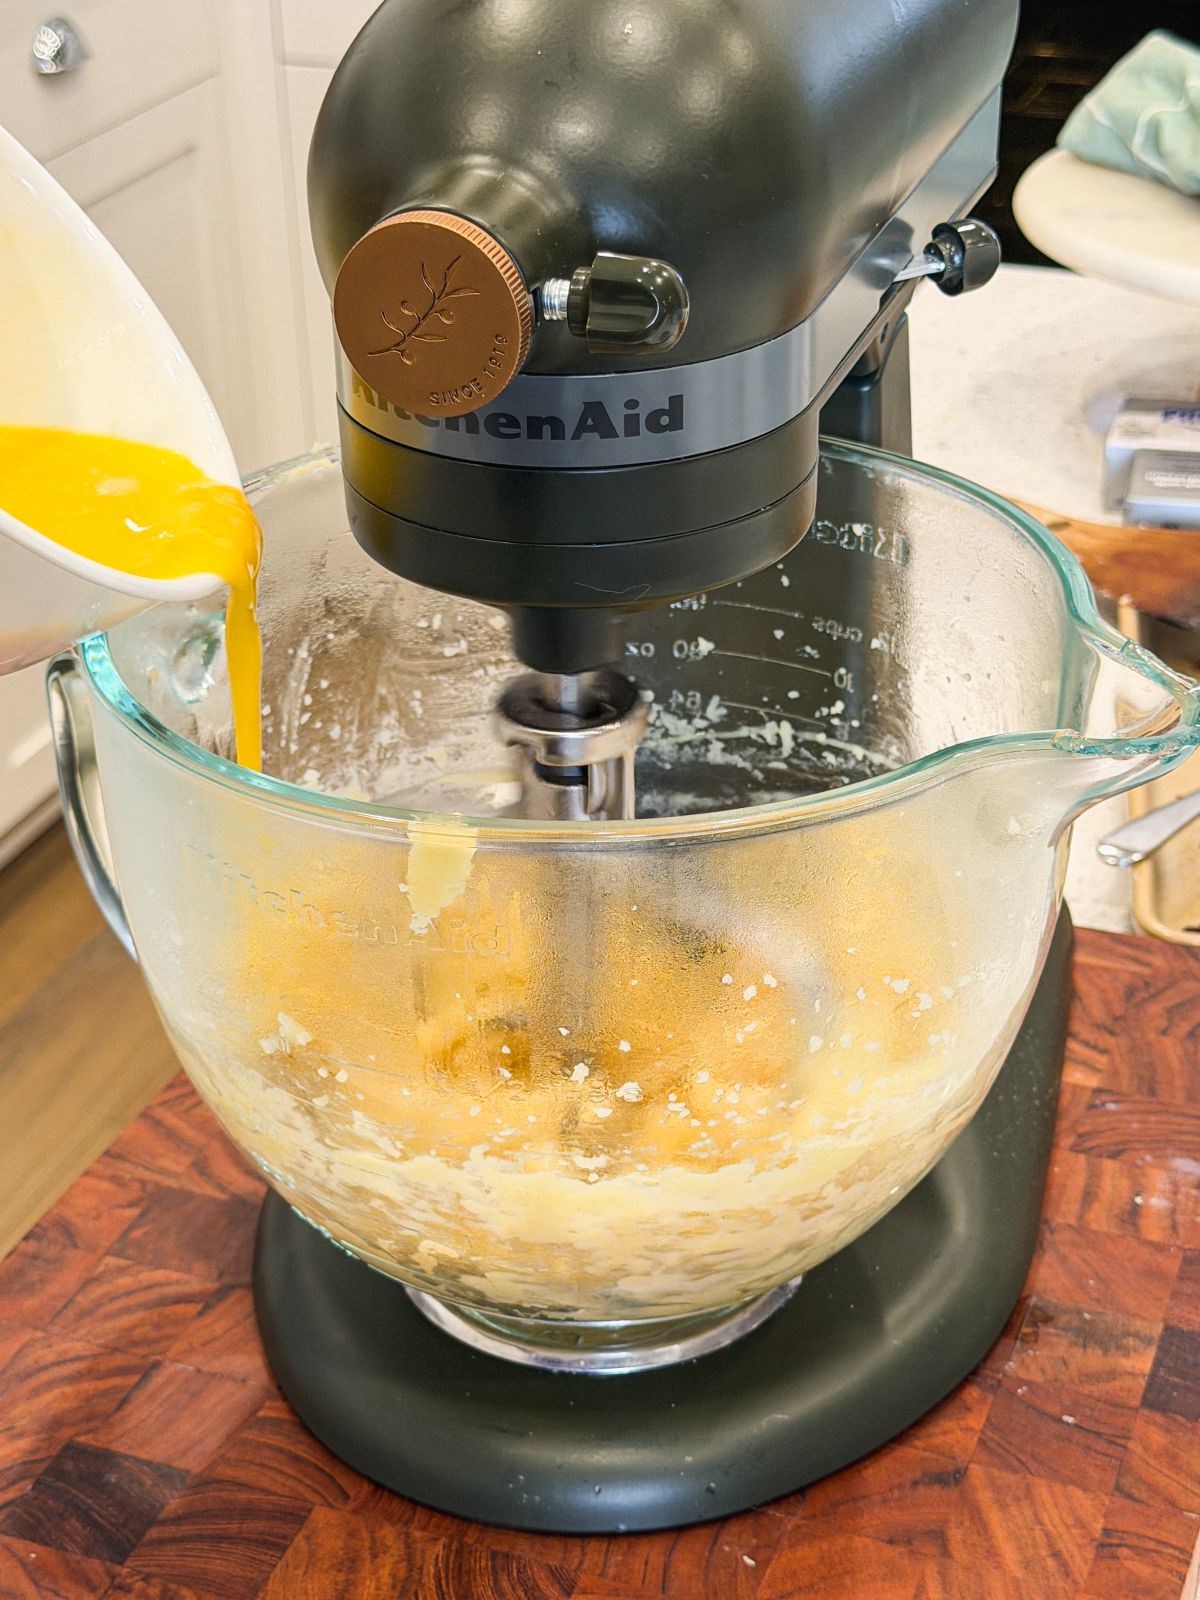
Break and whisk the eggs in a separate bowl, and transfer the choux pastry to the bowl of your stand mixer. Start adding the eggs a little at a time, whisking for 20-30s between each addition.
Only add enough eggs to achieve the right consistency of choux pastry, then stop. You will likely have a little egg leftover. Transfer to a piping bag with a small round tip.
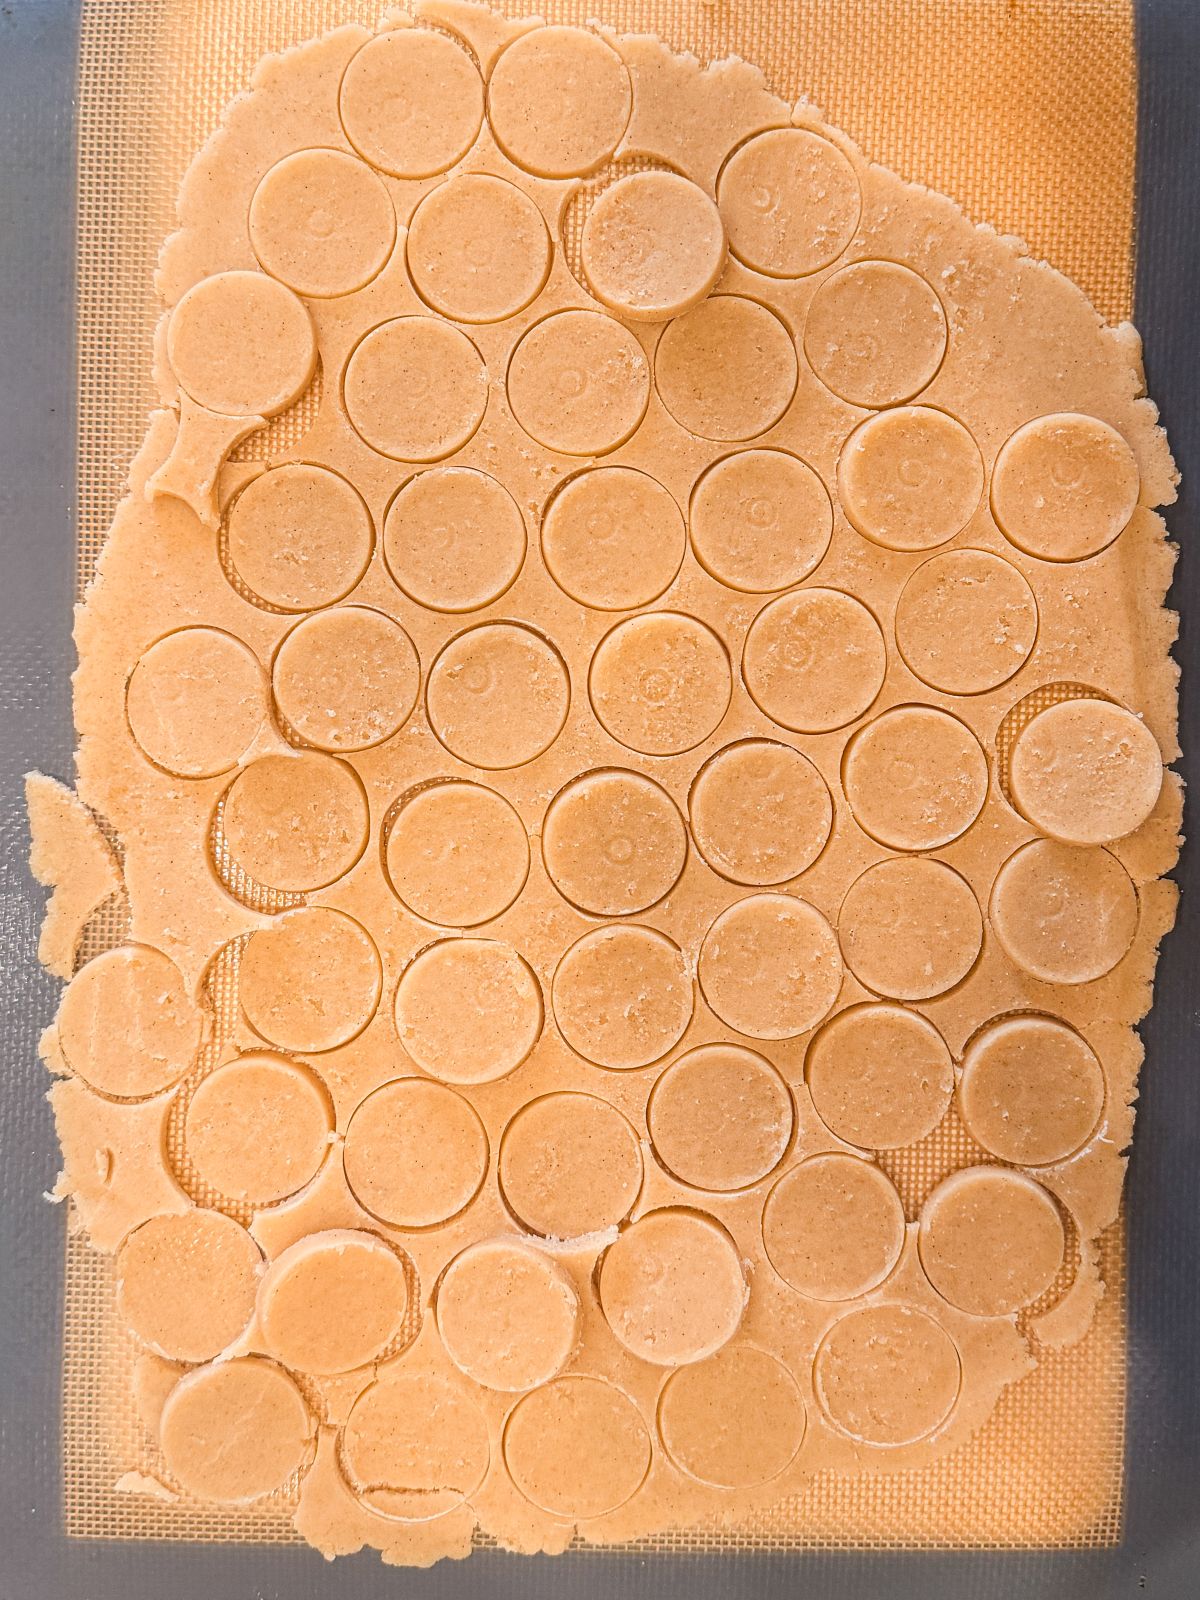
Use the back of a piping tip that's ~1.5" to cut the craquelin into 1.5" discs.
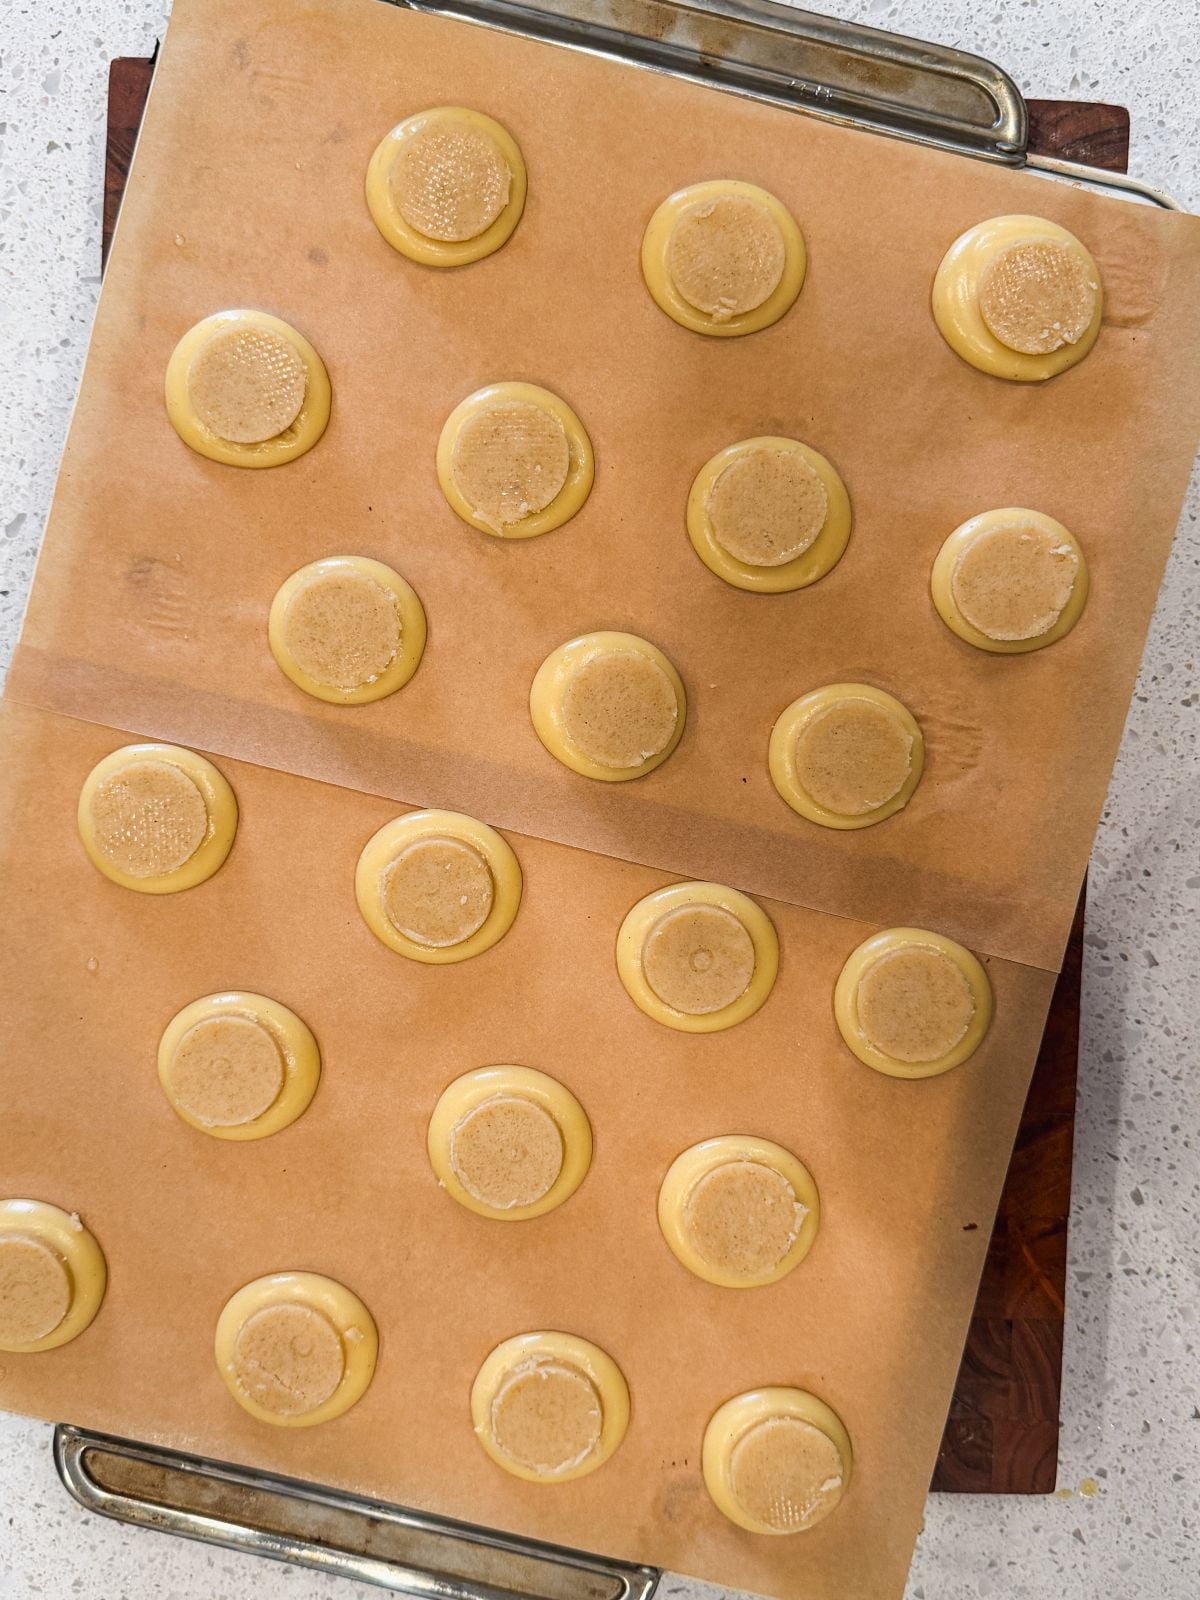
Pipe the choux pastry into 1.5" dollops, and cover each dollop with a craquelin disc. Bake until golden brown.
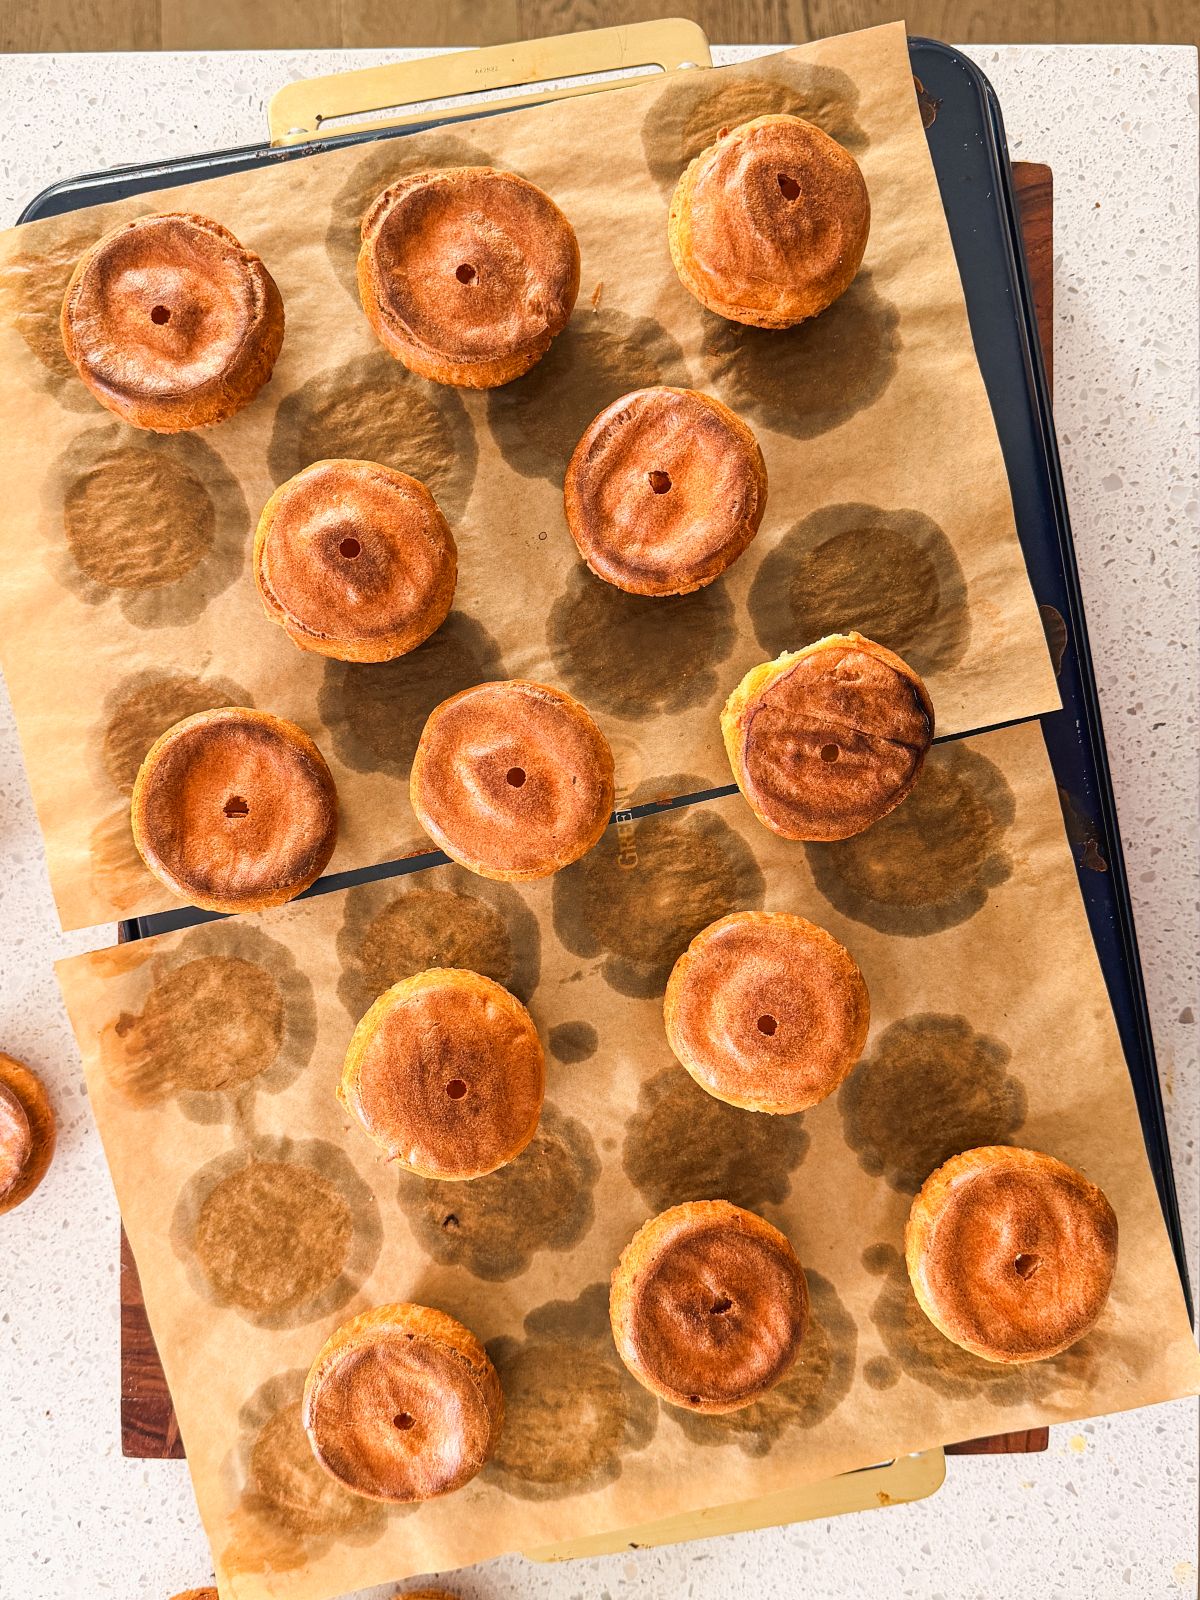
As soon as the cream puffs come out of the oven, use a Bismark piping tip to make holes on the bottom. This helps release steam so the pastry does not become soggy.
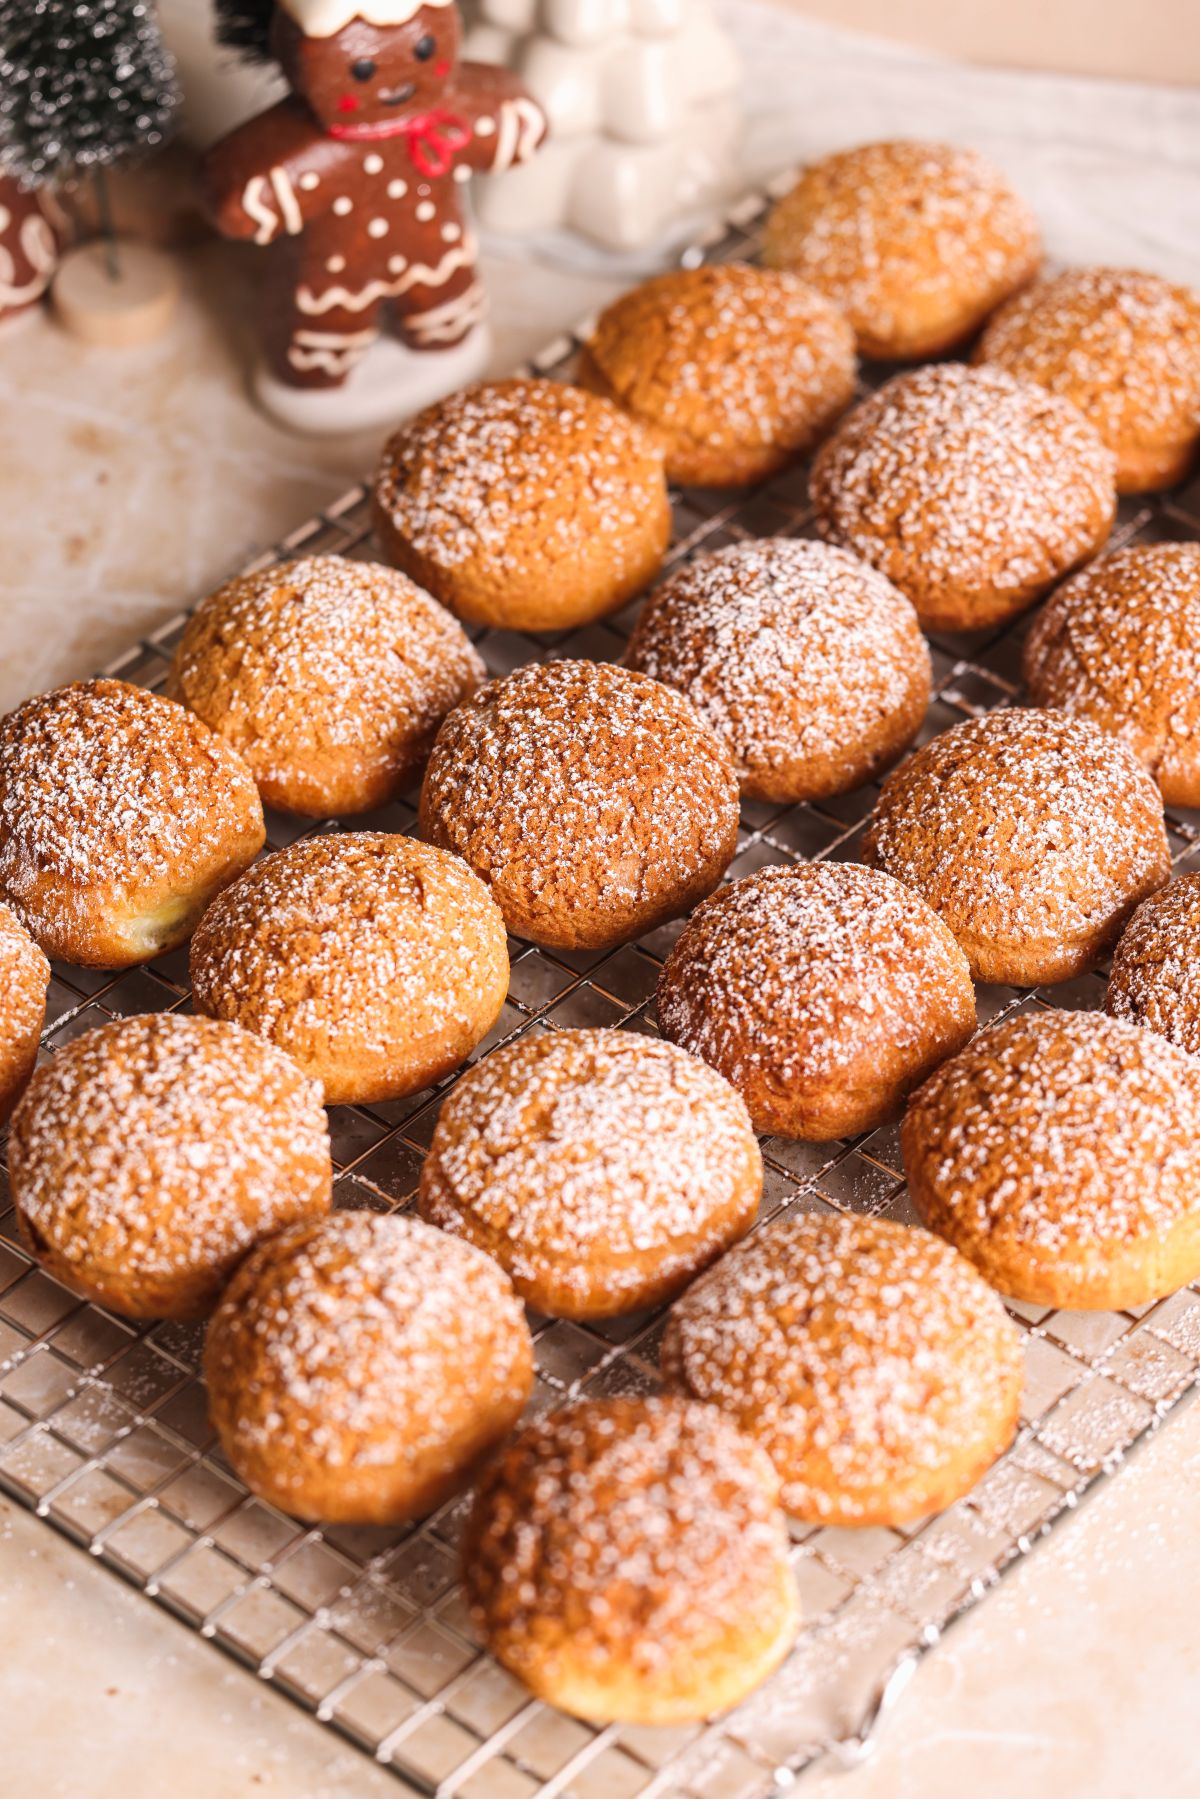
Once cool, fill each choux bun generously with the cheesecake whipped cream, dust with powdered sugar, and serve!
A few more tips before you make them
- PLEASE weigh your ingredients. Especially flour! It's so easy to add too much when using a measuring cup, which can easily ruin the choux pastry
- For consistent sizing, use a pencil and a piping tip to make 1.5" circles on parchment paper
- Make sure to leave ample room between circle, as the cream puffs more than double in size, and overcrowding can cause them to rise unevenly or even deflate. I typically use 3 large baking sheets (13x18") with 18-20 choux buns on one sheet
- Don't pipe them too big! You should stay within the 1.5" diameter markings. Piping choux buns too big weakens their structure, causing them to deflate after baking
- You can bake choux pastry in batches. Choux pastry stays fine when left out as long as it's covered or in a piping bag, so you can bake it in batches
- Keep an eye on the bake. Bake until a deep golden brown color to ensure the shells are crispy and dried out inside
- Fill generously! Nothing sucks more than a half filled cream puff. You want to pipe until you feel resistance, or the cream starts pushing back

The PERFECT Cream Puffs (Profiteroles) Recipe
- Total Time: 90 minutes + cooling
- Yield: 50 cream puffs
Description
Light choux pastry shells with a crispy craquelin crust filled generosuly with a delicious, silky cheesecake whipped cream. This recipe makes ~50 small cream puffs / profiteroles
Ingredients
Craquelin:
- ½ cup unsalted butter, room temp (113g)
- ⅓ cup (66g) light brown sugar
- ⅓ cup (66g) granulated sugar
- 1 tsp vanilla
- 1 cup all purpose flour (130g)
Choux pastry:
- ⅔ cup water (160g)
- ⅓ cup whole milk (80g)
- ½ cup unsalted butter (113g), cut into cubes
- 1 tsp vanilla bean paste
- 1 tbsp granulated sugar
- ¾ tsp salt
- 1 cup bread flour (or use all purpose) (130g)
- 4 large eggs, cold (you may not use all)
Cheesecake whipped cream:
- 12 oz cream cheese (340g), room temp
- ¾ cup granulated sugar (150g)
- 2 tsp vanilla
- ½ tsp salt
- 3 cups heavy cream, chilled (720g)
Instructions
Craquelin:
- Add the butter, light brown sugar, granulated sugar and vanilla to a bowl. Whisk on medium speed for 1-2 minutes until combined and creamy. Scrape the bowl
- Add the flour, and whisk on low speed until the mixture starts to look like a crumble. It should stick together when you apply pressure (just like pie dough)
- Place a silicone mat or parchment paper sheet on the back of a 9x13" baking tray. Add the craquelin mixture in the middle and press it into a disc. Cover with another sheet of parchment paper, and use a rolling pin to roll it out into a thin sheet (~2mm thick, or similar to pie crust)
- Transfer to the fridge or freezer while you make the choux pastry
Choux pastry:
- Pre-heat your oven to 390F (conventional, no fan) and prepare 2-3 large baking sheets. Place them upside down, and line with parchment paper. Use a pencil and the back of a large piping tip to make 1.5" circle markings on the parchment paper, leaving at least 1.5" between each circle. If you only have 1 baking sheet, don't worry, as you can bake in batches!
- Add the water, milk, butter, vanilla, sugar and salt to a light colored saucepan. Put on the stove on medium heat, and stir and cook until the butter has melted and the mixture starts to boil
- Remove from the heat, and add the flour. Use a wooden spatula to mix and fold the flour into the wet ingredients, breaking any lumps, until it comes together into a smooth ball
- Place the pan back on the heat on low flame, and cook and stir (using a press and swirl motion) for 2 minutes. This will dry out the dough and it will start to leave a thin film on the bottom of the pan (this doesn't always happen if you're using a nonstick pan, so don't worry too much). Remove from the stove and let cool for 5 minutes
- In a separate bowl, add the 4 large eggs, and whisk them lightly to break them down
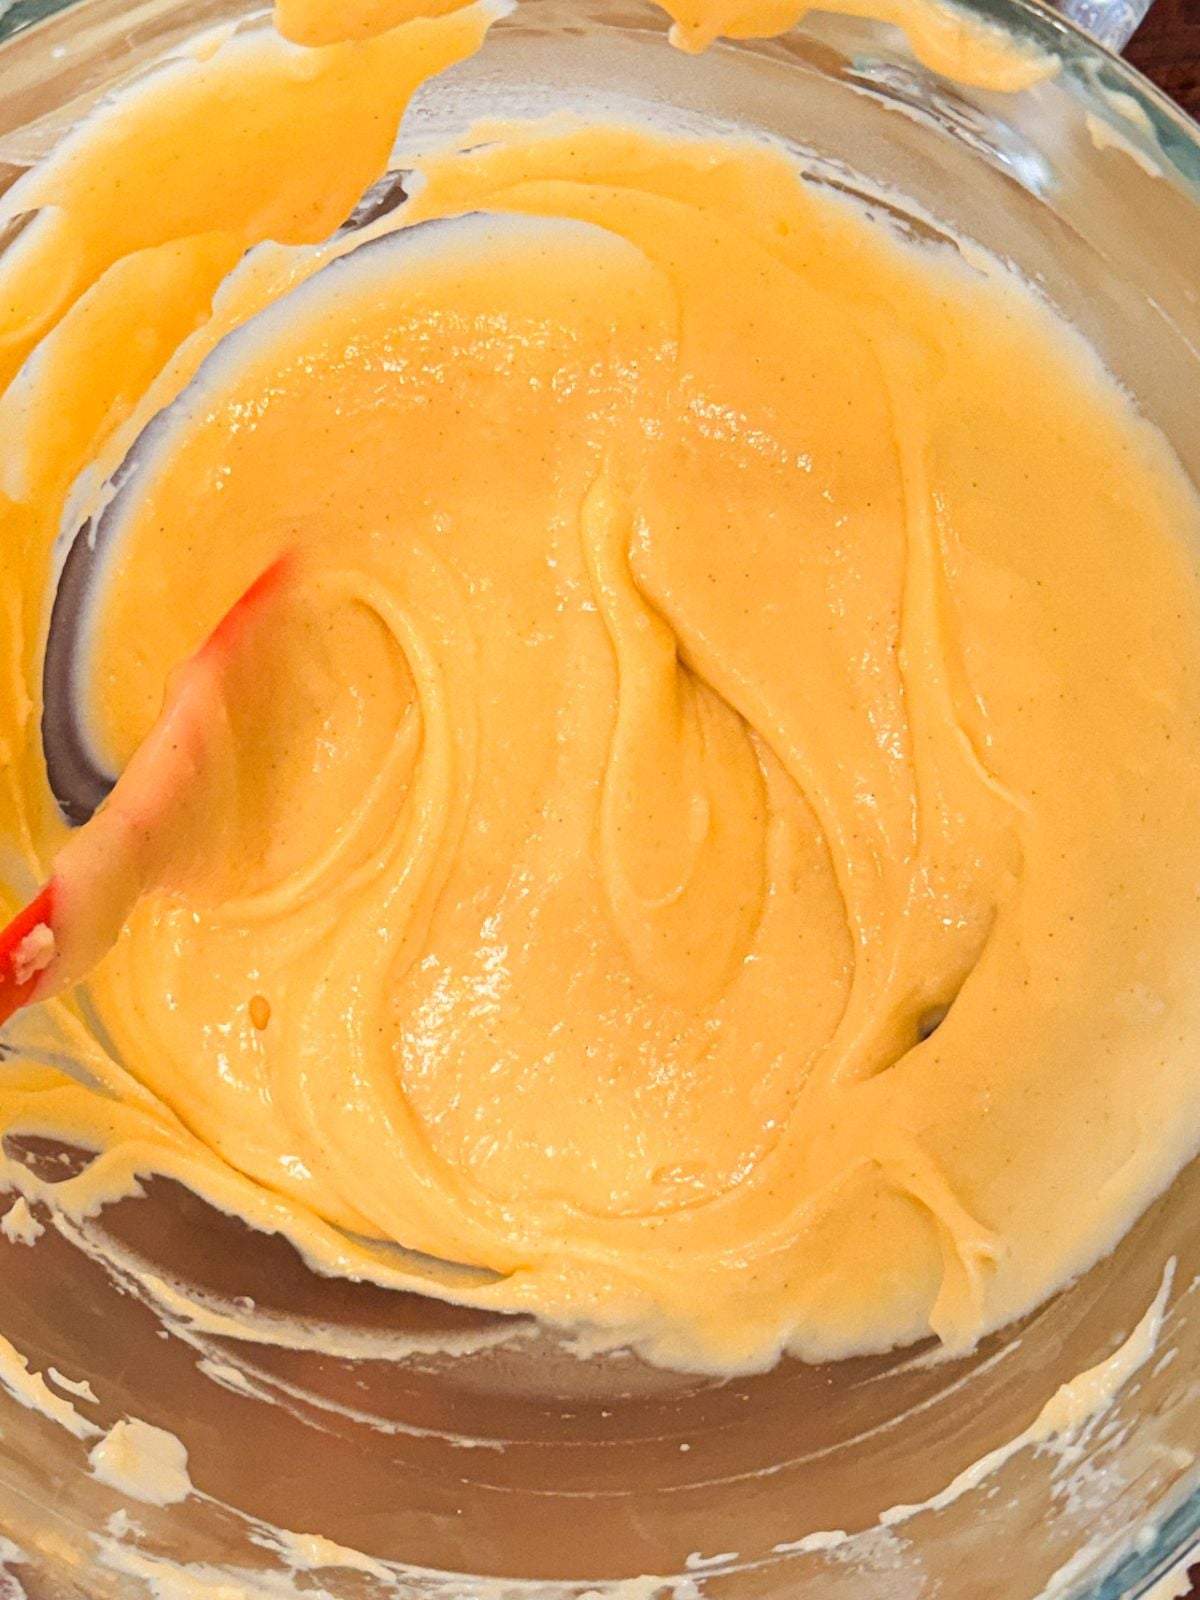
- Transfer the choux pastry dough to the bowl of your stand mixer with a paddle attachment (you can also use a hand mixer, or just a rubber spatula and your hands if you don't mind a workout). Add about a quarter of the egg mix to the dough, and whisk on medium-low speed for 20-30 seconds until the egg has incorporated. After this, add the egg a little at a time, mixing for 20-30 seconds until fully incorporated, scrape the bowl and check the consistency of the dough after each addition. The choux pastry should become smooth and shiny, and, when you lift it with a rubber spatula and let it fall back into the bowl, it should fall off slowly in a continuous ribbon, then taper off leaving a smooth V shape behind. The pastry should still be thick enough that it holds shape when it falls back into the bowl, instead of just dissolving back in. As soon as you reach this consistency, stop adding more egg. I usually have just a little bit left over, but sometimes have had to add a little more egg beyond the 4 eggs too - so it's all about the consistency!
- Transfer the choux pastry to a piping bag with a ½" round tip. You may have to pipe in batches depending on the size of your piping bags
- Use a little choux pastry to stick the corners of the parchment paper to the baking sheet so it doesn't move as you pipe. Now pipe the choux pastry using the circle markings you made earlier. Hold the piping bag vertically, apply steady pressure and lift the piping bag up as you pipe so each mound is tall instead of flat. Once the dollop approaches the 1.5" circle marking, release pressure, lift and flick the piping bag. If piping in batches, keep the rest of the choux pastry covered or in a piping bag at room temperature
- Take the craquelin out of the fridge/freezer. It should be firm now. Remove the parchment paper on top, and use the same piping tip as in step 1 to cut the craquelin into 1.5" discs. Cover each choux pastry dollop with a craquelin disc. If piping / baking in batches, keep the craquelin discs in the fridge so they don't become soft
- Now, it's time to bake! Transfer the baking sheet with choux pastry piped on it into the oven. Bake at 390F for 10 minutes, then reduce the temperature to 355F without opening the oven, and bake for another 18-20 minutes until the shells are golden brown and crispy. I recommend baking on only one rack in the oven to ensure all choux buns rise evenly - and yes, this does mean you typically have to bake in batches
- Remove from the oven, and immediately puncture holes on the bottom of each choux bun using a bismark piping tip so the steam can escape and the shells don't become soft. You will use the same holes to pipe into them later
- Repeat until all the choux buns have been baked and cooled down
Cheesecake whipped cream:
- Add the cream cheese, sugar, vanilla and salt to a large bowl, and whisk for 2 minutes until the mixture is creamy
- Add the cold heavy cream, and whisk again for a few minutes until the mixture becomes thick, fluffy and holds shape (medium stiff peak consistency). Do not overmix
- Transfer to a large piping bag in batches, and use a small round piping tip to fill each choux bun generously until the cream starts to push back
- Dust the cream puffs with icing sugar, serve and enjoy!
Video Tutorial:
Notes
- Scaling: This recipe makes a large batch of ~50 cream puffs, but you can easily halve all the quantities to make a smaller batch
- Storage: Cream puffs are best eaten within a few hours of being filled, as choux pastry becomes soft quickly. I recommend baking, filling and serving the same day, and keeping the rest in an airtight container in the fridge to consume within a day
- Make ahead: If you want to prep ahead of time, you can pipe the choux pastry onto the baking sheet and cover with craquelin discs. Then cover loosely with cling wrap and refrigerate overnight. Remove from the fridge and bake directly the next day
- Prep Time: 1 hour
- Cook Time: 30 minutes
- Category: Dessert
- Cuisine: French

Honey says
can I make the shells one day ahead and recrisp them the next day then fill them?
Catherine says
Best choux I’ve ever made. Mine got so big I ran out of cream to fill them with. This will be my new go to recipe for choice. They’re delicious. So crispy. And massive. 😂
Jenny says
Thank you for this really detailed recipe. The obvious love for cooking and care for your readers to be able to replicate this complicated recipe really shines through. Thank you so much! Ive been on a kick recently of trying coffee versions of things so these desserts arent too sweet. Im planning to make the craqueline with some espresso powder and also a coffee version of this creamcheese filling. Does the creamcheese weep at all? Would some gelatin in the filling help prevent that? Im planning to go for a cookie swap and would like to offer some of these and Im wondering if it will last longer than a couple of hours before they go soggy. The party is likely to go on for a while.
Zoha says
Thanks so much, Jenny! I hope you were able to try and liked the recipe. Craquelin with coffee sounds delicious. The cream cheese whipped cream shouldn't weep but it's obviously not something to be left out for hours. In my opinion you don't need gelatin. If you make them the same day, they will still be delicious for your cookie swap - thankfully the craquelin stays crispy 🙂
Sandi Wagner says
These turned out so well!! I've never made a choux before and while it's not beginner level, it was easy to follow and turned out so yummy!!
Salma says
Salaams Zoha
Is it possible to make these ahead and freeze them? Then take them out of the freezer about 30 minutes before serving?
Zoha Malik says
Hi Salma! Not filled cream puffs. you can bake the shells, puncture holes in them, place in an airtight container and freeze them, though. Fill before serving, as the cream will make the shells soft with time 🙂
Sweetpotato says
This was a great easy to follow recipe and was my first time making choux! The cream wasn't too sweet and the puffs were good size. I used vanilla bean pods instead of paste in the cream and it turned out great!
Soma says
Amazing recipe and I tried it today. The Chiux puff were tasty and the top came out crisp too as expected, however, the choux pastry collapsed at the back when I turned it around, what can I do to fix it?
Zoha says
Thank you for trying the recipe, Soma! Do you mean the pastry deflated, or that the bottom was "sunken"?
Zachary says
These came out amazing! Just like the photos so much room for the filling. The recipe and instructions were clear and easy to follow. I actually needed to add more egg, probably 4 1/2 eggs based on the ribbon and v-shape test described. I baked them on silicone mats with the sheet pans normal side up and that worked well for me. At first I thought the cream cheese in the filling made it too heavy for me but after eating several, I think it is just right to help cut some of the sweetness. Everybody loved them and I can't wait to make them again!
Zoha says
Aww, thank you so much for trying the recipe and sharing your review! it's a tricky one so I am very impressed 🙂
Ines says
Delicious. Only problem I had was that the bottom of the cream puff sank so I could not get the full filling that you have in your cream puffs. What do you think I did wrong?
Zoha Malik says
Hi Ines! it's possible you took out of the oven too soon, didn't puncture holes to let the steam escape, or just had a batter that was slightly too wet.
Sara says
Hello, I love the recipe but I have oven with fan what temp I should use in c?
Zoha Malik says
Reduce the provided temperature by 25F 🙂
Ines cardillo says
I baked these and they were delicious. However when I flipped the shell to punch a hole, after awhile the center of the bottom sank in and I could not fill them like yours. What did I do wrong?
Zoha Malik says
Hi Ines! I think we already discussed this but most likely, the batter is too loose (reduce egg) OR you need to bake a little longer
Ines cardillo says
I just read your response. Thank you. I’m going to bake them longer next time. My family loved them even with less filling and want me to bring them at the next family gathering. These were a hit!
Zoha Malik says
Thank you so much, Ines! Really appreciate the support <3
Ayesha says
Omg best cream rolls ever!! They came out so perfect! Easy to follow recipe as always! Love all your recipes. I didn’t get to make the cream cheese filling because I didn’t have any cream cheese but I made basic Chantilly cream and it was great! Next time, I’m def trying the cheesecake filling!
Zoha Malik says
Woo! I am so happy you were brave enough to attempt this recipe and it went well! And yes, the cheesecake filling definitely takes them up a notch 😀