
Rich and decadent with an ooey gooey molten chocolate center, these Chocolate Lava Cakes take only 6 ingredients and less than 30 minutes to make, and are better than Chili's. They are always a crowd pleaser and easier to perfect than you think, especially with this step by step guide.

Read the full blog post below for a detailed guide with tips, photos and videos.
Jump to:
What to expect
Serving: This recipe makes 5 jumbo sized chocolate lava cakes. They are big and tall, with the perfect ratio of cooked cake to molten center, just like the Chili's lava cake (if you know, you know)
Flavor: These cakes have a higher quantity of chocolate than most recipes, resulting in an ultra chocolatey, decadent and not too sweet flavor!
Texture: They are soft and light outside with an abundance of molten lava inside. When you get this recipe right, you won't be searching for the molten chocolate inside the cake, it will come oozing out
Effort: This is a quick and easy recipe which takes less than 30 minutes from start to finish with just a few, fuss-free steps

Step by step photos
The detailed recipe is provided in the recipe card at the bottom of this post, but let's go over the steps quickly with photos to help you visualize everything.
Melt the butter and chocolate together in 20 second increments in the microwave:


Separately, whisk the eggs and sugar until light in color, thick, frothy and ribbony:


Whisk the chocolate mixture into the egg mixture until just combined:


Sift in the flour and salt, and gently fold until combined:


Divide the batter evenly between well-lined cups of a jumbo muffin pan:


Bake, rest for 1 minute, then carefully remove from the pan:


Serve with a dusting of powdered sugar and / or ice cream, and enjoy!


Perfecting the baking time
Making a good chocolate lava cake comes down to one thing: getting the baking time right. The perfectly baked cake will be set outside with an abundant amount of molten lava inside. Take it out of the oven too early and it will collapse when removed from the mold, and bake for too long and it will no longer be molten.
The difference between underbaking and overbaking can come down to seconds. And it is not possible to give you an exact time to follow, as the baking time will vary based on different factors such as oven setting / calibration, type of mold, amount of batter, etc.
But you can get it just right by looking for the right signs. The cake is perfectly baked when:
- The surface looks cooked and set, and the edges of the cake start to pull away from the muffin pan / ramekin. If you gently poke the edge of the cake with a finger, it should spring back
- When you gently shake the cake, it jiggles, indicating it is still molten in the middle. You can also insert a toothpick in the middle to ensure there is wet batter inside
- Once removed from the oven, the middle of the cake will sink a little because of the lava center
Pro Tips
Bake a test cake, especially if this is your first time! After dividing your batter between the ramekins, put all but one in the fridge. Place that one ramekin in your preheated oven, and bake it for 9 minutes. Open the oven door and check for doneness. When it looks done, remove from the oven, demold, and try. If it is too molten, add ~1 minute of baking time. If it is overbaked, reduce ~1 minute of baking time
Remember, the cake continues to cook after being removed from the oven due to residual heat, so when in doubt, it is better to lean towards slightly underbaked rather than overdoing it!

Ramekins vs jumbo muffin tray
Chocolate lava cakes are typically made in ramekins (I recommend 8oz ramekins for these larger sized cakes). However, I personally prefer baking them in a non-stick jumbo muffin tray! They come out taller and are easier to demold than ramekins, which are quite heavy and have nothing to grip onto when you flip them. Be sure to use a light colored tray so the cakes don't brown too quickly.
You can bake these cakes in either of the two based on your preference, but keep 2 things in mind:
- If you wish to bake a test cake first to perfect the baking time, you will have to make it in a ramekin (the cups are connected in a muffin tray so you have to bake them together)
- Since ceramic takes longer to heat up than metal, the cakes will take ~1-2 minutes longer to bake in ramekins vs the muffin tray
More tips to perfect this recipe
Measure with a weighing scale for accuracy. This is especially important for flour and chocolate
Use good quality dark chocolate in the form of a bar. Chocolate chips have stabilizers in them and don't melt the same way as chocolate bars, and therefore aren't ideal for a chocolate lava cake
Make sure to prepare the ramekins / muffin tray properly. Brush generously with butter and dust with cocoa powder to ensure the cakes come out easily
Frequently asked questions
Although many recipes suggest you can prepare and refrigerate the batter in advance, I don't recommend that because the batter loses air as it sits. These cakes are best made and enjoyed fresh. However, you can refrigerate or freeze the baked chocolate lava cakes in an airtight container, and microwave until hot before serving again.
Yes, you can use 6oz ramekins but the recipe will yield 7-8 smaller cakes and the baking time will be reduced accordingly.

Chocolate Lava Cakes Recipe
- Total Time: 25 min
- Yield: 5 large lava cakes
Description
Super decadent and chocolatey jumbo-sized chocolate lava cakes made with 6 ingredients in under 30 minutes. These are better than Chili's!
Ingredients
- 300g dark chocolate, chopped (60-70% cocoa, in the form of a bar preferred)
- 12 tbsp unsalted butter (170g)
- 4 large eggs
- 2 egg yolks
- ½ cup granulated sugar (100g)
- ⅓ cup all purpose flour (45g)
- ½ tsp salt
Instructions
- Pre-heat oven to 450F (conventional, no fan)
- Prepare 5 muffin cups in a non-stick jumbo muffin pan, or 5 8oz ramekins, by generously brushing them with softened butter and then dusting with cocoa powder. Shake out any excess cocoa powder and clean the edges (otherwise the excess cocoa powder on the edges or on the muffin pan can burn and create smoke in the oven)*
- Place the chopped dark chocolate and unsalted butter in a microwave safe bowl. Microwave in 20 second increments, stirring in between, until the chocolate and butter are fully melted and mixed together. Set aside
- In a separate bowl, add the eggs, egg yolks and sugar. Whisk on medium-high speed for ~3 minutes until the mixture becomes really light in color, thick, fluffy and ribbony. It should almost triple in volume
- Pour the chocolate mixture into the egg mixture, and whisk on medium-low speed just until combined. Do not overmix
- Sift in the flour and salt. Use a rubber spatula to very gently fold the dry ingredients into the batter, taking care not to overmix
- Divide the batter evenly between the 5 prepared muffin cups or the ramekins. The batter will almost reach the top with a little margin left**
- Bake in the pre-heated oven for 8-10 minutes if using the muffin tray, or 10-12 minutes if using the ramekins. Be sure to keep an eye on the cakes and look for signs of doneness. They are done baking when the top looks set and the edges pull away from the pan, but the cakes still jiggle when lightly shaken. You can also insert a toothpick in the middle to ensure it is molten but not completely liquid / raw
- Remove the cakes from the oven. Rest them for 1 minute, then use a butter knife to gently separate them from the edges of the muffin cups / ramekins. Carefully flip the cakes out of their molds; they should come out easily
- Serve hot with a dusting of powdered sugar and / or a scoop of vanilla ice cream. You can even drizzle over some chocolate fudge sauce. Enjoy!
Video Tutorial:
Notes
*If you are using ramekins, place them in a large baking sheet so they are easy to take out of the oven. Grabbing them individually when hot can be challenging
**If you intend to bake a test cake first to confirm the baking time, make sure to use at least 1 ramekin. Bake that ramekin first to check how long the cake needs to be baked to be molten inside, then bake the remaining in a muffin tray or more ramekins
- Prep Time: 15 min
- Cook Time: 10 min
- Category: Dessert
- Cuisine: American
More classic recipes
In the mood for more classic recipes? Check these out:
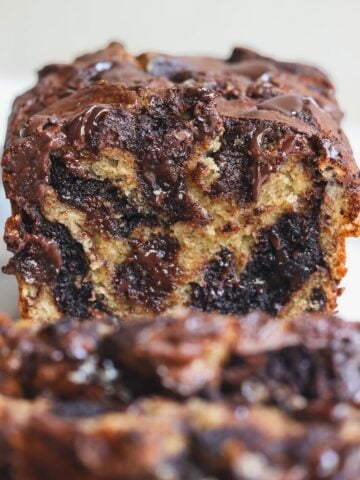
- My Easy Chocolate Cake which is incredibly moist, decadent and foolproof
- The Fudgiest Matilda Chocolate Cake with a dark chocolate fudge frosting
- A Baked Chocolate Cheesecake which is rich and creamy like chocolate gelato
- The ultimate Chocolate Chip Banana Bread made with brown butter for a delicious caramel flavor
- The classic New York Cheesecake with a crispy graham cracker crust and a silky creamy cheesecake filling
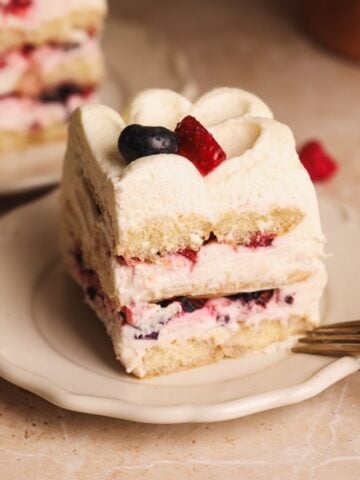
- The perfect Italian Tiramisu with a beautifully balanced flavor that lets the coffee shine
- The most incredible Brown Butter Chocolate Chip Cookies you will ever have
Neha says
Hi Zoha! These lava cakes look delish! Cannot wait to make these. Just one question though. Can I make the batter in advance and keep it in the fridge and bake just before serving?
Zoha says
Hi Neha! Technically yes, you can do that. Just keep in mind the batter will lose air when allowed to sit, and that can result in a cake that doesn't feel as light.
Sakina Razvi says
Can’t wait to make these! Can I just do one large one in a 9 inch round pan or is it best to make them in a muffin pan or ramekins?
Zoha says
Hi Sakina! A large cake will not end up with a molten center because it will have much more surface area, due to which the heat will get to the middle quickly and cook it. For a molten center, please use muffin pans or ramekins 🙂
Amna Aslam says
Hello. How many cakes will this recipe make? I just want to make 2 and want to adjust the recipe accordingly. Thanks!
Zoha says
This recipe makes 5 large cakes! You can do half the ingredients and get 2 large ones and one smaller one 🙂
Aleemath Arshana says
what will be the temp if i use gas oven?
Zoha says
I also use a gas oven! So same as the recipe
Carisa says
Can you use milk chocolate?
Zoha says
I don't recommend milk chocolate as the result will be too sweet.
Eyshal says
The lava cake was so delicious
All your recipes are so good
Dina says
Can I slightly reduce the sugar maybe to 1/4cup or 1/3cup?
Dina says
Why aren’t you answering my comment?
Zoha says
Hi Dina, apologies for the delay. I don't think you need to reduce the sugar but that should be fine
Aneesa says
Perfect!
Zoha says
Thank you!
manal says
hii! i cant wait to make these but i am a little confused what would be the temperature?
Zoha says
450F as mentioned in step 1 🙂
Maham says
Hi Zoha,
Whats the maximum time you can keep the batter in the refrigerator?
Making it the last minute for guests is a bit difficult
Zoha says
Hi maham! Hard to say as ive never left it for more than 30 minutes. It will deflate the longer it sits