
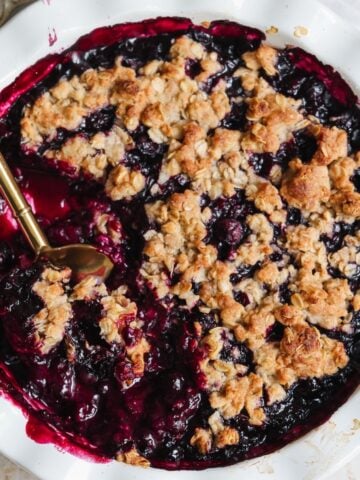
Cheesecake Croissant Buns = crispy, flakey cups made with croissant dough filled with a thick, luscious no-bake cheesecake filling and topped off with a raspberry glaze and crushed graham crackers. And with this recipe, you can learn how to make croissant buns which can be filled with literally anything you desire! Oof. Let's make these!

Jump to:
THE STORY BEHIND CHEESECAKE CROISSANT BUNS
This summer, I was traveling in London and came across a cute bakery called Buns From Home. They have multiple branches and sell rolls and buns of different flavors made with croissant dough. I tried their chocolate hazelnut, cinnamon and cheesecake buns, and they were all insanely delicious. The best, though, was the cheesecake croissant bun.
Immediately, I knew I had to recreate this recipe. I started going crazy obsessing over these, and brainstorming how to create the croissant cups.
If you know anything about croissant dough (or laminated dough), you know it is extremely trciky to work with. You can't just roll it up into a ball or form it into cups as you will ruin the lamination which gives it the flakey, butter texture.
I tried and tested a few different techniques (like vol-au-vents and pastel de nata) and had far too many disasters. But then, upon a follower's suggestion, I had my aha moment: use an upside down muffin pan!
I was finally able to create the cups. The cheesecake filling and toppings were the easy part. These buns tasted almost identical to the ones I had eaten in London, and I was over the moon for them!
HOW TO MAKE CROISSANT BUNS (OR 'CUPS')
I am not going to sugar-coat it: this is a complicated recipe. The toughest part is making the croissant dough, as it is not usually something you can buy pre-made (like puff pastry). So let's break it down.
1. Make the croissant (laminated) dough
This is the toughest part and requires signficiant patience. I have included my instructions in the recipe card below. Just remember: the key is to keep the butter and dough chilled throughout the process, and that requires being patient at every step.
If you're looking for a more in depth blog post on making croissant dough - I am working on it! I am on a journey to make the perfect croissants and have been researching different methods and recipes. So stay tuned.
In the meanwhile, you can check out Claire Saffitz's detailed youtube video in which she covers all the basics you need to know.

2. Shape and bake the croissant cups
Once your dough is ready, you are ready to shape the croissant cups! If you're following a different recipe for croissant dough, make sure you stop before shaping the actual croissants (for which you will have to cut the dough into triangles and roll them up).
- First, coat the backside of a muffin tray with butter and chill it
- Then, roll out your croissant dough into a 9"x16" rectangle (if you're using a different recipe, roll it out into these dimensions at the last rolling step into the dimensions provided)
- Divide this into 2 rectangles: one that is 3"x16", and one that is 6"x16". Place the 3x16 rectangle into the fridge
- Now you're going to cut the 6"x16"rectangle into 9 strips along the length (each strip will be ~0.7"x16") each
- Carefully wrap these strips one by one around the edges of the muffin cups, starting from the bottom and working your way up. Wrap them tightly so there aren't any gaping holes. Use the heat of your fingers to gently press the strips together and seal them
- If at any time your dough starts to become too warm and melty, take a break and regirgerate it until it is fully chilled. It is best to work one strip at a time
- Now it is time to cover the bottoms of your cups using a pastel de nata technique. Take the other rectangle of dough and divde it into 2 3"x8" rectangles. Roll them into a log along the length, like a cinnamon roll. Then cut them into 9-10 equal circular pieces
- Working one piece at a time (keeping the rest in the fridge), flatten and roll out each circular piece with a rolling pin until it is slightly larger than the uncovered bottom of your muffin cups
- Place onto the muffin cups and seal with the strips we wrapped around them earlier using your fingers. You can also use some egg wash to seal together the pieces
- Repeat for all cups until they're covered
Once your cups are shaped, you are going to proof them at room temperature (75F) for about 2 hours until they look puffed up. If any pieces have slid around, seal them together into place again.
Lastly, bake the cups! I bake mine for about 20 minutes at 350F, and then cover the muffin pan with a light sheet pan and bake for another 10-15 minutes until the cups are golden brown. The weight of the second pan helps flatten the bottom of the cups.
HOW TO FILL THE CROISSANT BUNS
This is the easy and fun part! Yay.
Once the cups have cooled, remove them from the muffin pan and gently pull them apart. Place them onto your serving dish, and fill them generously with the no-bake cheesecake filling. Top off with raspberry glaze and crushed graham crackers.
Refrigerate for 2-3 hours to ensure the cheesecake filling is set, and then serve! Since we overbake the croissant cups just a touch, they should remain crispy even when filled with cheesecake.

FREQUENTLY ASKED QUESTIONS
What is croissant dough?
Croissant dough is a laminated bread dough. Basically, you make a yeasted bread dough (called Détrempe in French), and laminate it with layers of butter (called Beurrage). The lamination creates the signature flaky layers in croissants as the water in the butter evaporates and creates air pockets in the croissants while baking.
Is croissant dough the same as puff pastry?
No, but they're not too different! Puff pastry and croissant dough are the two most commonly made laminated baked goods. Croissant dough uses a bread base (i.e., it has yeast) while puff pastry uses a pastry base which is not kneaded and is therefore a lot crumblier and flakier. As a result, puff pastry is a lot crispier than croissants when baked.
How do you make croissant dough?
First, you make the dough and let it proof. Then, you make a butter block, which is encased in the dough. Then you begin the process of rolling out and folding the dough two times (a single fold and double fold) to create layers of dough and butter ("lamination"). This process can be tricky and requires keeping the butter and dough very cold and at a similar temperature so you can roll them without the butter melting everywhere. Watch this video by Claire Saffitz for an overview of the process!
Can I use puff pastry instead of croissant dough to make croissant buns?
If you really don't have the patience to make croissant dough and want to buy puff pastry instead, go ahead! Just know the outcome will be a lot more crispy, and you will need to adjust the baking time according to the instructions on the package.
Feeling ready to tackle these bad boys? Let's do it!
Print
CHEESECAKE CROISSANT BUNS RECIPE (BUNS FROM HOME)
- Total Time: 8 hours
- Yield: 9 buns
Description
These delicious cheesecake croissant buns are inspired by Buns From Home in London. Crispy, flakey croissant cups are filled with a rich no-bake cheesecake filling and topped off with a homemade raspberry glaze and crushed graham crackers.
Ingredients
Croissant dough:
- 70g milk
- 5g yeast (1.5 tsp)
- 50g water
- 125g all purpose flour
- 125g bread flour
- 7g salt (1tsp)
- 25g granulated sugar
- 1 tsp honey 7g
- 50g butter, softened
- 130g butter for lamination (use high quality butter with at least 82% butter fat, I like Kerry gold)
Croissant cups:
- 9x16" prepared croissant dough sheet
- 1 egg + 1 tbsp milk for egg wash
Cheesecake filling:
- 350g cream cheese (12oz), room temp
- 100g sugar
- 1 tsp vanilla
- ¼ tsp salt
- 2-3 tablespoon lemon juice
- 130g sour cream
- 130g heavy cream, chilled & whipped to medium peaks
Raspberry glaze:
- 4 tbsp raspberry jam
- 2 tbsp water
- 1 tbsp sugar
- 2-3 Graham crackers for topping
Instructions
Laminated croissant dough:
- Combine all ingredients for the dough except the 50g butter and 130g butter, and knead using a hook attachment on a standmixer for 5-7 minutes on medium-high speed
- Add the 50g softened butter and knead again for 5 minutes until the butter is incorporated into the dough
- Cover the dough and let it rise for about 1 hour at room temperature
- Once it is chilled, roll it out into a 5.5"x11" rectangle. Cover in cling wrap and place in the freezer for 5 minutes followed by refrigerating for 30 minutes
- In the meanwhile, take the 130g butter and place it in parchment paper you've folded to form a 5x5" square. Beat the butter with a rolling pin to flatten it out fully all the way to the corners of the parchment paper square. You want the butter to form an even, square shaped block.
- Refrigerate the butter for 15 minutes
- Encase the butter square into the dough rectangle, and fold the dough to seal the butter on all edges neatly
- Roll out gently into a large rectangle that is about 1cm thick. Keeping the short edge towards you, fold down the top into the middle and then the bottom, so you get a three-layered fold (called a single turn or simple fold)
- Refrigerate for 10-15 minutes. Then roll out again into a large rectangle that is about 7mm thick. Then perform a double turn: fold both short edges towards the middle until they meet each other. Then fold into half. You will form 4 layers in this turn.
- Refrigerate for about 30-60 minutes. Then roll out into a 9x16" rectangle and proceed to the shaping steps below!
Croissant cups:
- Brush butter on an upside down muffin pan
- Remove 3"x16" of the croissant sheet and place it in the fridge
- Divide the remaining 6"x16" into 9 strips along the length (should be roughly ⅔"x16" each)
- Gently stretch each strip and roll it around each muffin cup, starting from the bottom and working up the edges, trying your best not to leave any gaps. Press down gently so the strip holds its shape
- Take the remaining 3x16" sheet and cut it into 2 3"x8" sheets. Roll each into a log along the length like a cinnamon roll. Then divide into 9-10 equal circular pieces
- Working one piece at a time, flatten each circle on a cold surface and roll it out until it's slightly larger than the base of your cup. Place onto the cup and stretch to seal together with the strips placed earlier on the edges. Work one piece at a time, keeping the remaining in the fridge
- Proof cups at room temp (75F) for about 2 hours until they look nicely puffed up
- Preheat oven to 350F in the last 15 minutes
- Brush the cups generously with egg wash and then place the tray in the oven. Bake for 20 min, then place some weight on top of the cups to flatten them (e.g., a light baking sheet). Bake for another 10-15 min with the added weight
Cheesecake filling:
- Whisk the cream cheese and sugar together until they are fully combined
- Add the sour cream, lemon juice, vanilla and salt and whisk until combined
- Whisk the heavy cream until it forms stiff peaks
- Fold in the whipped cream into the cream cheese mix and fold until combined
Raspberry glaze:
- Heat the raspberry jam with water and sugar on low heat until they form a thick glaze like syrup. Let cool for 5-10 minutes
Final assembly:
- Transfer cheesecake mixture to a piping bag. Make a large opening, and fill the croissant cups evenly with the cheesecake filling
- Drizzle 1-2 table spoons of the glaze on top, and cover with crushed graham crackers
- Refrigerate for 2-3 hours before serving
Video Tutorial:
Notes
- I recommend watching a youtube video on making croissants to understand the folding process
- If you follow a different croissant dough recipe, make sure to scale it so that the total flour (all purpose flour + bread flour) quantity adds up to 250g. Then roll into a 9x16" rectangle at the end and follow the remaining steps above
- You can substitute ready-made puff pastry instead of croissant dough. If you do this, there is no need to proof the dough. Instead, directly bake once shaped. The baking time may also vary, and will likely be shorter (I would start with 10 minutes, followed by 5-10 minutes with added weight)
- Prep Time: 2 hours
- Chilling Time: 5 hours
- Cook Time: 35 minutes
- Category: Croissants, Dessert
- Method: Baking
- Cuisine: American

Vicky says
Hands down the best and most creative recipe of yours ! And taste is on point too. Don’t have to go to London for it now that I can make it myslef !
Thank you soo much for sharing.
Zoha says
yayyy!!!! So glad you liked them!
Lian says
Hello, I love your recipe! And wanna make for my family. But I was wondering how you store the croissant cup? Does the filling and croissant need to separate?
Thank you
Zoha says
Hi there! once these are made, I store them in the fridge in an airtight container. Because the croissants do become soggy with time, these are best eaten within a day or two.
Saira Qureshi says
I will be honest. If I had just looked at those, would never have deciphered the technique to make the cups. Would give five stars just for the way you made them so simple to follow. The taste of fresh ones was divine. Mine got a bit chewy next day. Did I do something wrong?
Would love some savoury recipes too.
Zoha says
Thank you for trying this recipe, Saira! It's a tough one so you definitely have courage. And no - croissants are just like that, they don't stay crispy for very long. However, they're still delicious to eat!
Marwah Samee says
Amazing!!!! I am drooling
Zoha says
Aw, thank you Marwah!
Safa says
Hi! In Claire’s recipe she performs a double turn and then a simple turn, but in yours it is switched around; is there a reason for this? (She also freezes for an hour in between these steps)
Zoha says
Hi Safa! The order of the turns doesn't matter as the end result is the same number of turns. As for chilling time, please feel free to follow her method which is more in depth. I will share my own detailed croissant recipe this year and plan to do a lot more testing for it first.
Anna says
That’s brillant, thank you so much for the recipe and the video!!!
I was desperate to find how to make them at home and your version looks perfect !!
Can I ask what is the site of your muffin tray please ?
Thanks again
Anna says
I ment size*
Zoha says
Thank you so much, Anna! These do turn out great 🙂 My muffin cups are 2" in diameter and 1.25" in depth 🙂
Anna says
Oh thank you!
Zoha says
🙂
Nicole Ace says
Hello,
Do you proof and bake the cups upside down?
Zoha says
Yes!
Stecy says
Could you please make the recipe for the classic buns from home cinammon flavour?
Zoha says
Oh yes for sure!!
Ibtesam says
Omg thanks for doing the hard work for us! This hardly took me any time to make using puff pastry and turned out SO GOOD!! Will definitely be making this whenever I’m hosting next, or tbh whenever I feel like having it, because it’s THAT good. Was a big hit with the family too!
Zoha says
This is a challenging recipe to perfect, so great work!!! I'm thrilled you loved it 🙂
Safina kasam says
I first time tried one of ur recipes, nd i wasnt sure tht i ll be able to do or not but i did it nd i m so proud of myself, i love ur videos nd love the website, everything is explained in so much details, this was the best thing i ever made. loved it Thank you so much
Zoha says
I'm so proud of you! Thank you & great job 🙂
Kayla says
Excited to use this recipe. I just wanted to ask if you used active dry yeast or instant yeast?
Yum says
Interesting take on getting the shape, cool beans