
Knafeh (or Kunafa) is a delicious Middle Eastern dessert with layered crispy pastry and sweet cheese soaked in syrup, and is believed to have originated centuries ago in Nablus, a city in Palestine, where it was made using local Nabulsi cheese. It is crunchy on the outside, cheesy and gooey on the inside, and overall just delicious!

There are two popular types of Knafeh: Na'ameh, which is made with ground semolina dough called farkeh, and Khishneh, which is made with shredded phyllo dough called kataifi. This recipe is for Knafeh Khishneh.
Although traditionally Knafeh is made on the stove in special silver plates, I know that's difficult for most people. Therefore, this recipe will rely on the oven and baking instead.
Before getting started with the recipe, I want to thank the kind Palestinian family that shared their recipe with me and allowed me to share it with you all. You can find ways to support Gaza here.
Jump to:
INGREDIENTS NEEDED AND WHERE TO FIND THEM
Knafeh is not a complicated dessert as it requires only a few ingredients, but they can be a bit hard to come by. So let's cover them one by one:
- Kataifi. Kataifi is a shredded phyllo pastry, which is then broken into shorter strands (1-3") for Knafeh. There isn't any substitute for this (although if you can't find it, you can try making Knafeh Na'ameh). Kataifi is sold at most Middle Eastern and even South Asian grocery stores, and can be found in the freezer section along with puff pastry and phyllo pastry
- Ghee. Ghee is essentially clarified butter, and easily found at many grocery stores. However, you can also make your own ghee by browning butter and then straining out the brown bits. Or, you can just use butter!
- Knafeh food color. This is a beautiful orangish red food color added to Kataifi to give Knafeh its distinctive orange color. I found it at my local South Asian grocery store, but you can also just use any other red or orange food color you have (or skip it)
- Sweet Cheese. Sweet cheese or Nabulsi / Akkawi is traditionally used to make Knafeh, but unfortunately is hard to find! If you are not able to find it at your local Middle Eastern grocery story, you have the following options available:
- Queso Fresco Casero or Queso Fresco, which is found at most grocery stores. Try to find one that does not contain salt. If it does contain salt, you will have to soak the cheese in water for at least 2 hours to drain it out
- Ricotta Cheese - this is widely accepted as another alternate, although I have not personally tried it
- Fresh Mozzarella Cheese. This one is self explanatory! I suggest going for a full-fat mozzarella. Before using, you do have to dry out the mozzarella by placing it between paper towels and putting some weight on top
- Sugar
- Rosewater extract. This can also be difficult to find, but I would call it optional so don't worry if you can't get it
- Pistachios. Chopped pistachios are used to decorate Knafeh. I highly recommend blanching the pistachios in boiling water for 30 seconds and then peeling off their skin. Although tedious, this makes them much greener and prettier!
HOW TO MAKE KNAFEH
Let's discuss the steps:
1. Prepare the cheese
If you are using a replacement for Sweet Cheese which has salt in it (like Queso Fresco), first soak it in water for at least 2 hours. Then, slice it into ¼" slices, along with the fresh mozzarella, and place in one layer between paper towels. Place some weight on top (I used my cutting board) to help the paper towels soak up all the excess moisture in the cheeses.
2. Prepare the kataifi
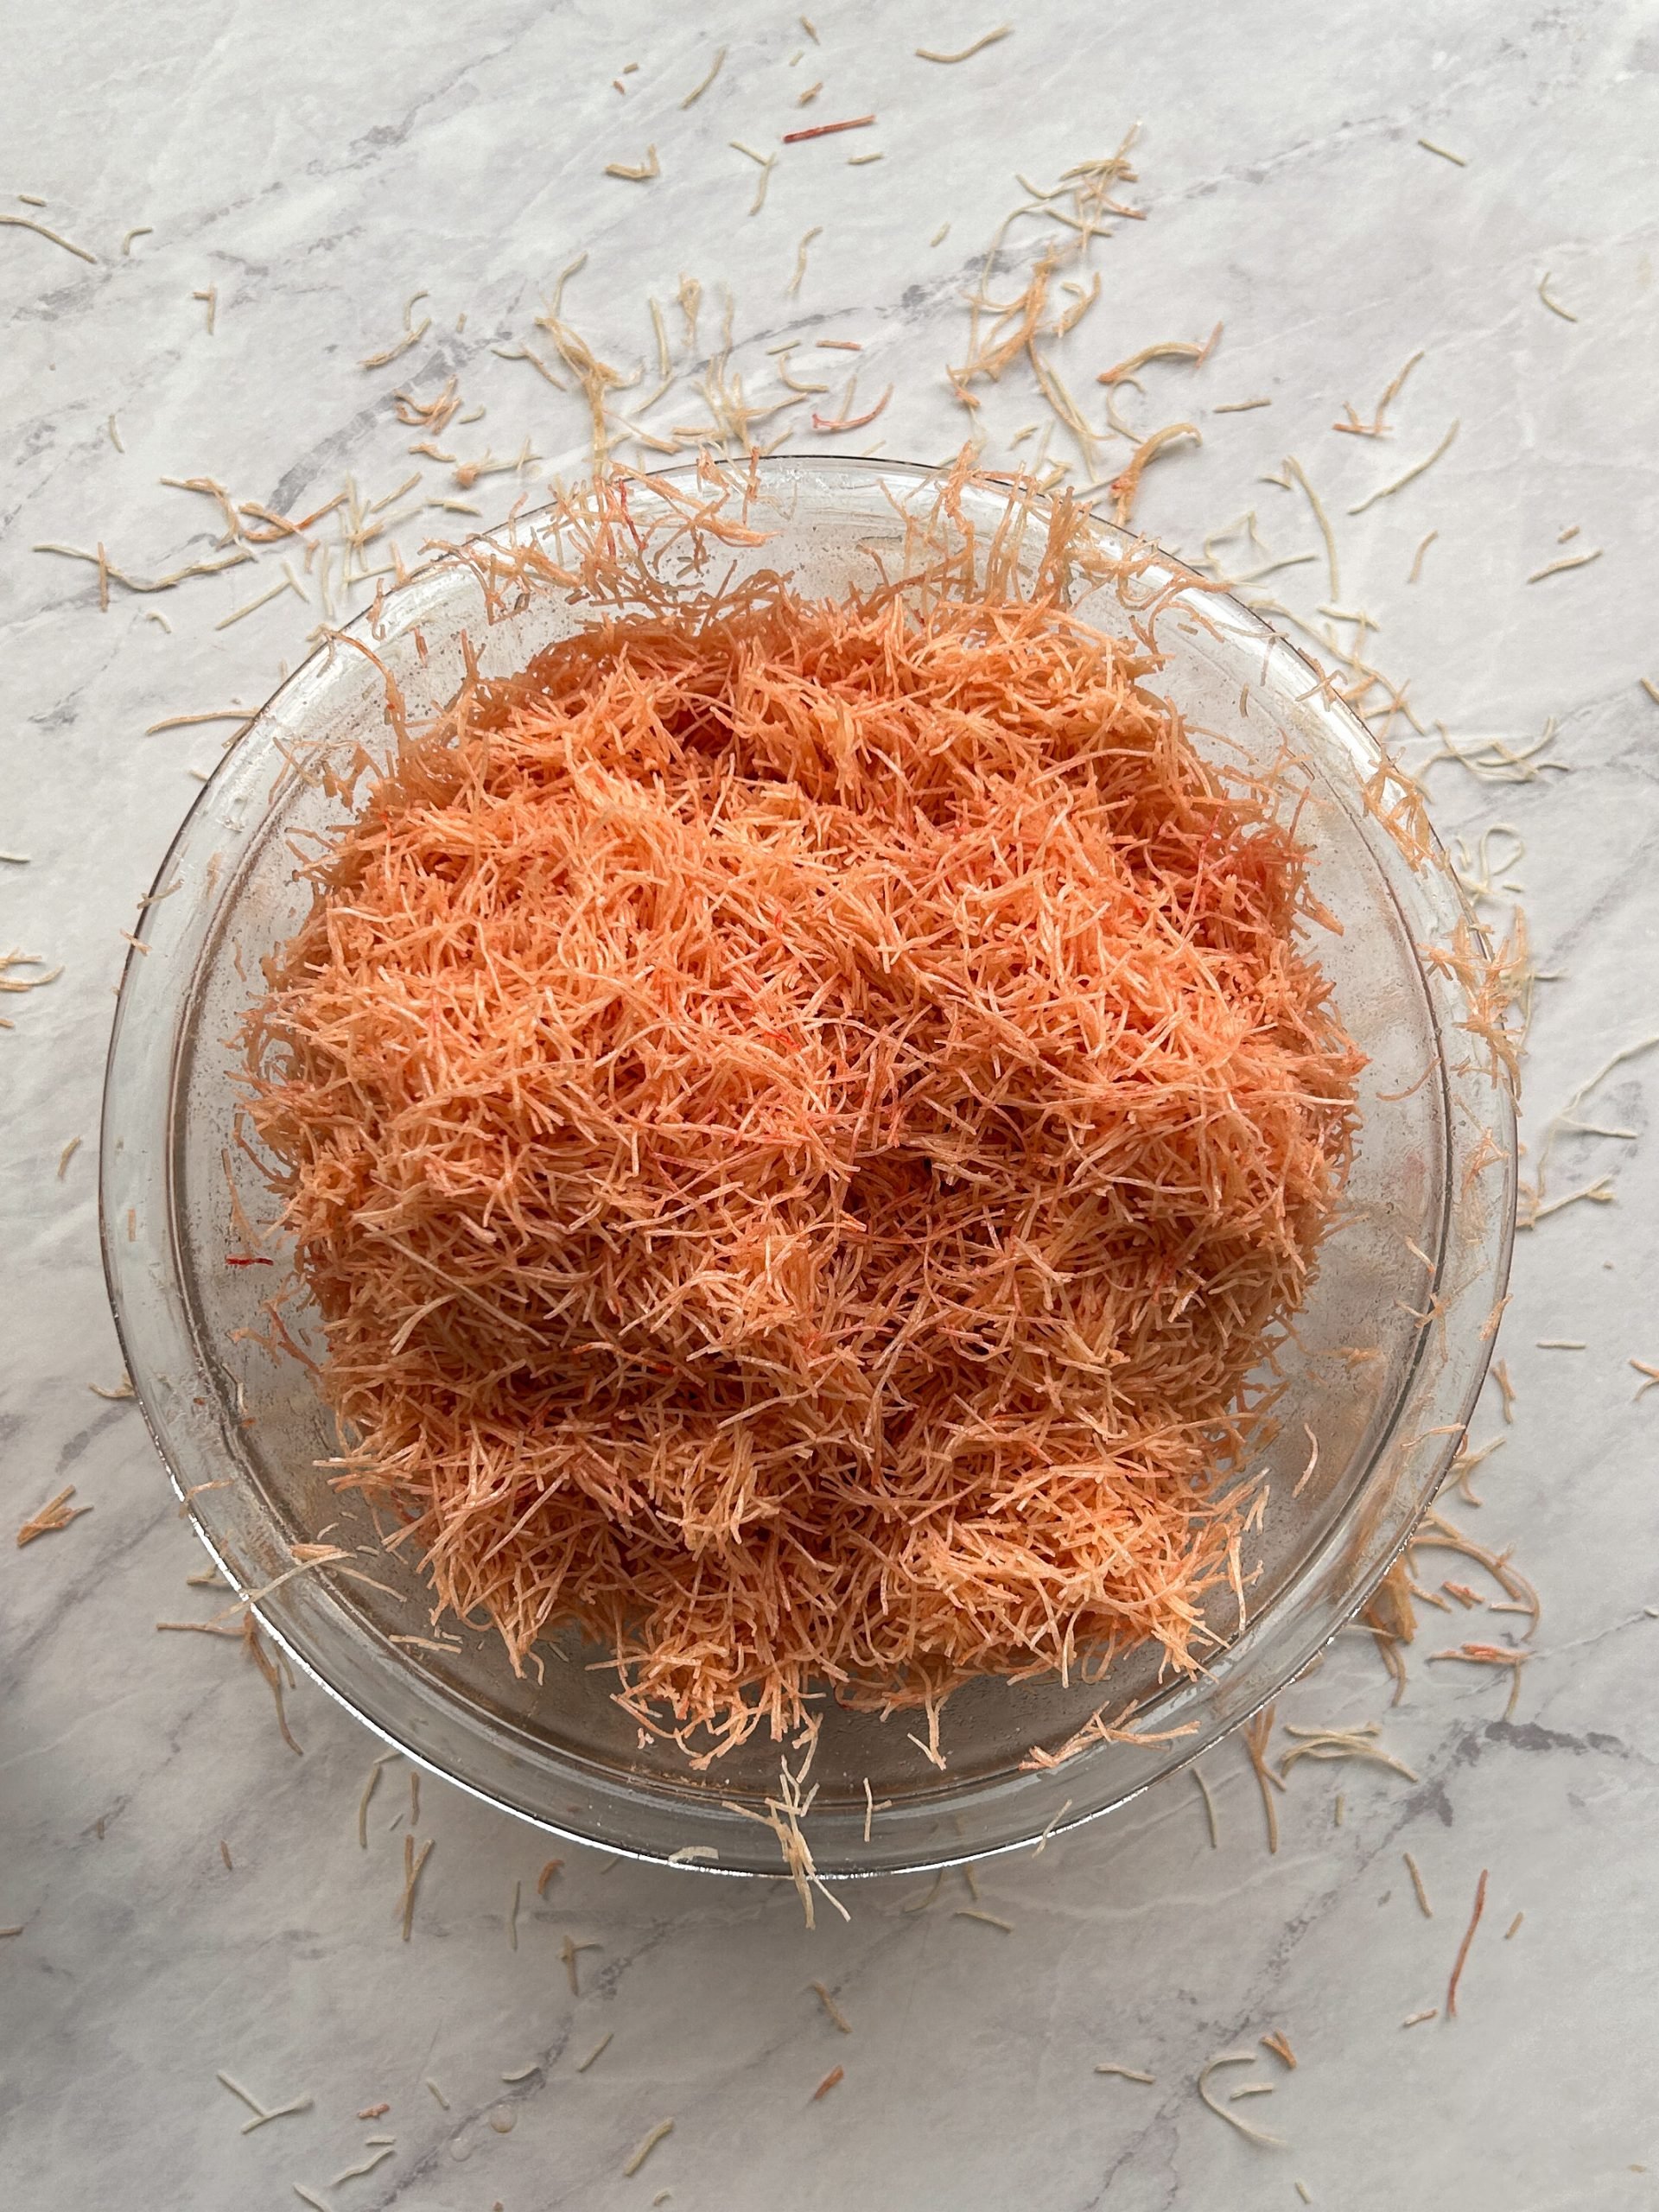
Take the kataifi out of the freezer and shred it with your hands (or using a knife or food processor) into short strands about 1-3" long. Mix the melted ghee with the knafeh food coloring, and add to the kataifi. Using your hands, mix thoroughly to coat all strands with ghee. You will need a large bowl for this!

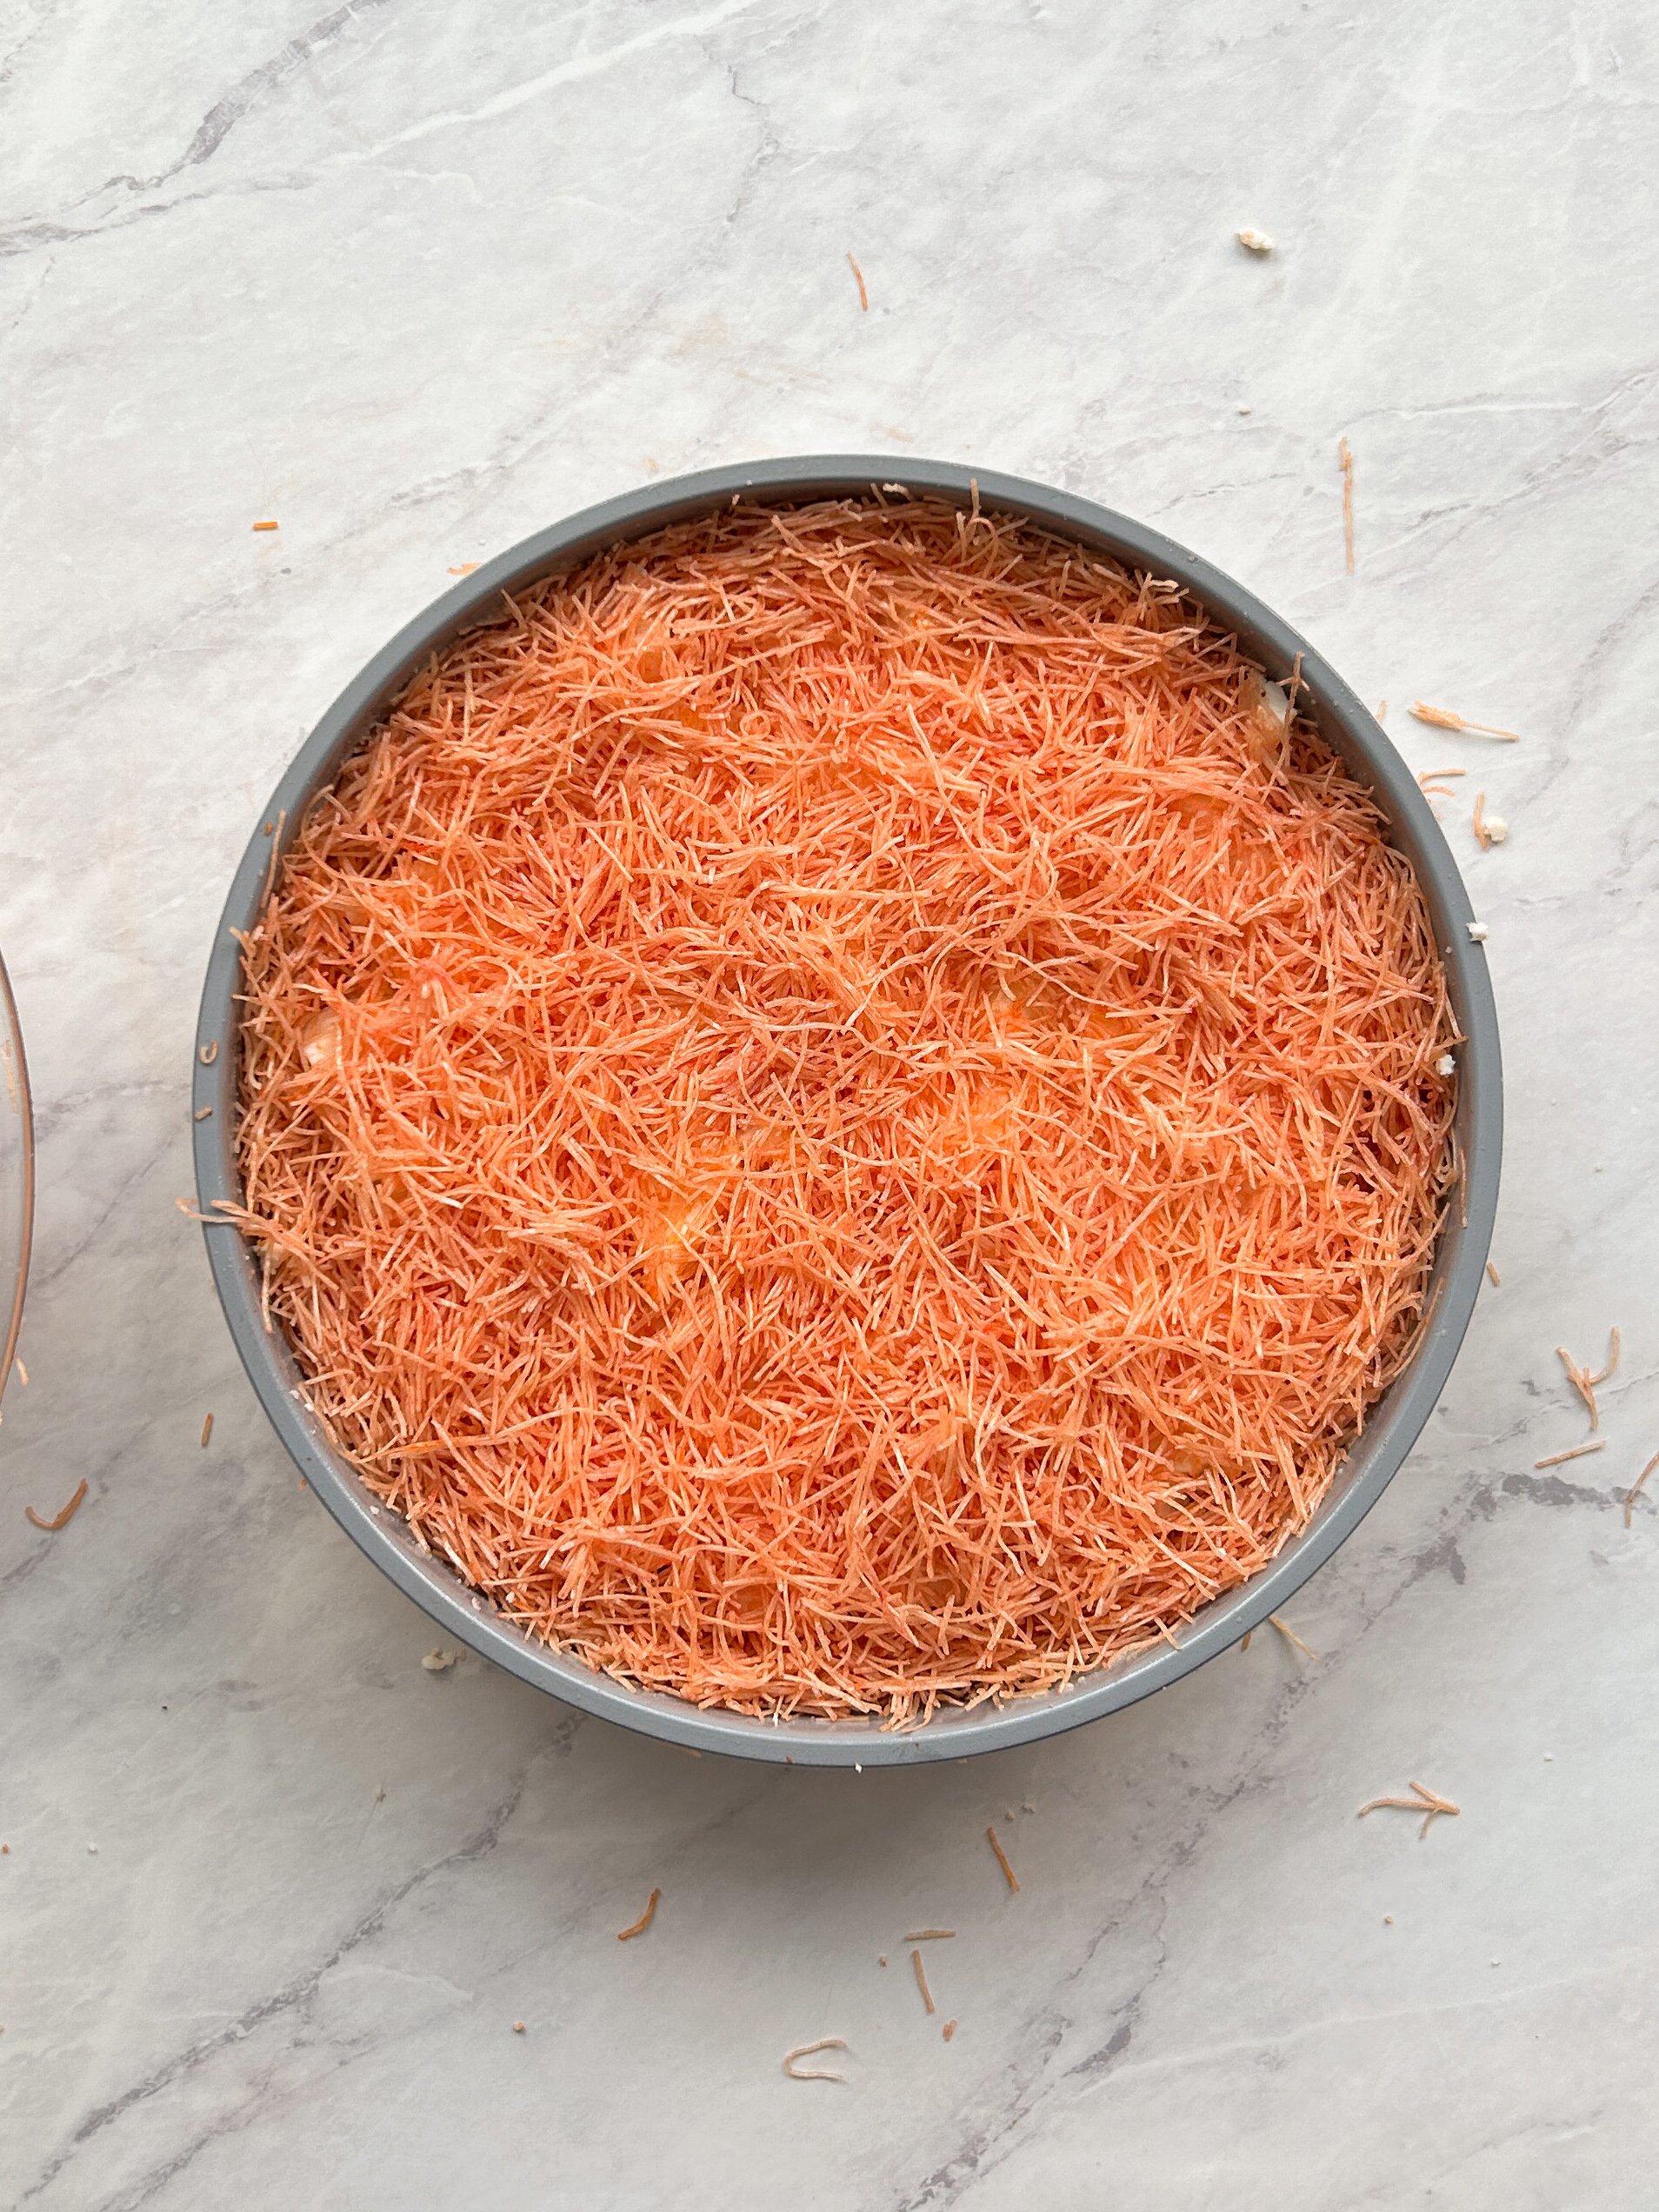
3. Layer the Knafeh
This recipe makes a large amount of Knafeh, I was able to use up one 9" pan and one 6" pan. But you are free to use any kind of large cake / baking pan you want; the ideal height of the Knafeh after layering should be less than 1".
Brush the pan(s) you are using with ghee or butter, then add in about ¾ of the kataifi. Press down firmly, ideally using the back of a measuring cup, pushing some up along the edges so the cheese does not come in direct contact with the pan. The tighter you pack, the more crispy the Knafeh will be.
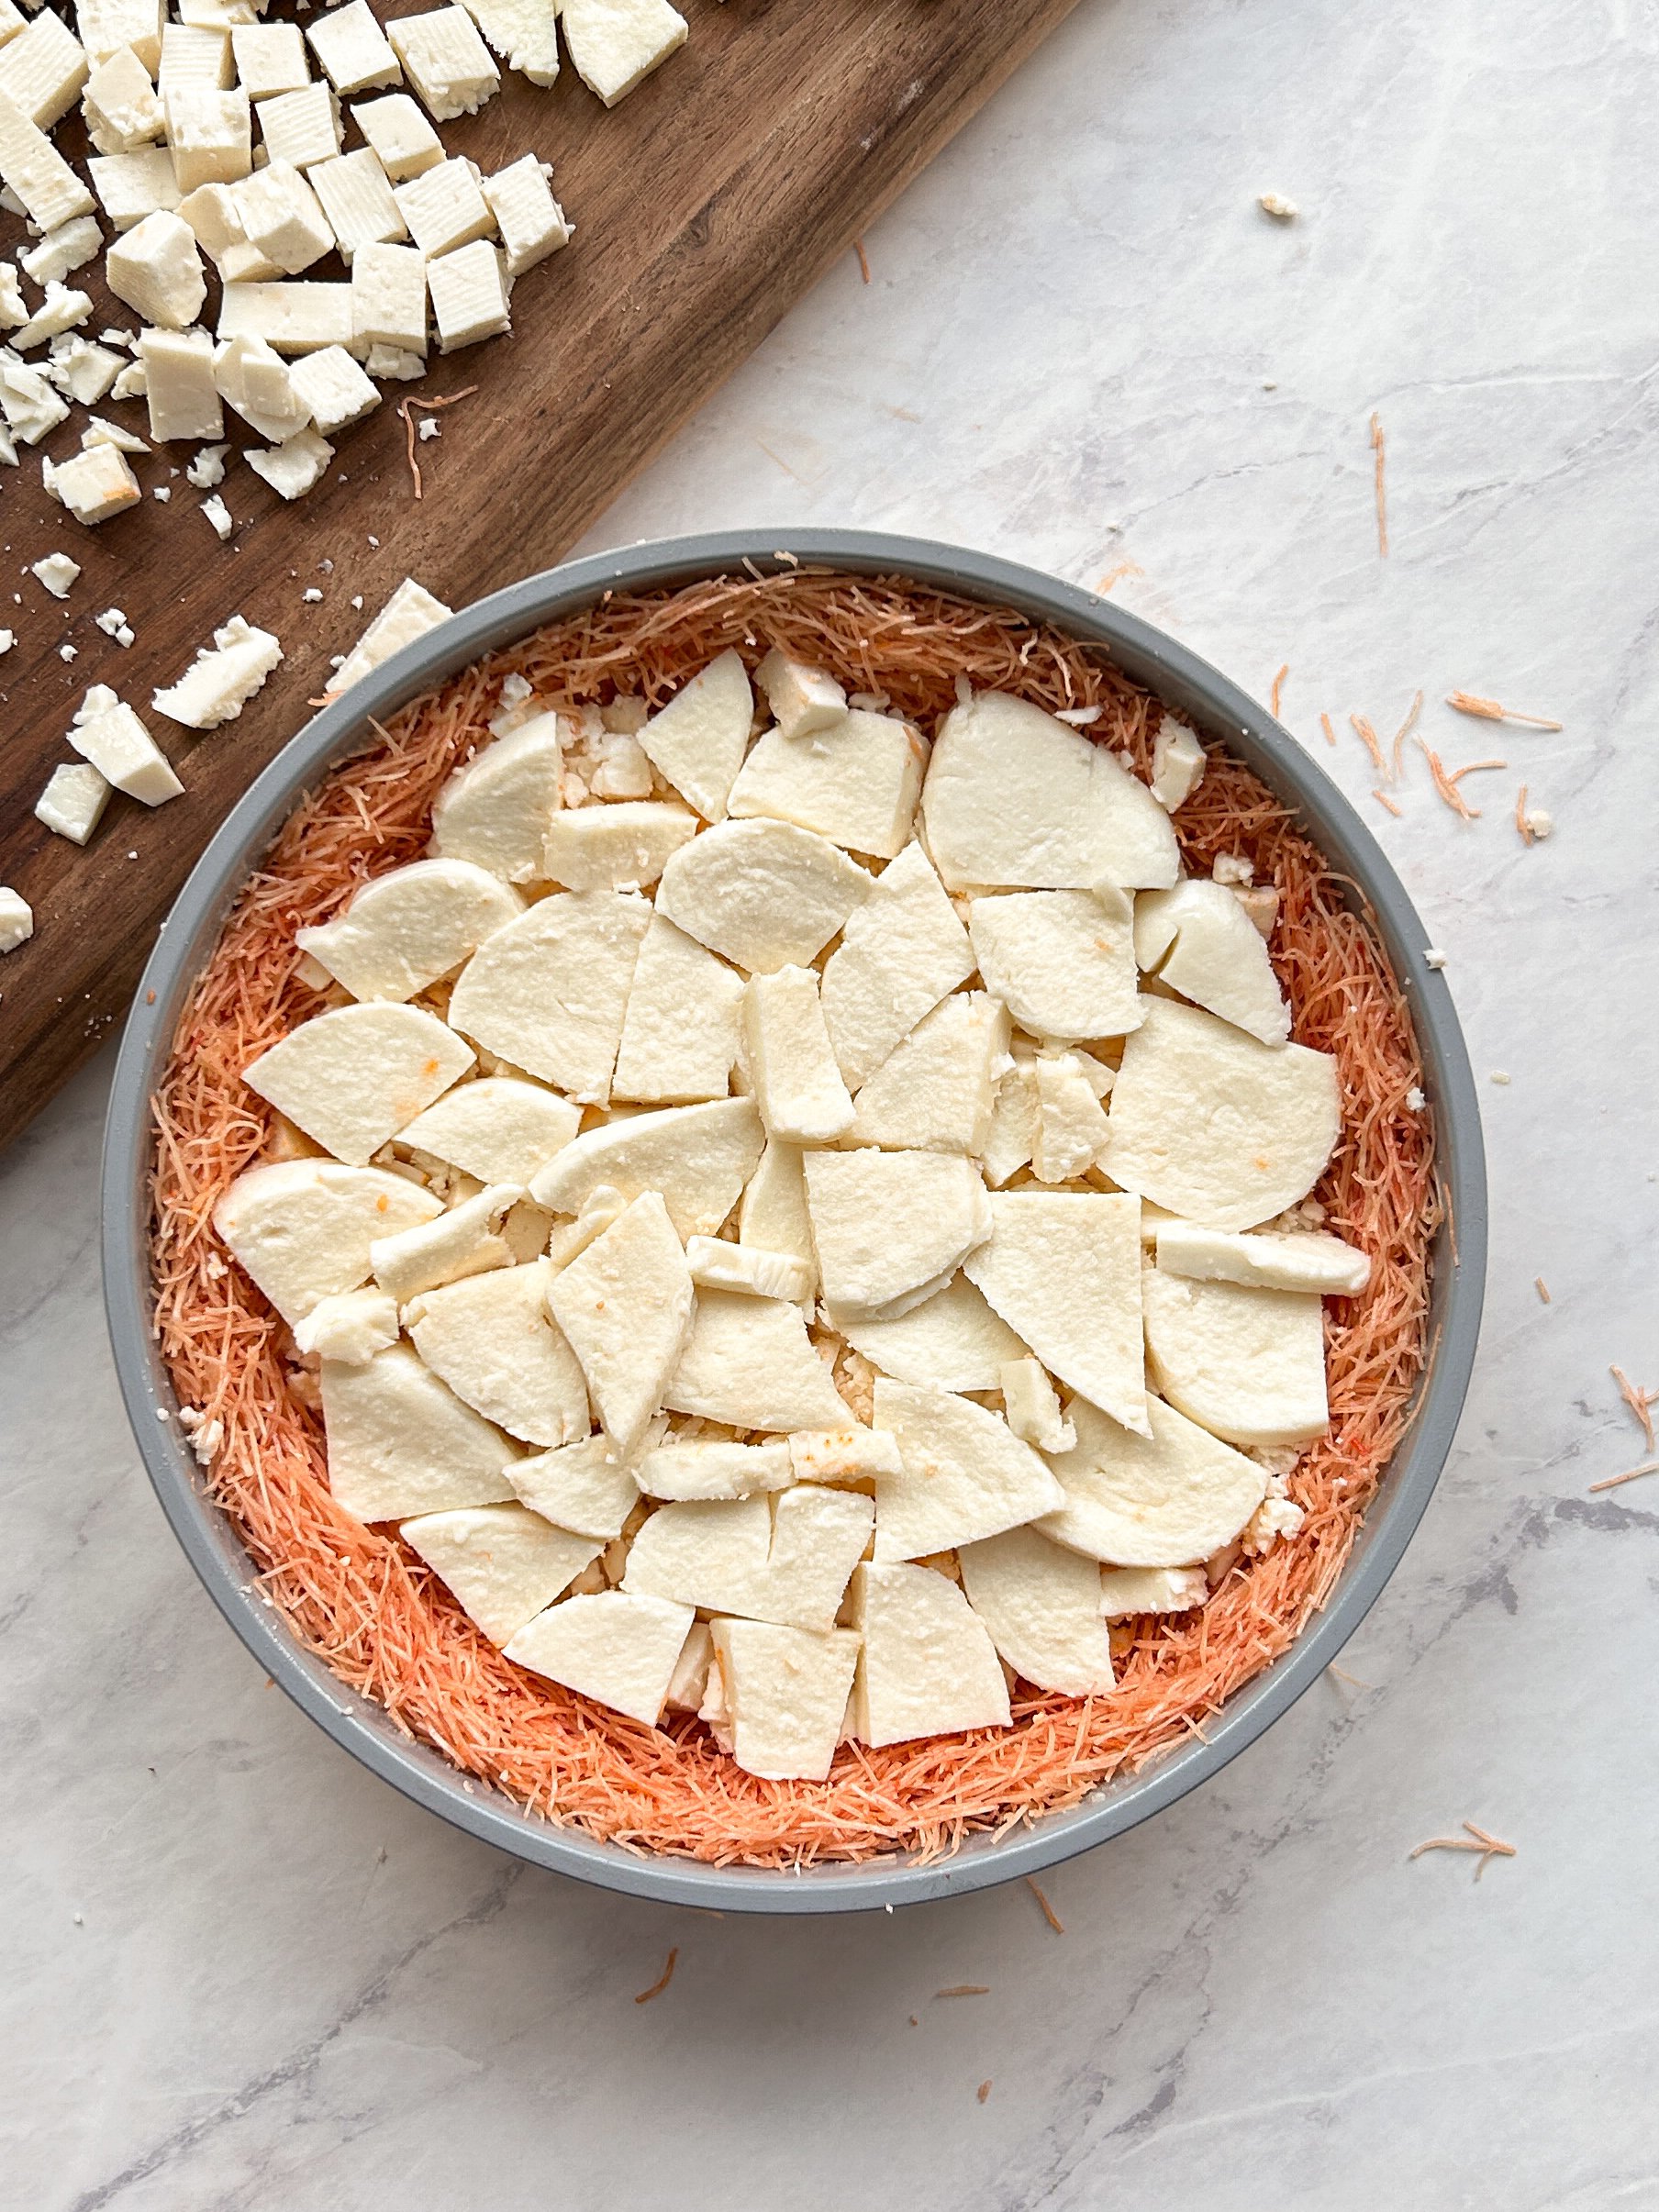
Then, layer in the cheeses. You want to crumble in the sweet cheese, and tear the mozzarella in small strands (or chunks). I did one layer of sweet cheese followed by a layer of mozzarella. Press down firmly
Cover the cheese with the remaining kataifi and press down again.


4. Bake and prepare the syrup
Place the Knafeh in the oven (450F preheated) and bake for ~20-25 minutes until it becomes golden and crispy on the edges and bottom. It should become loose form the edges of the pan.
In the meanwhile, prepare the syrup by mixing sugar, water and rosewater extract in a saucepan, and bringing to a boil. Cook for just 1-2 minutes until the sugar dissolves, then remove from heat and let cool down.
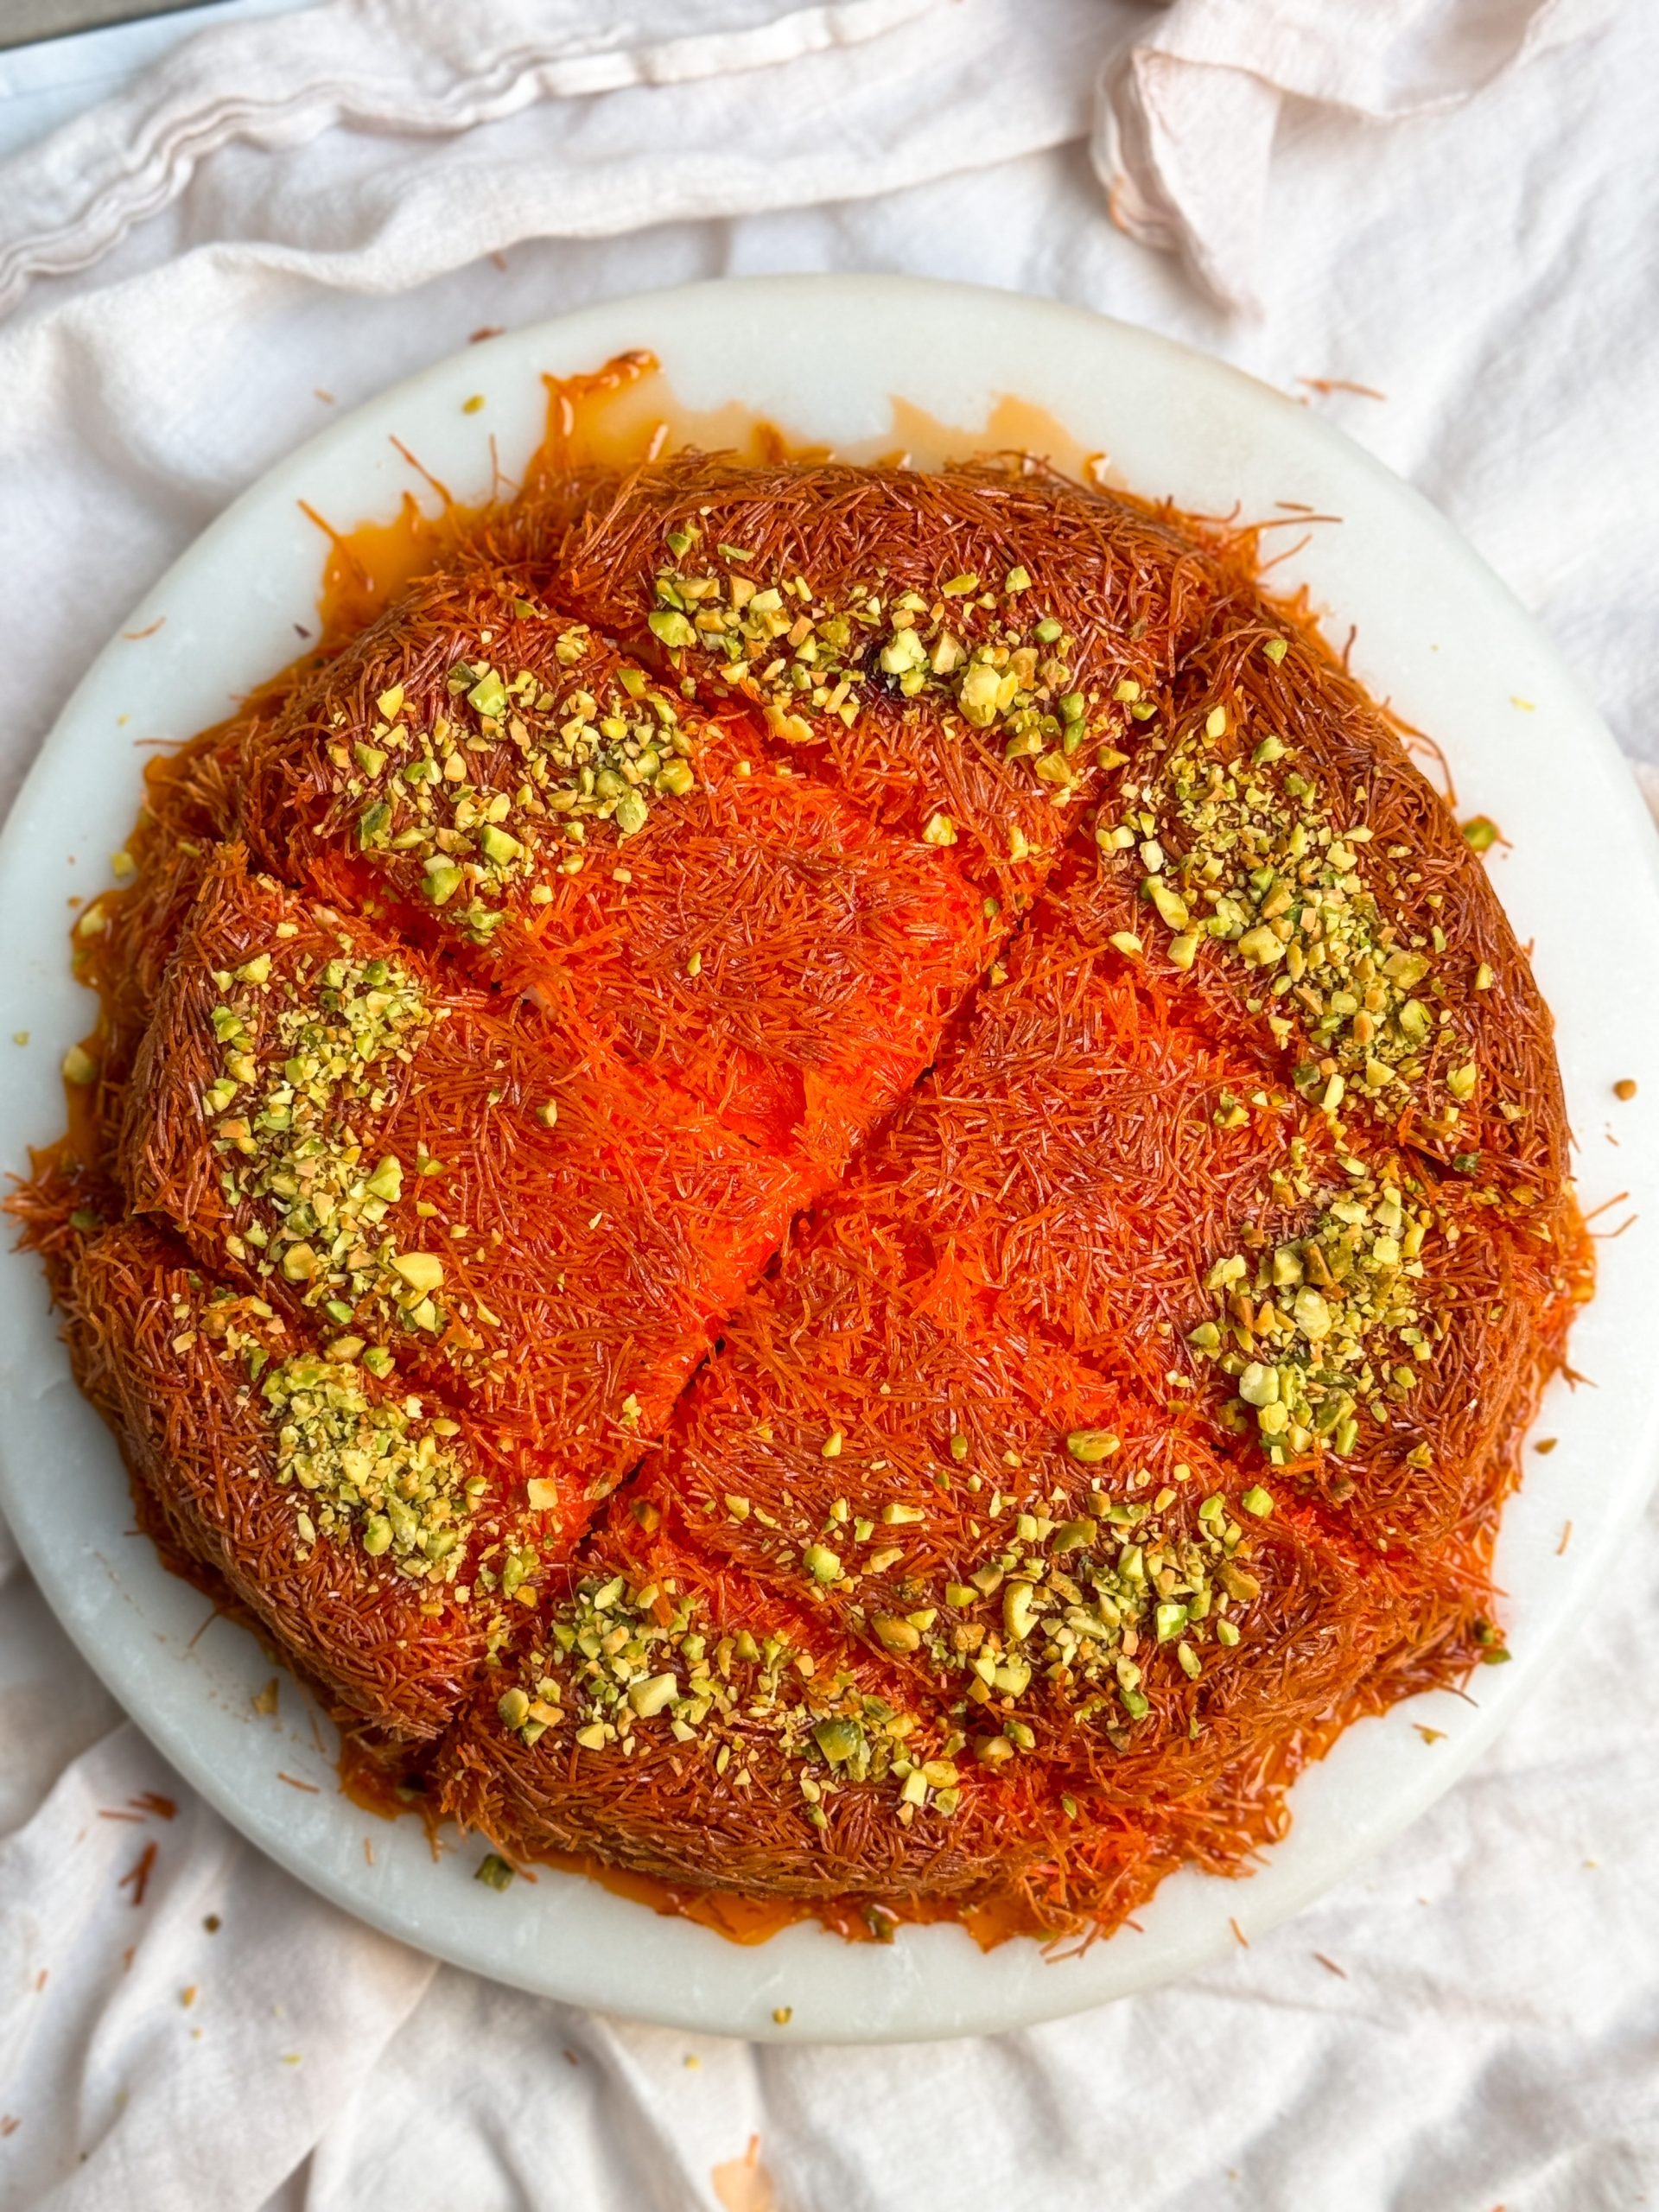
5. Soak, decorate and serve!
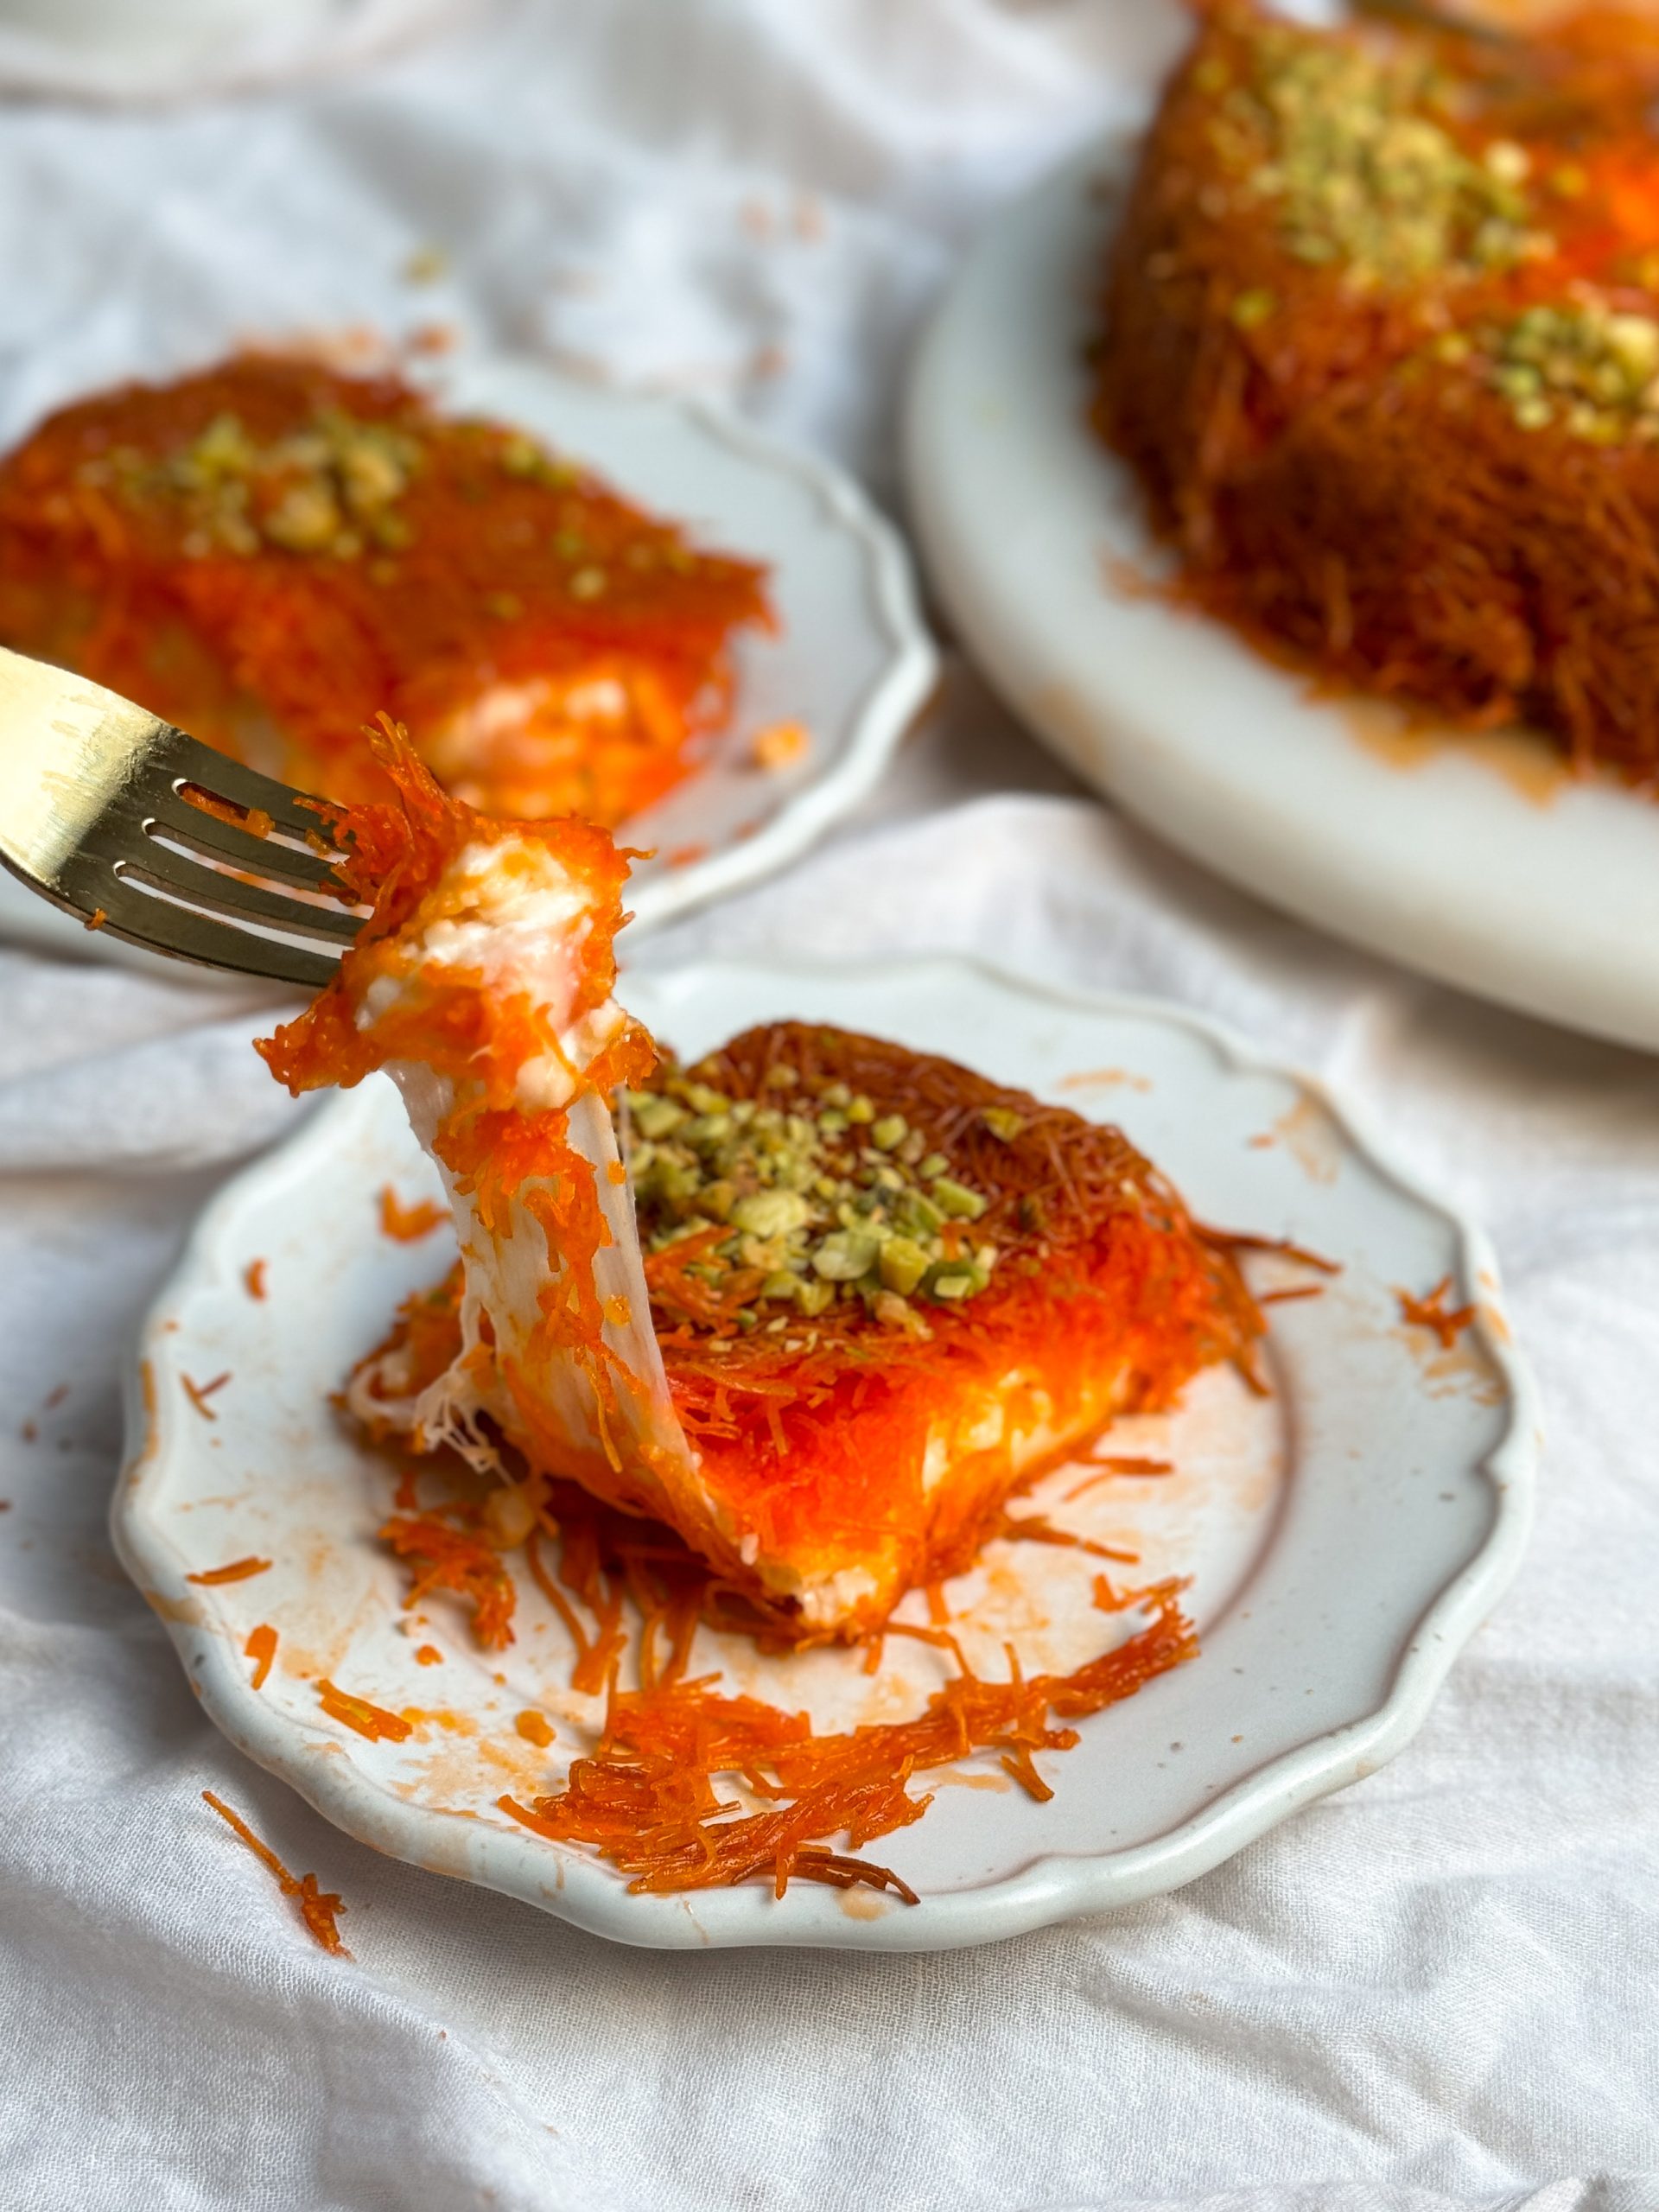
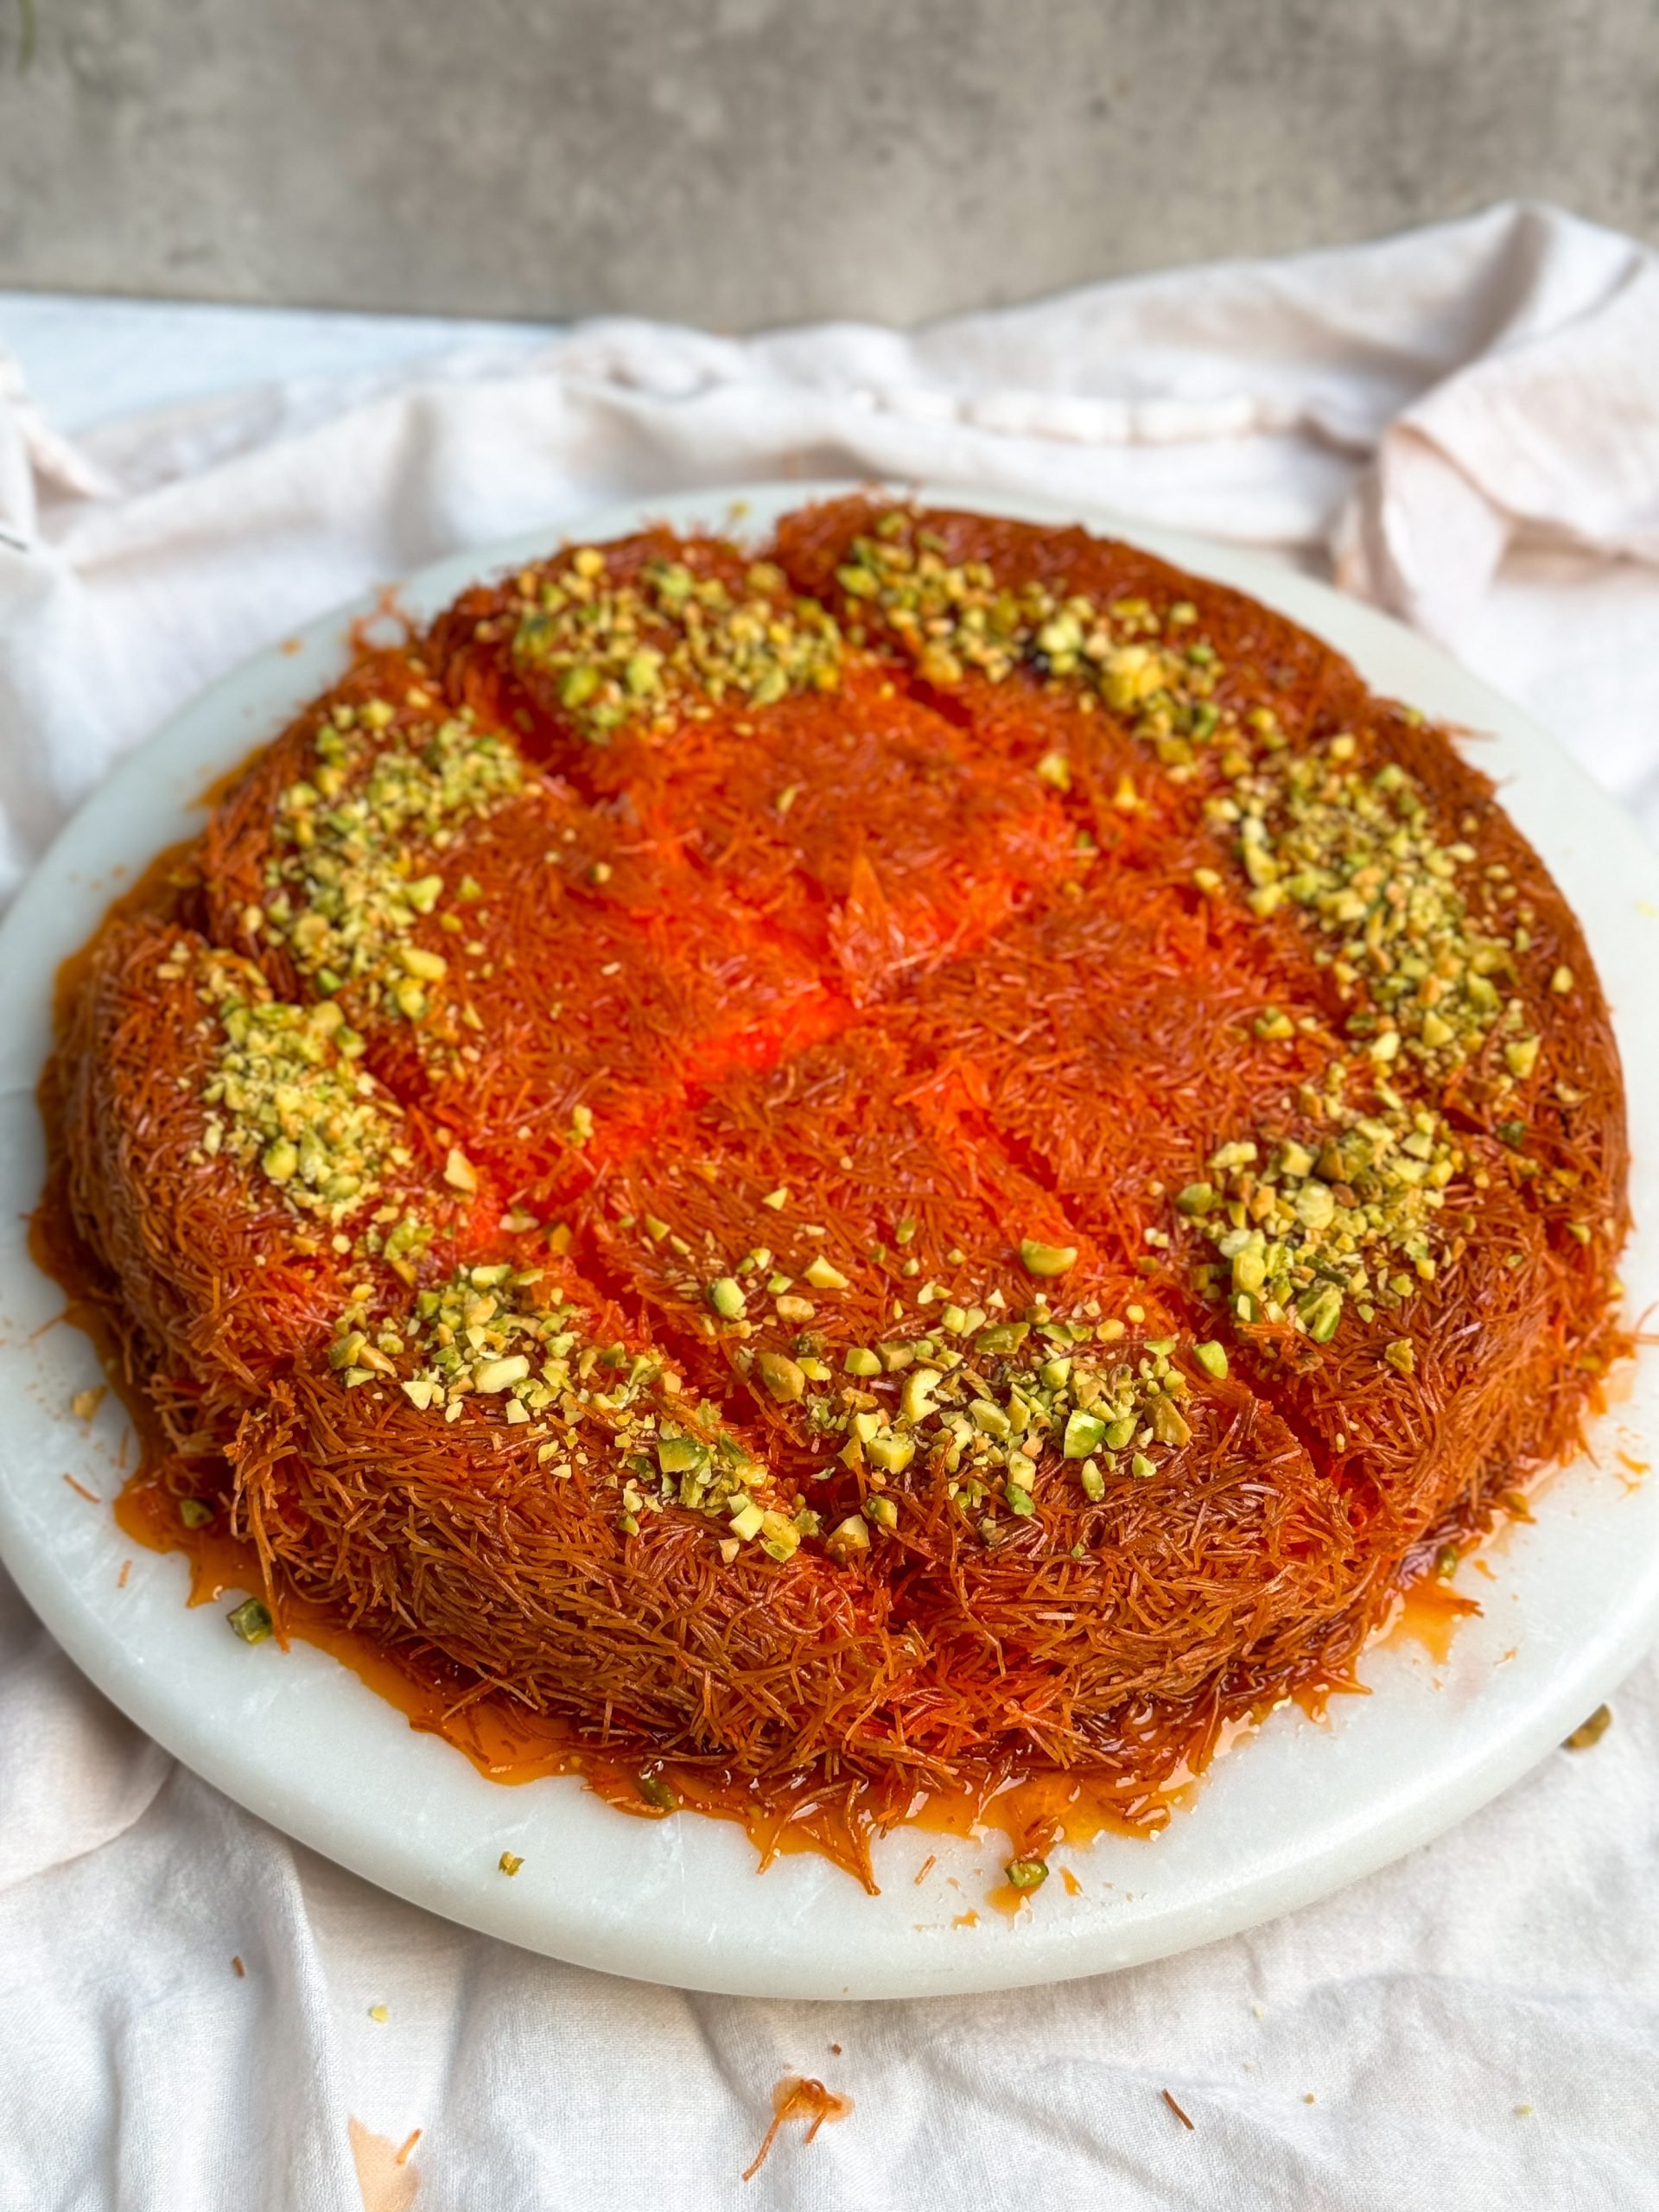
Once the Knafeh has baked, carefully turn it out onto your serving plate, and soak it generously in the syrup. I suggest using a large spoon to add the syrup slowly and evenly - you want the Knafeh to be thoroughly wet but not so saturated that the syrup is spilling everywhere.
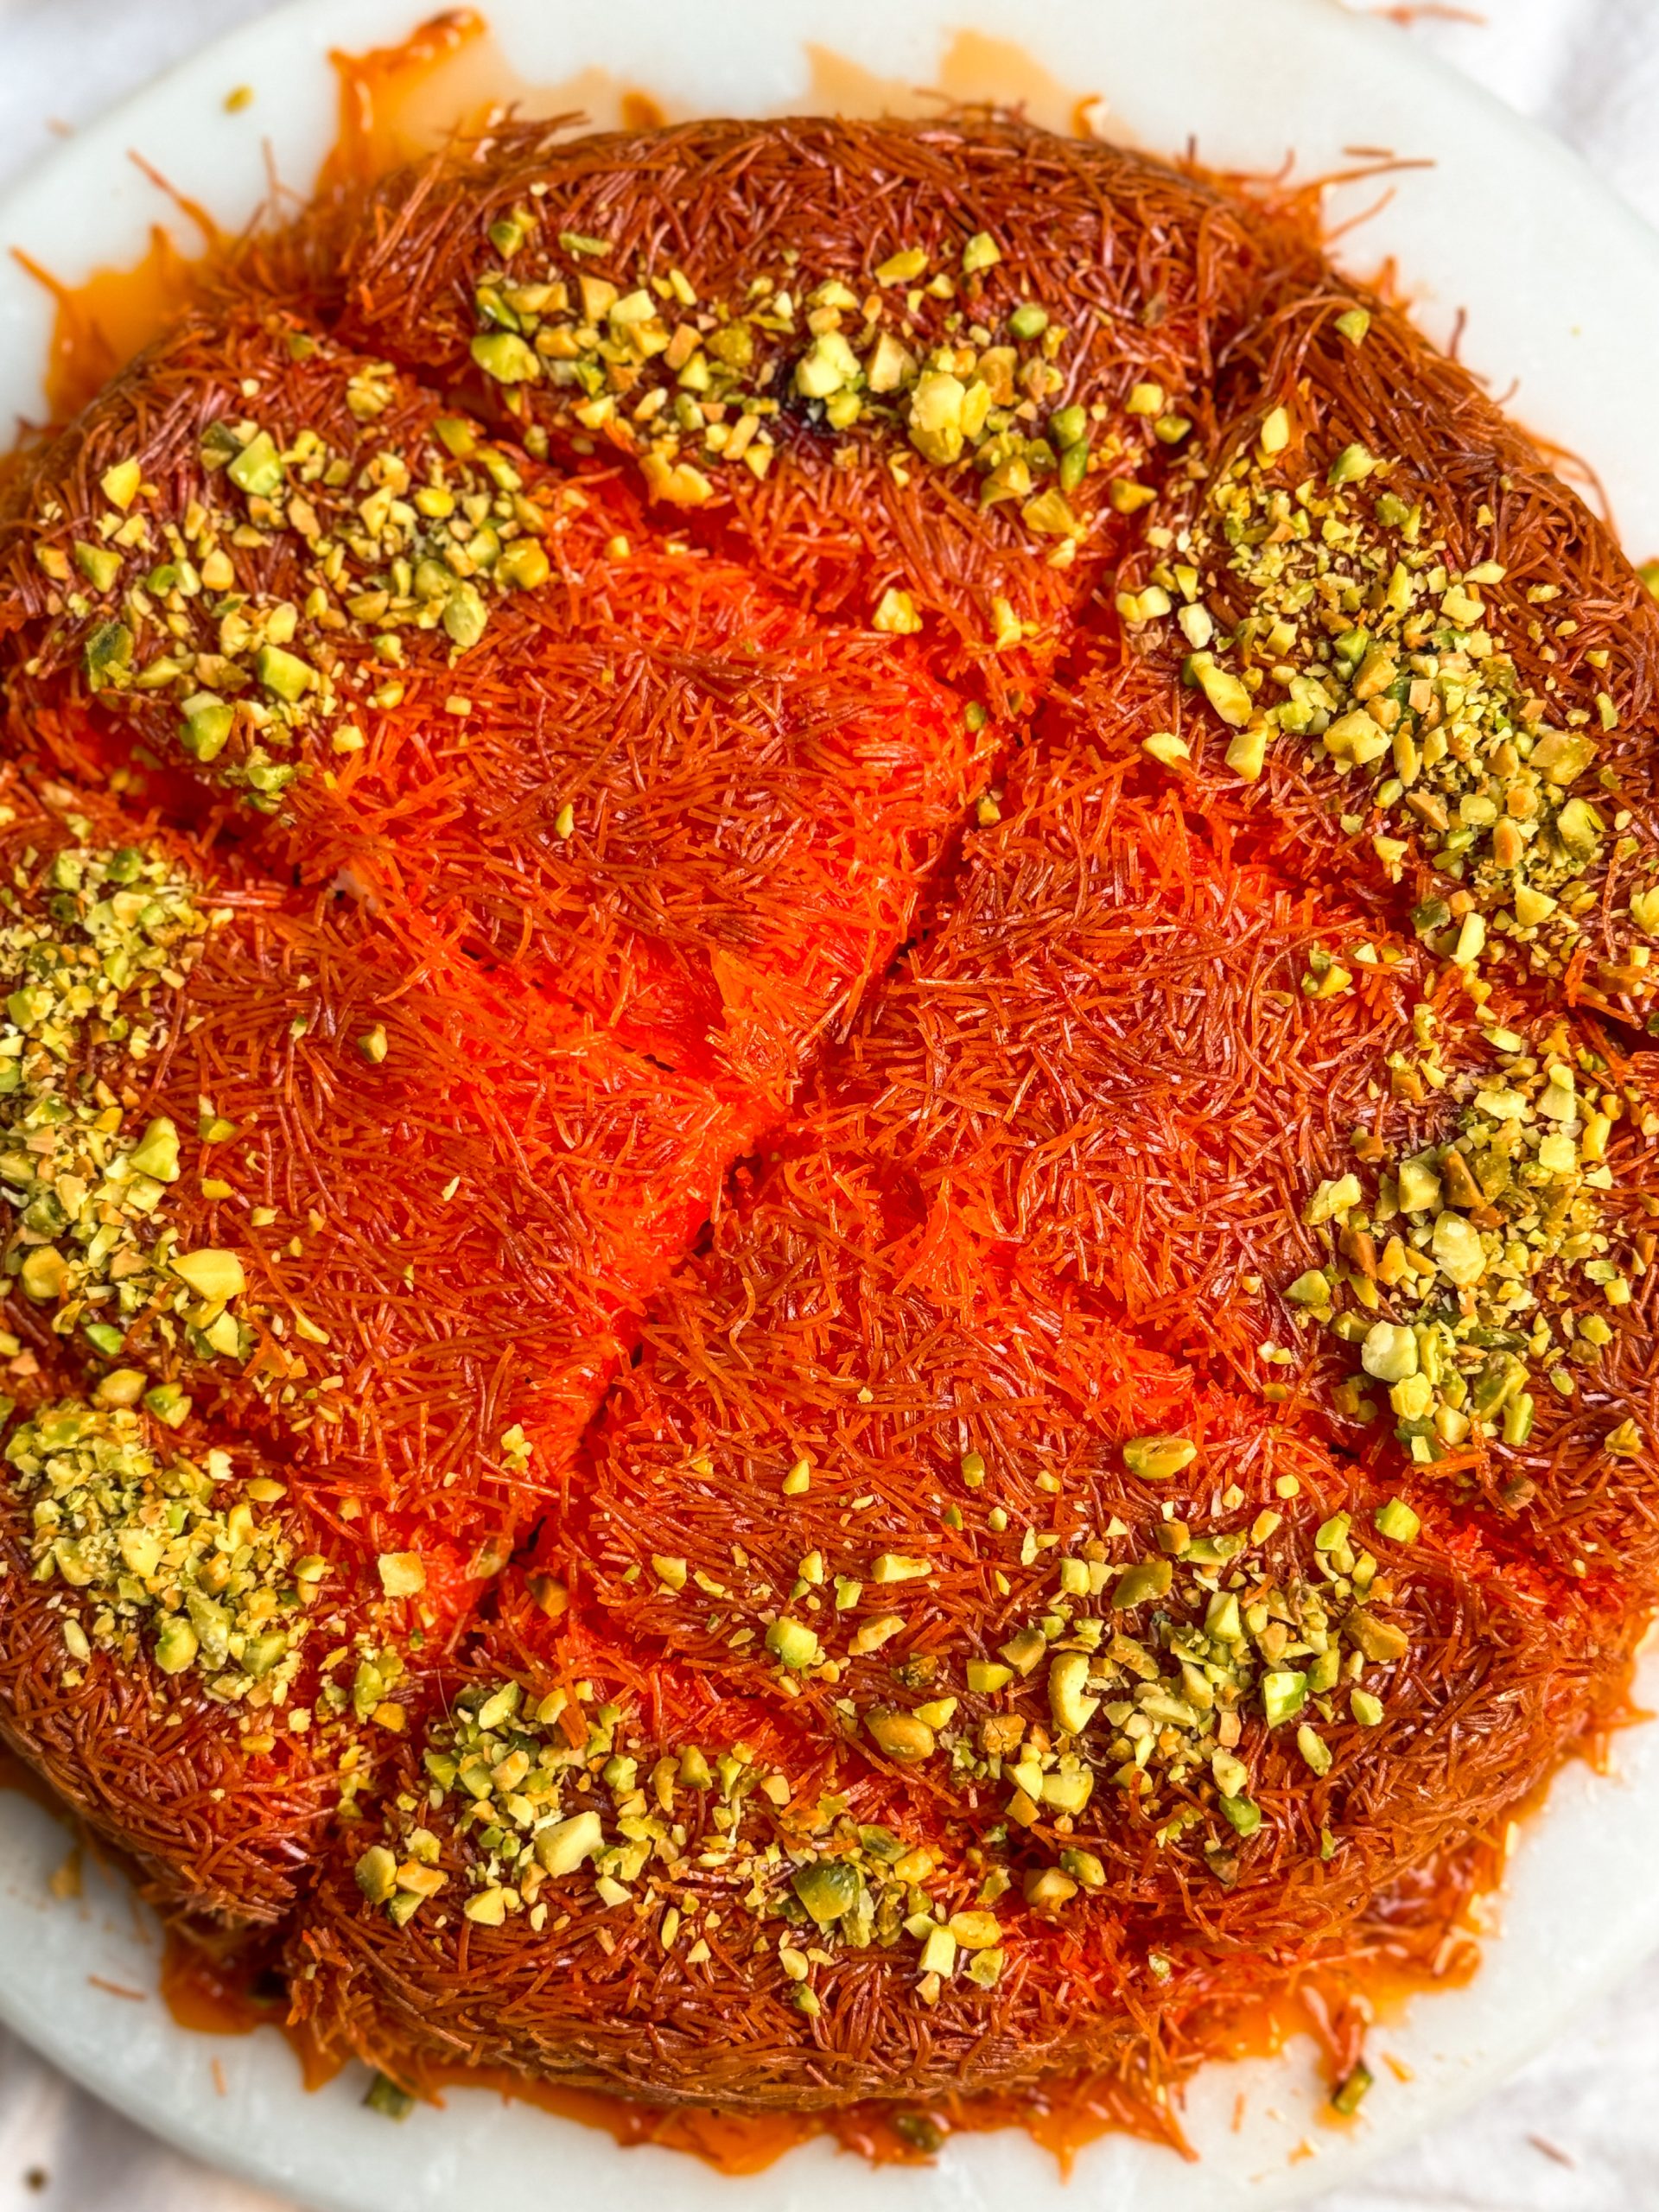
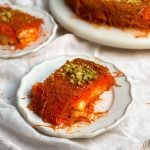
Once soaked, decorate with chopped pistachios, slice, and serve! Knafeh is best eaten warm (or hot) so the cheese inside is nice and molten.
WHAT PAN TO BAKE KNAFEH IN?
Traditionally Knafeh is made in metal plates used specifically for Knafeh, and cooked on the stovetop. However, this recipe is modified for the oven.
You can use any kind of oven baking pan you have which is large enough for all the ingredients. I used a 9" pan and a 6" cake pan, but you could also use a 9x13" rectangular pan. Just ensure the Knafeh does not become taller than 1" as that might be a bit too thick for the syrup to soak through.
You can also make this Knafeh into individual cups by using a muffin tray (in fact, this was the recommendation of the Palestinian family as it is more beginner friendly). Add the kataifi, press down using the bottom of a glass, fill with cheese, and add more kataiif on top.
Palestinian Knafeh (Kunafa) Recipe
- Total Time: 45 minutes
- Yield: 12 servings
Description
A delicious dessert made with crispy shredded phyllo pastry and sweet cheese soaked in sugar syrup
Ingredients
- 1 lb Kataifi (shredded phyllo dough) - usually 1 pack
- ¾ cups ghee or butter + more to brush inside pan
- 1 tsp Knafeh food color
- 1 lb sweet cheese (or Queso Fresco or ricotta)
- 1 lb fresh mozzarella, pressed dry
- 1 ½ cups sugar
- 1 ½ cups water
- Rosewater extract to taste
- Chopped pistachios for decoration
Instructions
- Prepare the cheeses. If using an alternative to sweet cheese which contains salt, first soak in water for 2 hours. Then slice into ¼" slices along with the mozzarella and press between paper towels to dry out (don't do this step if using ricotta cheese)
- Pre-heat oven to 450F and prepare your baking pan(s) by brushing butter inside
- In a large bowl, shred the kataifi into 1-3" long strands
- Mix the ghee with the food color and add to the kataifi. Rub in thoroughly with your hands to coat all strands
- Add ¾ of the kataifi to the baking pan(s) and press down very firmly, pushing some of it up the edges to create a tart like casing
- Add a layer of the sweet cheese, crumbling it with your hands. Then add a layer of mozzarella, tearing into large chunks as you go. Press down both cheeses
- Add the remaining kataifi on top and press down
- Bake for 20-25 minutes until the Knafeh is golden and crispy on the edges and bottom, it should become loose from the pan
- In the meanwhile, prepare the syrup by mixing sugar, water and rosewater extract in a saucepan. Bring to a boil and simmer for just 1-2 minutes until the sugar dissolves. Remove from the heat and let cool
- Once the Knafeh is baked, carefully turn it out onto the serving dish you are using. Using a large spoon, gently drench the Knafeh in the syrup. It should be thoroughly wet but not overflowing
- Decorate with chopped pistachios, slice and serve! Knafeh is best eaten very warm (or hot)
Video Tutorial:
- Prep Time: 20 minutes
- Cook Time: 25 minutes
- Category: Dessert
- Method: Baking
- Cuisine: Middle Eastern
wardah says
????
Zoha says
<3
Ali says
thanks for saying "Palestinian"
Tahrir says
Nothing like Palestinian knafah ! Simply the best .
Zoha says
Agreed!
SARA says
AWESOME!!!
Zoha says
<3
Sania says
Will definitely try.
Zoha says
<3
Asma Amer says
Great recipe. Had some in Dubai but it looks yummier. Will definitely try.
Zoha says
Thank you mama
Tara says
This was my first time making it for my husband. During Ramadan he always asks for Arabic dishes. He liked it so it is 5 stars for me. It also didn’t have me running all over the city looking for impossible ingredients!!!!
Zoha says
Aww, I am so grateful to hear that, Tara! 🙂
Isha says
Awesome
Zoha says
Thank you!
Elise says
SO GOOD
Zoha says
THANK YOU <3
Nancy A. Pacchioli says
what is sweet cheese?
Irene B says
Didn't taste good at all
Zoha says
Thanks for trying the recipe, Irene. I understand this may not be the type of dessert that everyone loves.
Fida says
delicious!
allie says
sounds like a you problem
Meena says
Where can we get kataifi from?
Zoha says
Arabic / middle eastern or even south asian grocery stores 🙂
Rayna says
How big is the pan you used?
Zoha says
Hi Rayna! See the FAQ 🙂
Bonnie says
This may be a silly question, but I don't cook with pastry very often. I want to make this for a morning tea at my work office, which is an hour away from my home. There is a small commercial kitchen with an oven at my work. Would it be better to assemble it at home and cook it at work, or can it be reheated and syrup added once reheated?
Zoha says
I think you can definitely assemble and bake at work! It's best when fresh 🙂
Eli Copter says
Ebrahim Raisi’s last delicious dessert
Alisya says
only people like u will get this heated over a recipe lol. goes to show how deeply affected you are by the existence of Palestinians
♥️ says
Free palestineeee <3
I’ve made this recipe for my family multiple times and they always love how it comes out. For everyone wondering, you can get all ingredients at your local Arabic store. And for all of the random mean comments, F off. This recipe is amazing
Zoha says
Thank you for your support & solidarity <3
Carmel says
Great recipe! Absolutely delicious and easy to follow. The only thing I would say is that it required more time in the oven for me until it got really brown and crispy.
Zoha says
I am glad you liked the recipe! And baking times can definitely vary depending on many different factors.
Rick P says
Meh. It’s an ok version of knafeh. Not anywhere near the best out there.
S. Nahas says
3 secrets everyone should know about kunafeh.
1- Use tumeric powder quarter of tea spoon or even less instead of the colourings, it gives BLONDIE effect. plus tumeric is v healthy.
2- Sugar ratio is best and thicker syrup if sugar 2 to water 1. Add (GLOCOSE) syrup half tea spoon to the sugar after it is hot. Glucose cut the sharpness taste of the sugar in the throat, and if you leave the syrup for a long time it will not crystallise. Glocose available , just ask the shop. This is a big secret.
3- Hot syrup on hot kunafeh. Never cold syrup on hot kunafeh. Hot on Hot. Enjoy it.
Zoha says
Thank you, so helpful!
Michelle says
Don’t use salted butter 🙁 mine turned out super salty tasting. My own fault but advice for others
AK says
I love your recipe personally. Unfortunately someone I made it for doesn't enjoy the stretchiness of the cheese and feels there is too much cheese for the dough and that it is too thick. I love the Nabulsi cheese and mozzarella combo and think it's great! I might try a soft cheese version like you suggested with the ricotta for others though and lessen the amount of cheese.
Zoha says
Totally understand that! Some people love more cheese and some don't
D says
oh you ate w this one 🍉 would make again
Zoha says
Thank you!
Zainab says
I want to try making this amazing recipe! Can I use this recipe to make kunafa cups instead?
Ayesha says
Love Palestinian knafeh!!
Isabelle says
I have made this twice, once as a big knafeh and once in muffin pans. Both times they turned out so well, guests loved it. Great recipe and great results!
Zoha says
AW thank you so much!