
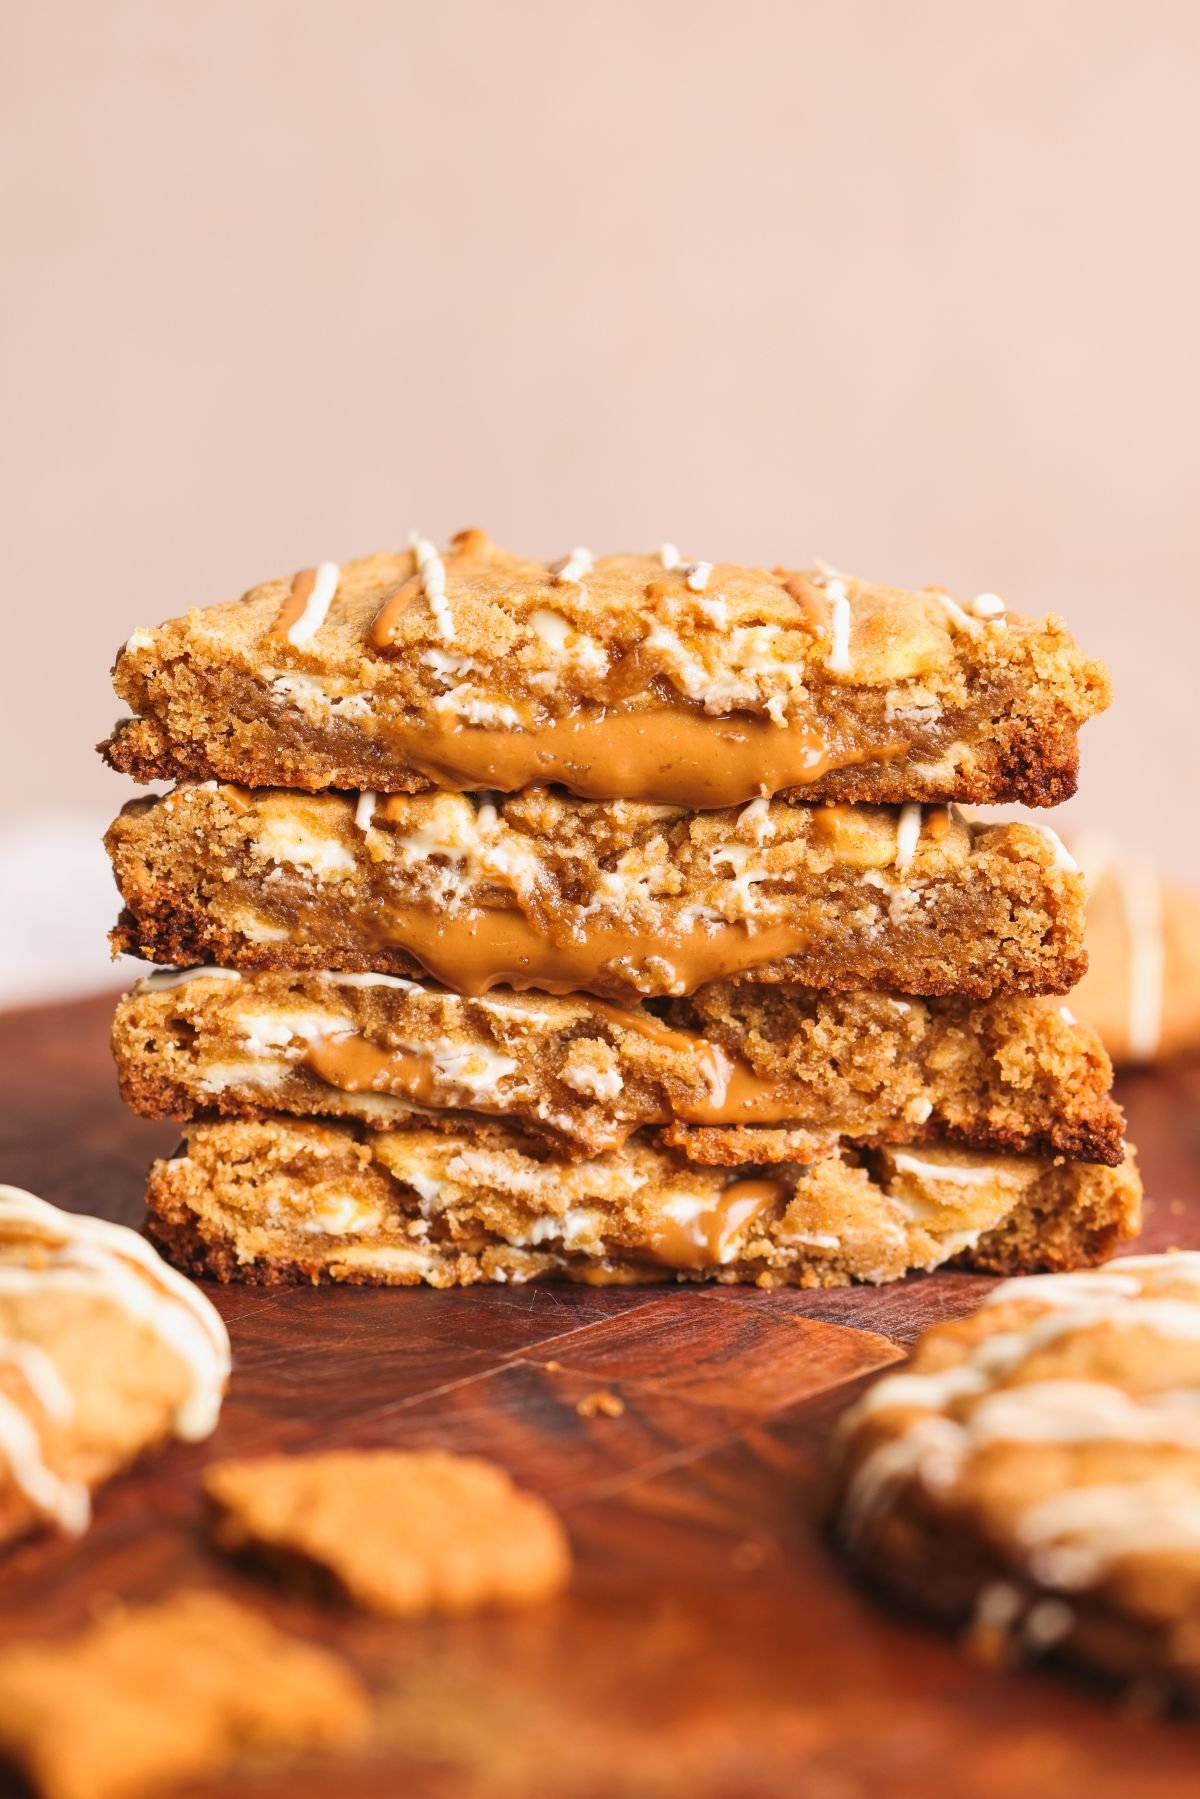
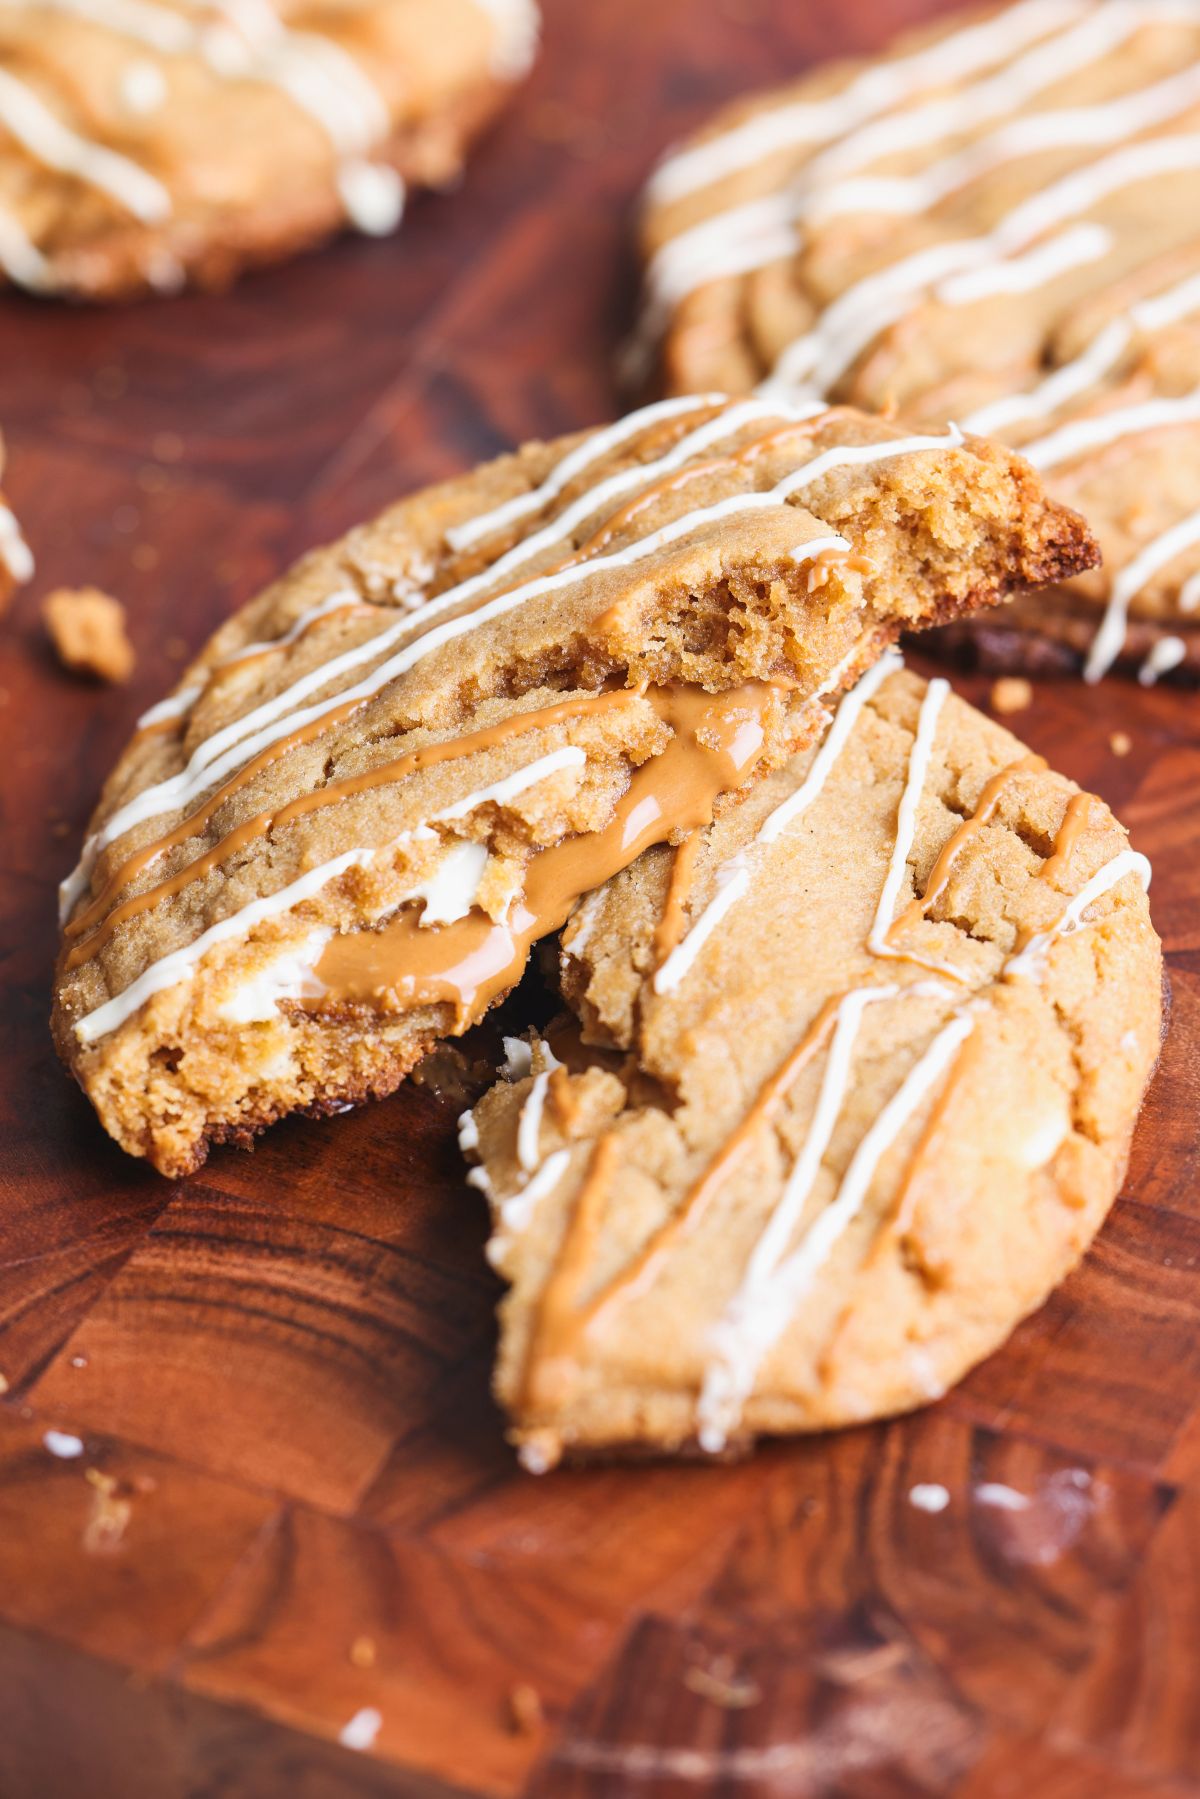
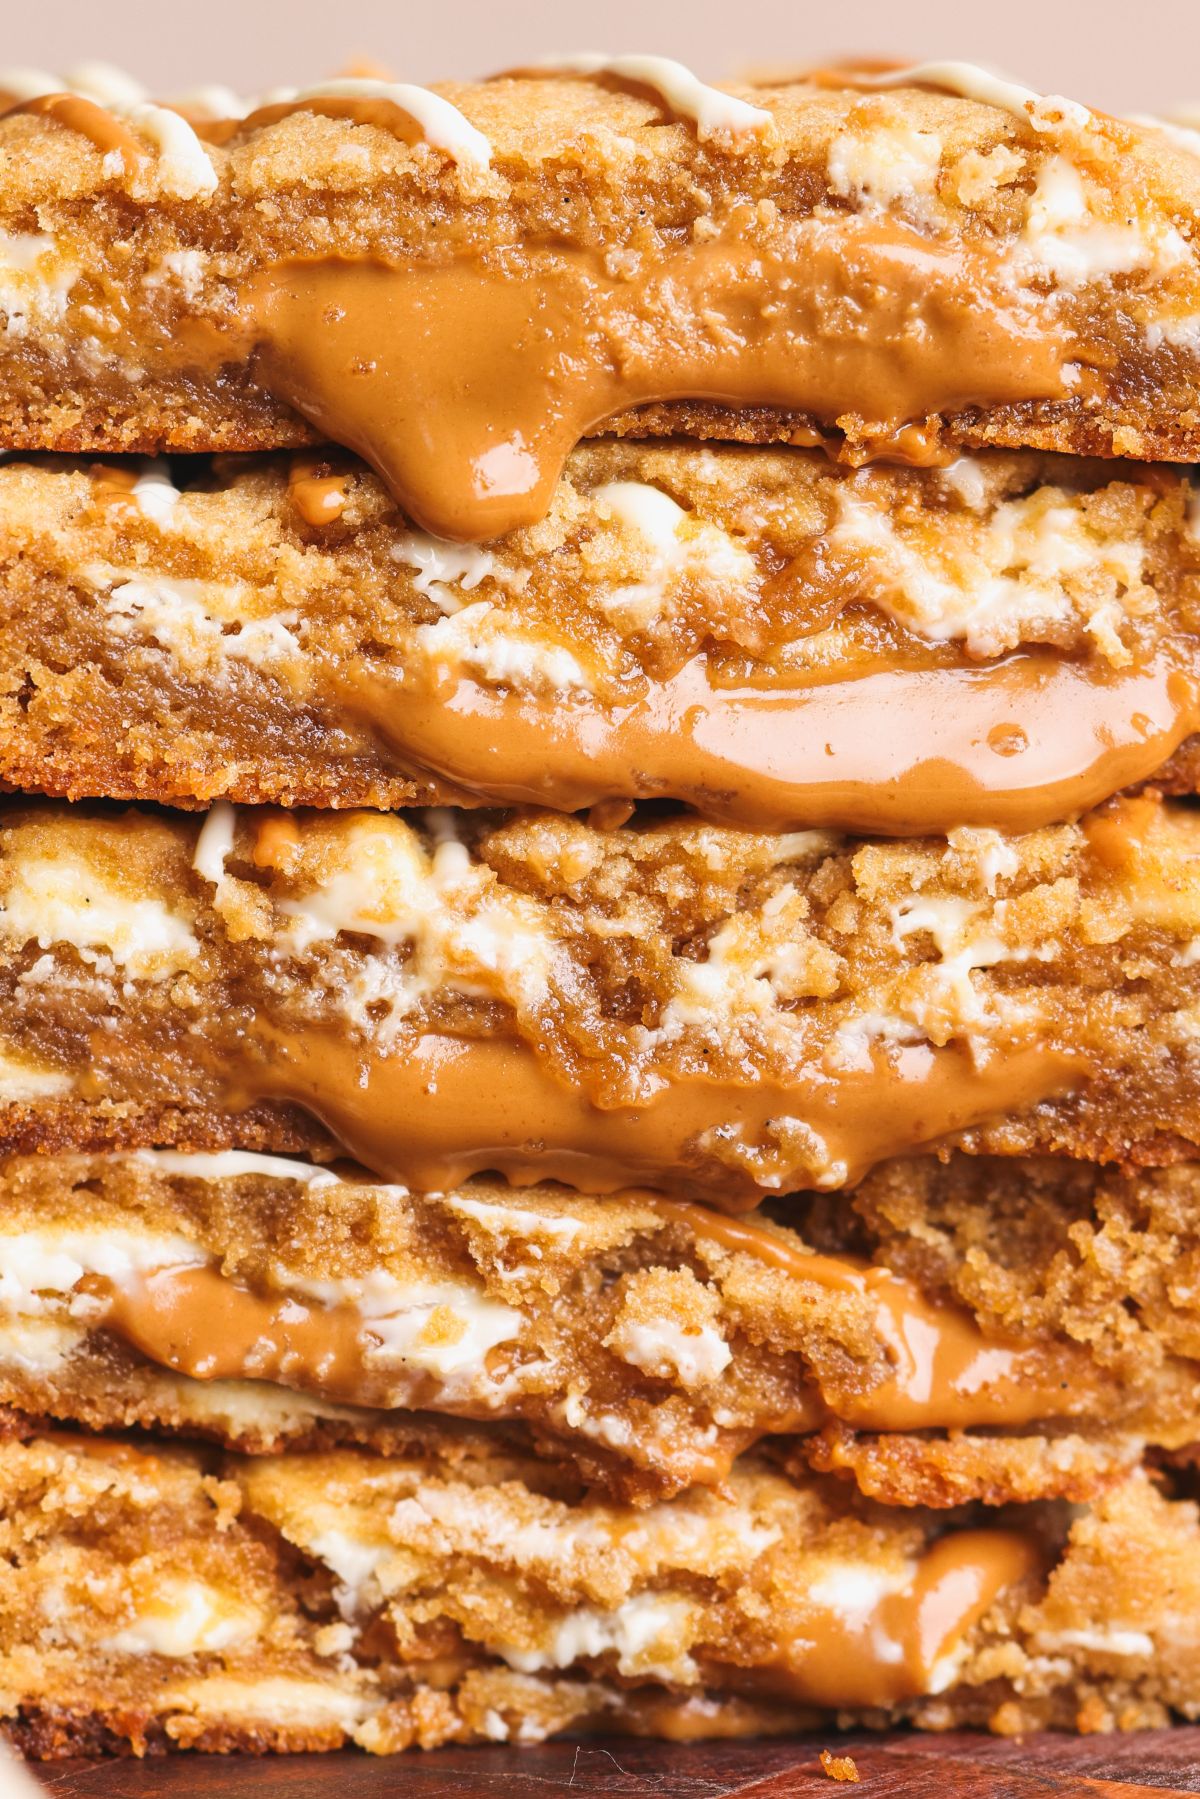
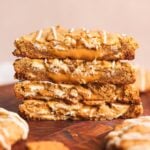
Biscoff lovers are in for an absolute treat with these Biscoff Lava Cookies! They are divine: jumbo sized, thick and chunky with crisp golden edges, a chewy and gooey interior, lots of white chocolate and an irresistible molten biscoff filling. Made with both Biscoff spread and crushed Biscoff cookies, they have a perfectly balanced flavor that lets the warm caramel goodness of Biscoff shine without being too sweet or overpowering.
I've been on a roll recreating Crumbl cookie recipes lately (better versions, of course) and decided to tackle their Biscoff Lava Cookie next. It was tricky to perfect because I wanted to pack in as much Biscoff as possible without turning the cookies too dense or greasy. But once I nailed it, WOW. I genuinely thought I was over the Biscoff hype, but one bite of these brought it all back. That warm, spiced caramel flavor is pure comfort and nostalgia. These aren't just better than Crumbl's version, they are actually my favorite Biscoff dessert ever, and easily in my top 5 cookie flavors of all time.
And if you're a fan of Biscoff, I highly recommend my luscious no bake Biscoff salted caramel cheesecake with a Biscoff crust, and my quick and easy Biscoff tiramisu!
3 components of these cookies
These Biscoff lava cookies have 3 simple components:
- A thick, chewy Biscoff cookie base. Somewhere in between a snickerdoodle and a sugar cookie, this cookie dough contains both Biscoff spread and crushed Biscoff cookies, and is studded with white chocolate chips. It bakes to be delightfully crispy on the edges and chewy and gooey in the middle
- Biscoff spread filling. You scoop the spread into little balls, freeze them, and stuff them in the middle of the cookie dough balls - because the more the merrier when it comes to Biscoff
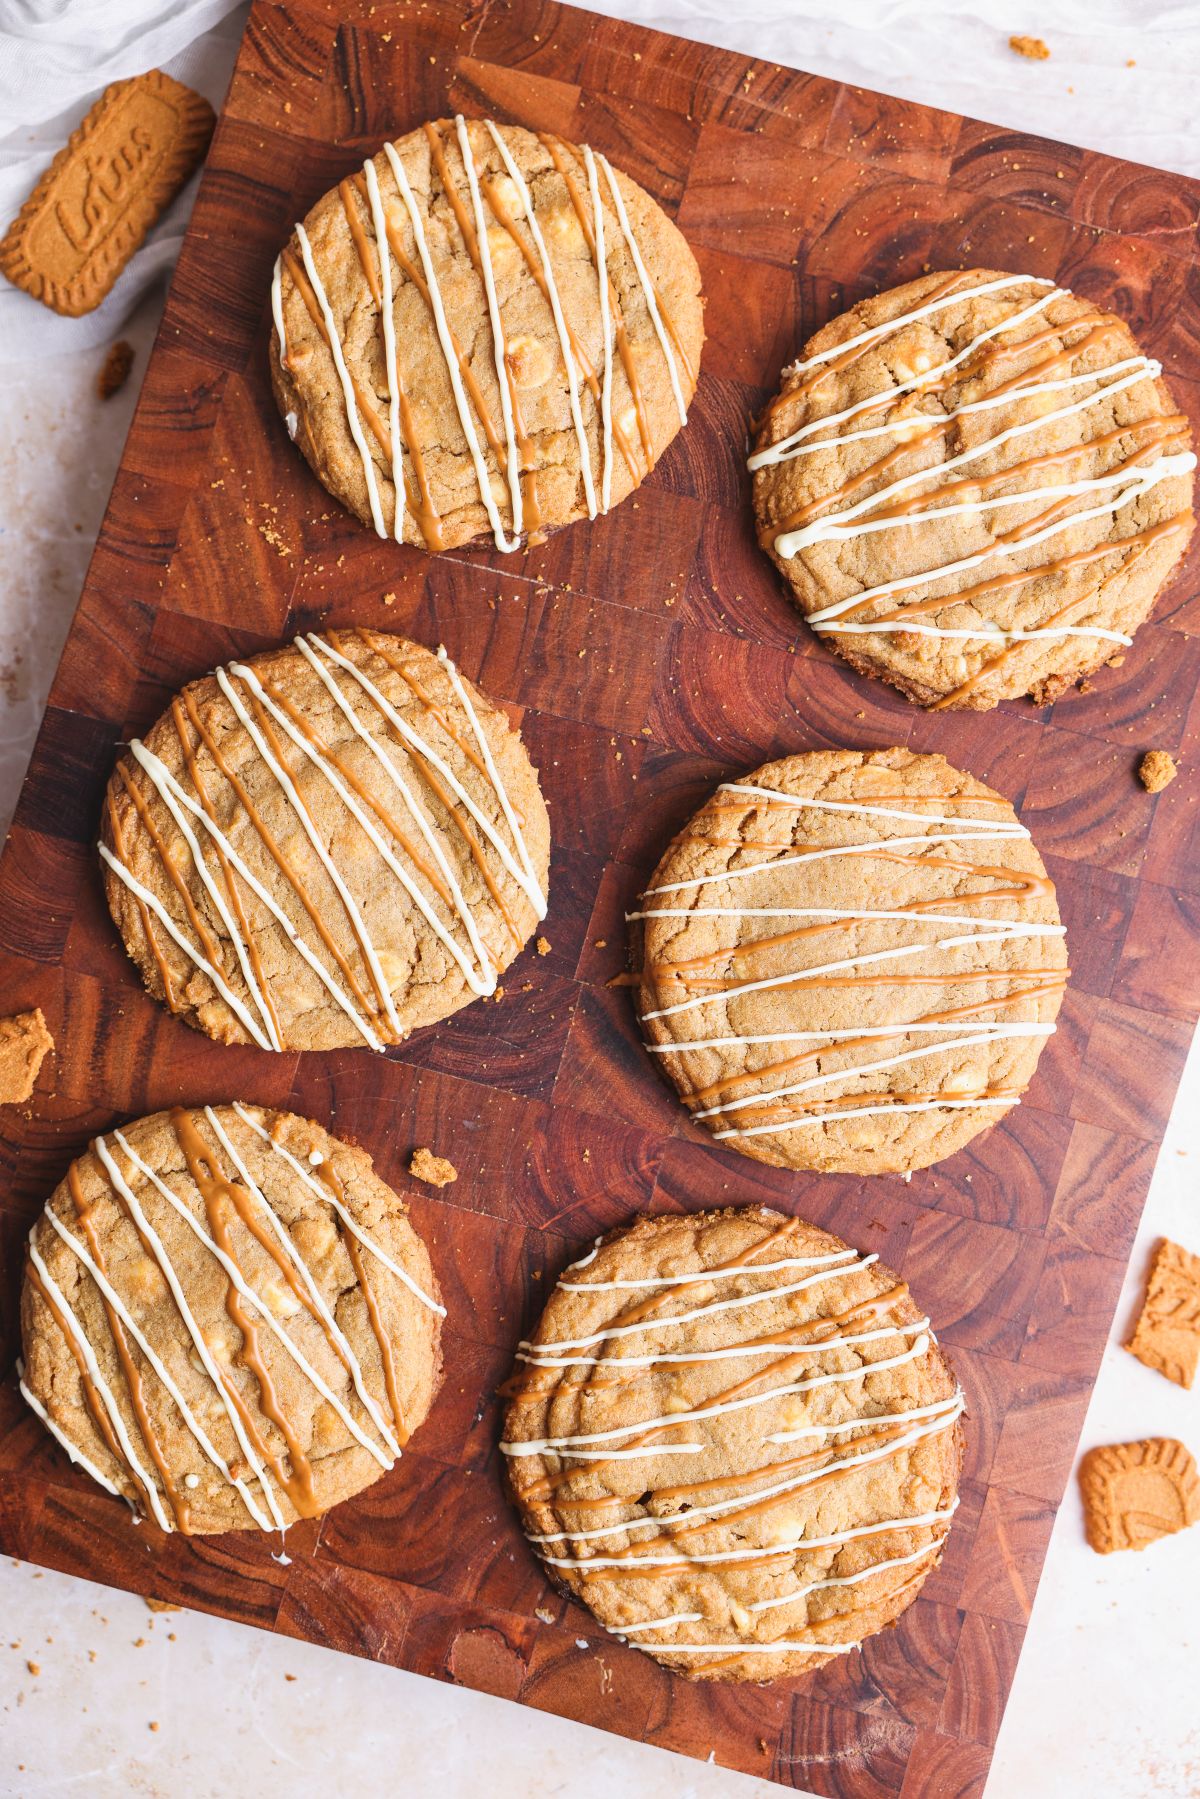
- Biscoff and white chocolate drizzle. Optionally, if you want to give the cookies a more finished look, melt some more biscoff and white chocolate, transfer to piping bags, and drizzle on top
Getting the bake right
I say this for almost all my Crumbl cookie recipes, but getting the bake right on large cookies is tricky because the middle takes a lot longer to cook than the edges. After a lot of trial and error, I've discovered that the best way to bake these is to start at 375F for 5 minutes so the edges can set and the cookie doesn't spread too much, then drop the temperature to 340F and bake for another 13-14 minutes.
In addition to this, I have 3 important tips for you:
- Use a light colored baking sheet. A dark sheet will cause the cookies to brown too much on the bottom
- ALWAYS bake a test cookie first! Everyone's oven is different, and the baking time can drastically vary even for the exact same recipe. A test cookie will allow you to figure out the exact settings you need to use
- Check for doneness instead of just following the times. When perfectly baked, the cookies will have a golden color, feel set around the edges, but still soft in the middle. They will firm up after ~20 minutes at room temperature
Bonus tip: If you're worried your cookies are browning too quickly on the bottom, when you drop the temperature from 375F to 340F, quickly open the oven door and stack a cold baking sheet under the cookie sheet in the oven. This will drop the temperature of the cookie sheet and slow down the browning process!
A few more tips before you make them
Here are a few tips that will help you get the perfect Biscoff Lava cookies:
- Weigh all your ingredients with a kitchen scale. Ingredients like biscoff cookies, biscoff spread and flour are hard to measure accurately with measuring cups
- If the cookie dough feels too soft or sticky, chill it for 10-15 minutes before shaping the cookies
- Make sure the Biscoff scoops are chilled and firm before you stuff them into the cookies, and make sure they are fully encased by cookie dough so the Biscoff doesn't melt out
- DO NOT rush the chilling process! These cookies will spread too thin and lack flavor and texture depth if they're not chilled overnight. If you wanna read more about the importance of chilling cookie dough, I go into more detail in my brown butter chocolate chip cookie recipe
Thick And Chewy Biscoff Lava Cookies Recipe
- Total Time: 50 minutes + overnight chilling
- Yield: 6 large cookies
Description
Thick, chewy and gooey Biscoff cookies with white chocolate chips and a molten Biscoff filling
Ingredients
- Filling: ¾ cup biscoff spread (180g)
- ¾ cup unsalted butter (12 tbsp or 170g), room temperature
- ⅔ cup light brown sugar, packed (133g)
- ¼ cup granulated sugar (50g)
- 1 large egg
- 1 egg yolk
- 1 tsp vanilla bean paste
- ¼ cup Biscoff spread (60g)
- ½ cup crushed Biscoff cookies (60g)
- 1 ¾ cup all purpose flour (227g)
- ¾ tsp baking powder
- ¼ tsp baking soda
- 1 tsp salt
- 180g white chocolate chips
- Optional: 2 tablespoon each Biscoff spread and melted white chocolate to drizzle on top
Instructions
- Lay parchment paper on a baking sheet or a plate. Spray a round tablespoon measure with oil or nonstick spray, and use it to scoop 6 balls of Biscoff spread that are ~30g each (1 heaping tablespoon). Place the balls on the parchment paper. Transfer to the freezer to allow the balls to freeze while you work on the cookie dough
- Add the butter, brown sugar and granulated sugar to a bowl and whisk on medium high speed for 2-3 minutes until the mixture turns fluffy and light in color. Keep scraping the bowl along the way
- Add the egg, egg yolk and vanilla. Whisk for another minute until a creamy mixture forms
- Add the ¼ cup Biscoff spread and whisk until combined
- Add the crushed Biscoff cookies and use a rubber spatula to fold them in until combined
- Now sift the flour, baking powder, baking soda and salt in a separate bowl and mix to combine. Add the dry ingredients to the cookie dough and use a rubber spatula to gently fold until the flour is almost mixed into the dough
- Add the white chocolate chips and continue folding until no more streaks of flour remain and the chocolate is evenly dispersed. Don't overmix
- The cookie dough should be soft and easy to work with. If it feels too sticky, refrigerate it for 10-15 minutes until it becomes easier to shape with your hands
- Remove the Biscoff balls from step 1 from the freezer. Now divide the cookie dough into 5oz portions - you should get 6 balls. Working one piece at a time, flatten the cookie dough into a disc in your palm, place the Biscoff ball in the middle, then fold the cookie dough around it to completely seal it. Make sure the Biscoff is fully encased, the gently roll the cookie dough into a ball. Repeat with all portions so you have 6 balls filled wit Biscoff, each weighing ~6oz
- Place the cookie dough balls on a plate/tray and refrigerate overnight (minimum 6 hours, overnight recommended for best results)
- When you're ready to bake after chilling, pre-heat the oven to 375F (conventional / no fan) and line a large light colored baking sheet with parchment paper
- Place the chilled cookie dough balls on the baking sheet, keeping at least 3" between each
- Place in the oven and bake at 375F for 5 minutes, then drop the temperature to 340F and bake for another 13-14 minutes for a total baking time of 18-19 minutes. The cookies are done baking when they are golden in color, look set on the edges but are still soft to touch in the middle.
- Remove from the oven and let cool at room temperature for 20 minutes
- If you're adding the optional drizzles on top, microwave the Biscoff spread and white chocolate separately in 15s bursts until they are molten. Transfer to piping bags, and cut off a small hole in each. Then drizzle onto the cookies as shown in the pictures
- Rest for another 10 minutes, then serve and enjoy!
Notes
- Make ahead & storage: These cookies are best eaten fresh and warm. If you do end up with leftovers, keep them in an airtight container at room temperature for up to 2 days, or in the fridge for up to 5 days, and reheat in the oven at 350F until they're warm again. But if you don't intend to consume all cookies the first day, I recommend keeping the cookie dough balls in the fridge for up to 2 weeks, or in the freezer for up to 3 months, and baking fresh cookies whenever you want them. Just increase the baking time by 2-3 minutes if baking a frozen cookie
- Prep Time: 30 minutes
- Cook Time: 20 minutes
- Category: Dessert
- Cuisine: American

Carmen Goldberg says
I baked these for my Christmas cookie box and they were such a hit! They tasted just as good as they looked too which is the best combo ever. Zoha has the best recipes an never fail.
Zoha says
I am so honored you used my recipe! THank you so much!
Maryam says
Made them today. Zoha you're a marvel to be discovered by anyone who bakes or wants to start baking. The cookies were delicioussssss and the level of sweetnesssss nomatter what sweet treat it is you create it has such a perfect balance to it. Neverrrr more justttt perfect each time . love love love you .
Zoha says
AWWWW you are so kind! Thank you so much :')
Anjola says
I was wondering if i can brown the butter instead and if i can do i still use 170g
Zoha Malik says
hi Anjola! You can use cooled brown butter and still weigh the same amount AFTER browning, but the result won't be the same because brown butter has higher fat content and less moisture.
Mahnur says
Hi zoha, this is not the first recipe of yours that I’ve used and I just want to say that you rekindled my love for baking ♥️ this was my first attempt at cookies and they turned out so so good! Perfectly balanced, the texture was amazing and the taste was to die for. I’m a huge fan of yours. Thank you for the amazing recipe 💕
Zoha Malik says
AWH thank you SO much, Mahnur! <3