
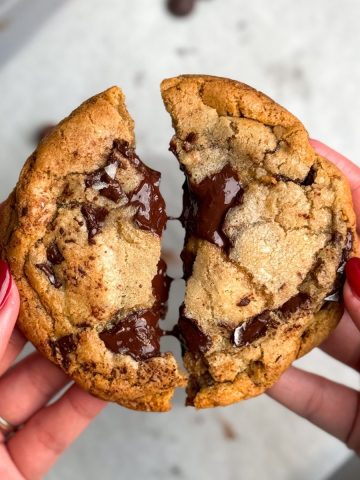
These Chocolate Thumbprint Cookies are nostalgic and celebratory all at once: buttery, chewy chocolate cookies filled with a rich, silky chocolate ganache. They are easy to make, easy to munch on, and look absolutely adorable. They are also so fun to bake with your kids or family, making them fantastic for the Holidays and Christmas!


Read the full blog post below for detailed notes, tips, tricks, photos and videos.
Jump to:
What are chocolate thumbprint cookies?
Classic thumbprint cookies are small sugar cookies that have a "thumbprint" or indentation on top, which is filled with different kinds of toppings like jam and ganache. They are very popular especially during the Holidays and Christmas, as they have a fun, celebratory look and are easy to bake. Chocolate thumbprint cookies are the chocolate version, made with a chocolate cookie and filled with chocolate ganache. They are cute, small, chewy and delicious!
Why are these the best chocolate thumbprint cookies?
I grew up obsessed with the chocolate thumbprint cookies I used to get from a bakery near my house. I used to get a dozen and munch them up in a single sitting. Now that I am older though, I recognize those cookies weren't actually that great: they were quite dry and crumbly, and the ganache tasted more like sugar than chocolate. So I wanted to pay homage to my childhood favorite by making an elevated version, and this recipe is exactly that!
I think these are the best chocolate thumbprint cookies because:
- They taste chocolatey. Not sugary, not like vanilla. These are proper chocolate cookies and taste like it: rich, decadent and delicious!
- They have the perfect texture. The cookies are set around the edges but have a soft, moist and chewy interior. The ganache has the perfect "soft set", which means it is just firm enough at room temperature that it stays in place, but is creamy and silky when you bite into it. The combination is just divine
- They are very easy and fuss free to make. This recipe has no fancy ingredients or steps, and comes together very easily, making it very beginner (and kid) friendly
- They are SO fun. Fun to make, fun sized, fun to look at, fun to eat. Make them with your kids or families and you will have a blast


Tips to perfect this recipe
Here are a few tips to help you make the best chocolate thumbprint cookies:
- Weigh the ingredients with a scale for accuracy. This is especially important with the flour and cocoa powder, as it is very easy to put too much if you use measuring cups. Here is an inexpensive scale on Amazon that works really well
- Make sure the butter and eggs are at room temperature. I recommend taking them out of the fridge 2 hours beforehand. This will make it much easier to make the cookie dough
- Use Dutch processed cocoa powder. It tastes much better than regular cocoa powder! I love this one from Rodelle
- Make sure to chill the cookie balls before baking. You only need to chill for 30 minutes, but it will help make sure the cookies don't spread out too much
- Don't overbake the cookies. Take them out when they feel set on the edges and slightly soft in the middle. They will set more with time. It's always a great idea to bake one cookie as a test first!
- Use good quality chocolate for the ganache, and make sure it's something you like the flavor of! I used a mixture of Lindt dark chocolate and Lindt milk chocolate


Process with photos
The detailed recipe is provided in the recipe card at the bottom of this post, but let's go over the steps with photos to help you visualize everything.
Whisk the butter and sugar until light, fluffy and creamy:


Add the eggs and vanilla, and whisk again until combined:


Sift in the dry ingredients and fold into a cookie dough:


Shape into 1" balls, and use the back of a ½ teaspoon measure (or something of similar size) to press "thumbprints" into each cookie. Chill the balls:


Prepare the chocolate ganache while the cookie balls chill:


Bake the cookies, and press them again with a larger spoon measure when they are fresh out of the oven to make the indentation deeper. Fill generously with the ganache:


Cool, decorate, serve and enjoy!


Ideas to decorate chocolate thumbprint cookies
If you're baking for the holidays, you may want the cookies to look extra special! Here are a few easy decoration ideas:
- Decorate with crushed freeze dried strawberries. This is what I did and I think the pink color looks so pretty! Just make sure to crush and sprinkle the strawberries quickly as they get moist and sticky fairly quickly
- Use any other freeze dried fruit, or a combination! Different kinds of berries would be lovely to add color and a light flavor
- Decorate with colorful sprinkles. Or even silver and golden ones
- Play around the the filling itself. Maybe you can do different types of chocolate ganache (like dark and white), and swirl them with each other!
- Roll the cookie dough balls in sugar before baking. This will add a "glittery" effect to the cookies
Frequently asked questions
Yes, you do have to chill the cookie dough, but only for ~30 minutes. Shape the dough into individual cookies, place onto a baking sheet, and then refrigerate. This will help ensure the cookies don't spread out too much in the oven and maintain their shape. Baking without chilling will result in cookies that are too flat and therefore don't have enough room to hold a good amount of ganache.
This is normal - the cookies puff up as they bake, which makes the thumbprints less prominent. Worry not, though, as you can press them down again as soon as they are out of the oven to bring back the thumbprints.
If you want the cookies to be less soft / chewy and more on the crumbly side, you can bake for 1-2 minutes longer.
I find semi-sweet chocolate works best, but yes, you can use a different type of chocolate for the ganache based on your preference. Just know that if you use milk or white chocolate, you may need to reduce the amount of the cream to get the right consistency.
Keep the cookies in an airtight container at room temperature for 2-3 days, or in the fridge if storing for longer. They are best eaten within 1-2 days, though!
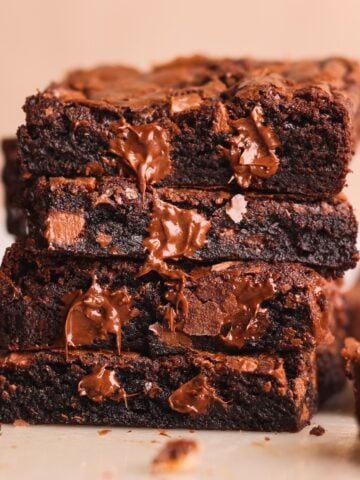
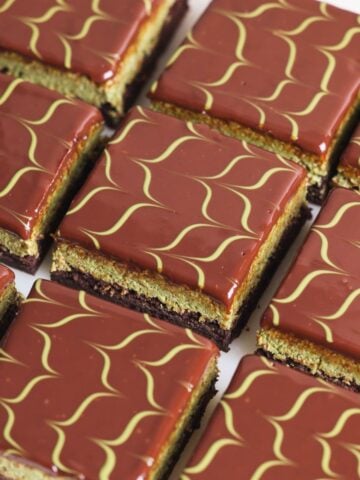
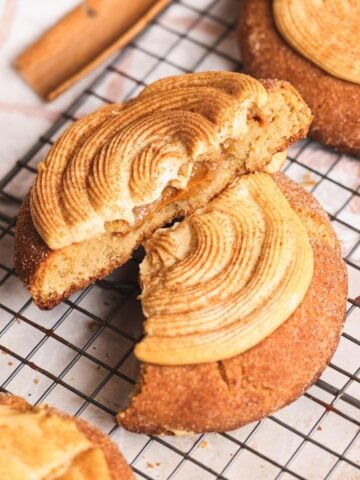
More cookie recipes
In the mood for cookies? Check out these popular cookie recipes on the blog:


Best Chocolate Thumbprint Cookies Recipe
- Total Time: 90 min with cooling
- Yield: 26 small cookies
Description
Decadent and chewy chocolate cookies filled with a rich, silky chocolate ganache - they are delicious, easy and so fun!
Ingredients
Chocolate Cookies:
- ¾ cup unsalted butter (170g or 12 tbsp), softened at room temp
- 1 cup granulated sugar (200g)
- 1 large egg
- 1 egg yolk
- 1 tsp vanilla
- 1 ½ cups all purpose flour (195g)
- ½ cup Dutch processed cocoa powder (50g)
- ½ tsp baking powder
- ¼ tsp baking soda
- ½ tsp salt
Chocolate Ganache:
- 150g semi-sweet chocolate
- 75g heavy cream (about ⅓ cup)
Serving:
- Crushed freeze dried strawberries for decoration; optional
Instructions
Chocolate Cookies:
- Whisk the softened butter and sugar for 2-3 minutes until the mixture looks really light and fluffy, scraping the bowl at least twice in the middle
- Add the egg, egg yolk and vanilla, and whisk again until the ingredients are combined. Scrape the bowl again
- Sift and mix the dry ingredients in a separate bowl. Add the dry ingredients to the wet ingredients in 2-3 batches, folding gently with a rubber spatula. Try not to overmix the dough and stop as soon as the dry ingredients are combined. The result should be a soft but workable cookie dough
- Line 1-2 large baking sheets with parchment paper
- Shape the cookie dough into 25g balls, about 1" in diameter each. This should make about ~26 balls. Use minimal pressure to make the balls and remove any cracks from the surface, but don't over work them as that will cause them to become greasy
- Place the balls on the lined baking sheets, keeping about 2" between each
- Use the back of a ½ teaspoon measure (or something of similar size; it should be a round shape that is smaller than the size of the cookie ball) to press "thumbprints" into each cookie ball. This will also naturally flatten each ball slightly. You can use your thumbs but it is easier and more consistent with a spoon measure
- Place the sheets in the fridge to chill for 30 minutes (or ~15 min in the freezer). In the meanwhile, work on the chocolate ganache (see below)
- In the last 15 minutes of chilling, pre-heat the oven to 375F (conventional, no fan)
- Once the cookie balls have chilled and oven has pre-heated, bake the cookies for ~9-11 minutes. 9 min will yield softer, chewier cookies while they will be firmer at 11 minutes. I baked mine for 10 minutes, and strongly recommend baking one cookie as a test first
- As soon as the cookies are out of the oven and are still hot, use a larger spoon measure (like 1 tbsp) to press down gently on the cookies again. They puff up and partly lose the thumbprint in the oven, so this step helps bring it back
- Let them cool at room temperature for 10 minutes
Chocolate Ganache:
- Add the chopped chocolate / chips to a bowl
- Heat the cream until it just starts to simmer. Pour over the chocolate, making sure the chocolate is covered in the cream. Cover and wait 5 minutes
- Gently stir until the chocolate fully melts and a smooth, shiny chocolate ganache forms. Let it cool and thicken up at room temperature while you bake the cookies
Assembly & serving:
- Once the cookies and ganache have both cooled down, fill each cookie generously with the ganache. I just do this with a spoon
- Let them rest for ~30 or so minutes so the ganache can set more
- Decorate however you like; I used crushed freeze dried strawberries
- Serve & enjoy!
Video Tutorial:
Notes
- I highly recommend baking one cookie as a test first, and letting it cool down. This will help you decide exactly how long you should bake to achieve the texture you want
- It is important to press down on the cookies quickly after baking them while they're still hot to make the thumbprints again. They are still soft when they're hot so you can gently alter their shape
- Store the cookies at room temperature in an airtight container for 2-3 days
- Prep Time: 40 min
- Cook Time: 10 min
- Category: Dessert
- Cuisine: American

Alishba says
Hi Zoha! My family and I are SET for the holidays with these delicious recipes you’ve been releasing. These cookies were PERFECT. Thank you!!!
Zoha says
Aww thanks Alishba!
Rania says
They turned out AMAZING!!
SS says
I tried them and they turned out soo good!
Zoha says
YAY! Glad to hear that!
khudija arif says
decadent
Zoha says
Thank you!
Ayesha says
Delicious! Thank you for the wonderful and easy recipe. I’m thinking of making them for a party tomorrow, can I freeze the unbaked cookies and bake them tomorrow?
farwy says
The cookies came out yummy but my ganache was pretty bitter. it also was mostly on the liquidy side- was it supposed to firm up at all?
Faiza says
oh masha Allah i tried them they tasted good abit sweeter though but great..lovely choclty..but they flattened..still really good
Vanita Sharma says
hi zoha looks yummy recipe,just wanted to ask can I replace eggs with flaxseed paste
Charlotte says
These look decadent! I would love to add them to my Christmas cookie platters that I gift to friends. My only question is ... are they stackable? Or still a little sticky so they can't be piled with other cookies?
Shal says
Hey
So my dough was still sticky not shiny like yours. It was tough to make perfect rounds like yours.
So I couldn’t even make the proper indentations 😒
What did I miss? How could I fix it? I wonder how come no one else had this issue?!
I ‘ve tried a few of your recipes and they have always worked for me. Not sure what happened here. Any suggestions would be helpful!
Though I feel you’re probably super busy with being a mommy at the moment 😊
So enjoy you’re holidays with your loved ones!
Shal says
Update -
I figured out what I did wrong. So ignore my question above!
Thanks!
Different question -
1- can I freeze the dough and bake later?
2- how can I save the baked cookies? Are they stackable? Will the ganache harden? (I don’t have much experience with Ganache)
Thanks!
Happy Holidays
Zoha says
So sorry for the delay as I am on maternity leave! You can definitely freeze the dough but let it thaw in the fridge before baking. The ganache consistency will depend on the type of chocolate you use. For a hardened ganache you can use 1.5x the amount of chocolate as cream.
Maham says
Turned out absolutely amazing!!