
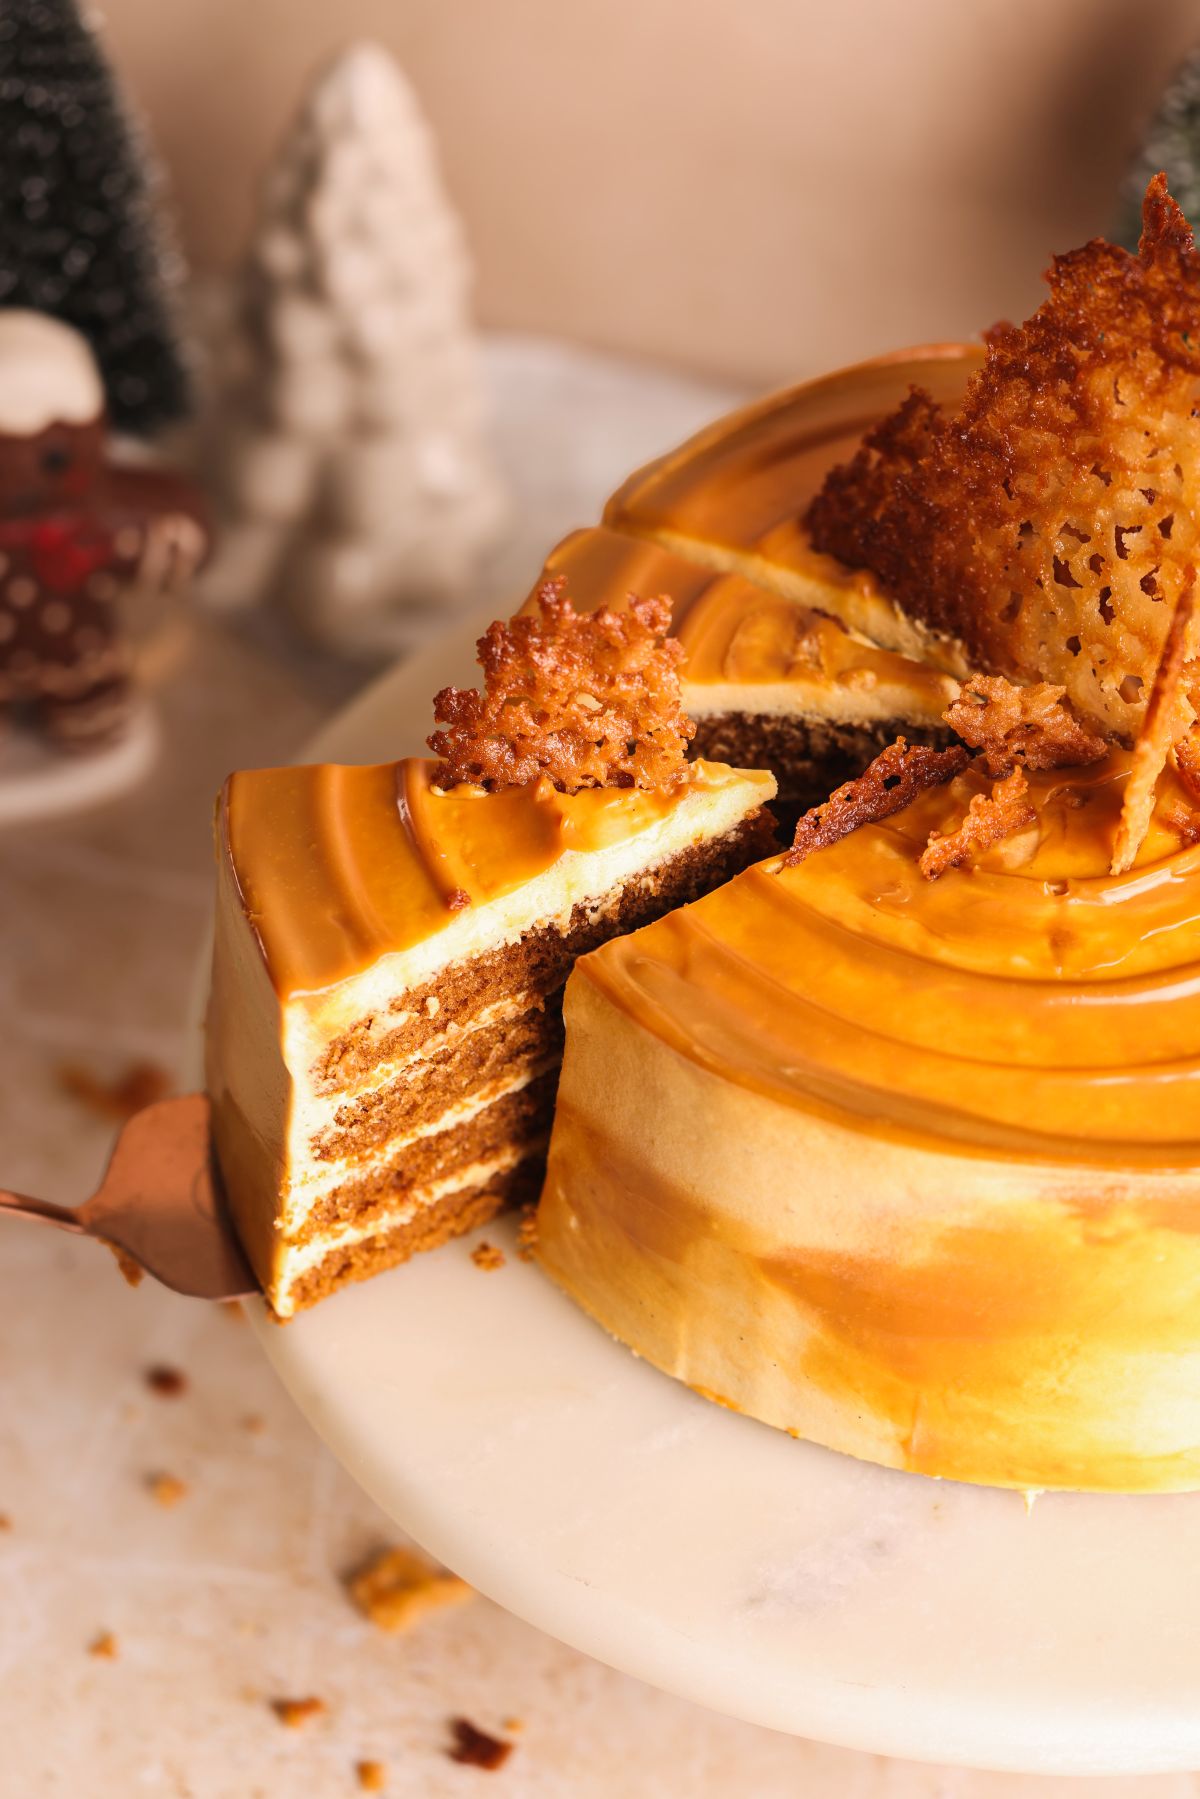
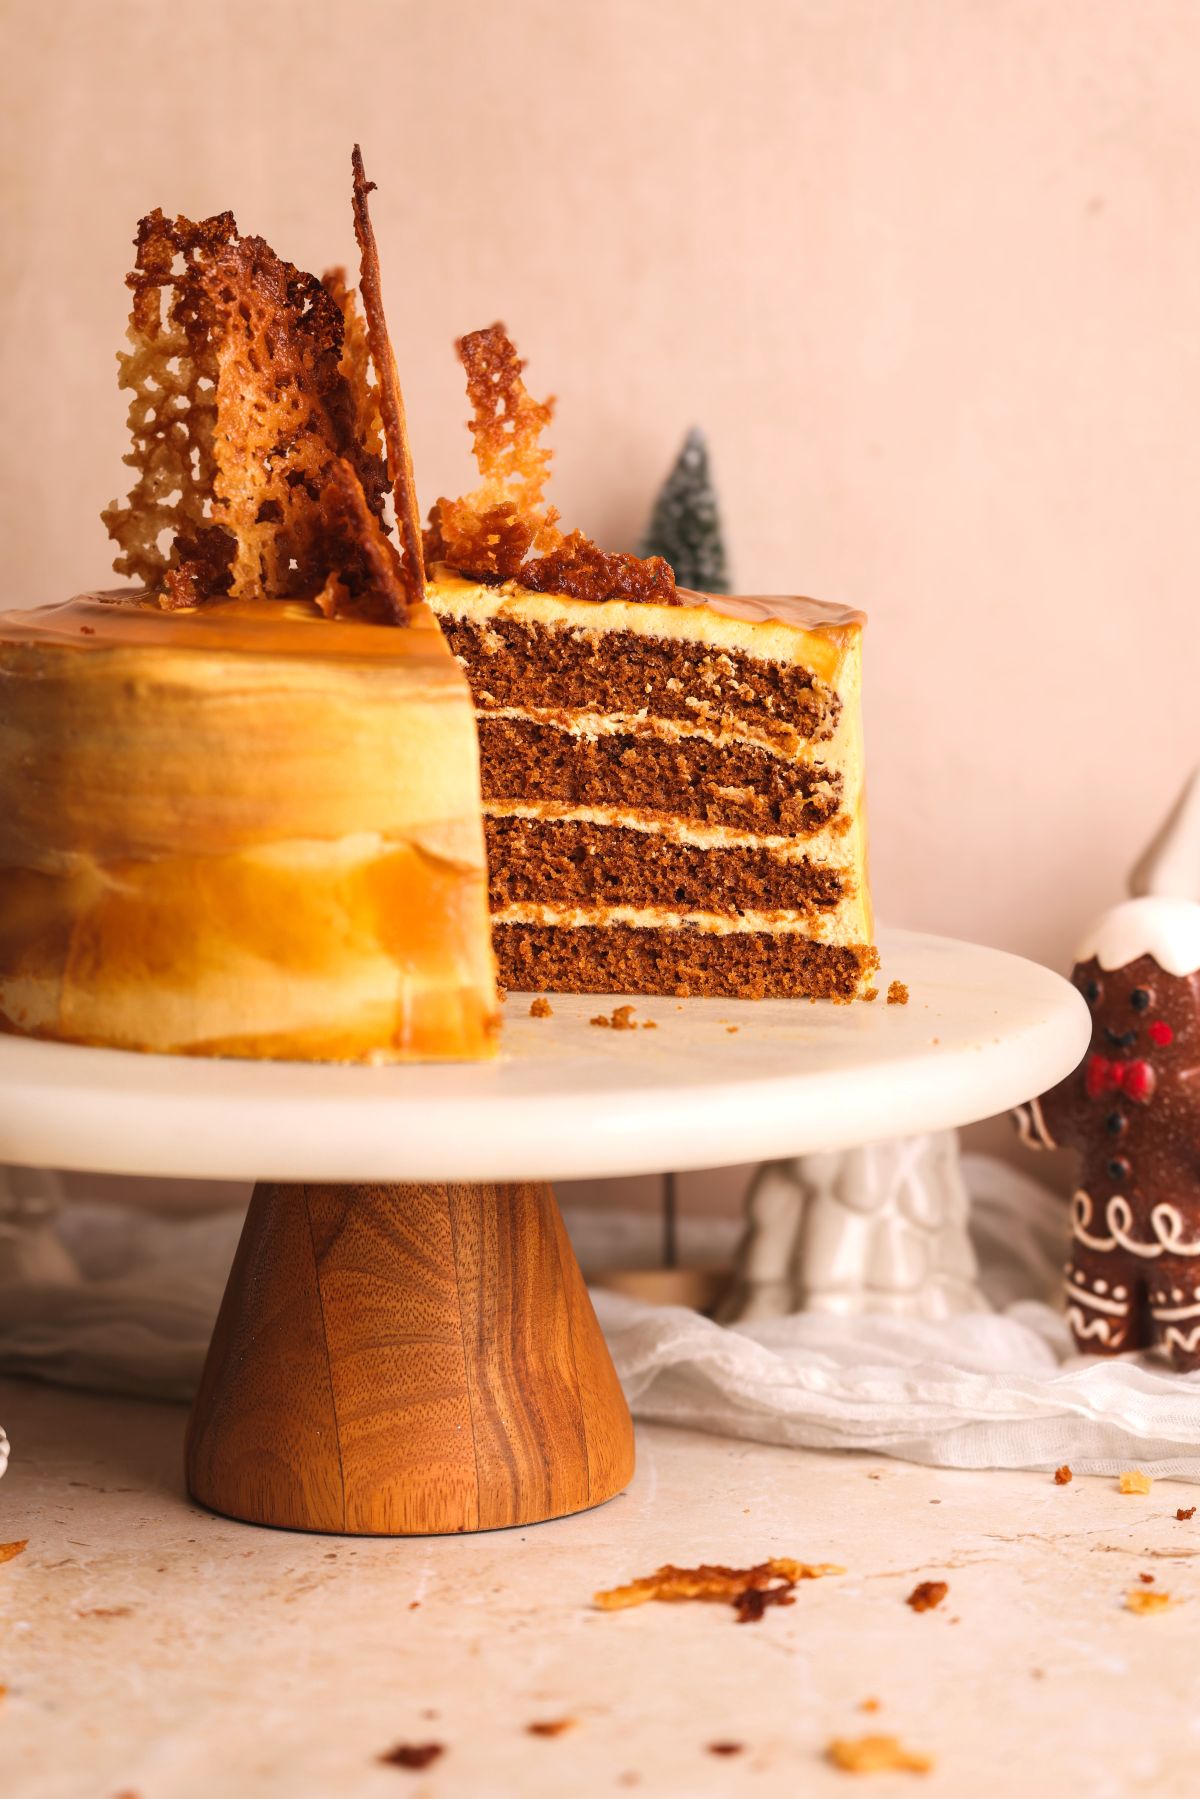
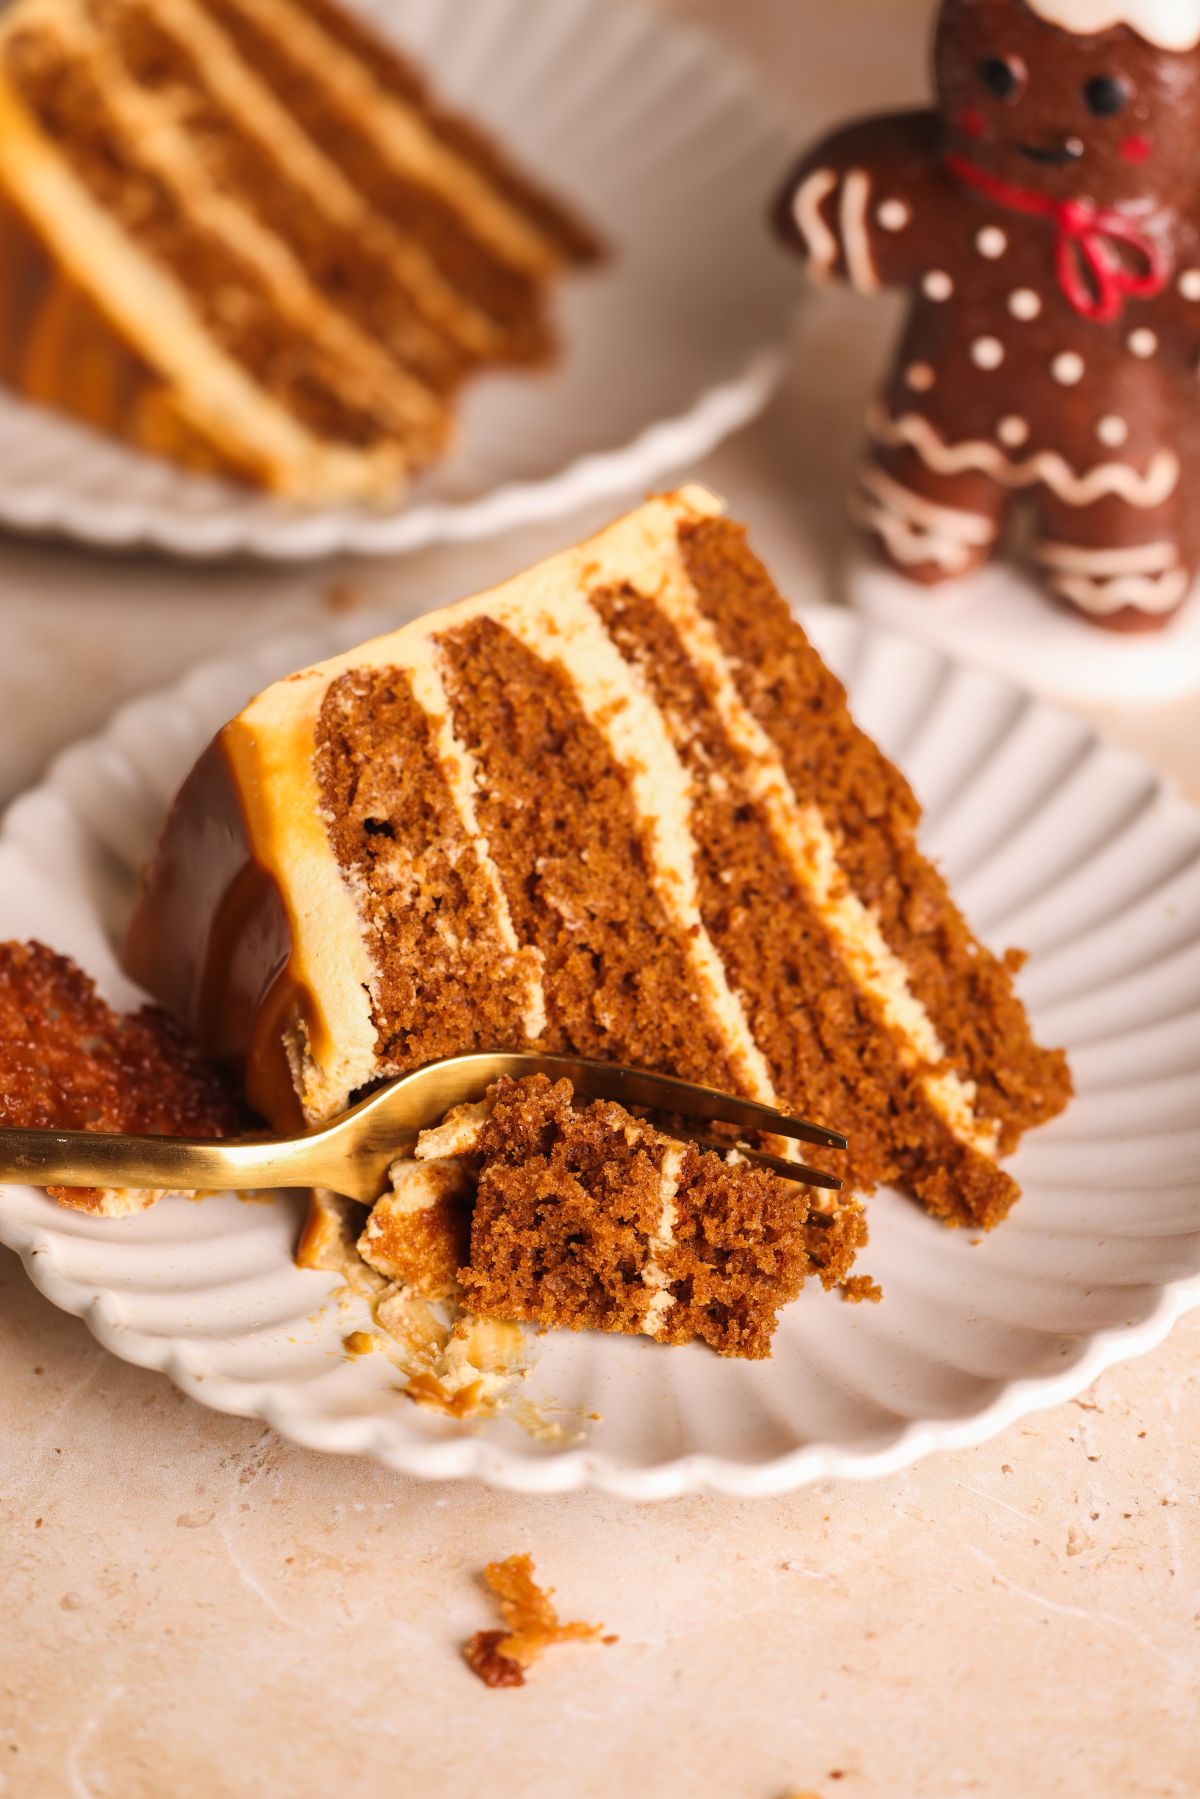
This Gingerbread Dulce De Leche layered cake is an absolute showstopper: bold, beautiful and bound to stand out in a sea of desserts. It's made with very soft and moist gingerbread orange cake layers, a silky dulce de leche cream cheese frosting, a creamy dulce de leche filling and finished with crispy, golden ginger snaps. Beautifully balanced in flavor with a delectable texture, this cake takes gingerbread to a whole new level and is incredibly easy to make. Even ginger haters will fall in love - and if you need proof, this is the cake I made on Next Level Baker and it took top dish!
If you're in the mood for more celebration worthy cakes, you will also love my easy carrot cake and beautiful Black Forest yule log!
This cake earned top bake on Next Level Baker
I recently competed in Gordon Ramsay's first ever baking competition show, Next Level Baker, and the third challenge was ginger. We had 75 minutes to make a holiday showstopper, and I made this gingerbread dulce de leche cake. I was fully winging it, and the journey was tumultuous, to say the least. There were a few disasters and last minute pivots, but the result was way better than I could have ever imagined. The judges LOVED this cake, with Gordon calling it "absolutely stunning" and Candace Nelson calling it "perfect". Here's a snippet of the rollercoaster:

What sucked was that I couldn't actually taste the cake myself, and was left wondering what the judges loved so much about it. So, of course, I recreated it as soon as I got home and - wow. I get it. This cake is incredible!!
4 easy components of this cake
This cake is made with 4 easy components, one of which is optional:
- Gingerbread orange cake. The cake itself is a very simple one bowl recipe, made extra special because it uses oil and hot water for moisture, is flavored with orange to complement the ginger, and uses both molasses and brown sugar for a caramel flavor. It's not too sweet, nor too spicy - just perfectly balanced and lets the ginger shine!
- Dulce de leche cream cheese frosting. The frosting is a very simple one, and uses a generous amount of canned dulce de leche which pairs wonderfully with ginger. In Next Level Baker, I made an Italian meringue dulce de leche frosting, but only because I didn't have cream cheese. Cream cheese frosting always wins, for both flavor and ease!
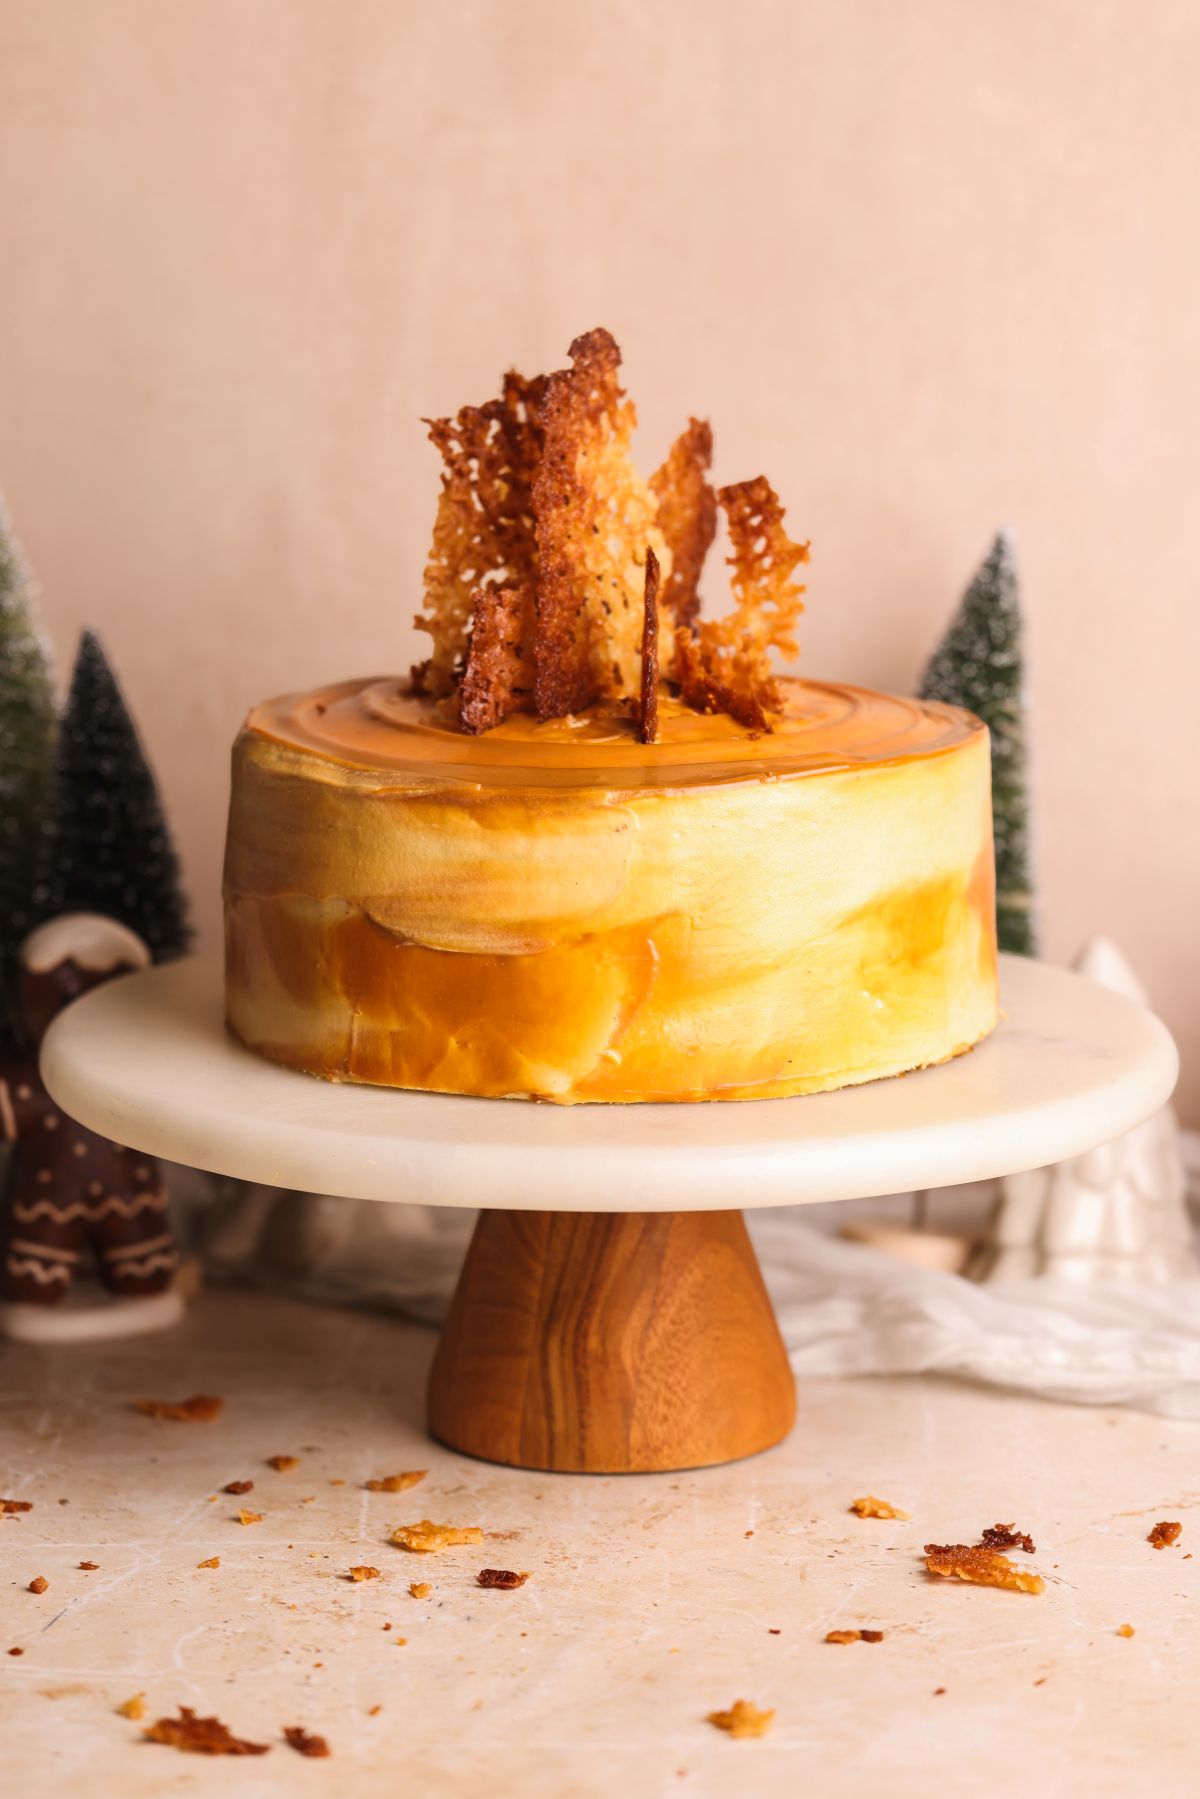
- Dulce de leche cream. A simple cream made with dulce de leche and heavy cream, with a pinch of salt, goes between the cake layers and is also used to create a marbled look on top of the cake. You can also use it to make a drip on the cake, if you don't want the marbled effect
- Gingersnaps (optional). To take the decoration of this cake to the next level, you can make golden, crispy ginger snaps. These are very thin tuille like biscuits that take less than 10 minutes to make, and look and taste beautiful. You can place them on top of the cake to add height, or along the edges like I did on the show
Step by step photos
Let's quickly go over the steps with photos to help you visualize this easy recipe:
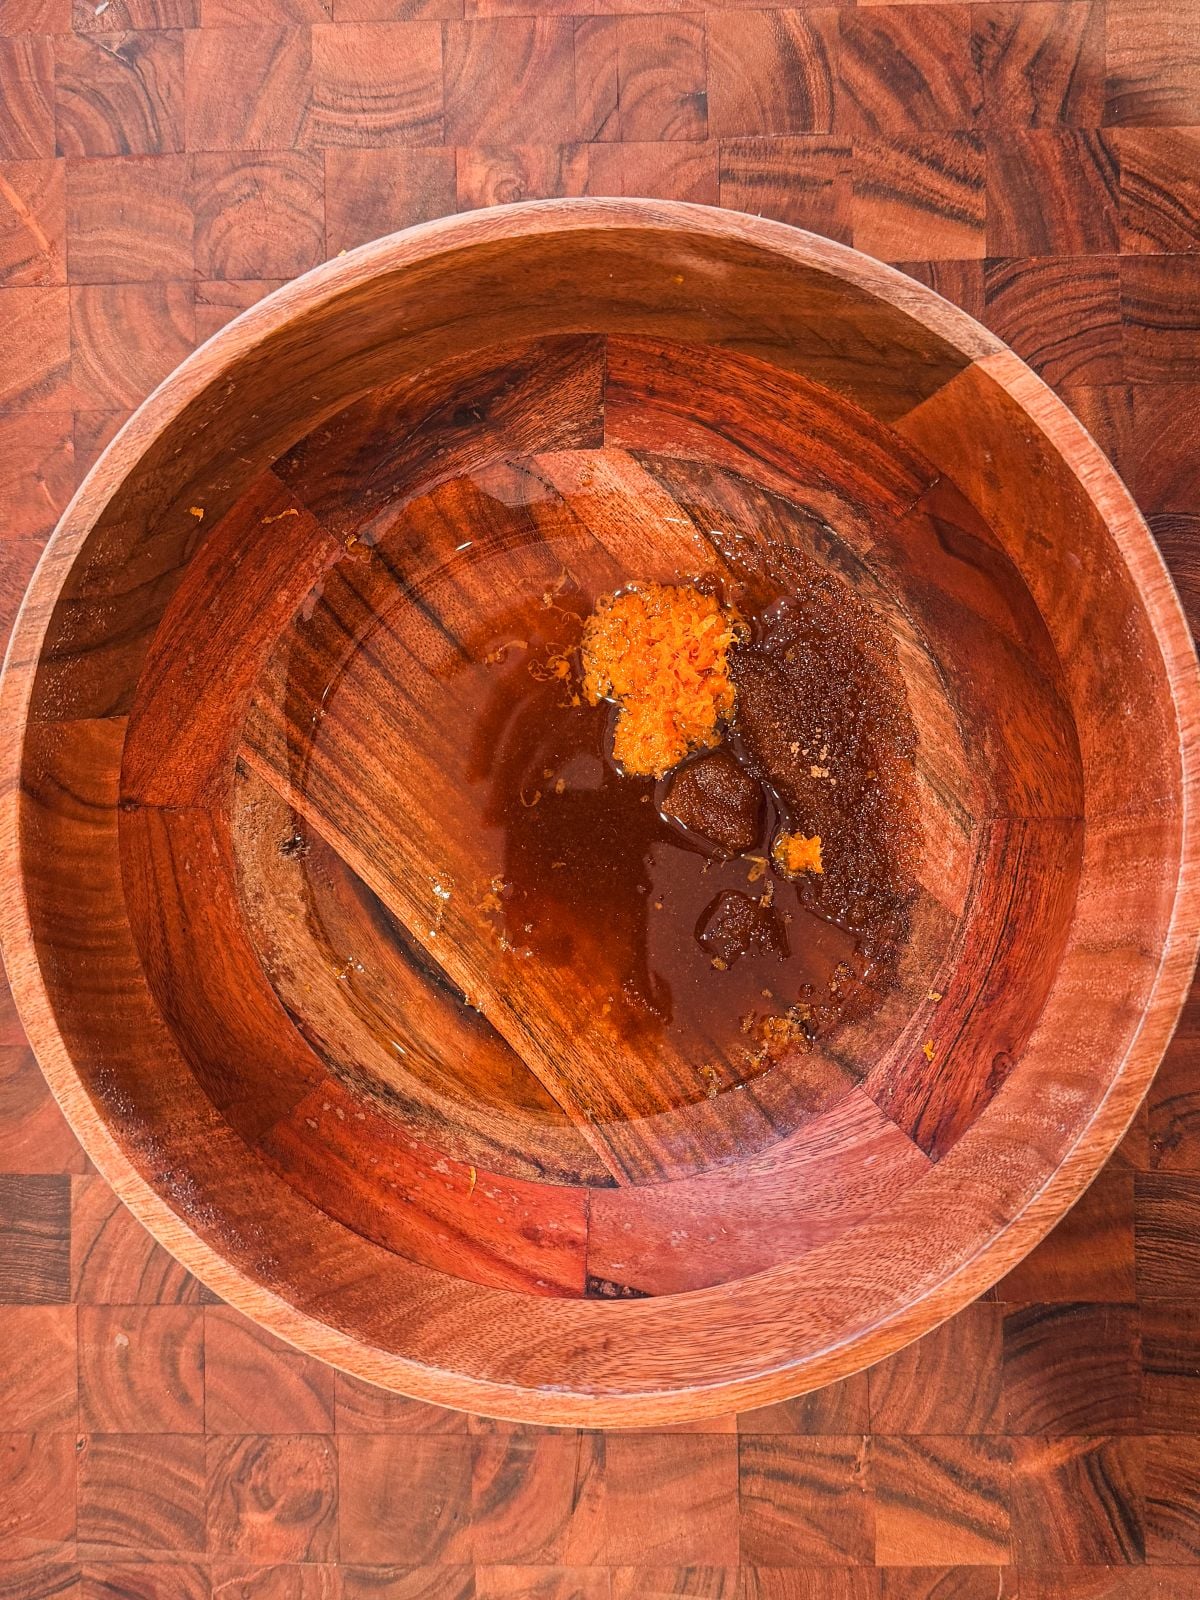
Add the oil, brown sugar and orange zest to a bowl.
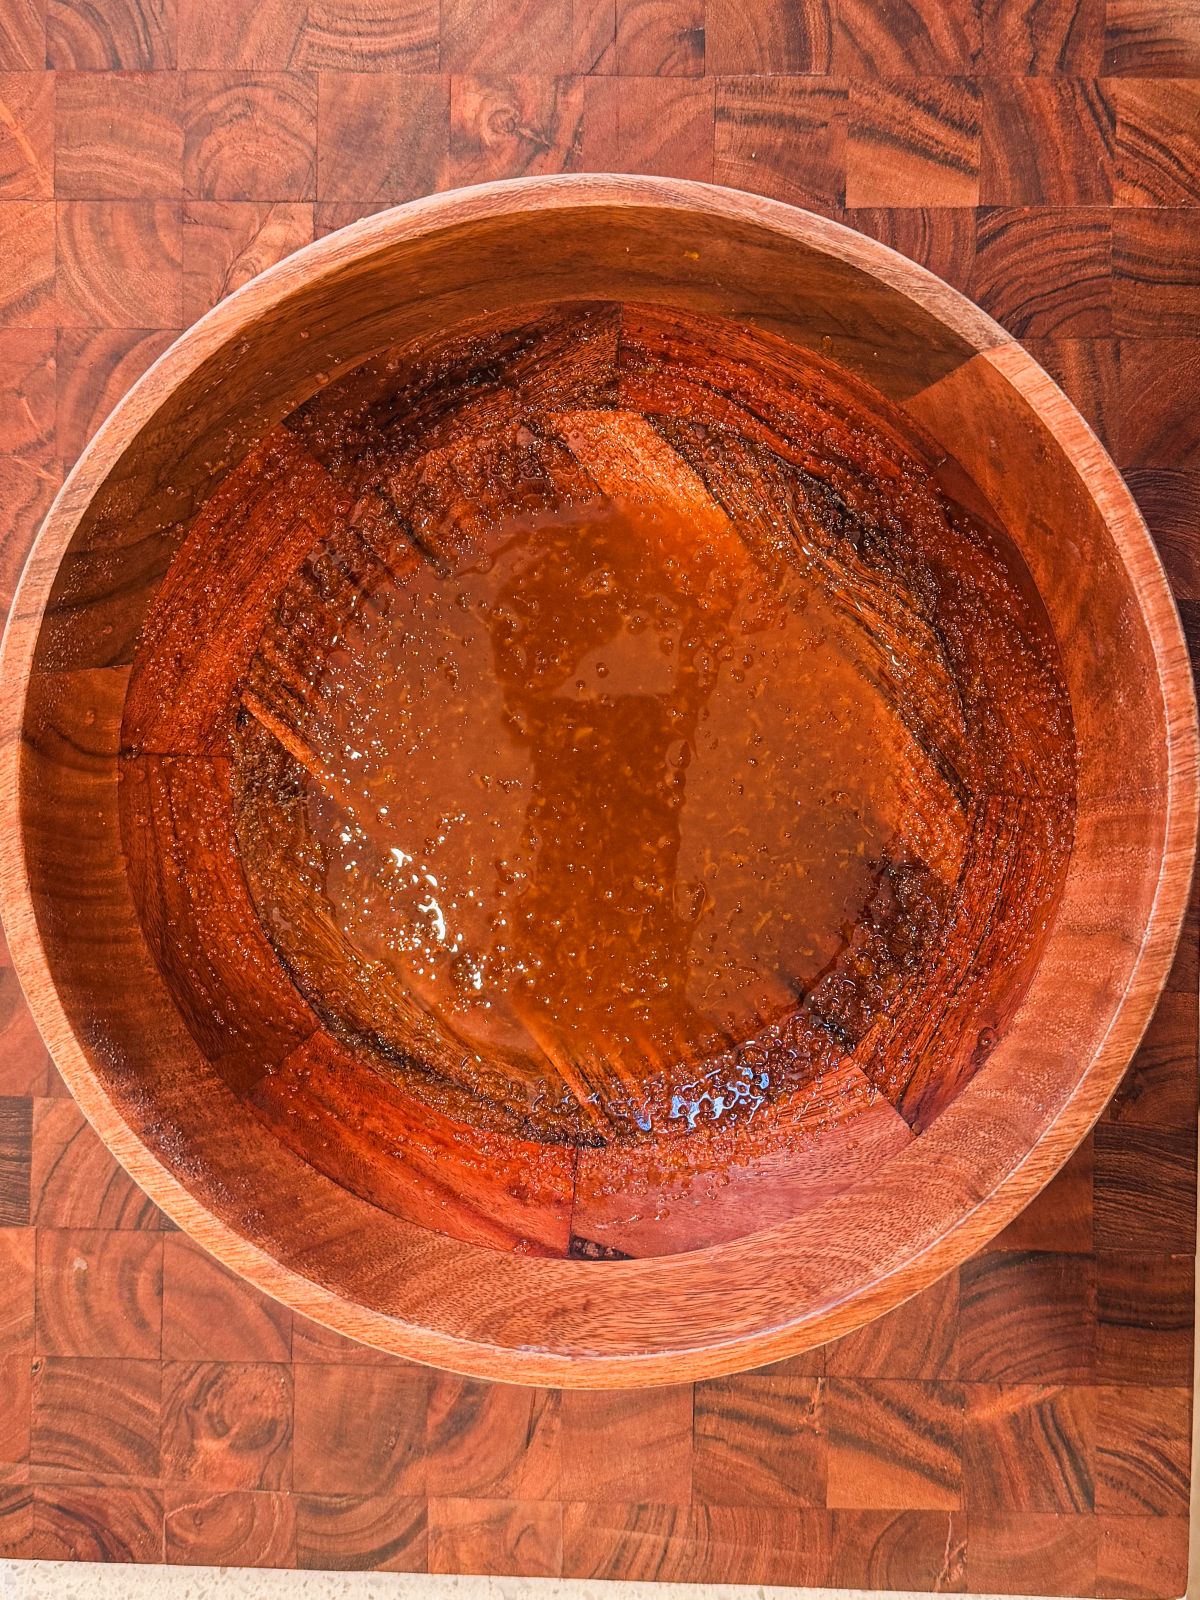
Whisk until combined.
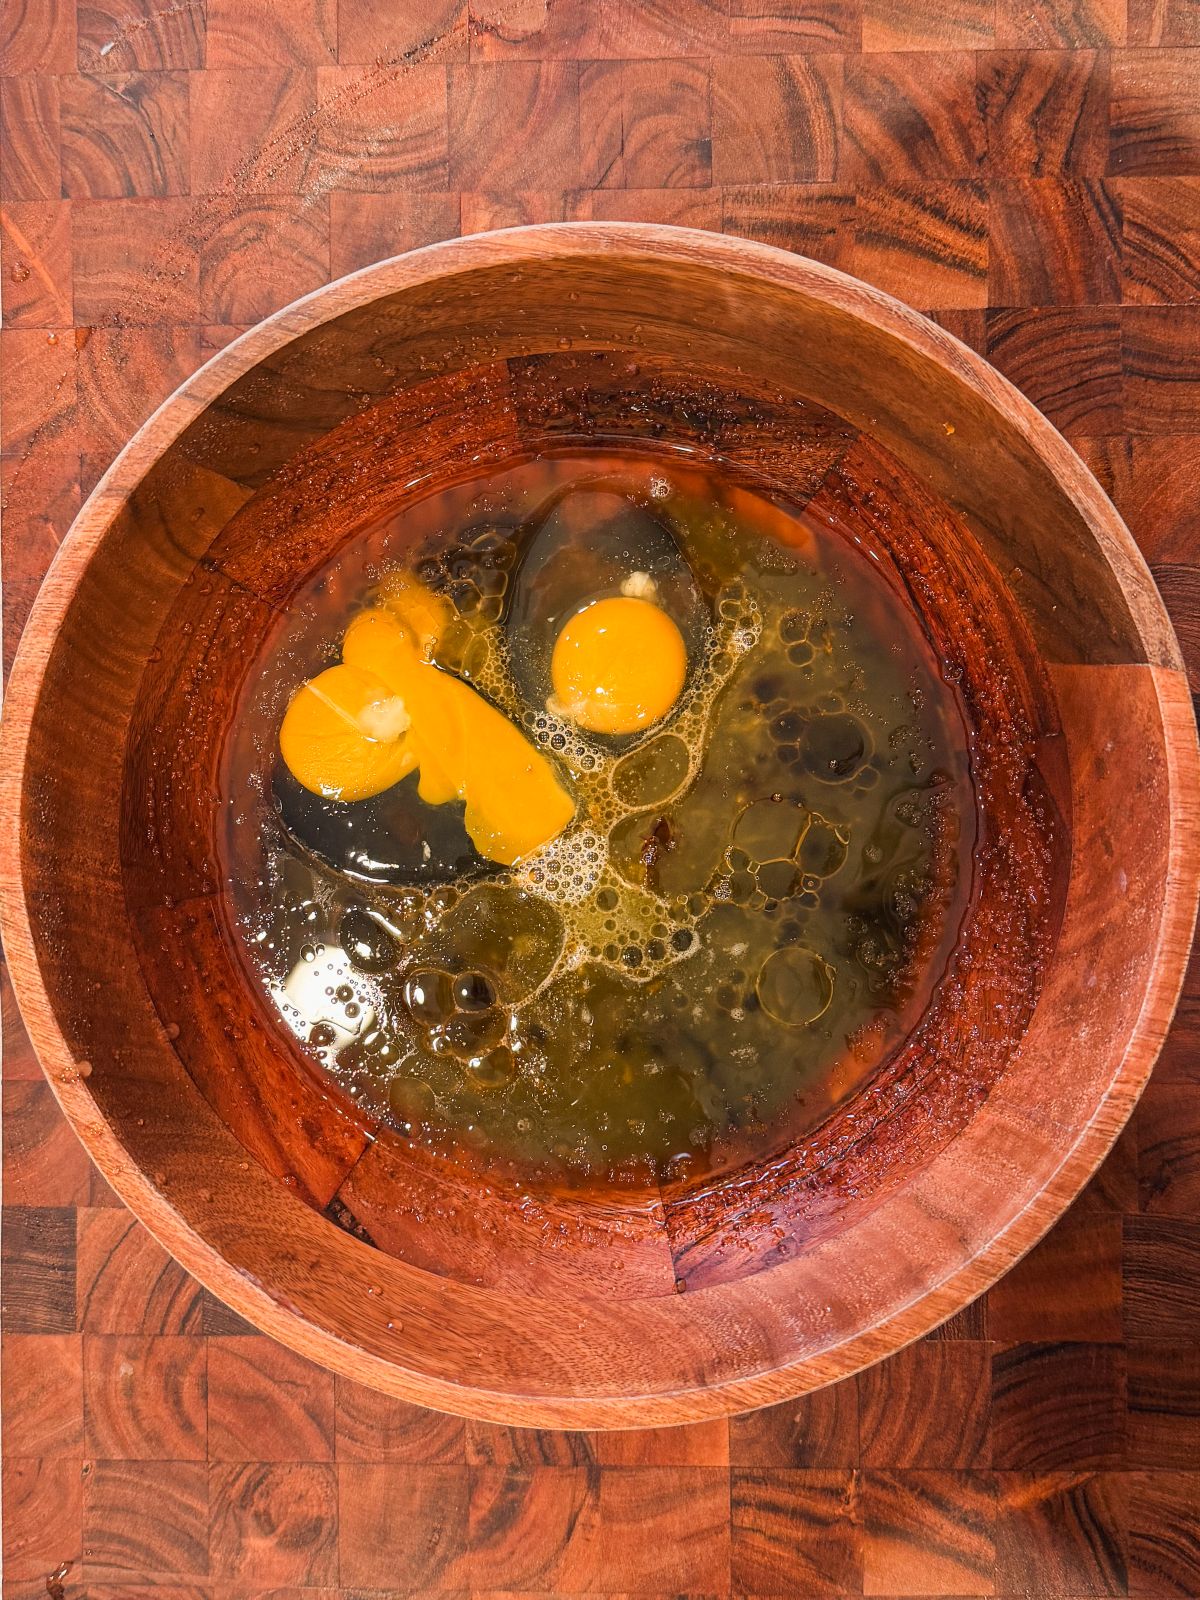
Add the eggs, molasses, and orange juice.
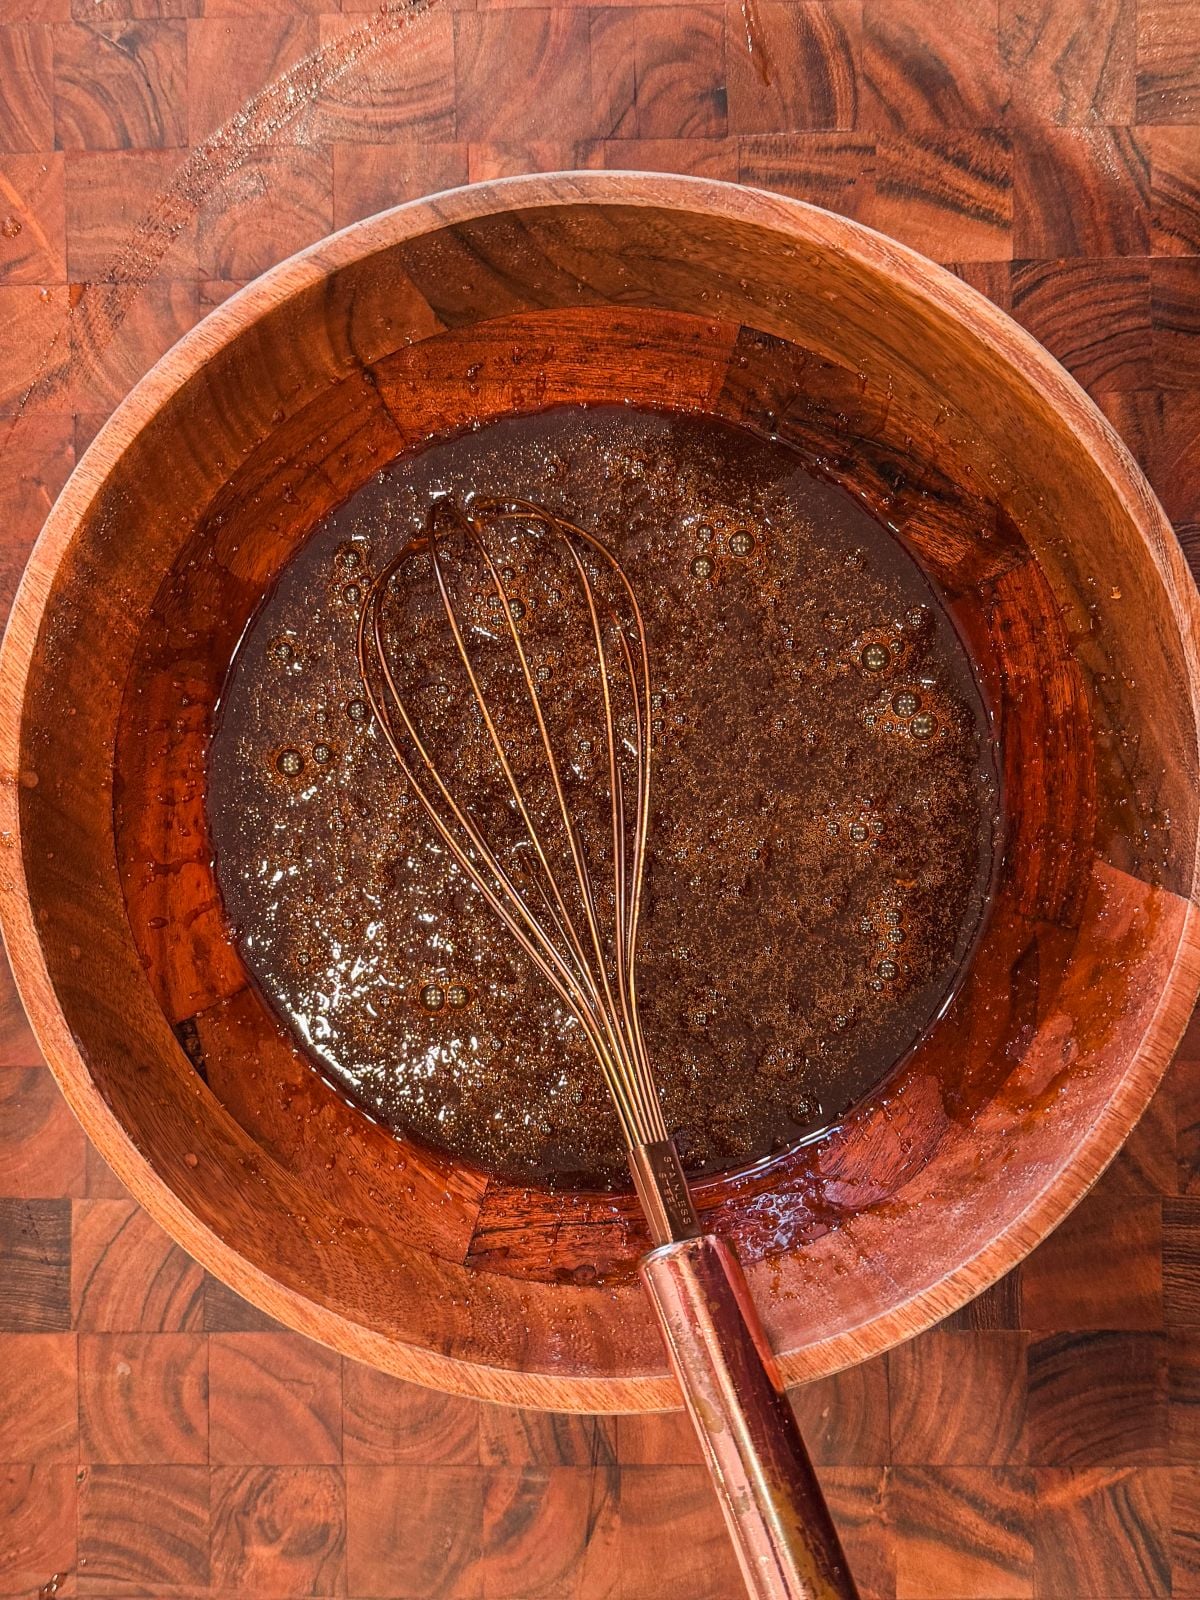
Whisk for 1-2 minutes until smooth and creamy.
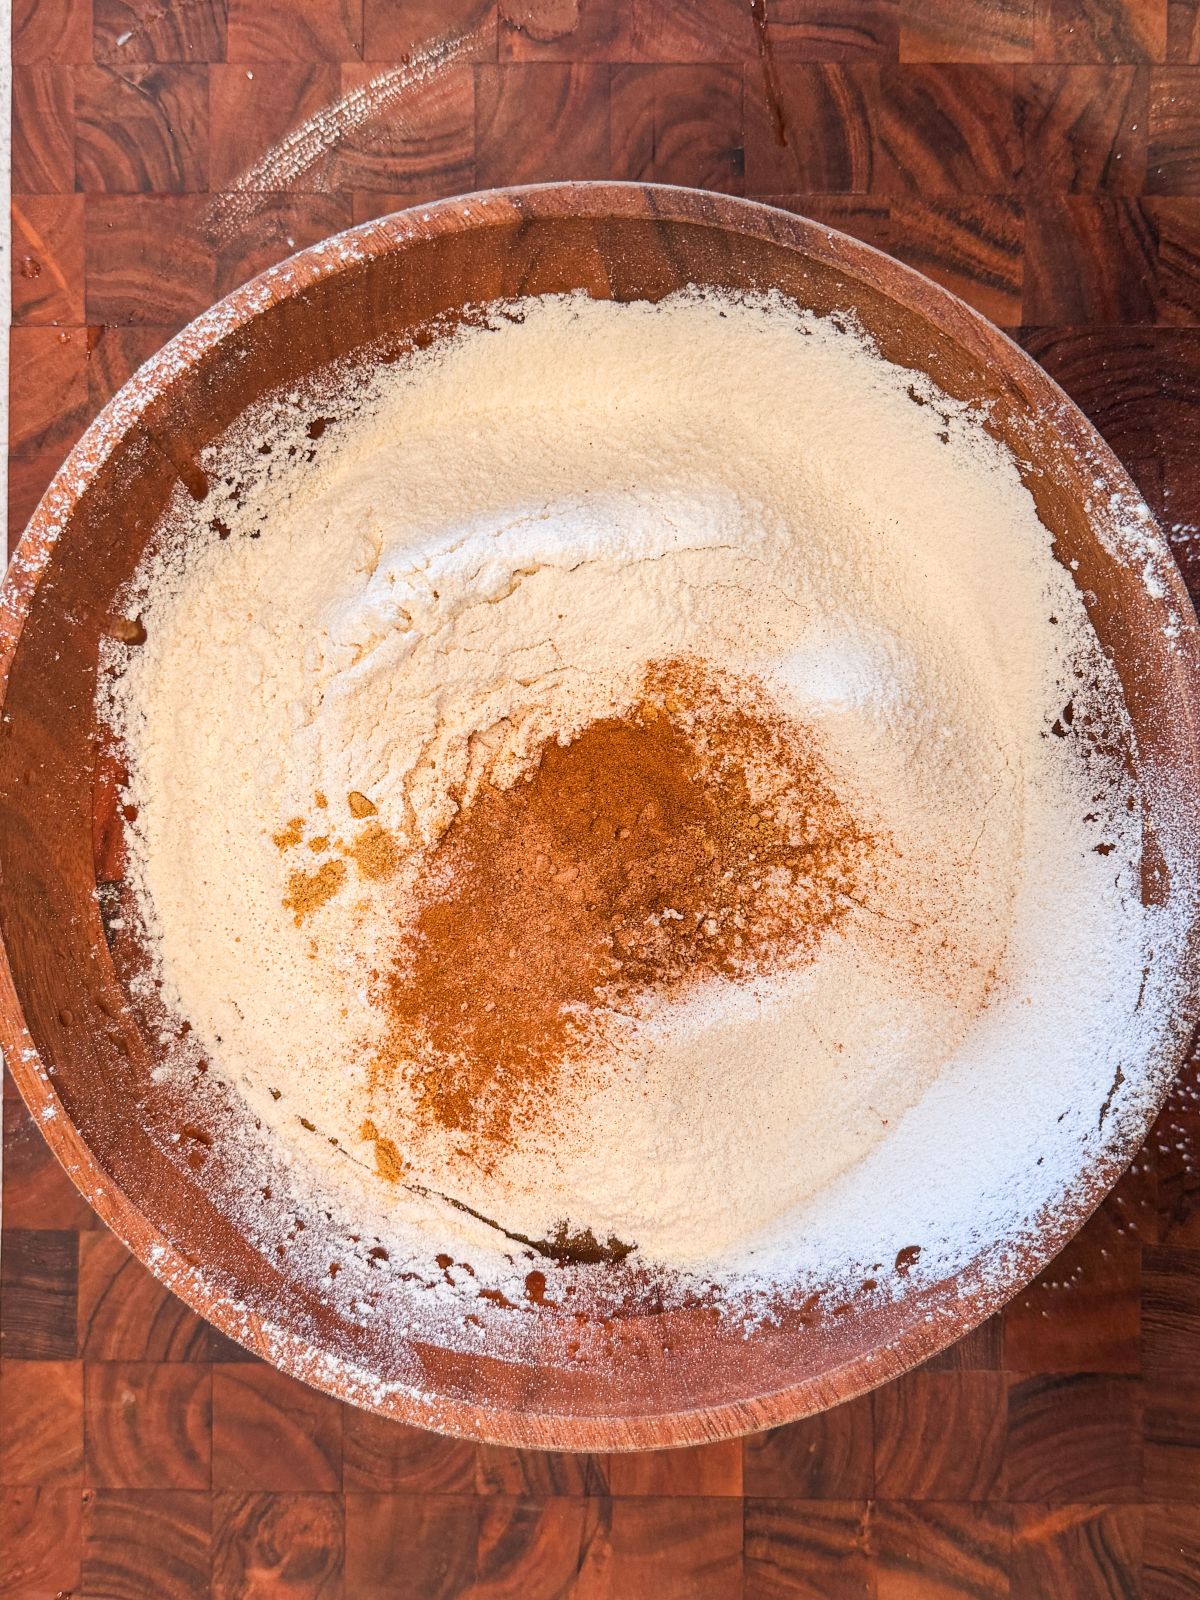
Sift in all the dry ingredients and fold to combine; take care not to overmix!
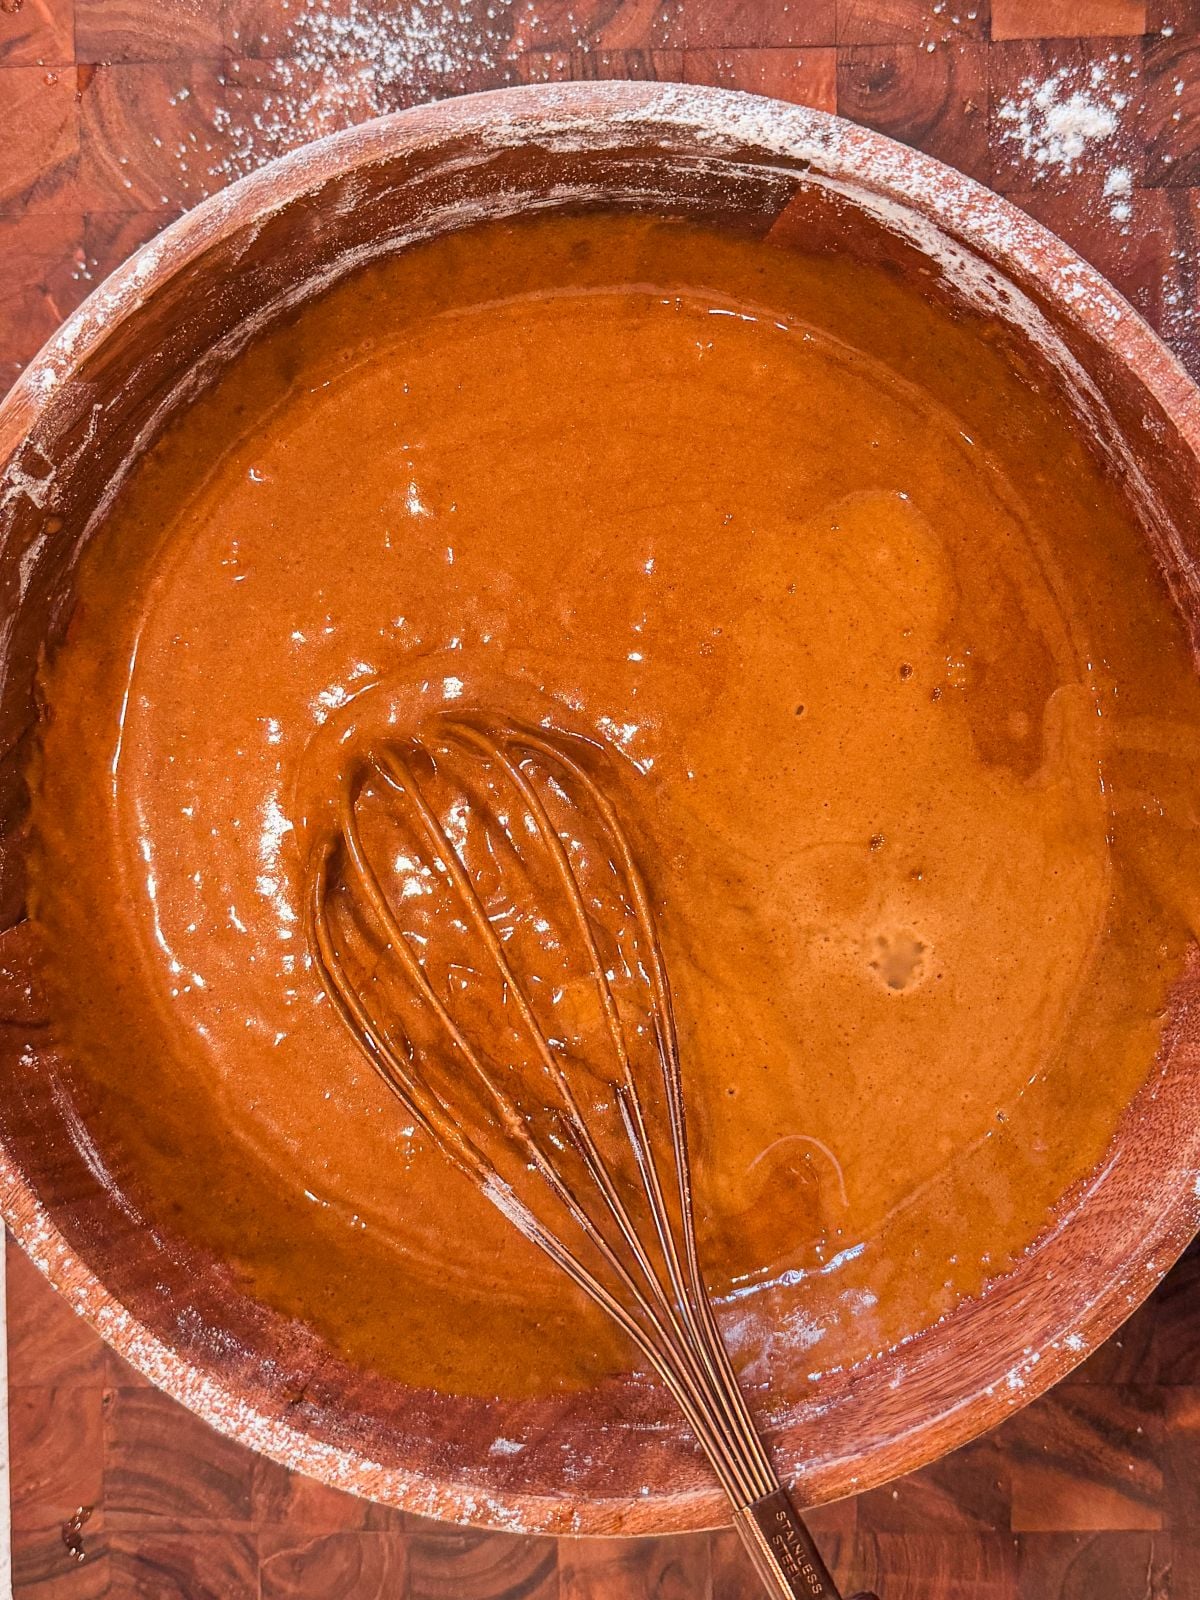
Lastly, carefully fold in hot water until just combined.
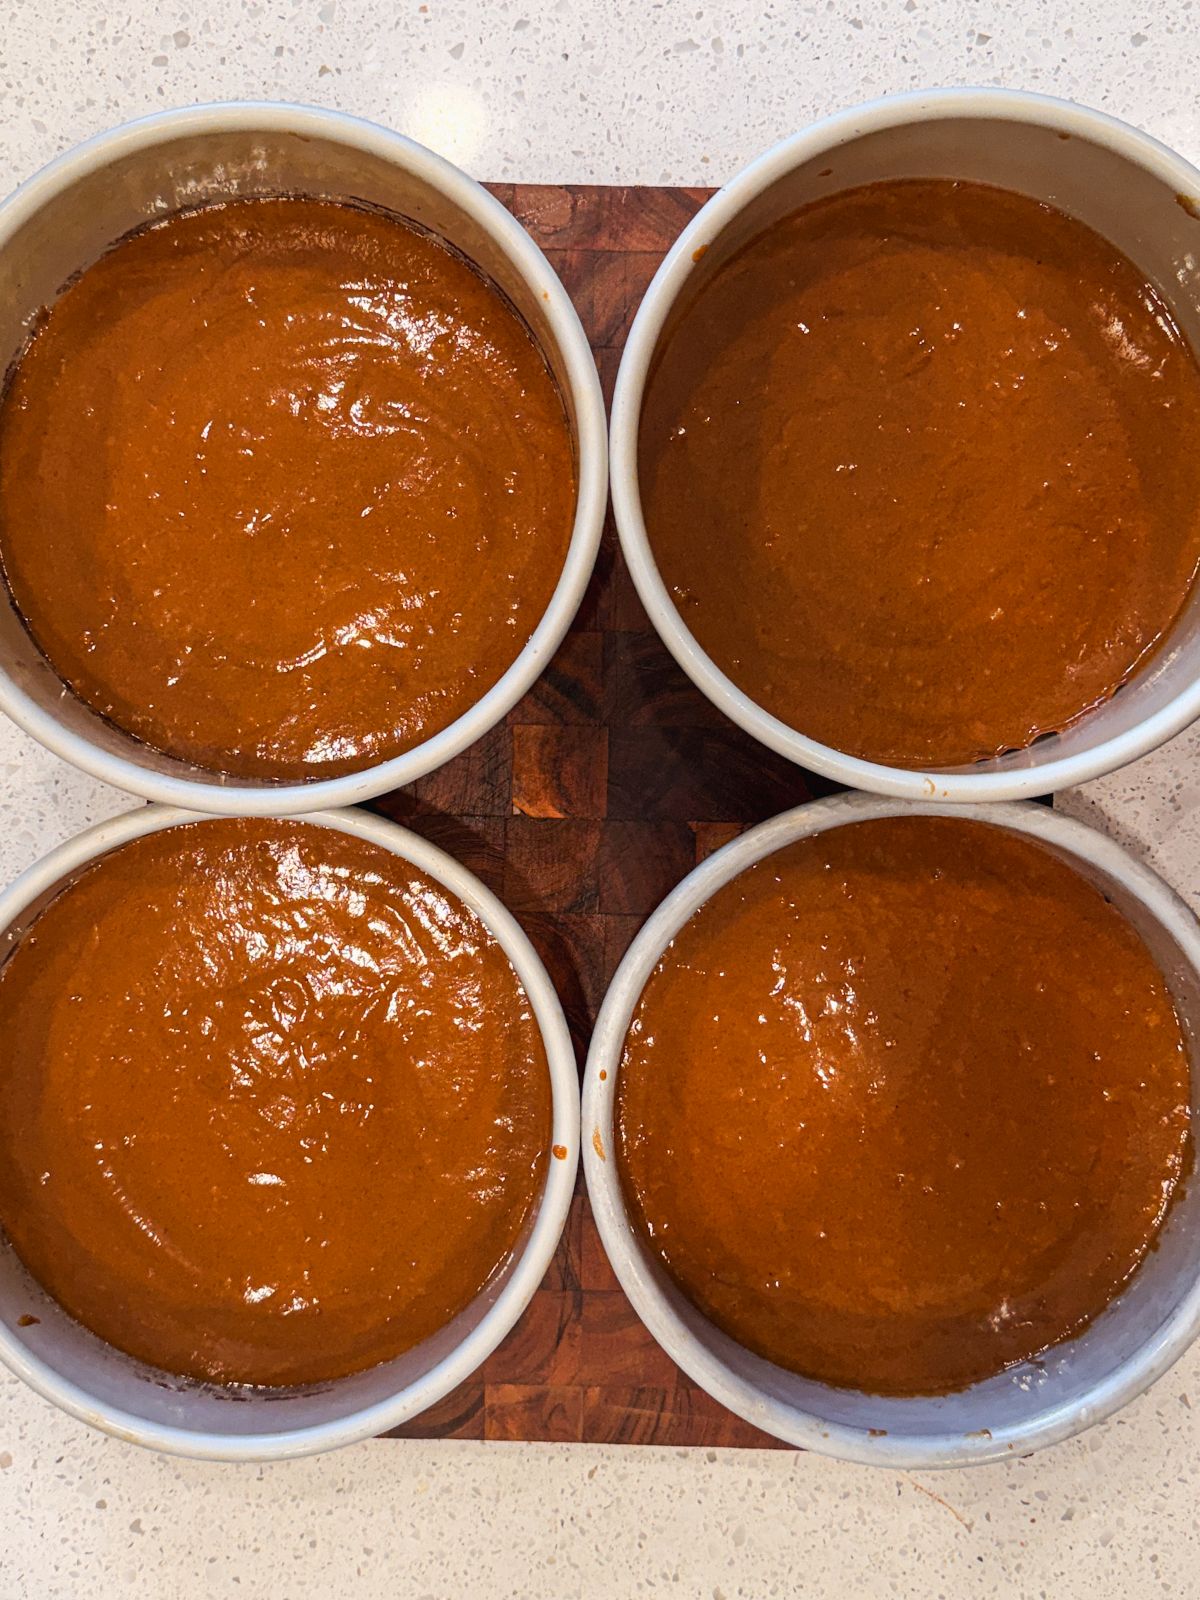
Pour the batter into 4 8" cake pans.

Bake until a toothpick inserted in the middle has light, moist crumbs on it. These cakes will bake fast! Remove from the pans and cool down.
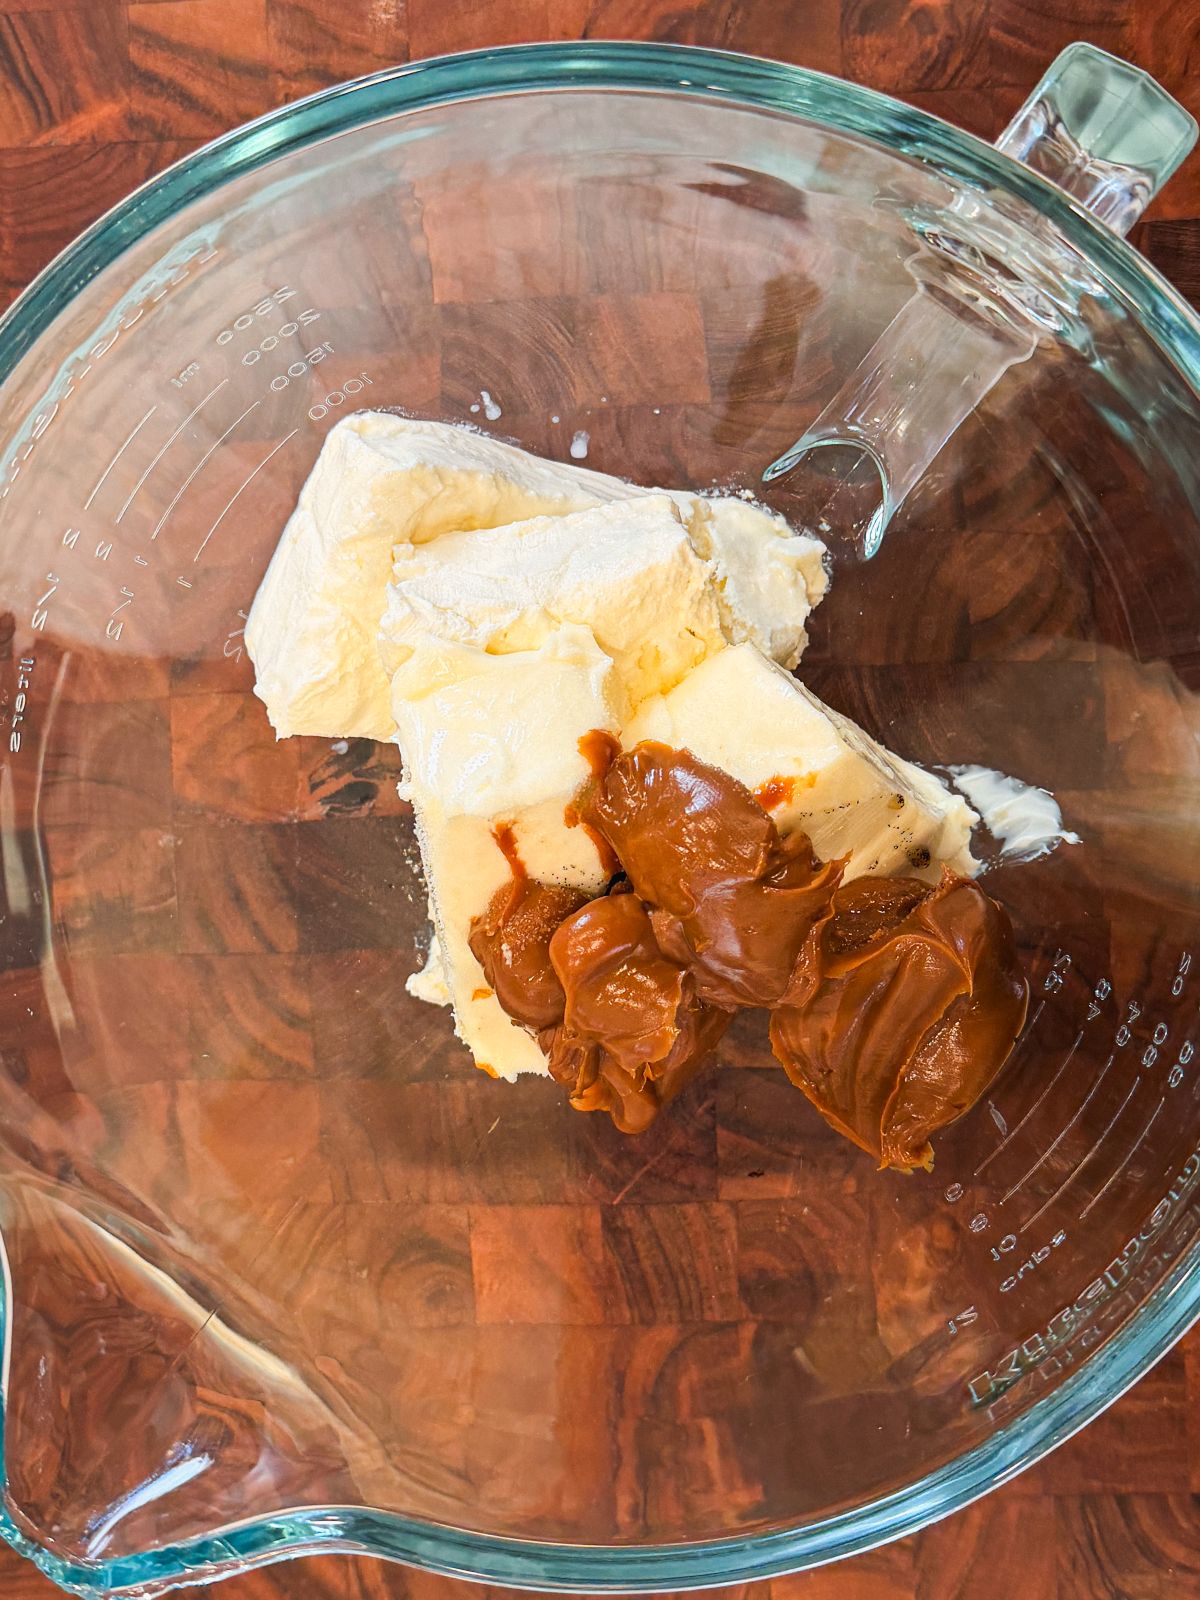
To make the frosting, start by whisking the cream cheese, butter, dulce de leche and salt until creamy.
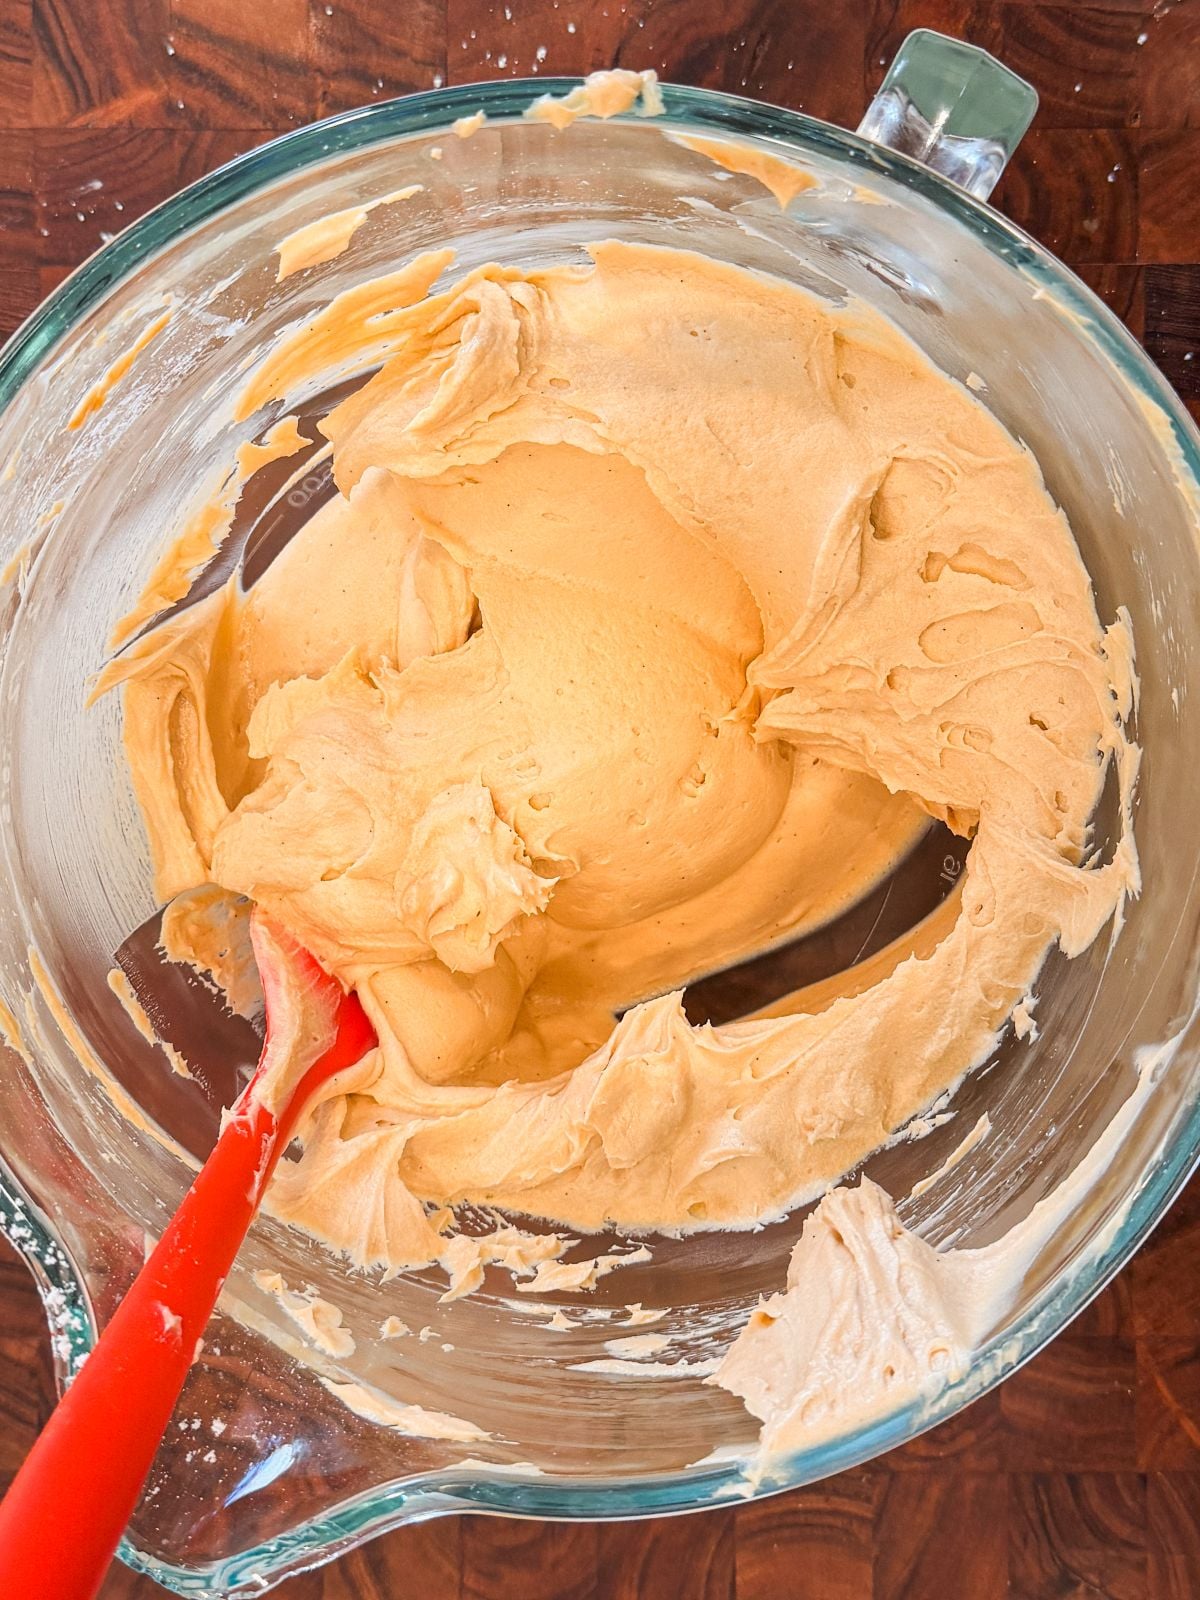
Sift in the powdered sugar and whisk until fluffy. Don't overmix, because that can cause a cream cheese frosting to become softer
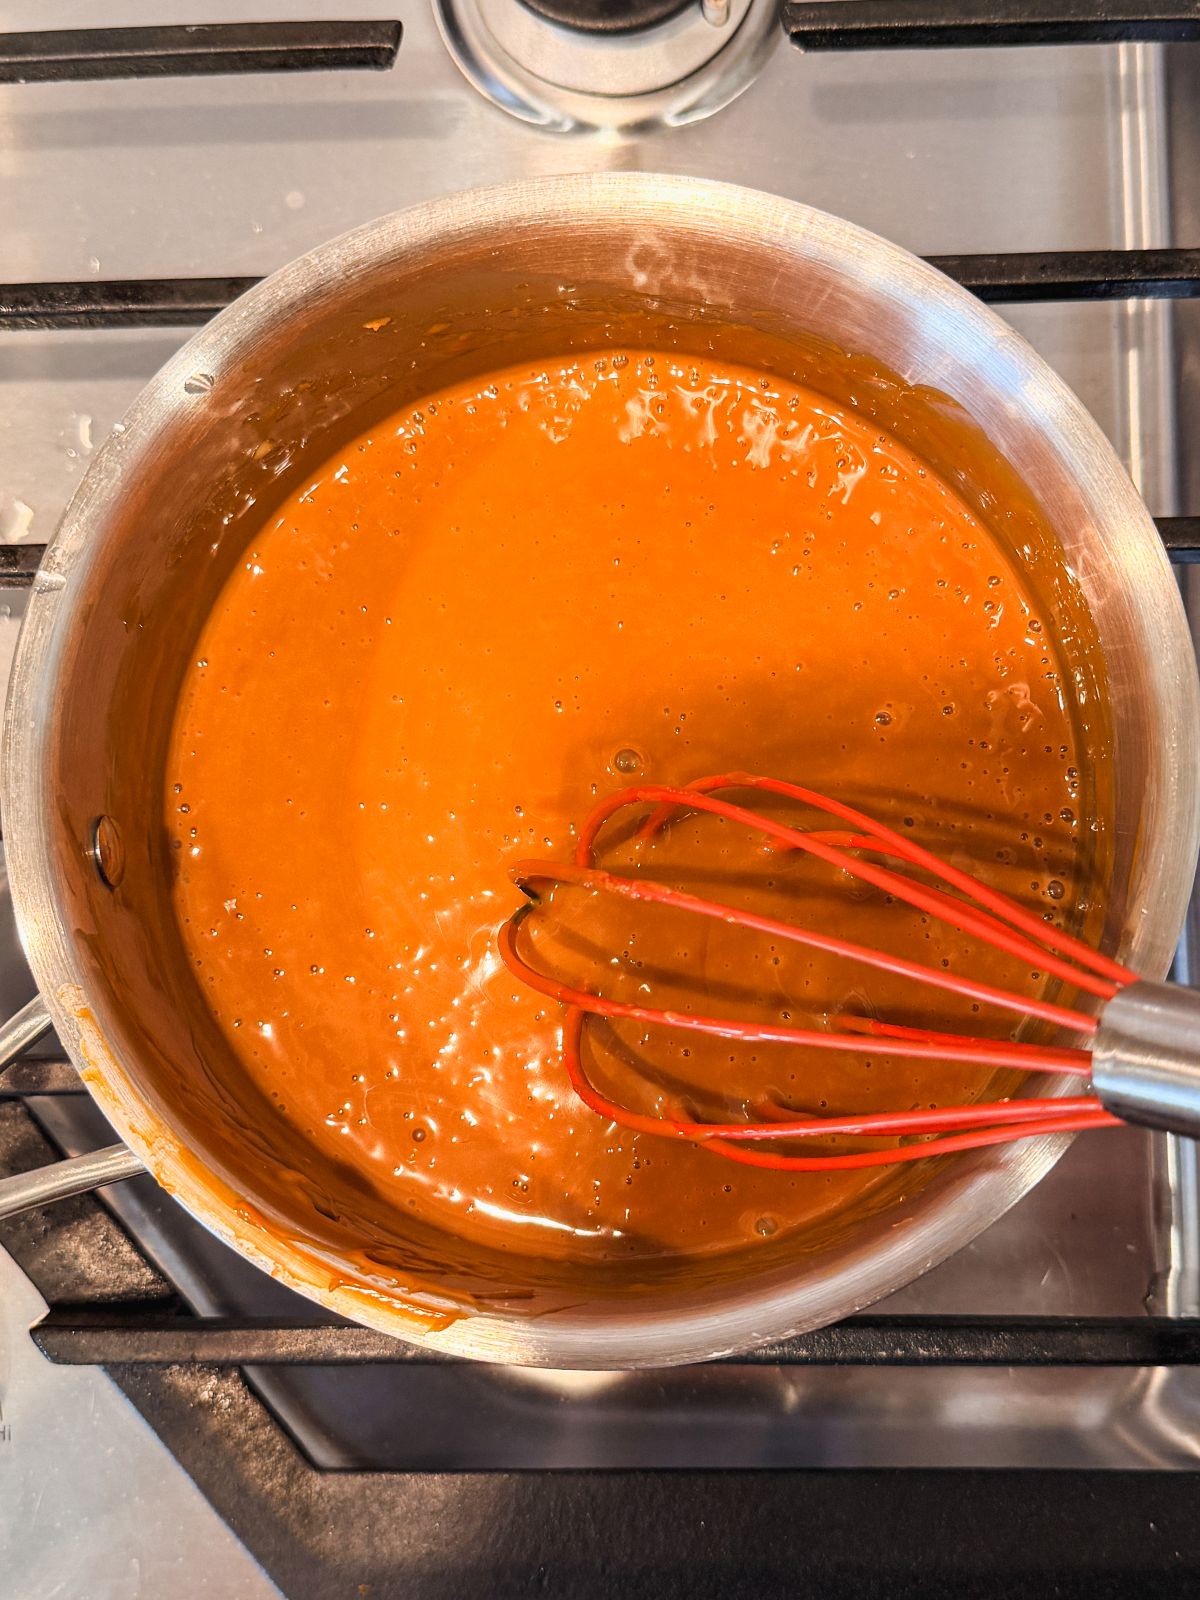
Make the dulce de leche cream by whisking the dulce de leche, heavy cream and salt on low heat until combined.
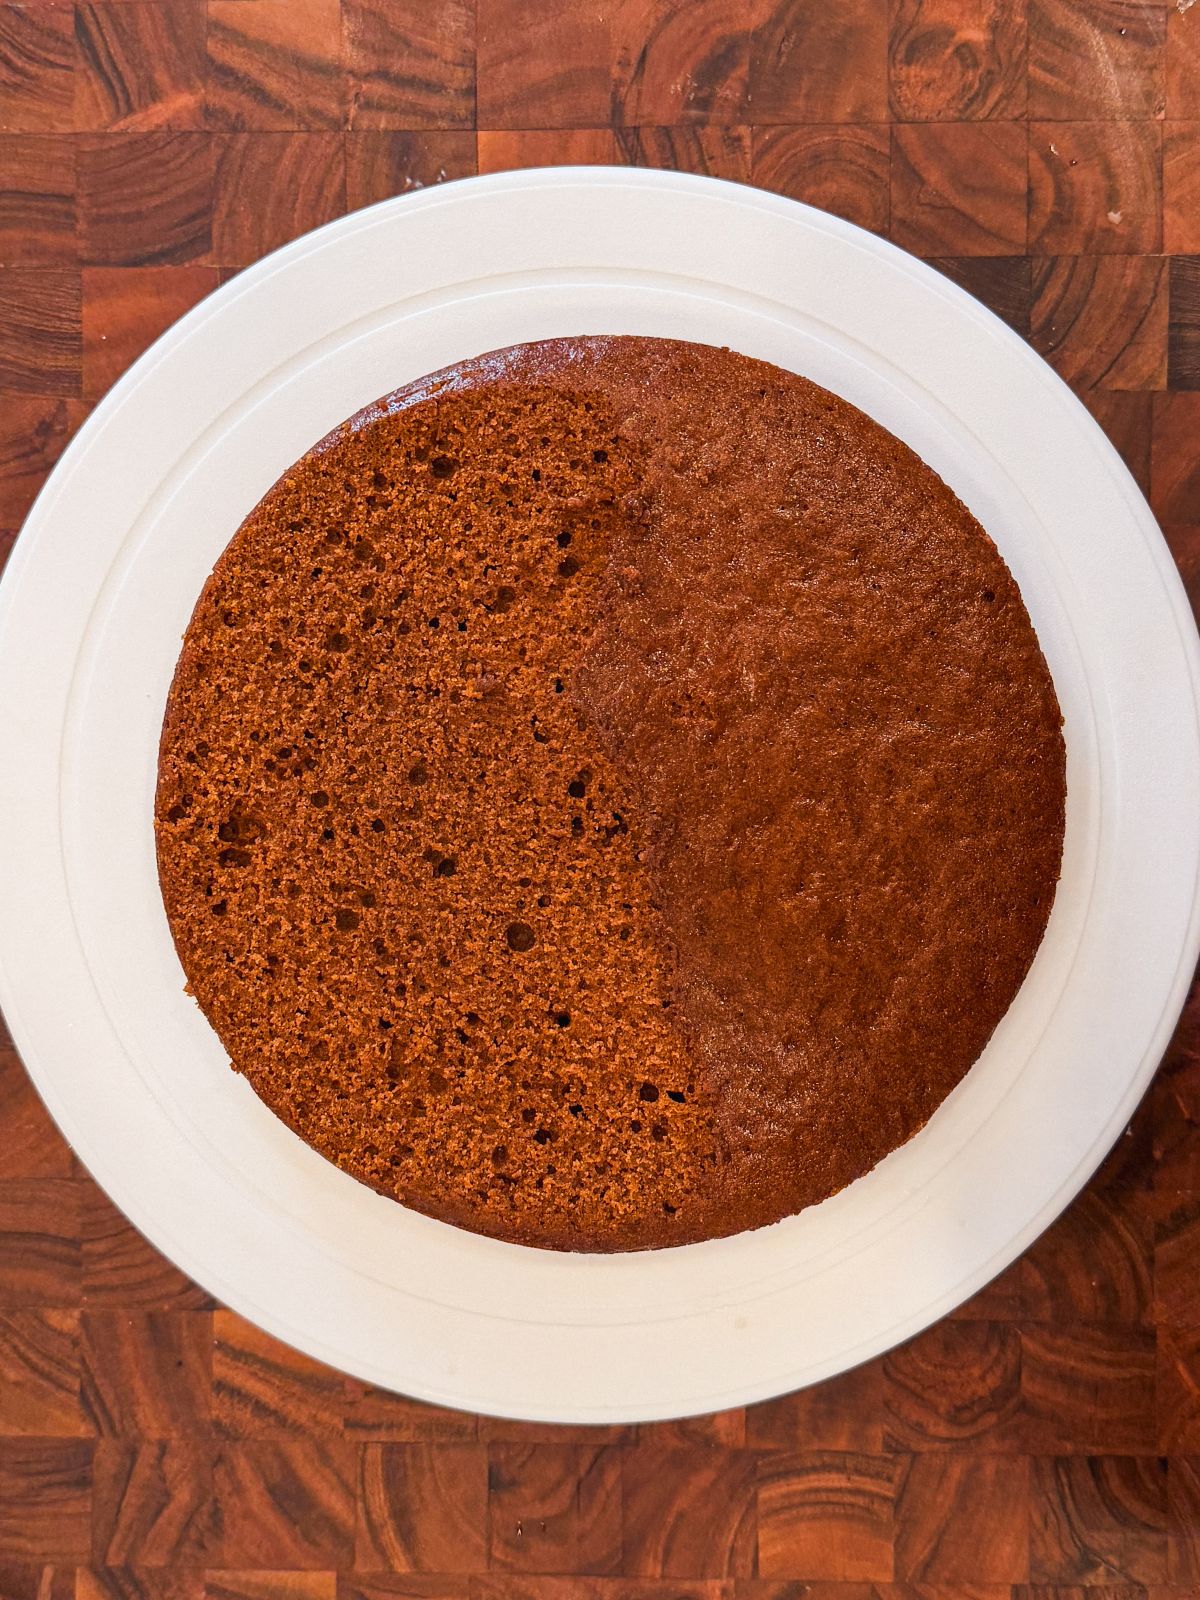
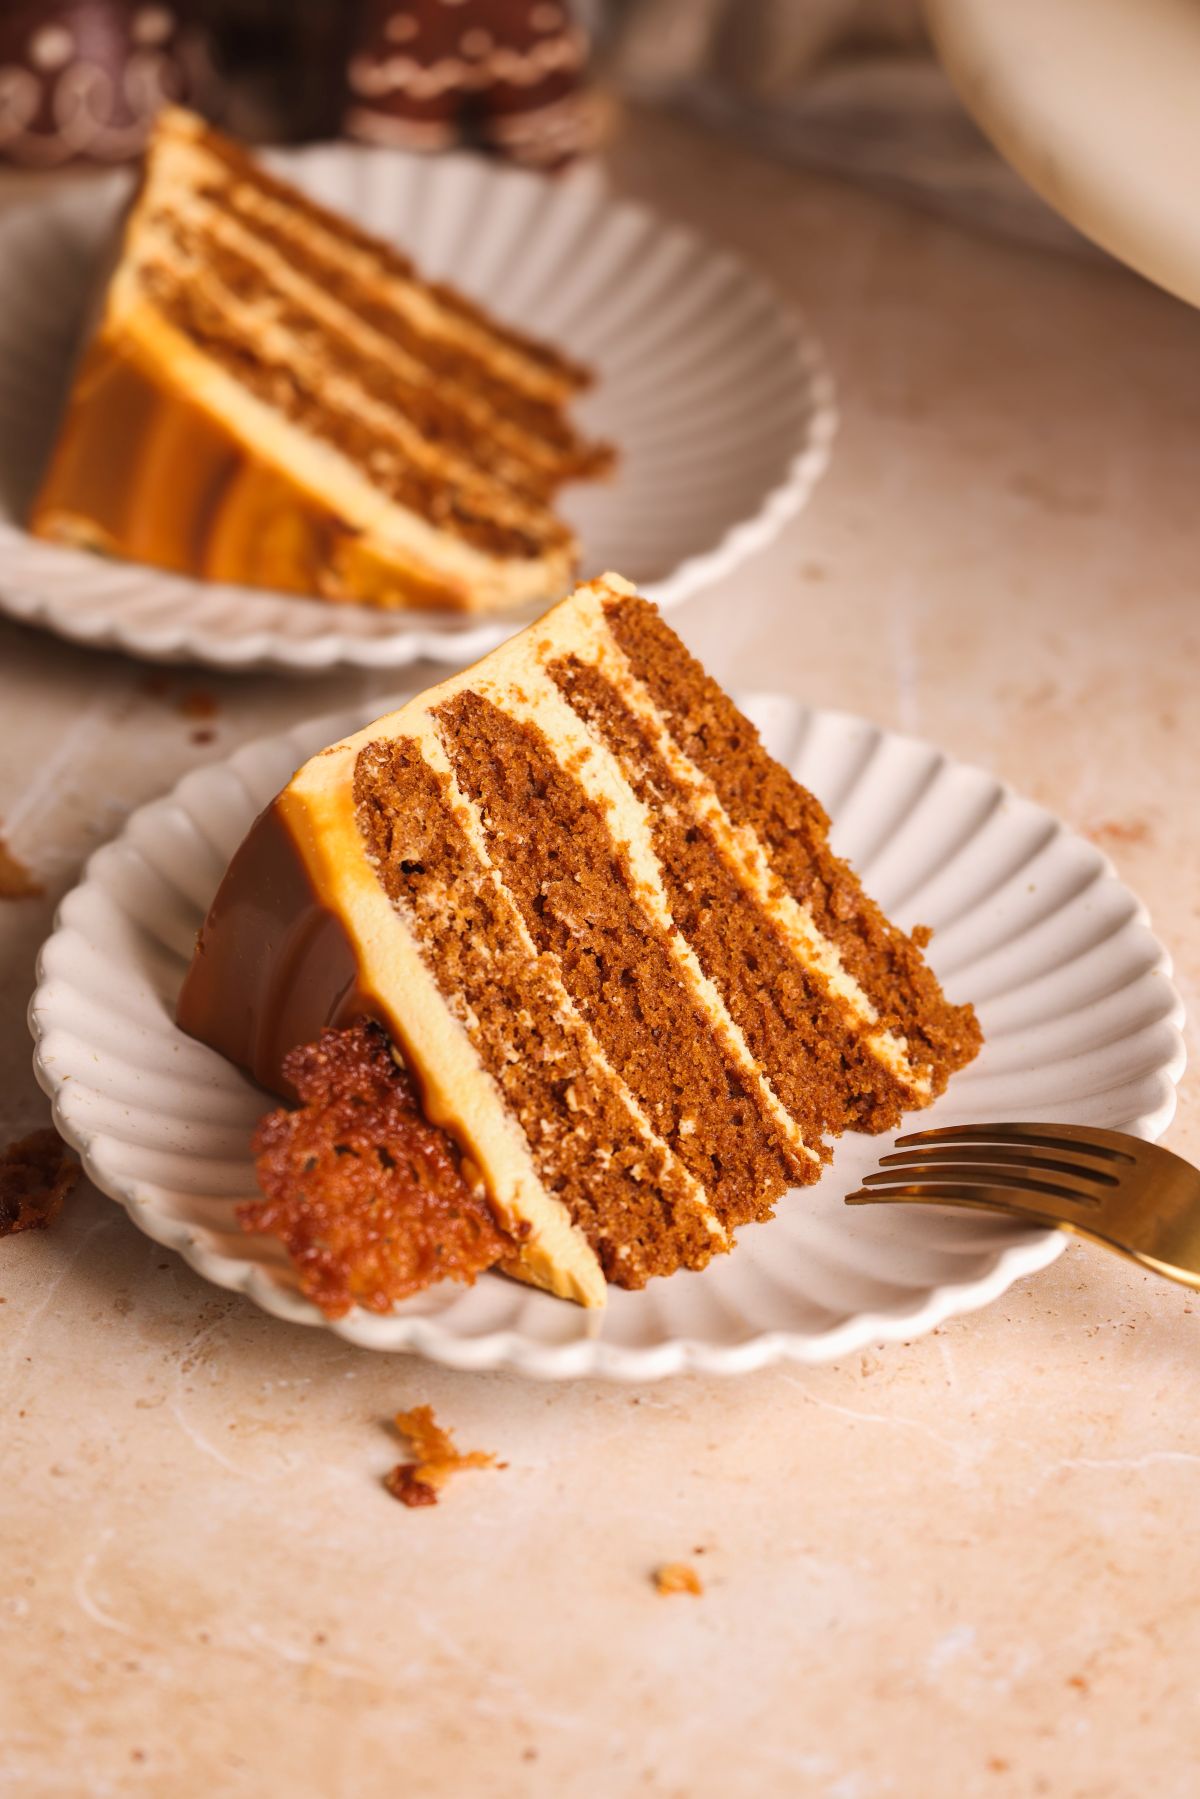
To assemble, trim off the dome from the first layer of cake.
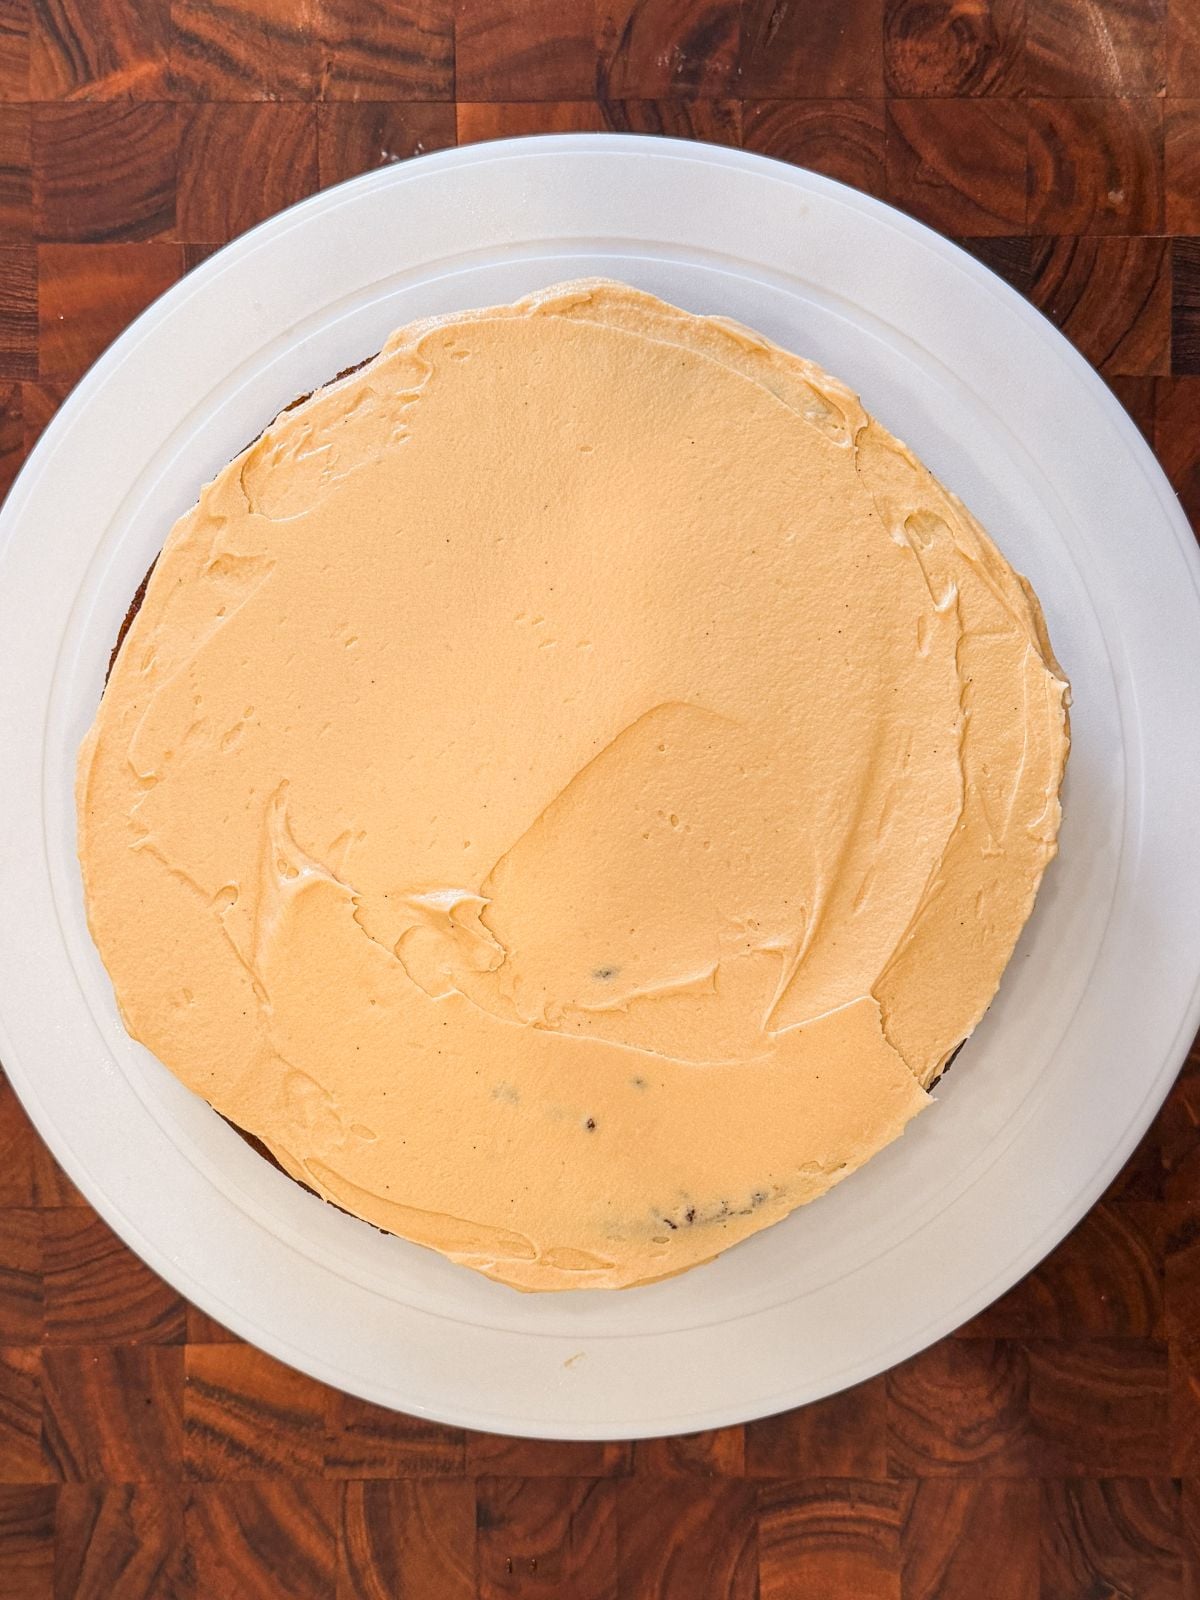
Spread an even and generous layer of the frosting.
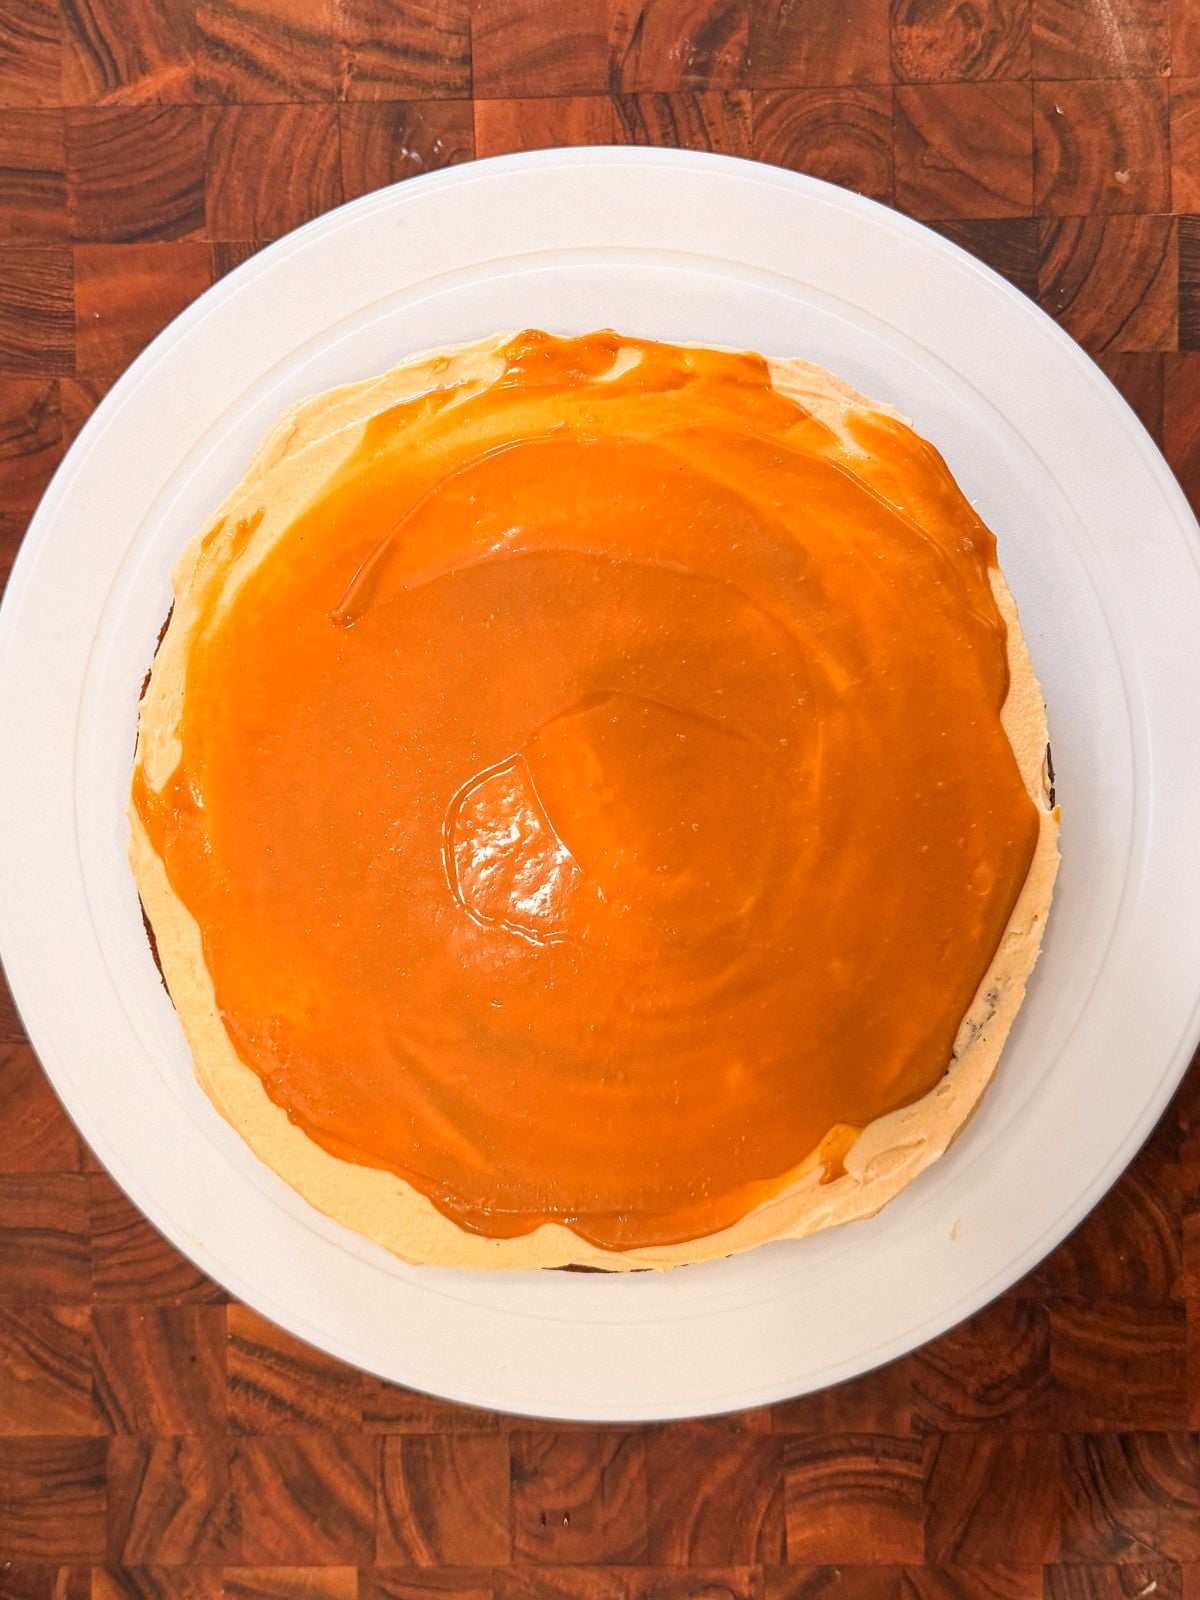
Spread on a thin layer of the dulce de leche cream. Repeat with all layers, and cover the cake with the remaining frosting.
Then decorate however your heart desires (my optional gingersnap recipe is included in the recipe card below!). Serve and enjoy!!
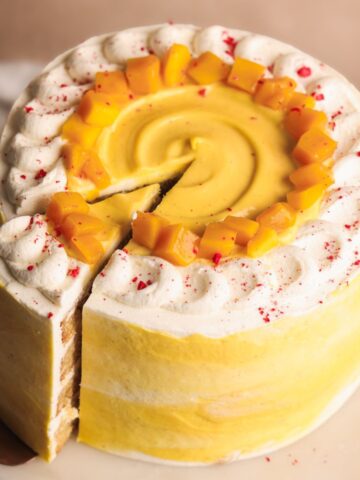
How to do a marbled frosting
The marbled frosting on this cake was actually a happy accident on Next Level Baker. I was going for a dulce de leche drip, but it was too hot and melted into the frosting. So I took a scraper and ran it over the cake, which mixed the drip with the frosting to create a beautiful marbled effect. I loved it so much, I did it on purpose this time around! Here's how you can do it:
- First, apply a crumb coat of the cream cheese frosting. This is a thin layer of frosting all over the cake that traps any crumbs. Refrigerate for 15 minutes or until firm
- Apply the rest of the frosting all over, and make it as neat as you can using an offset spatula and cake scraper
- The dulce de leche cream should be warm (not too hot!). Pour a generous amount on top of the cake, and use a spatula to quickly spread it and let it pour down the sides
- Now, working quickly, keep using the spatula and a cake scraper to smooth out the cake and apply gentle pressure. This should cause the dulce de leche cream to mix in with the frosting and create a marbled effect. You want to strike the right balance where the frosting and cream are mixed enough to create a marbled look, but not so much that they become one cohesive color. If you feel like there's not enough dulce de leche cream in any spot, you can apply some with a spatula and smooth it out
- That's it! the frosting will likely be on the softer side, so place in the fridge to allow it to firm up
If this method seems too stressful, you can also apply the dulce de leche cream more intentionally on different spots, and smooth it out.
A few tips before you make this
- PLEASE weigh your ingredients. Especially flour! It's so easy to add too much when using a measuring cup, which can easily ruin the texture of the cake
- Don't overmix the cake batter. Mix only until combined, and bake right away. Overmixing creates too much gluten, which can make the cake tough
- Don't overbake! These are thin cake layers and take only ~10 minutes to bake. Overbaking can cause them to dry out
- Let the cakes cool down before taking them out of the pan. These cakes are very soft and delicate, trying to demold them while warm will break them
- Use temperature to your advantage for the frosting. If it feels too soft, just refrigerate for 15-20 minutes and it should become firmer
- Don't add too much dulce de leche filling between the cake layers! This is a runny cream, and if you add too much, it will start to drip out and cause the layers to slip and slide. We're looking for a thin layer. If you wanna add more, you can pipe a wall of frosting around the edge of the cake first so it can hold in the cream

Soft and Moist Gingerbread Dulce De Leche Cake Recipe
- Total Time: 1 hour + cooling
- Yield: 10-12 servings
Description
An irresistible showstopper of a cake made with layers of soft and moist gingerbread orange cake, dulce de leche cream cheese frosting and dulce de leche cream filling, with a marbled effect and optional gingersnap decoration on top.
Ingredients
Gingerbread orange cake:
- ½ cup vegetable oil (110g)
- ⅓ cup brown sugar (66g)
- Zest of 1 orange
- 2 large eggs
- 1 cup unsulphered molasses (240g)
- ¼ cup freshly squeezed orange juice (60g)
- 2 ½ cups all purpose flour (325g)
- 1 ½ teaspoons baking soda
- 1 ½ teaspoon ground cinnamon
- 1 teaspoon ground ginger
- ½ teaspoon salt
- ¼ teaspoon nutmeg (optional)
- ¾ cup very hot water (180g)
Dulce de leche filling:
- ½ cup canned dulce de leche (160g)
- ⅓ cup heavy cream (80g)
- ¼ tsp salt
Dulce de leche cream cheese frosting:
- 1 cup unsalted butter, softened (226g)
- 16 oz cream cheese, room temperature (450g)
- 1 tsp vanilla
- ½ tsp salt
- ½ cup dulce de leche (160g)
- 1 ½ to 2 cups icing sugar, to taste, sifted (150g to 200g)
Ginger snaps (optional):
- ¼ cup unsalted butter (56g)
- ¼ cup granulated sugar (50g)
- 2 tbsp honey
- ⅓ cup all purpose flour (45G)
- 1 tsp ground ginger
Instructions
Gingerbread orange cake:
- Pre-heat your oven to 350F and prepare 4 8" cake pans with parchment paper (see notes if you want to use 2 pans)
- Add the oil, brown sugar and orange zest to a bowl. Whisk for 60 seconds until somewhat combined
- Add the eggs, molasses and orange juice, and whisk for 2 minutes until the mixture looks smooth and creamy
- Sift in the flour, baking soda, cinnamon, ginger, nutmeg and salt. Slowly and gently fold with a whisk until the dry ingredients are just combined and there are no more lumps of flour. Do not overmix
- Add the very hot water, and slow and carefully fold it into the rest of the batter. Stop mixing as soon as it is combined
- Divide the batter evenly between the prepared cake pans and spread evenly as needed
- Bake in the preheated oven for about 10 minutes, or until a toothpick inserted in the middle comes out with light, moist crumbs on it (no wet batter)
- Remove from the oven. Let the cakes cool in the pans for 15 minutes, then carefully remove them and place on a wire rack to completely cool down
Dulce de leche filling:
- Add the dulce de leche, cream and salt to a saucepan. Place on the stove on low heat and whisk and cook until the mixture becomes smooth and just starts to simmer. Remove from heat and let it cool down
Dulce de leche cream cheese frosting:
- Add the butter, cream cheese, dulce de leche, vanilla and salt to the bowl of your stand mixer with a paddle attachment. Whisk on medium-high speed for 1-2 minutes, scraping along the way, until the ingredients are combined and the mixture looks creamy
- Sift in 1 cup of powdered sugar and whisk on high speed for 1-2 minutes until the frosting looks fluffy. Taste, and add more icing sugar as needed. Don't overmix as that can cause the frosting to become runny.
- If the frosting is too soft, refrigerate for 15-20 minutes
Ginger snaps:
- Preheat oven to 350F (or keep it at 350F after the cakes are baked) and line a large baking sheet with parchment paper
- Add the butter, sugar and honey to a saucepan. Cook and stir on low heat until the butter has melted
- Add the flour and ground ginger, and whisk until a thick paste / batter forms. Remove from heat
- Using a tablespoon measure, place 3-4 spoons of the batter on the baking sheet, keeping a good 4-5" between each dollop. Don't make the spoons heaping
- Bake at 350F for 4-6 minutes or until the batter turns into a thin, lacy cookie that is golden brown in color. Remove from the oven and let cool for a few minutes. The cookie should become crispy. Remove, and repeat with any remaining batter until all ginger snaps are cooked
Assembly:
- Place one cake layer on a turntable and trim off any dome using a sharp serrated knife
- Spread a thick layer of the frosting evenly on top of the cake
- Add a thin layer of the dulce de leche cream filling (about 2 tbsp) and spread it evenly on top of the frosting
- Repeat until all cake layers are done. Cover the cake in a thin layer of the cream cheese frosting, and refrigerate until firm. This is the crumb coat which will trap any crumbs so they don't show on top of the cake. Then cover with the rest of the frosting and make it as even as you can
- To decorate, you can make a marbled effect on top of the cake with the remaining dulce de leche cream filling - see notes on how to do this in the blog post above. You can also use the cream to make a drip on top of the cake. If using the ginger snaps, break them into shards and add them on top of the cake or on the sides
- Serve and enjoy!
Video Tutorial:
Notes
- Using 2 cake pans instead of 4: If you only have 2 8" cake pans, you can divide the batter evenly between them and bake the cake for about ~22 minutes or until a toothpick inserted in the middle comes out with moist crumbs and no wet batter. When baking more batter in one pan, cakes dome more, so you will have to trim off more of the dome. Then, once cooled down, divide each cake layer into 2 layers using a sharp serrated knife so you can still enjoy a 4 layered cake as pictured in this recipe
- Make ahead and storage: This cake keeps well in the fridge for up to 5 days; just make sure it is properly covered in cling wrap so it doesn't dry out, and don't apply gingersnaps until you're ready to serve. Once served, store any leftovers in an airtight container in the fridge for up to 3 days
- Prep Time: 50 minutes
- Cook Time: 10 minutes
- Category: Cakes
- Cuisine: American
Kirah says
Hi Zoha
Can this be made as a 2 layered cake only? I want to try it out but I feel like 4 layers is just stress if not for an event lol
Rachel says
I am definitely making this recipe. It sounds delicious. I have a question about the link to the canned dulce de leche in section of this post titled "4 easy components of this cake". It links to La Lechera sweetened condensed milk. Should it link to the La Lechera dulce de leche? I just want to make sure I use the correct ingredient. I am loving Next Level Baker. It is a great competition.
Sai says
Watched the show and made this, awesome!
FM says
Thanks! Turned out to be an excellent cake!
Nadia says
Made those for Christmas Eve dinner. It was a huge hit! Thank you!