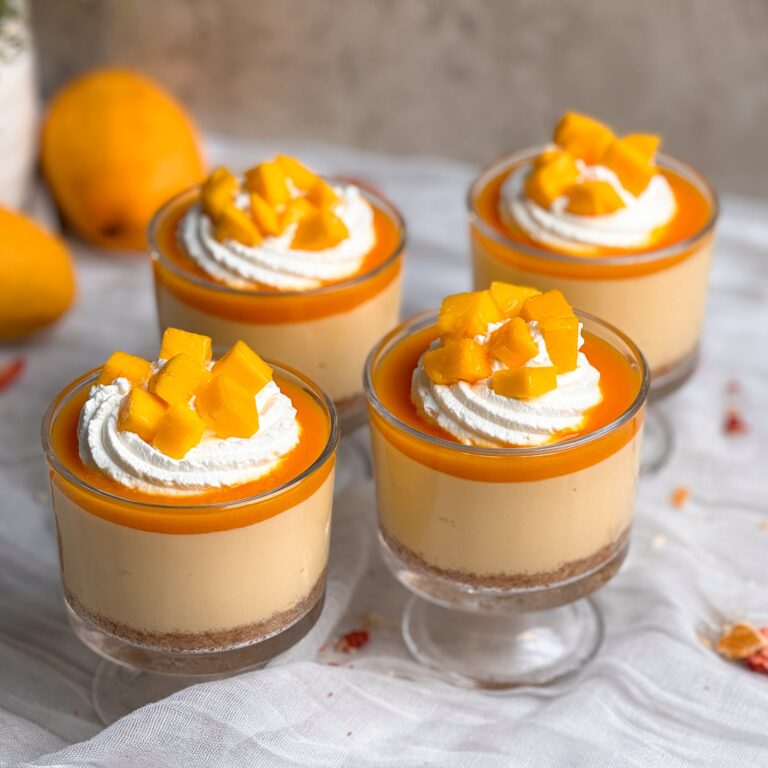
NO BAKE MANGO CHEESECAKE CUPS RECIPE
Mango Ice Cream meets cheesecake in these creamy, delicious and very easy to make No Bake Mango Cheesecake Cups!
Yield:6-8 dessert cups
- Prep Time:
- 30 mins
- Chilling Time:
- 6 hrs
- Total Time:
- 6 hrs, 30 mins
Ingredients
Crust:
- 150g Nilla wafers (about 40 wafers)
- 40g unsalted butter, melted (3 tbsp) *see notes
Mango cheesecake filling:
- 2 tbsp cold water + 2 tsp gelatin powder *see notes
- 2 blocks room temperature cream cheese (16 oz or 450g)
- 1/2 tsp vanilla
- 2-4 tbsp sugar (to taste, depending on sweetness of mangoes)
- 3/4 cup mango pulp, strained (170g) *see notes
- 1/2 cup heavy cream, chilled (120g)
Decoration:
- 3/4 cup mango pulp (170g)
- 1/2 cup heavy cream, whipped
- 1-2 mangoes, chopped into small cubes
Instructions
Crust:
- Blitz the Nilla wafers in your food processor until they form a fine crumb. Add the melted butter and gently mix
- Divide the crumbs evenly between the dessert cups. Lightly press them down using the bottom of a thinner glass. You don’t want the crust to be packed too tightly, as that can make it hard to break it with a spoon when eating out of a dessert cup
- Place the cups in the fridge while you work on the filling
Mango cheesecake filling:
- Add 2 tbsp cold water to a small bowl or a glass, and sprinkle over 2 tsp of gelatin powder. Place in the fridge for 5-10 minutes while you work on the filling
- Add the cream cheese, sugar and vanilla to a large bowl. Use an electric hand mixer to whisk on medium speed for 2-3 minutes until the mixture is creamy, making sure to scrape the edges and bottom of the bowl with a rubber spatula halfway through
- Strain in the mango pulp and whisk again until just combined. Do not overmix
- Remove the gelatin from the fridge and stir. It should be clumpy / firm. Microwave it for ~10-15 seconds until it warms up and the gelatin dissolves in the water
- Add the dissolved gelatin to the cheesecake filling and whisk on low speed until just combined
- In a separate bowl, add the chilled heavy cream. Whisk on high speed until the cream reaches stiff peaks
- Add the whipped cream to the cheesecake filling, and use a rubber spatula to gently fold it in until just combined. At this point, you should have a light and fluffy cheesecake batter
- Divide the batter evenly between the cups with the crust inside, and tap them so the filling spreads out evenly
- Place in the fridge overnight to set (at least 6 hours recommended)
Decoration:
- When you are ready to serve, add 1-2 tbsp of mango pulp on top of each cheesecake cup, and tilt the cups to spread it out
- Whip cold heavy cream until it forms stiff peaks. Transfer to a piping bag with any piping tip you like, and pipe onto the cheesecake cups
- Cut a mango into small cubes and place them on top of the cups
- Serve and enjoy!
Notes
- Butter: You can omit the butter in the crust and turn it into a crumb instead. If using a crumb, I recommend doubling the amount of Nilla wafers, and adding 2 layers of the crushed biscuits and 2 layers of the cheesecake filling in each dessert cup. This will make more of a mango cheesecake parfait, which is also very delicious!
- Gelatin: 2 tsp of gelatin bloomed in 2 tbsp water result in a soft set texture instead of a firm set texture in these cheesecake cups. You can skip the gelatin but the result will be a creamy filling. If you want a fully set filling, try doubling the amount of gelatin and water (although I don’t recommend this)
- If you have good fresh mangoes, you can make your own mango pulp by blending the flesh and straining. Otherwise, canned Kesar mango pulp works great
- Read the blog post above for notes on the texture of this cheesecake, customizing the recipe, and frequently asked questions