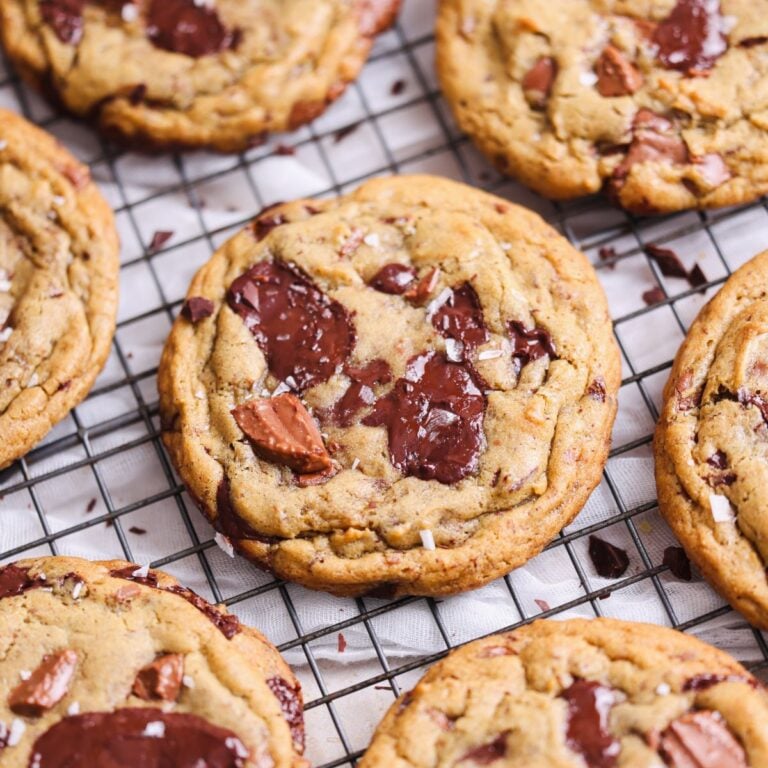
Thick & Gooey Brown Butter Cookies
These brown butter chocolate chip cookies have a deep nutty, toffee flavor from my unique method of toasting the sugars in butter!
Yield:10 cookies
- Prep Time:
- 25 mins
- Cook Time:
- 10 mins
- Chilling Time:
- 2 hrs
- Total Time:
- 2 hrs, 35 mins
Ingredients
- 10 tbsp unsalted butter (140g)
- 1/2 cup packed light brown sugar (100g)
- 1/4 cup white granulated sugar (50g)
- 1 large egg, cold
- 1 egg yolk, cold
- 1 tsp vanilla bean paste
- 1 tsp instant coffee dissolved in 1 tsp hot water
- 1 1/3 cup all purpose flour (170g)
- 3/4 tsp salt, plus optional flaky sea salt to sprinkle on top
- 1/2 tsp baking powder
- 1/4 tsp baking soda
- 4 oz dark chocolate, chopped (113g)
- 4 oz milk chocolate, chopped (113g)
Instructions
- Place the butter in a non-stick pan and melt it on medium-low heat. Keep stirring for a few minutes until the butter starts to look brown and develops a caramel-y nutty aroma. It will become bubbly and frothy first, but as it gets closer to browning, it will stop spluttering as much.
- Turn the heat all the way to the lowest setting, and add the brown and white sugars. Whisk on the lowest flame for 90 seconds, then remove from the heat. This step toasts the sugars and starts breaking them down for a deeper flavor. You are not trying to caramelize or dissolve the sugars, so don’t worry about any visual changes and just follow the time. The mixture may look grainy depending on your butter, don’t worry and remove from the heat, as cooking too long can lead to crystallization!
- Cool the mixture for 5-10 minutes. It should be warm, but not hot anymore
- Add the egg and yolk, along with the vanilla and instant coffee dissolved in water. Whisk for 1-2 minutes until the mixture becomes very smooth and creamy like caramel. If you see any clumps of sugar, press them down with the back of a spoon and they should mix in.
- Sift all the dry ingredients into a separate bowl. Add the chopped chocolate and mix everything together. I like to reserve some chocolate to press on top of the balls after shaping
- Make sure the wet ingredients aren’t hot (they shouldn’t be). Add the dry ingredients to the wet in 2 batches and fold with a rubber spatula until just combined. Do not over-mix!
- Use a 2 tbsp cookie scoop to divide the dough into 10 balls (if the dough feels a bit too runny to scoop, refrigerate for 10 min first). Don’t apply pressure onto the balls, just gently pull them together. Each ball should be 65-70g
- Place the cookie balls onto a plate or baking sheet, and add a few chocolate chunks on top (you can add more chocolate or use the reserved chocolate from earlier)
- Refrigerate for at least 2 hours, but ideally overnight for best results. They really get better with time.
- Prepare 2 cookie sheets with parchment paper. It is best to use lighter colored cookie sheets.
- Pre-heat oven to 375F (conventional / no fan) for cookies you’ve chilled for 2 hours, and 365F (conventional/no fan) for cookies chilled overnight or longer.
- Transfer the balls to the sheets, keeping at least 3″ between them. Sprinkle with the optional flaky sea salt
- For cookies chilled 2 hours, bake for ~9-10 minutes depending on how soft and gooey you want the cookies to be. For cookies chilled overnight or longer, bake for 10-11 minutes. You’re looking for a light golden color, edges that feel firm but middles that still feel soft. I always recommend baking 1 test cookie first!
- Let them cool down on the cookie sheet at room temperature for 10-15 minutes or until they feel set. If at any point they start to look too brown on the bottom, peel the parchment paper off the cookie sheet and let them cool on the counter.
- Serve and enjoy while still warm!
Notes
- Sugar quantity: I have reduced the sugar in this recipe to just 3/4 cup total. I don’t recommend reducing it any further!
- Chocolate chips: If you like chocolate chips, you can use them instead of chopped chocolate, but the cookies won’t be as good and might turn out thicker (spread less). This is because chips don’t melt in the cookies while baking.
- Convection/fan ovens: If you can, please turn off the fan and bake with the bottom heating rod only. But if that’s not an option, for a convection oven, reduce the baking temperature by 25F
- Serving and storage: These cookies are best eaten freshly baked for the ultimate texture, which is why I recommend baking only as many as you need, and keeping the rest in the fridge/freezer. You can store them in an airtight container at room temperature for 3-4 days, and heat in the toaster oven / microwave before eating.
- Freezing: After 2 hours in the fridge, you can freeze the cookie dough balls in an airtight container, and bake directly from frozen when needed! Just increase the baking time by ~2-3 minutes depending on how well done you want them.